why?
->
프로젝트를 하던 중 아래와 같은 형태로 UI를 만들 필요가 있어 어떤 방식으로 작성하는게 좋을까?? 라는 고민을 하게되었다.
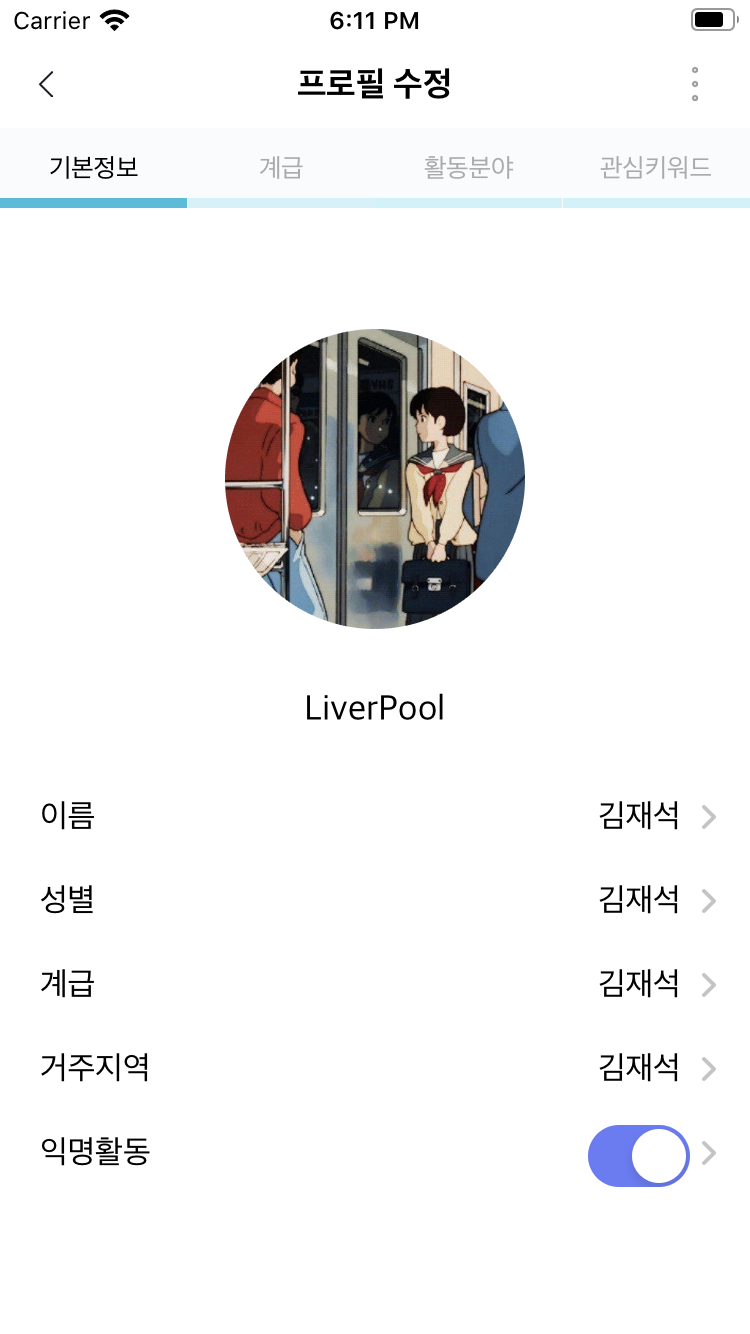
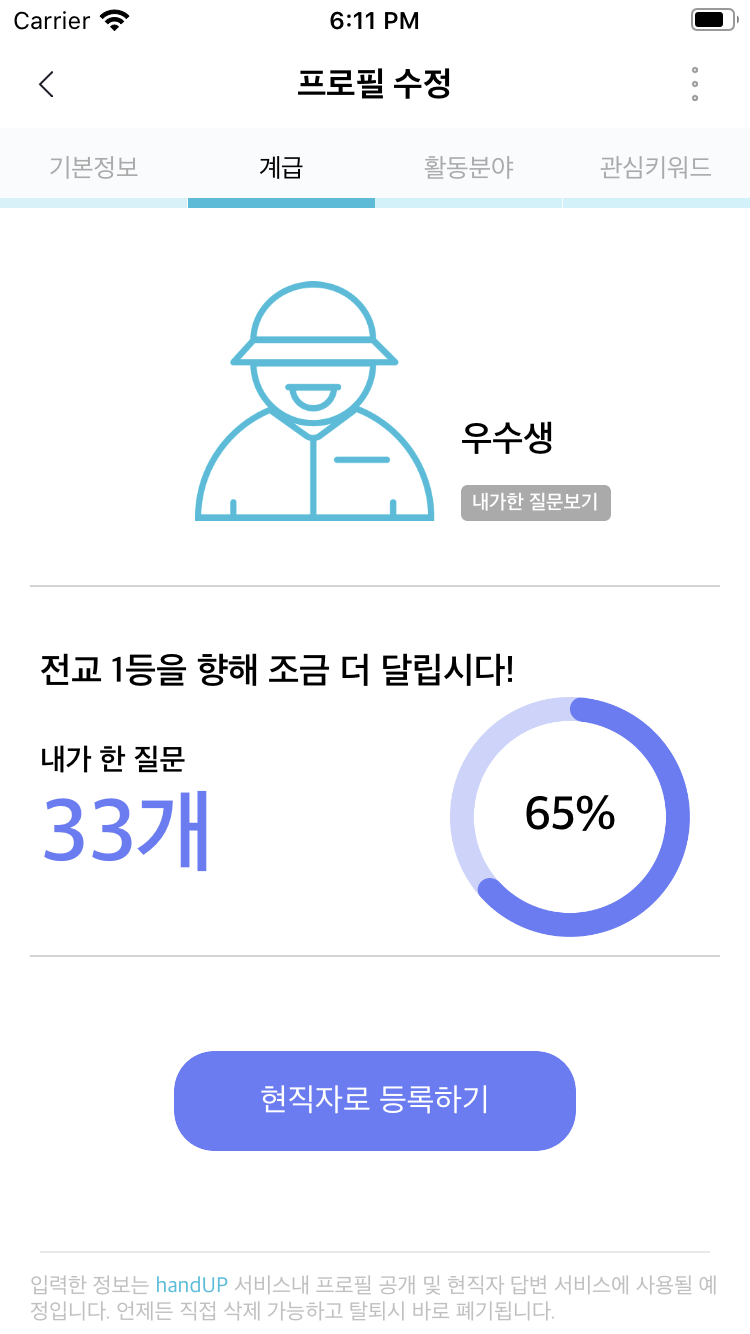
상단의 customeTabBar를 선택함에 따라 아래에 View가 바뀌도록 만들어주어야 했다.
background Knowledge
->
* containerViewController VS contentsViewController
뷰컨트롤러에는 containerViewController와 contentsViewController 이렇게 두개로 나뉘는데 각 ViewController에 대해 간단하게 설명하면 아래와 같다.
-
containerViewController
->
하나 이상의 viewController를 childViewController로 가지는 viewController를 이야기한다. childViewController에 구성된 view에서 발생하는 이벤트와 각 view에 화면 구성은childViewController가 담당하게 된다.
containerViewController에 예로는 tabBarController, navigationController등이 있다! -
contentsViewController
->
일반적으로 우리가 하는 viewController이다. 위에서 말한 childViewController도 contentsViewController에 속한다고 볼 수 있다.
* addSubView, addChildView
-
addSubView는 단순히 view를 추가하는 로직을 수행하게된다. 이렇게 되면 새롭게 추가하는 view에서 이뤄지는 이벤트와 화면구성을 parentsViewController에서 담당하게된다.
-
addChildView는 위에서와 같이 addView를 이용해서 새로운 view를 추가하고 해당 view에서 이뤄지는 이벤트와 화면구성을 별도의 viewController에서 담당하게 하고싶을 때 사용하면 된다. 이렇게 되면 parentViewController가 containerViewController가 되고 이 containerViewController에 childViewController로 새로운 viewController가 등록되게 되는 것이다.
how
->
상단 customTabBar를 선택하면서 그에 맞는 view를 보여주기 위해서 containerView를 이용하였다. 기존에 containerView를 이용할 때는 하나의 viewController만 Embeded 하여서 사용하였는데 이번 같은 경우는 containerViewController에(뒤에서 설명할 예정이다!) 여러개의 childView를 추가해줘 만들어야했다.
class ProfileViewController: UIViewController {

    @IBAction func touchUpToBack(_ sender: Any) {
        dismiss(animated: true, completion: nil)
    }

    @IBAction func touchUpToMenu(_ sender: Any) {
    }

    @IBOutlet weak var containerViewToVC: UIView!

    override func viewDidLoad() {
        super.viewDidLoad()

        // Do any additional setup after loading the view.
    }

    override func viewWillAppear(_ animated: Bool) {
        setContainerViewController(storyboard: "ProfileBasic", viewControllerID: "ProfileBasicViewController")
    }
}
containerView를 포함하는 containerViewController를 위와 같이 구성해준다 그리고 상단 customTabBar를 구성 각 cell들을 선택함에 따라 실행될 로직을 아래와 같이 구성해주었다.
extension ProfileViewController:UICollectionViewDataSource,UICollectionViewDelegate, UICollectionViewDelegateFlowLayout{
    func collectionView(_ collectionView: UICollectionView, numberOfItemsInSection section: Int) -> Int {
        return profileTopTabBarCellNames.count
    }

    func collectionView(_ collectionView: UICollectionView, cellForItemAt indexPath: IndexPath) -> UICollectionViewCell {
        guard let cell = collectionView.dequeueReusableCell(withReuseIdentifier: "ProfileTopCustomCollectionViewCell", for: indexPath) as? ProfileTopCustomCollectionViewCell else{
            return UICollectionViewCell()
        }

        cell.labelToName.text = profileTopTabBarCellNames[indexPath.row]
        return cell
    }

    func collectionView(_ collectionView: UICollectionView, didSelectItemAt indexPath: IndexPath) {
        guard var cell = collectionView.cellForItem(at: indexPath) as? ProfileTopCustomCollectionViewCell else{
            fatalError()
        }
        cell.labelToName.textColor = .black
        cell.viewToBottom.backgroundColor = hexStringToUIColor(hex: "#30BDDC")
        actionToSelectedCell(indexPath: indexPath)
    }

    func collectionView(_ collectionView: UICollectionView, didDeselectItemAt indexPath: IndexPath) {
        guard var cell = collectionView.cellForItem(at: indexPath) as? ProfileTopCustomCollectionViewCell else{
            fatalError()
        }
        cell.labelToName.textColor = .lightGray
        cell.viewToBottom.backgroundColor = hexStringToUIColor(hex: "#D3F1F8")
    }

    func collectionView(_ collectionView: UICollectionView, layout collectionViewLayout: UICollectionViewLayout, sizeForItemAt indexPath: IndexPath) -> CGSize {
        var size = returnCellSize(width: (collectionView.bounds.width/4) , height: 40)
        return size
    }
}
셀이 선택되면 actionToSelectedCell(indexPath: indexPath) 라는 메소드가 실행되는데 이는 내가 코드를 좀 더 깔끔하게 작성하고싶어서 따로 정의한 메소드이다. (hexStringToUIColor(hex:)는 hex코드를 이용해서 UIColor를 만들기 위해서 직접 만든 메소드이다. )
extension ProfileViewController{
    func setContainerViewController(storyboard: String, viewControllerID: String){
        let storyboard = UIStoryboard(name: storyboard, bundle: nil)
        let VC = storyboard.instantiateViewController(withIdentifier: viewControllerID)
        self.addChild(VC)
        containerViewToVC.addSubview((VC.view)!)
        VC.view.frame = containerViewToVC.bounds
        VC.didMove(toParent: self)
    }

    func actionToSelectedCell(indexPath : IndexPath){
        switch indexPath.row {
        case 0:
            setContainerViewController(storyboard: "ProfileBasic", viewControllerID: "ProfileBasicViewController")
        case 1:
            setContainerViewController(storyboard: "ProfileClass", viewControllerID: "ProfileClassViewController")
        case 2:
            setContainerViewController(storyboard: "ProfileField", viewControllerID: "ProfileFieldViewController")
        case 3:
            setContainerViewController(storyboard: "ProfileKeyword", viewControllerID: "ProfileKeywordViewController")
        default:
            print("-touchUP\(indexPath.row)-")
        }
    }
}actionToSelectedCell은 customTabBar에서 셀을 선택함에 적합함 view가 뿌려지도록 만들어준 메소드이다. 실직적으로 containerView에 view를 뿌려주게하는 메소드는setContainerViewController(storyboard: String, viewControllerID: String)이다. 간단하게 살펴보면 아래와 같이 설명할 수 있다.
1. 해당 viewController가 위치한 storyboard객체를 만들어준다.
2. 이를 사용해서 childViewController가 될 ViewController객체를 만들어준다.
3. containerViewController에 childViewController로 등록한다.
4. childViewController의 view를 containerView에 등록해준다.
5. 기존에 childViewConroller의 view에 적용된 constraints를 사용하기 위해서 contraints를 적용할 view의 크기를 주어야된다. 그래서 VC.view.frame = containerViewToVC.bounds 같이 크기를 지정해준다.
6. VC.didMove(toParent: self)는
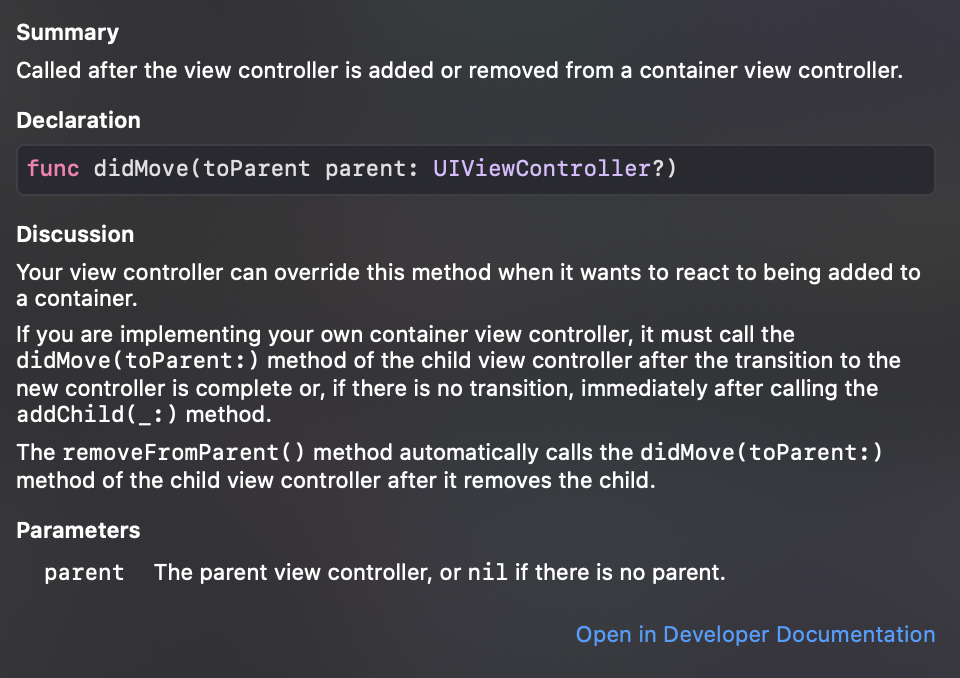
Documents에서 설명하는 것과 같이 containerViewController에 childViewController가 등록되었을 때 호출되는 메소드로 override해서 사용할 수 있다.

덕분에 좀더 편하게 배워갑니다^^