토스 상품권
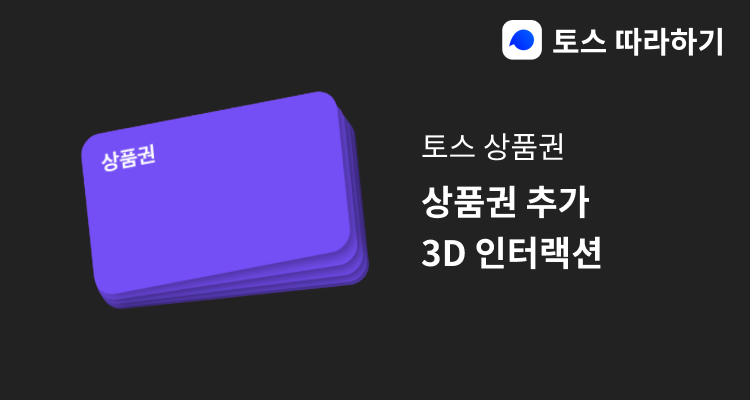
토스 상품권 구매하기 페이지에는 흥미로운 인터랙션이 있다.
구매 수량을 변경할 때마다 3D 애니메이션 효과가 있다.
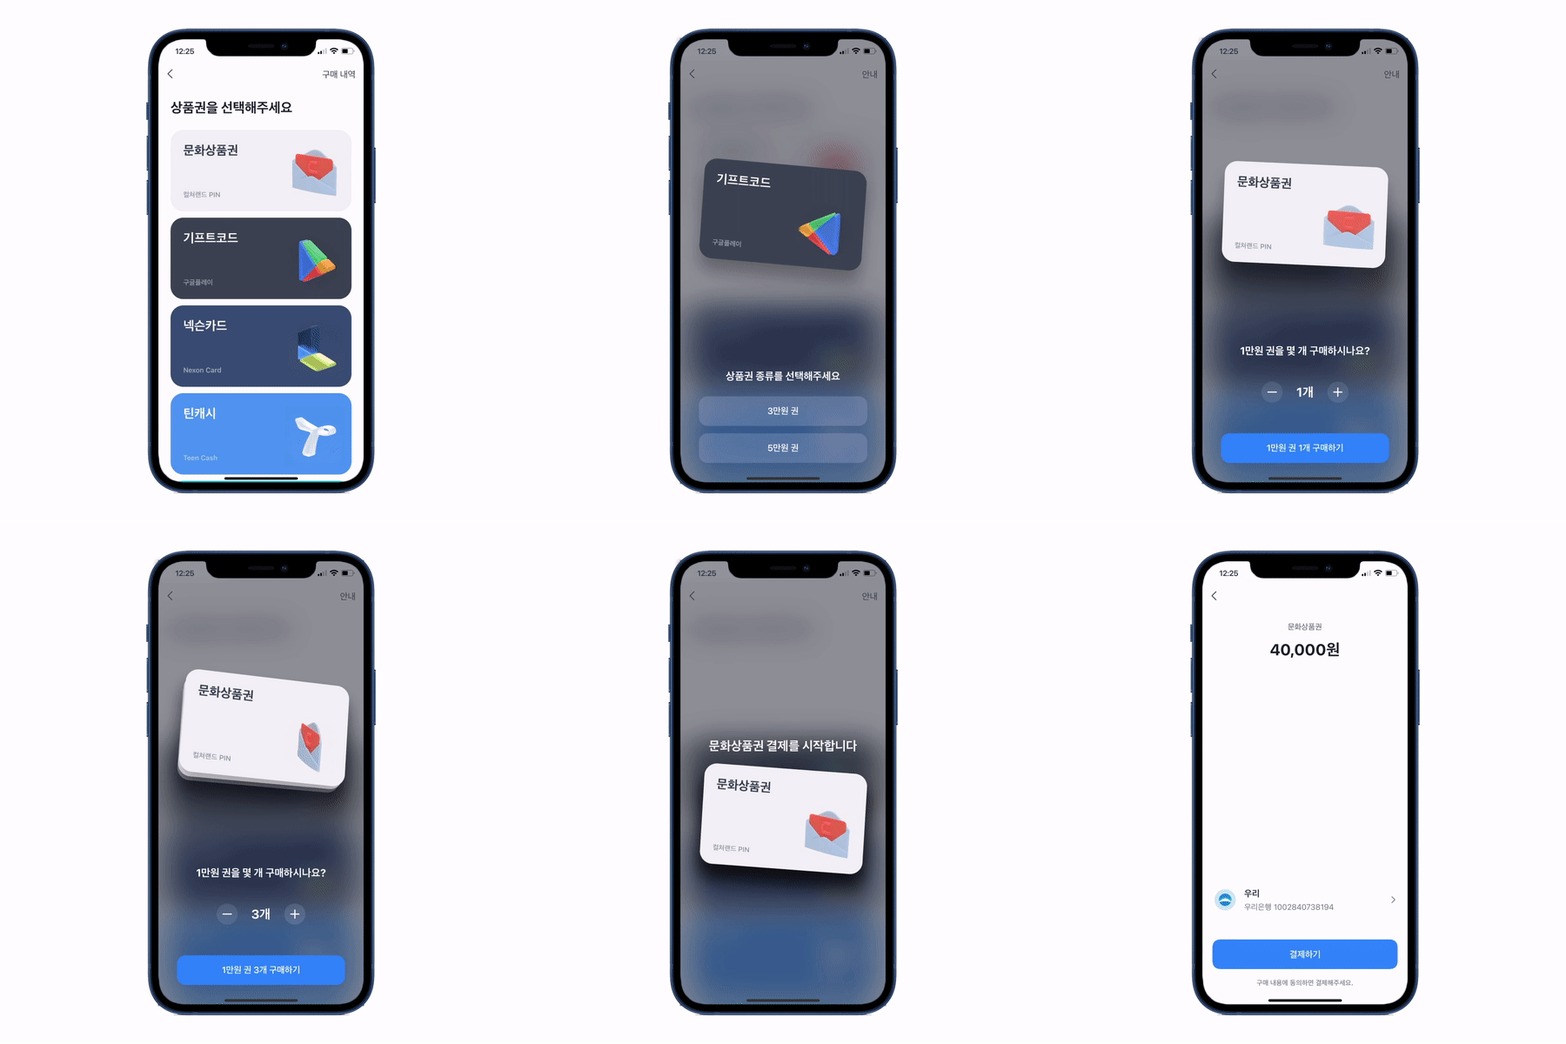
📌 이 페이지에서 중요한 인터랙션 부분을 따라 해볼 예정이다.
1️⃣ 수량 선택 페이지 초기에 카드 기울기 변화 애니메이션
2️⃣ 수량 변경 버튼 클릭 시, 버튼 크기 변화 애니메이션
3️⃣ 수량 변경 시, 카드가 추가되는 애니메이션
Flutter Rendering
우선 Flutter 렌더링에 대해서 알아보자.
우리에게 보이는 부분은 2D처럼 느껴지지만 Flutter는 원래 3D로 렌더링 되고 있었다.
구글 설명에도 나와있는데, 성능이 매우 안 좋은 스마트폰을 제외하고는 거의 모든 스마트폰에는 3D 그래픽에 최적화되어 있는 빠른 GPU가 포함되어 있다고 한다. 즉, 3D 그래픽 렌더링이 매우 빠르기 때문에 Flutter도 3D 렌더링을 이용하고 있다.
🔥 덕분에 Flutter를 이용해서 3D 애니메이션 효과를 줄 수 있고, 3D 이미지 모델링도 가능하고, 게임 제작도 가능하다.
카드 불러오기 인터랙션
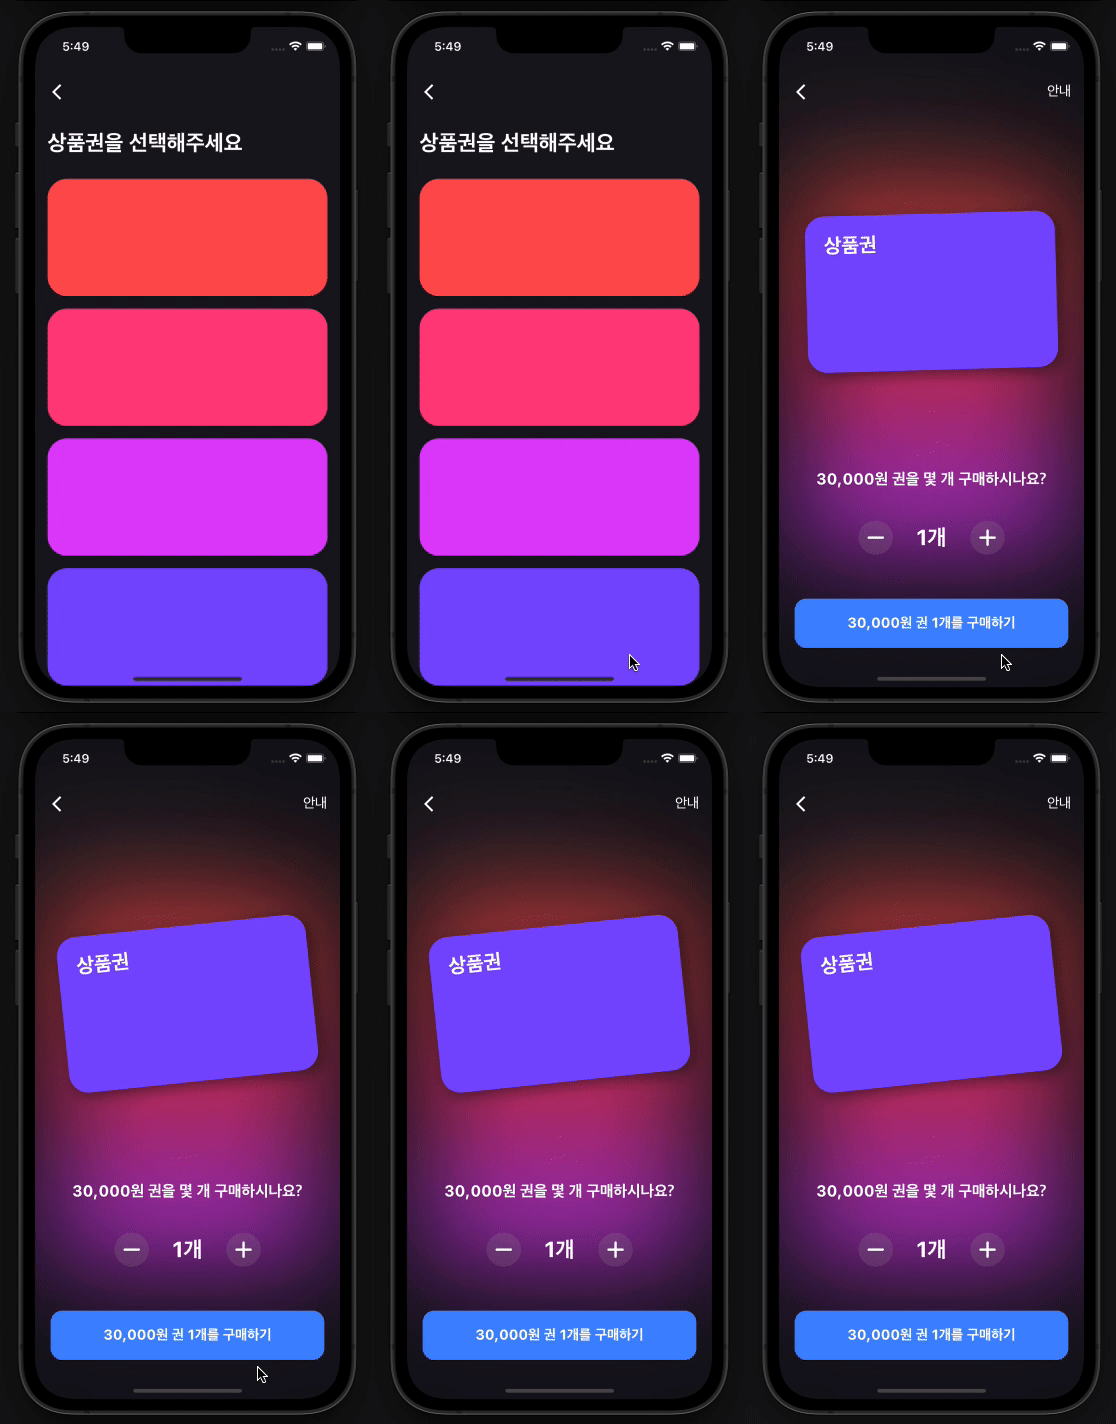
페이지를 처음 들어오면 카드가 수평으로 있다가 기울기가 천천히 변한다.
이 부분을 구현하기 위해서 AnimationController와 Transform.rotate 위젯을 이용해서 구현했다.
Transform.rotate
✅ Transform.rotate는 중심으로 회전을 사용하여 자식을 변화하는 위젯을 만든다.
✅ Transform.rotate의 angle 인수는 null이 아니여야 하고, angle 값은 시계 방향 라디안 단위의 회전을 제공한다.
애니메이션 효과를 컨트롤 할 수 있는 AnimationController를 생성했다.
AnimationController에서 받아오는 값을 가지고 기울기를 조절할 거다.
// 카드 애니메이션.
late AnimationController _cardRotateController = AnimationController(
vsync: this,
duration: const Duration(seconds: 1),
)..addListener(() => setState(() {}));
void initState() {
super.initState();
_cardRotateController.forward();
}⛔️ vsync: this 에서 The argument type '_GiftCardPageState' can't be assigned to the parameter type 'TickerProvider' 오류가 발생할 것이다.
이 오류는 TickerProvider를 할당할 수 없기 때문에 발생하는 오류이기 때문에 TickerProvider를 할당해 주면 간단하게 해결이 된다.
class _GiftCardPageState extends State<GiftCardPage> with TickerProviderStateMixin {}위에서 생성해 준 AnimationController를 통해서 회전 값을 지정해 줄 거다.
AnimationController의 초기값이 0.0이고, 애니메이션 forward를 통해서 1.0 값으로 변경되는 점을 이용한 것이다.
Transform.rotate(
  angle: _cardRotateController.value * (-math.pi / 30),
  child: _giftCard...
)
버튼 클릭 인터랙션
버튼을 클릭하게 되면 버튼의 크기가 증가했다가 원래 크기로 돌아온다.
이 애니메이션 효과를 주기 위해서 Transform.scale을 이용해서 크기 변화 효과를 주었다.
Transform.scale
✅ 2D 평면을 따라 자식의 크기를 조정하는 위젯을 만든다.
✅ scaleX 인수는 x축을 곱할 스칼라를 제공하고 scaleY 인수는 y축을 곱할 스칼라를 제공합니다. 둘 중 하나를 생략할 수 있으며 이 경우 축의 기본값은 1.0입니다.
✅ 편의상 scaleX와 scaleY를 제공하는 대신 자식의 크기를 균일하게 조정하기 위해 scale 매개변수를 사용할 수 있습니다.
✅ scale, scaleX 및 scaleY 중 적어도 하나는 null이 아니어야 합니다. scale이 제공되면 다른 두 개는 null이어야 합니다. 마찬가지로 제공되지 않으면 다른 둘 중 하나를 제공해야 합니다.
✅ 정렬은 눈금의 원점을 제어합니다. 기본적으로 이것은 상자의 중심입니다.
증가 버튼과 하단 버튼의 크기 변화가 각각 이뤄져야 하기 때문에 AnimationContoller도 각각 하나씩 생성해 주었다.
AnimationController을 생성해 주었을때 lowerBound와 upperBound 값도 지정해 주었다.
📌 upperBound: controller.value 중에서 얻을 수 있는 가장 큰 값이다.
📌 lowerBound: controller.value 중에서 얻을 수 있는 가장 작은 값이다.
// 증감 버튼 크기 애니메이션.
late AnimationController _decreaseButtonScaleController;
late AnimationController _increaseButtonScaleController;
// 바운스 애니메이션.
final Duration _bounceAnimationDuration = const Duration(milliseconds: 100);
// 버튼 크기 애니메이션 설정.
void _setButtonScaleAnimation() {
// 감소 버튼 애니메이션.
_decreaseButtonScaleController = AnimationController(
vsync: this,
duration: _bounceAnimationDuration,
lowerBound: 0.0,
upperBound: 0.6,
)..addListener(() => setState(() {}));
// 증가 버튼 애니메이션.
_increaseButtonScaleController = AnimationController(
vsync: this,
duration: _bounceAnimationDuration,
lowerBound: 0.0,
upperBound: 0.6,
)..addListener(() => setState(() {}));
}
void initState() {
super.initState();
...
_setButtonScaleAnimation();
}상품권 수량 증가, 감소 버튼을 클릭할 경우,
animationController 앞으로 진행하는 animationController.forward(); 메서드를 실행시켰다.
바운스 애니메이션이 끝나면 뒤로 진행하는 animationController.reverse(); 를 실행시켰다.
ℹ️ AnimationController를 앞으로, 뒤로 진행할 때마다 animationController.value 값이 위에서 지정한 값인 0.0과 0.6으로 변화한다.
CupertinoButton(
  onPressed: () {
    // 애니메이션 효과.
    animationController.forward();
    Future.delayed(_bounceAnimationDuration, () {
      animationController.reverse();
    });

    // 값 변경.
    ...

	// 카드 바운스 애니메이션.
    ...
  },
  child: Transform.scale(
    scale: 1 + animationController.value,
    child: Container(
      padding: const EdgeInsets.all(4),
      decoration: BoxDecoration(
        shape: BoxShape.circle,
        color: Colors.grey.withOpacity(0.2),
      ),
      child: Icon(
        iconData,
        size: 36,
        color: Colors.white,
      ),
    ),
  ),
)
카드 추가 인터랙션
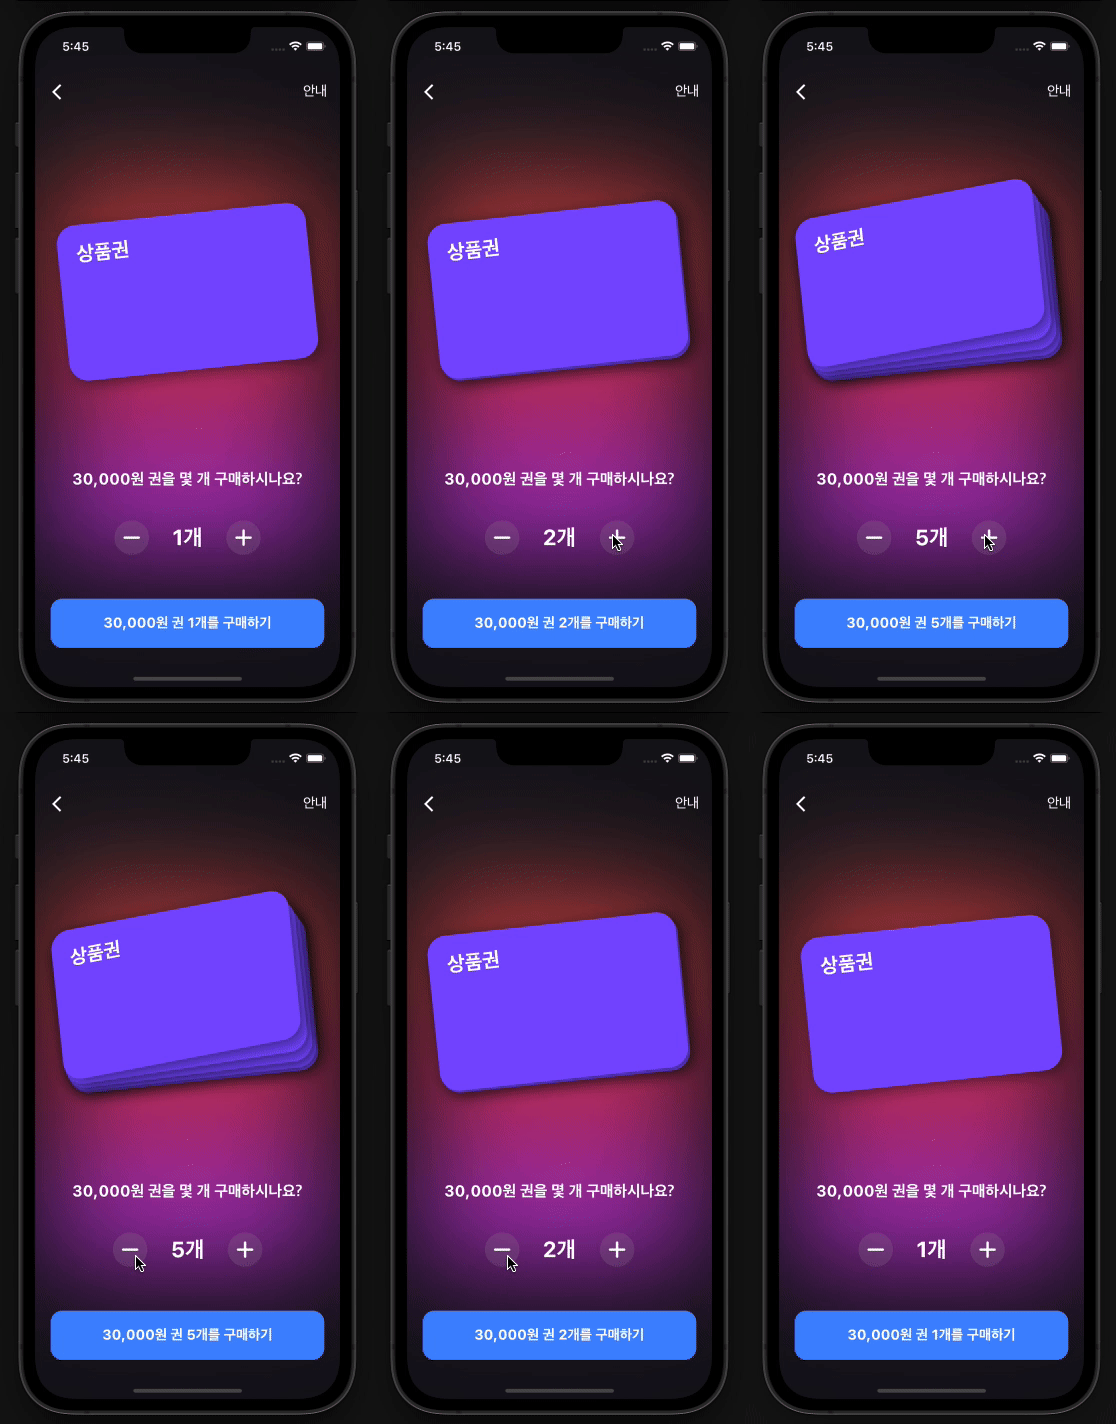
카드 수량이 변경될 때마다 카드가 하나씩 쌓이고 있다.
그리고 쌓이면서 카드 전체가 바운스 되는 애니메이션도 있다.
카드 추가와 3D 애니메이션에는 Transform 위젯을 이용했다.
Transform
✅ 자식을 그리기 전에 변환을 적용하는 위젯이다..
✅ 레이아웃 전에 회전을 적용하는 RotatedBox와 달리 이 객체는 페인팅 직전에 변형을 적용한다.
카드 추가
Stack 위젯을 통해서 수량 변경할 때마다, Stack 자식들도 변경해 주는 방법을 사용했다.
그리고 처음 카드가 항상 위에 쌓이고 있기 때문에 Stack 자식들의 순서를 역순으로 배열하여
처음 카드가 항상 위에 보이도록 하였다.
Stack(
  children: List.generate(
    _animationCardQuantity,
    (index) {
      return _giftCard(index: index),
      );
    },
  ).reversed.toList(),
)
⛔️ 하지만 이렇게 쌓기만 하면 동일한 위치에 위에 쌓이기 때문에 실제로는 하나로 보인다. 그렇기 때문에 카드마다 다른 위치 변화를 줘야 한다.
3D 효과를 주기 위해서 카드 위치와 회전의 변화를 주었다.
1️⃣ X축과 Y축으로 카드 위치를 이동.
2️⃣ X축과 Y축을 기준으로 카드 회전.
return Transform(
  transform: Matrix4.identity()
    // 이동.
    ..setEntry(0, 3, -1.5 * _index)
    ..setEntry(1, 3, -2.0 * _index)
    // 회전.
    ..rotateX(-0.075 * _index)
    ..rotateY(0.07 * _index),
  child: _giftCard(index: index),
);
카드 3D 바운스 애니메이션
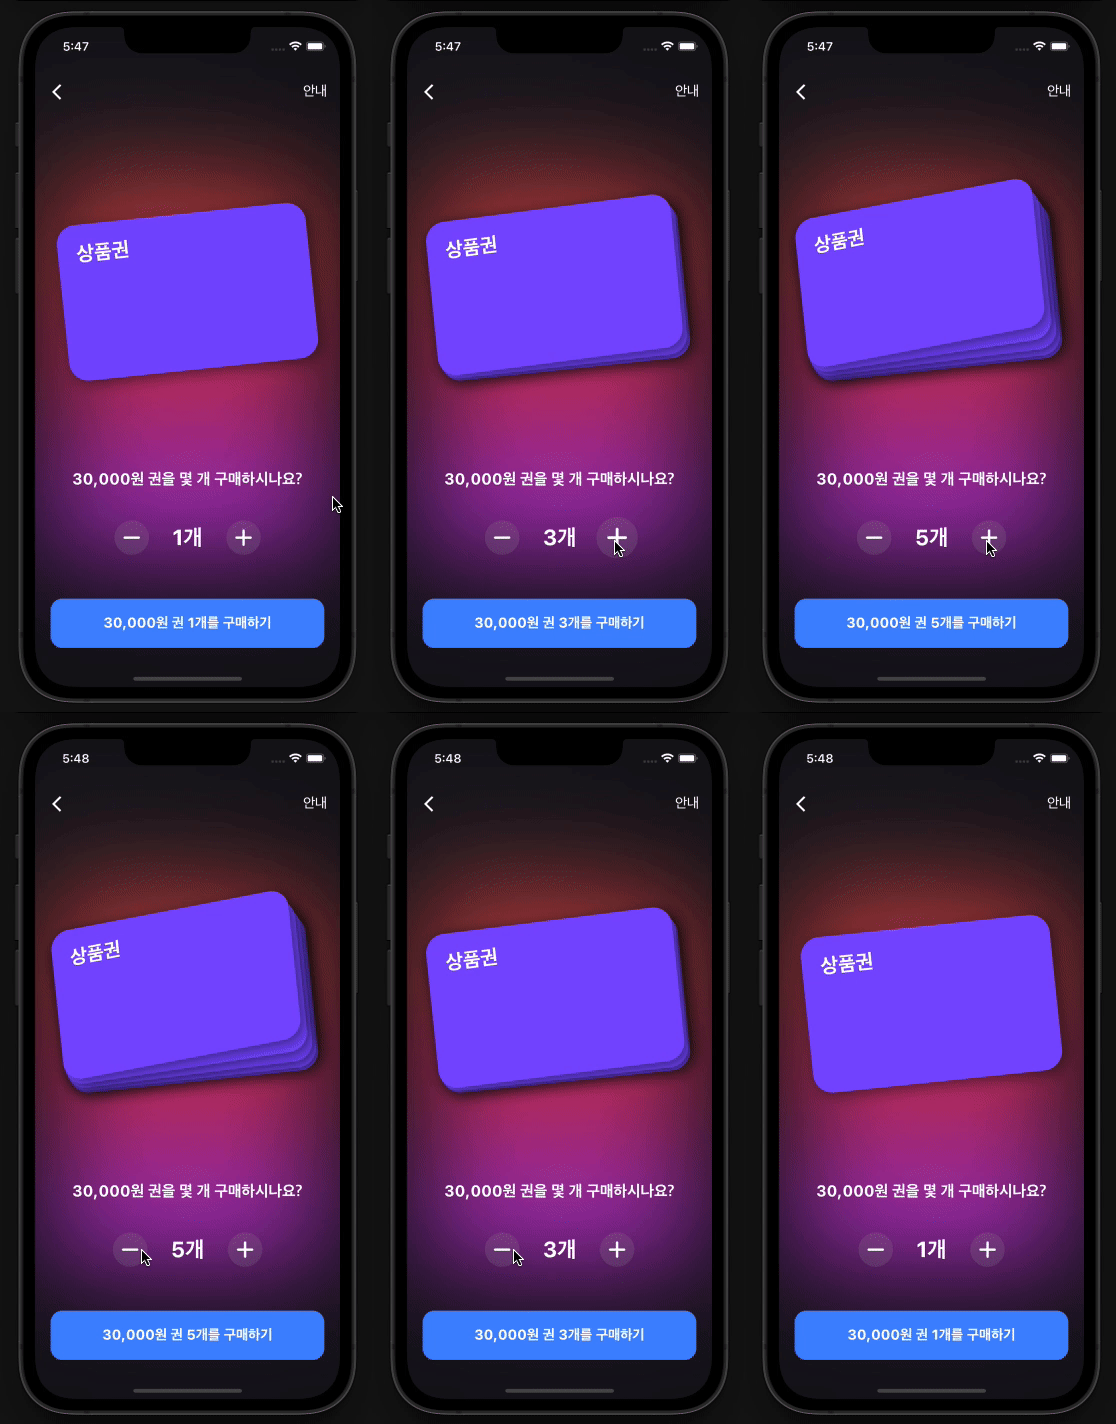
카드가 하나씩 추가되고 빠지게 될 때마다 3D 효과도 변화하고 카드 전체가 바운스 되는 효과가 있다.
바운스가 2D로 되는 것이 아니라, 3D로 되기 때문에 버튼 클릭 애니메이션과 다르게 적용 해야한다.
3D 애니메이션을 주기 위해서 회전 기능을 통해서 바운스 되도록 하였다.
late AnimationController _cardBounceController;

// 카드 바운스 애니메이션.
_cardBounceController = AnimationController(
  vsync: this,
  duration: _bounceAnimationDuration,
  lowerBound: 0.0,
  upperBound: 10.0,
)..addListener(() => setState(() {}));

// 카드.
Transform(
  alignment: Alignment.topLeft,
  transform: Matrix4.identity()
  // 회전.
  ..rotateX(_cardBounceController.value * (-math.pi / 400))
  ..rotateY(_cardBounceController.value * (math.pi / 400)),
  child: Stack(
    children: ...
  ).reversed.toList(),
),
애니메이션 효과 진행과 뒤로 가는 효과는 다른 애니메이션들과 동일하게 작성했다.
// 증감 버튼.
CupertinoButton(
  onPressed: () {
    // 버튼 크기 애니메이션 효과.
    ...

    // 값 변경.
    ...

    // 카드 바운스 애니메이션.
    _cardBounceController.forward();
    Future.delayed(_bounceAnimationDuration, () {
      _cardBounceController.reverse();
    });
  },
  child: 증감 버튼... ,
)
Github
https://github.com/cyb9701/toss-gift-card-interaction



잘 보고 갑니다:)