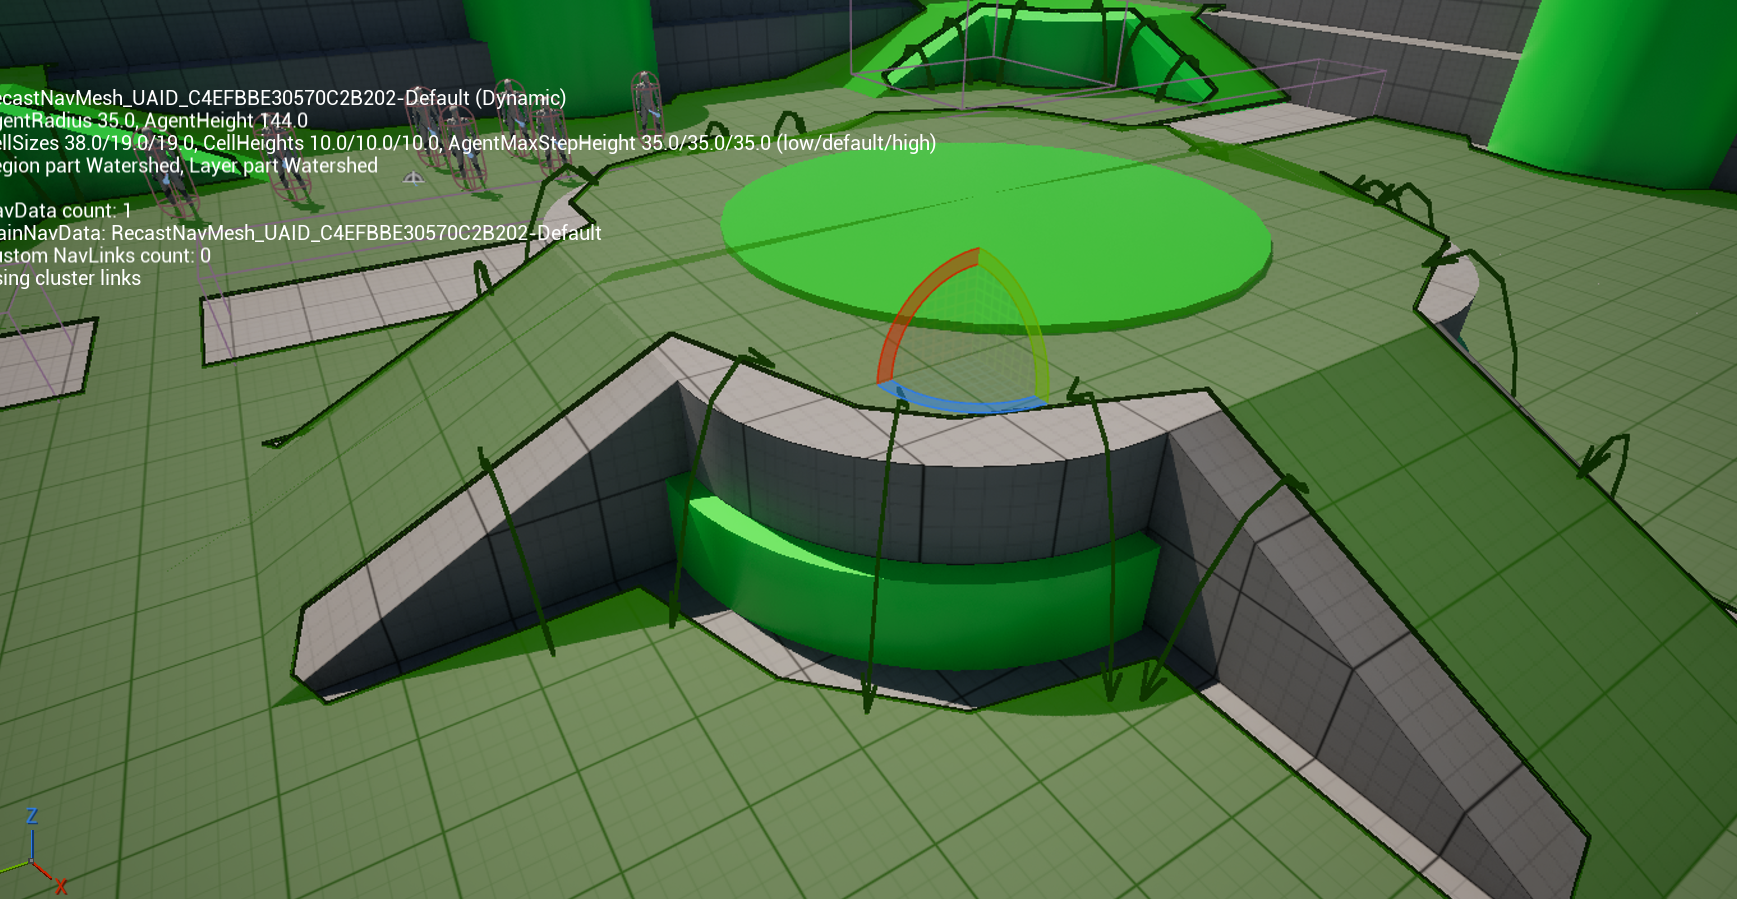
오늘은 AI가 캐릭터를 쫒아 오는 로직을 구현해보았다.
Chaser_AIController 클래스를 생성하여 캐릭터를 쫒아 올 수 있도록 로직을 구현하였다.
헤더 파일에서 변수와 함수를 선언하고
// Chaser_AIController.h

#pragma once

#include "CoreMinimal.h"
#include "AIController.h"
#include "Perception/AIPerceptionComponent.h"
#include "Perception/AISenseConfig_Sight.h"
#include "Kismet/GameplayStatics.h"
#include "Chaser_AIController.generated.h"

// AI 상태 열거형 정의
UENUM(BlueprintType)
enum class EAIState : uint8
{
    Idle,
    Suspicious, //의심하는 상태 추가
    Chasing
};

UCLASS()
class SCC_UEAI_LECTURE_API AChaser_AIController : public AAIController
{
	GENERATED_BODY()

public:
    // 생성자
    AChaser_AIController();

    // 추적할 타겟(플레이어, 추후 에디터에서 설정)
    UPROPERTY(EditAnywhere, BlueprintReadWrite, Category = "AI")
    AActor* TargetActor;

    // 추적 시작/중지 함수
    UFUNCTION(BlueprintCallable, Category = "AI")
    void StartChasing(AActor* Target);

    UFUNCTION(BlueprintCallable, Category = "AI")
    void StopChasing();

    // 추적 거리 설정 1000유닛(10m)
    UPROPERTY(EditAnywhere, BlueprintReadWrite, Category = "AI")
    float ChaseRadius = 1000.0f;

    // 시야 감지 설정
    UPROPERTY(VisibleAnywhere, BlueprintReadOnly, Category = "AI")
    UAISenseConfig_Sight* SightConfig;

    // 감지 이벤트 처리 함수
    UFUNCTION()
    void OnPerceptionUpdated(AActor* Actor, FAIStimulus Stimulus);

    // 상태 변환 함수
    UFUNCTION(BlueprintCallable, Category = "AI")
    void UpdateAIState();

    // 거리 설정 변수 추가
    UPROPERTY(EditAnywhere, BlueprintReadWrite, Category = "AI")
    float DetectionRadius = 1500.0f;

    UPROPERTY(EditAnywhere, BlueprintReadWrite, Category = "AI")
    float LoseInterestRadius = 2000.0f;

protected:
    virtual void BeginPlay() override;
    virtual void Tick(float DeltaTime) override;

private:
    // 타겟 추적 중인지 여부
    bool bIsChasing = false;

    // Private에 추가된 변수
    // 현재 상태 변수
    EAIState CurrentState = EAIState::Idle;
    // 마지막으로 타겟을 본 위치 저장
    FVector LastKnownLocation;
};
소스 파일에서 함수의 로직을 작성하였다.
생성자를 헤더에서 선언하는 것을 빼먹어 빌드시 오류가 발생했었다.
#include로 포함해야할 클래스들을 빼먹지 안도록 확인도 필요했다.
// Chaser_AIController.cpp


#include "Chaser_AIController.h"
#include "Kismet/GameplayStatics.h"
#include "GameFramework/Character.h"
#include "DrawDebugHelpers.h"

AChaser_AIController::AChaser_AIController()
{
    // 매 프레임 틱 활성화
    PrimaryActorTick.bCanEverTick = true;

    // 시야 감지 설정 생성
    SightConfig = CreateDefaultSubobject<UAISenseConfig_Sight>(TEXT("SightConfig"));
    SightConfig->SightRadius = DetectionRadius;
    SightConfig->LoseSightRadius = LoseInterestRadius;
    SightConfig->PeripheralVisionAngleDegrees = 90.0f;
    SightConfig->DetectionByAffiliation.bDetectEnemies = true;
    SightConfig->DetectionByAffiliation.bDetectNeutrals = true;
    SightConfig->DetectionByAffiliation.bDetectFriendlies = true;

    // 부모 클래스의 PerceptionComponent에 시야 설정 추가


}

void AChaser_AIController::Tick(float DeltaTime)
{
    Super::Tick(DeltaTime);

    // 상태 업데이트 추가
    UpdateAIState();

    if (bIsChasing && TargetActor)
    {
        APawn* ControlledPawn = GetPawn();
        if (ControlledPawn)
        {
            float Distance = FVector::Dist(ControlledPawn->GetActorLocation(), TargetActor->GetActorLocation());

            if (Distance <= ChaseRadius)
            {
                MoveToActor(TargetActor, 100.0f);

                // 마지막 위치 갱신 추가
                LastKnownLocation = TargetActor->GetActorLocation();

                // 디버그 시각화 추가
#if WITH_EDITOR
                DrawDebugLine(
                    GetWorld(),
                    ControlledPawn->GetActorLocation(),
                    TargetActor->GetActorLocation(),
                    FColor::Red,
                    false,
                    -1.0f,
                    0,
                    2.0f
                );
#endif
            }
            else if (Distance > LoseInterestRadius)  // 확장된 조건
            {
                StopChasing();
            }
        }
    }
}

// Called when the game starts or when spawned
void AChaser_AIController::BeginPlay()
{
    Super::BeginPlay();

    // 인지 컴포넌트 초기화 후 컴포넌트 세팅
    if (SightConfig && GetPerceptionComponent())
    {

        GetPerceptionComponent()->SetDominantSense(SightConfig->GetSenseImplementation());
        GetPerceptionComponent()->SetDominantSense(SightConfig->GetSenseImplementation());
        // 인지 이벤트에 델리게이트 바인딩
        GetPerceptionComponent()->OnTargetPerceptionUpdated.AddDynamic(this, &AChaser_AIController::OnPerceptionUpdated);
    }

    // 기본 타겟으로 플레이어 설정 (선택적)
    ACharacter* PlayerCharacter = UGameplayStatics::GetPlayerCharacter(GetWorld(), 0);
    if (PlayerCharacter)
    {
        TargetActor = PlayerCharacter;
    }
}

void AChaser_AIController::StartChasing(AActor* Target)
{
    TargetActor = Target;
    bIsChasing = true;

    if (Target)
    {
        // 마지막 위치 업데이트 추가
        LastKnownLocation = Target->GetActorLocation();
    }

    // 상태 변경 추가
    CurrentState = EAIState::Chasing;
}

void AChaser_AIController::StopChasing()
{
    bIsChasing = false;
    StopMovement();

    // 상태 변경 추가
    CurrentState = EAIState::Idle;
}

// Status별 상태 전환 함수를 추가해줍니다.
void AChaser_AIController::UpdateAIState()
{
    if (!TargetActor) return;

    APawn* ControlledPawn = GetPawn();
    if (!ControlledPawn) return;

    float DistanceToTarget = FVector::Dist(ControlledPawn->GetActorLocation(), TargetActor->GetActorLocation());

    switch (CurrentState)
    {
    case EAIState::Idle:
        if (DistanceToTarget <= DetectionRadius)
        {
            CurrentState = EAIState::Suspicious;
        }
        break;

    case EAIState::Suspicious:
        if (DistanceToTarget <= ChaseRadius)
        {
            StartChasing(TargetActor);
        }
        else if (DistanceToTarget > DetectionRadius)
        {
            CurrentState = EAIState::Idle;
        }
        break;

    case EAIState::Chasing:
        if (DistanceToTarget > LoseInterestRadius)
        {
            StopChasing();
        }
        break;
    }
}

// 인지 시스템의 이벤트 발생시 처리하는 함수 추가.
void AChaser_AIController::OnPerceptionUpdated(AActor* Actor, FAIStimulus Stimulus)
{
    // 플레이어 캐릭터인지 확인
    ACharacter* PlayerCharacter = UGameplayStatics::GetPlayerCharacter(GetWorld(), 0);

    if (Actor == PlayerCharacter)
    {
        if (Stimulus.WasSuccessfullySensed())
        {
            // 플레이어 감지 성공
            TargetActor = Actor;

            // 거리에 따라 상태 변경
            APawn* ControlledPawn = GetPawn();
            if (ControlledPawn)
            {
                float Distance = FVector::Dist(ControlledPawn->GetActorLocation(), Actor->GetActorLocation());

                if (Distance <= ChaseRadius)
                {
                    StartChasing(Actor);
                }
                else if (Distance <= DetectionRadius)
                {
                    CurrentState = EAIState::Suspicious;
                }
            }
        }
        else
        {
            // 플레이어 감지 실패 (시야에서 사라짐)
            if (CurrentState == EAIState::Chasing)
            {
                // 마지막으로 본 위치로 이동
                MoveToLocation(LastKnownLocation, 50.0f);

                // 의심 상태로 전환
                CurrentState = EAIState::Suspicious;
            }
        }
    }
}
AI가 감지, 의심, 추적 상태를 전환하며 캐릭터를 추적하는데 거리에 따라 추적을 할지 말지 결정한다.
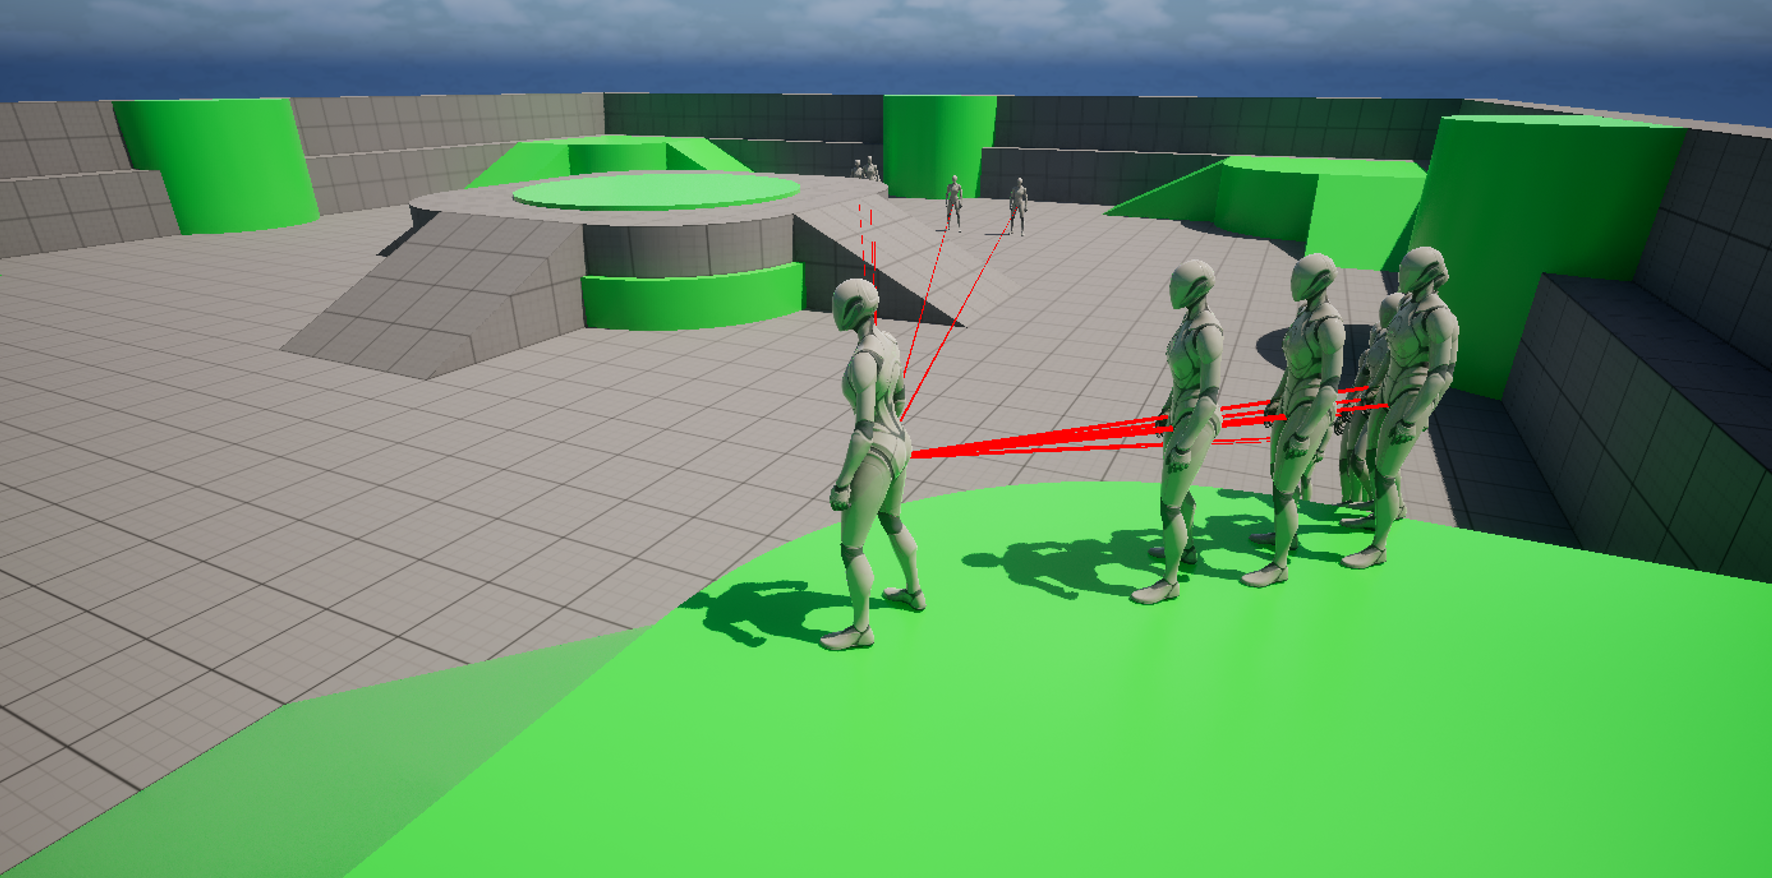
디버깅 애로우를 그려 캐릭터를 추적하는지 확인 할 수 있게 하였다.
추적 NPC 캐릭터도 CPP클래스로 생성하고 블루프린트 클래스로 상속받아 레벨에 배치하였다.
추적 캐릭터 헤더 파일
// RVO_Character.h

#pragma once

#include "CoreMinimal.h"
#include "GameFramework/Character.h"
#include "RVO_Character.generated.h"

UCLASS()
class SCC_UEAI_LECTURE_API ARVO_Character : public ACharacter
{
	GENERATED_BODY()

public:
	// Sets default values for this character's properties
	ARVO_Character();

protected:
	// Called when the game starts or when spawned
	virtual void BeginPlay() override;

public:
	// Called every frame
	virtual void Tick(float DeltaTime) override;

	// Called to bind functionality to input
	virtual void SetupPlayerInputComponent(class UInputComponent* PlayerInputComponent) override;

	// 타겟 위치로 이동
	UFUNCTION(BlueprintCallable, Category = "AI Movement")
	void MoveToTarget();

	// RVO 회피 활성화/비활성화
	UFUNCTION(BlueprintCallable, Category = "RVO")
	void SetRVOAvoidanceEnabled(bool bEnable);

public:
	// 이동할 타겟 액터
	UPROPERTY(EditAnywhere, BlueprintReadWrite, Category = "AI Movement")
	AActor* TargetActor;

	// RVO 회피 설정
	UPROPERTY(EditAnywhere, BlueprintReadWrite, Category = "RVO")
	float AvoidanceRadius = 300.0f;
	// RVO 계급 설정
	UPROPERTY(EditAnywhere, BlueprintReadWrite, Category = "RVO")
	float AvoidanceWeight = 0.5f;

private:
	// AI 컨트롤러 캐싱
	class AAIController* AIController;
};
추적 캐릭터 소스 파일
// RVO_Character.cpp


#include "RVO_Character.h"
#include "GameFramework/CharacterMovementComponent.h"
#include "AIController.h"

// Sets default values
ARVO_Character::ARVO_Character()
{
 	// Set this character to call Tick() every frame.  You can turn this off to improve performance if you don't need it.
	PrimaryActorTick.bCanEverTick = true;

	// RVO 회피 시스템 활성화
	UCharacterMovementComponent* MovementComponent = GetCharacterMovement();
	if (MovementComponent)
	{
		MovementComponent->bUseRVOAvoidance = true;
		MovementComponent->AvoidanceConsiderationRadius = AvoidanceRadius;
		MovementComponent->AvoidanceWeight = 0.5f;
	}
}

// Called when the game starts or when spawned
void ARVO_Character::BeginPlay()
{
	Super::BeginPlay();

	// AI 컨트롤러 참조 얻기
	AIController = Cast<AAIController>(GetController());

	// AI 컨트롤러가 없으면 로그 출력
	if (!AIController)
	{
		UE_LOG(LogTemp, Warning, TEXT("%s is not controlled by an AIController. Movement functions will not work."), *GetName());
	}
	else if (TargetActor)
	{
		// 타겟 액터가 설정되어 있으면 자동으로 이동 시작
		MoveToTarget();
	}
}

// Called every frame
void ARVO_Character::Tick(float DeltaTime)
{
	Super::Tick(DeltaTime);

}

// Called to bind functionality to input
void ARVO_Character::SetupPlayerInputComponent(UInputComponent* PlayerInputComponent)
{
	Super::SetupPlayerInputComponent(PlayerInputComponent);

}

void ARVO_Character::MoveToTarget()
{
	if (!AIController)
	{
		UE_LOG(LogTemp, Warning, TEXT("MoveToTarget failed: No AI Controller for %s"), *GetName());
		return;
	}

	if (!TargetActor)
	{
		UE_LOG(LogTemp, Warning, TEXT("MoveToTarget failed: No Target Actor set for %s"), *GetName());
		return;
	}

	// 타겟 액터를 향해 이동
	AIController->MoveToActor(
		TargetActor,    // 목표 액터
		50.0f,          // 도착 판정 반경
		true,           // 충돌 영역이 겹치면 도착으로 간주
		true,           // 경로 탐색 사용
		false           // 목적지를 네비게이션 메시에 투영(Projection)하지 않음
	);

	UE_LOG(LogTemp, Display, TEXT("%s moving to target: %s"),
		*GetName(), *TargetActor->GetName());
}

void ARVO_Character::SetRVOAvoidanceEnabled(bool bEnable)
{
	UCharacterMovementComponent* MovementComponent = GetCharacterMovement();
	if (MovementComponent)
	{
		MovementComponent->bUseRVOAvoidance = bEnable;
	}
}
RVO강의를 따라 만든 캐릭터를 재 활용하였다.
여기서 RVO란?
RVO(Reciprocal Velocity Obstacles), 장애물(주변의 객체)와 상호작용하여 속도와 방향을 능동적으로 변경하여 회피하는 기능이다. 예를 들어, 사람들이 붐비는 거리에서 우리는 주변 사람들의 움직임을 보며 자신의 속도와 방향을 조절한다. 길을 막고 있으면 천천히 걷거나, 자신을 향해 오면 피해주거나 등등의 방식으로 사용할 수 있다.
마지막으로 추적자 NPC가 캐릭터가 높은 곳에 있더라도 점프하여 뛰어 올라 올 수 있도록
자동 내비게이션 링크 생성 기능을 사용하였다.
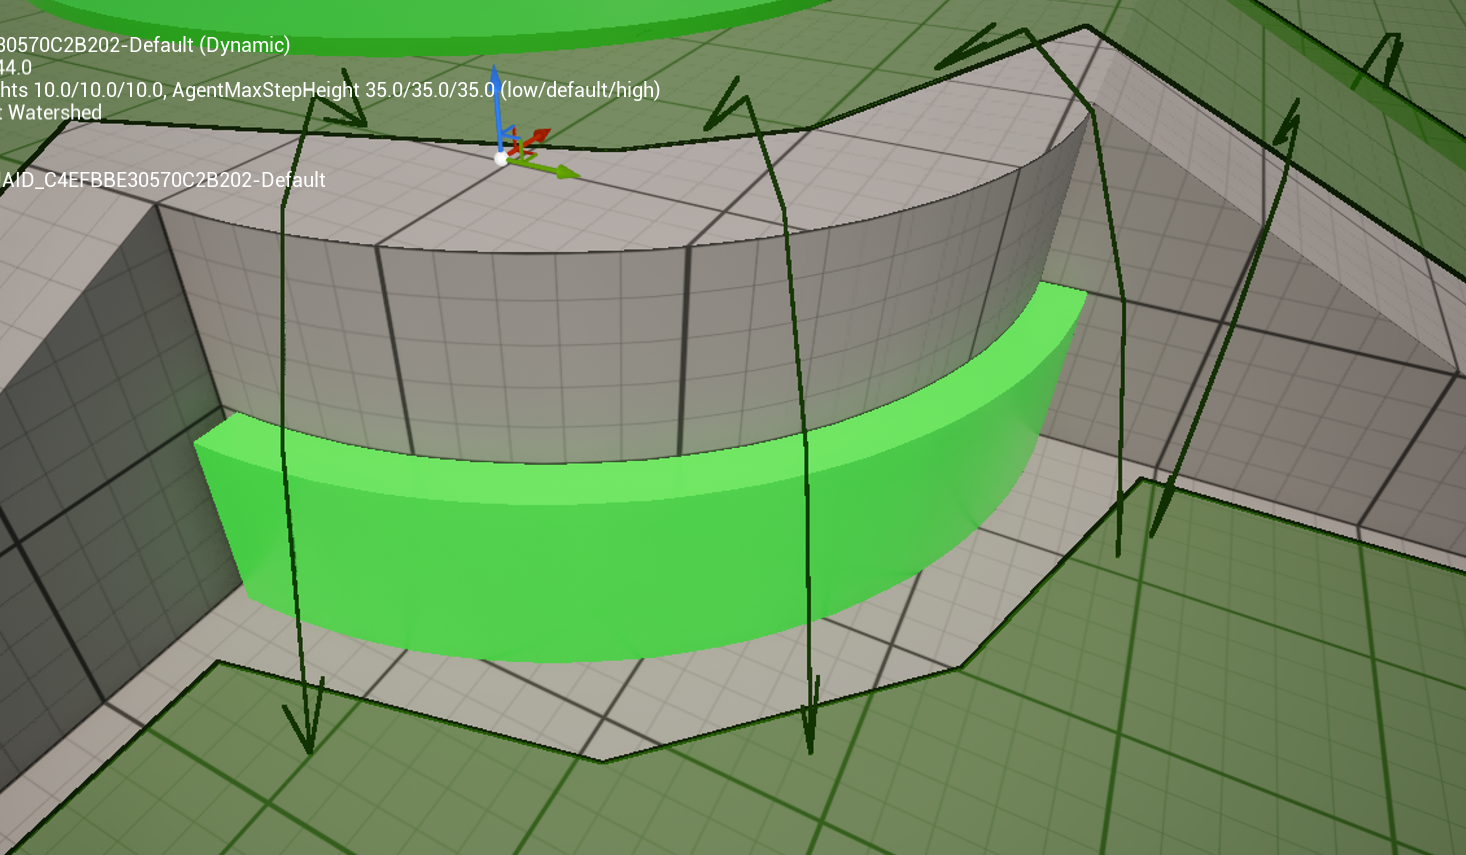
레벨에서 위와 같은 기능을 활성화하고
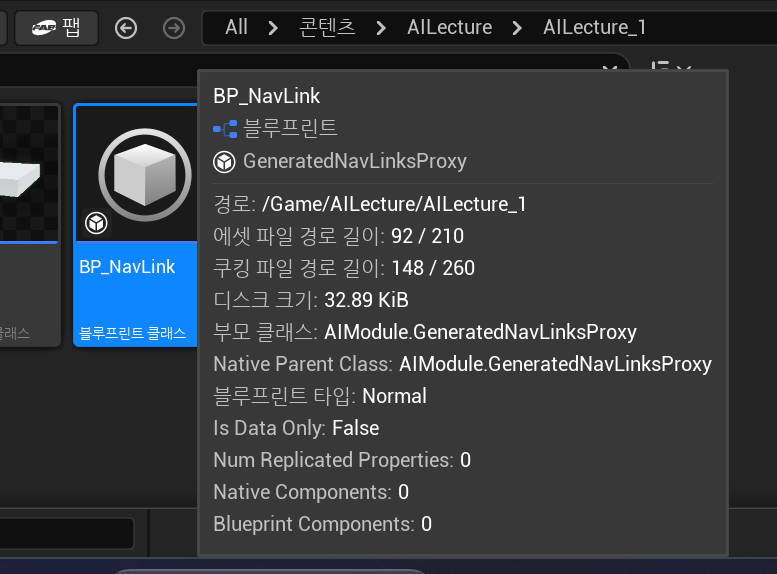 위 사진과 같이 블루프린트 클래스로 생성하여
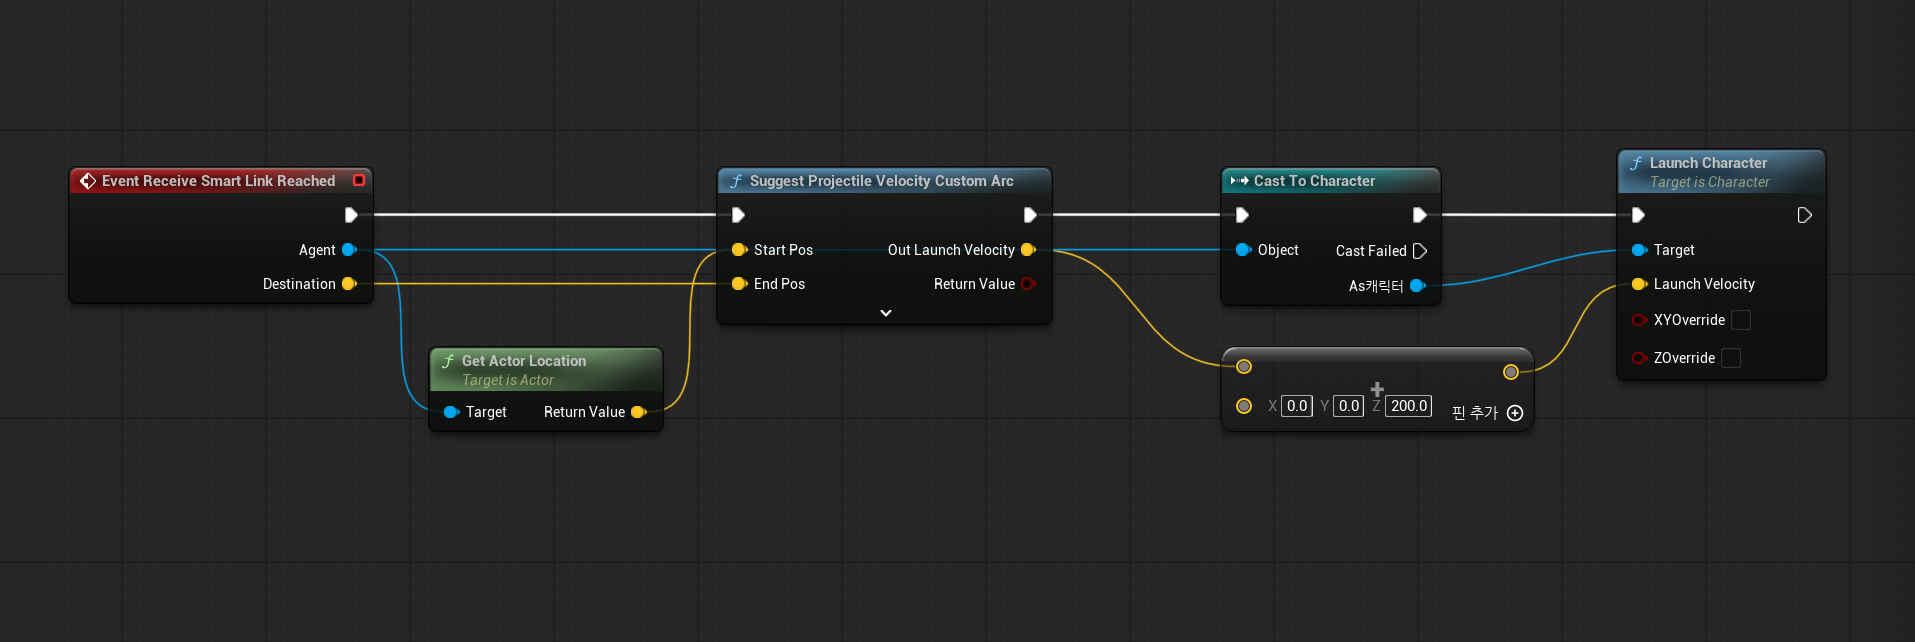 블루프린트 노드를 위 사진과 같이 연결한다.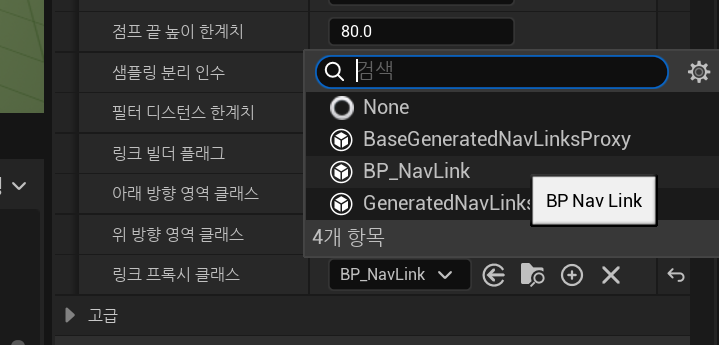
레벨 아웃라이너의 RecastNavMesh-Default에서 디테일 창의 링크 프록시 클래스를 방금 만든 BP_NavLink 설정해준다.
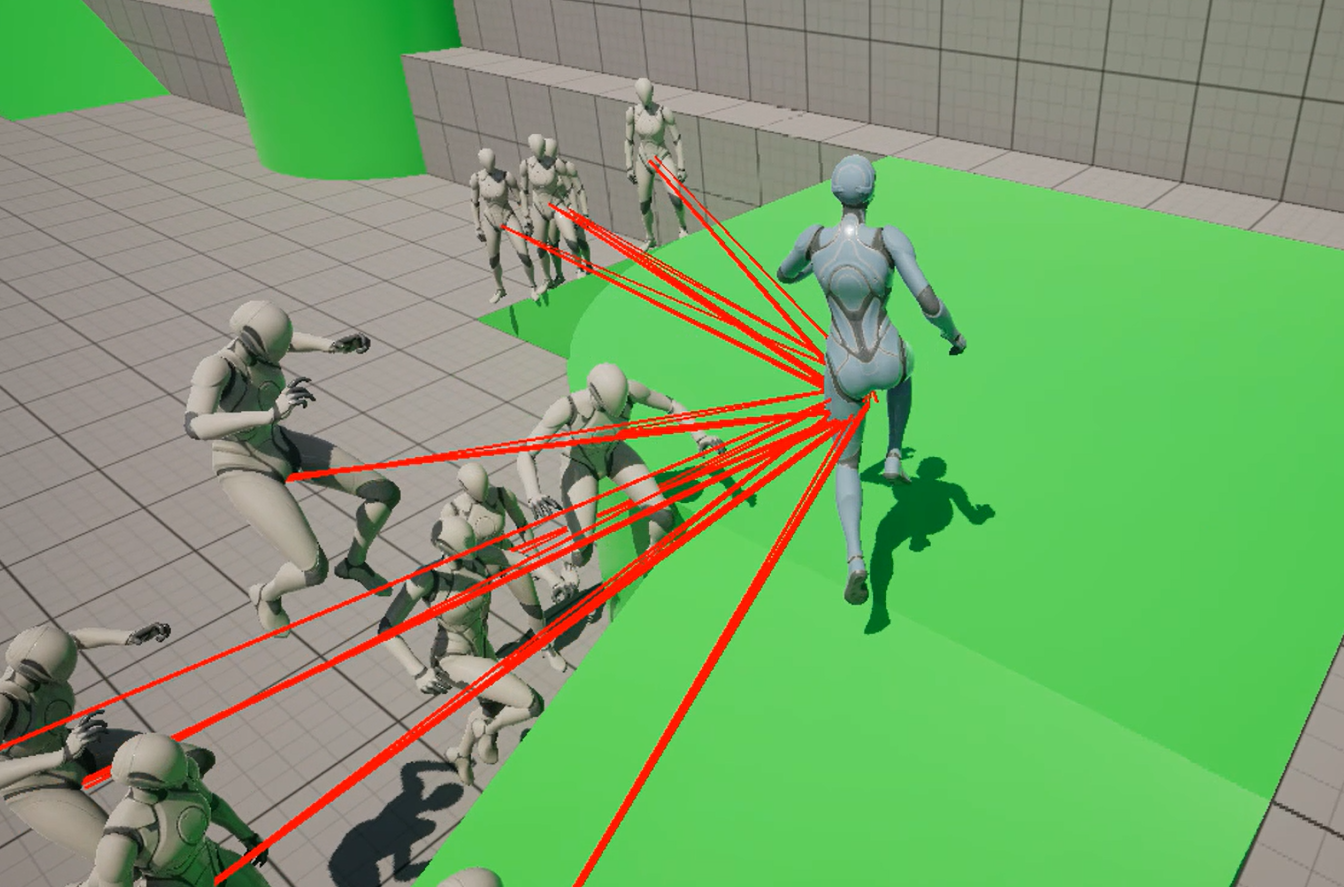 위 사진과 같이 높은 곳으로 올라가면 추적자들이 점프를 이용하여 캐릭터를 쫒아올 수 있게 된다.
- 참고 자료
캐릭터를 추적하는 NPC들을 만들어 보면서 게임의 재미를 다시 한 번 느끼는 시간이었고 이러한 기능을 잘 활용하여 NPC나 적(몬스터)들과의 상호작용을 연출 할 수 있을 것 같다.