
Router 안에 Props
URL 파라미터(Parameter)와 쿼리(Query)
- 파라미터 예시: /profiles/velopert
- 쿼리 예시: /about?details=true
URL
import React from "react"

const data = {
  veloport: {
    name: "김민준",
    description: "리액트를 좋아하는 개발자",
  },
  gildong: {
    name: "홍길동",
    description: "고전 소설 홍길동전의 주인공",
  },
}

const Profile = ({ match }) => {
  const { username } = match.params
  const profile = data[username]
  if (!profile) {
    return <div>존재하지 않는 사용자입니다</div>
  }
  return (
    <div>
      <h3>
        {username}({profile.name})
      </h3>
      <p>{profile.description}</p>
    </div>
  )
}

export default Profile
URL 파라미터는 라우트로 사용되는 컴포넌트에서 받아오는 match의 params를 참조한다.
<Route path="/profile/:username" component={Profile} />
profiles/:username 이라고 route path 를 설정해 주면 match.params.username 값을 통해 username 값을 참조하여 가져온다.
URL 쿼리
- 쿼리는 location 객체에 들어있는 search 값을 조회 할 수 있음.
기초적인 사용방법?
yarn add qs / npm install qs

import React from "react"
import qs from "qs"

const About = ({ location }) => {
  const query = qs.parse(location.search, {
    ignoreQueryPrefix: true, //문자열 앞의 ?를 생략함
  })
  const showDetail = query.detail === "true" //퀴리의 파싱 결과 값은 문자열입니다.
  return (
    <div>
      <h1>소개</h1>
      <p>이 프로젝트는 리액트 라우터 기초를 실습해 보는 예제 프로직트입니다</p>
      {showDetail && <p>detail 값을 true로 설정하셨군요!</p>}
    </div>
  )
}

export default About
일단 query url 을 만드는데는 성공했는데... 확실하게 이해가 되지 않아 나중에 기회가 되면 직접 구현 해봐야겟다..
URL 파라미터로는 언제써야하고 왜써야하는지 이해가 쉽게 갔는데... Query 파라미터는 언제 써야하는지 아직 이해가 잘안된거같다...
언제 써야하고..왜써야하는지 조금 다른 글들 참고하여 직접 블로그 따로 작성해야겟다.
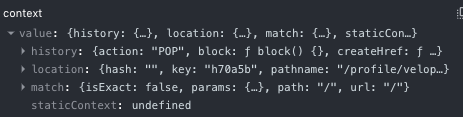
History
match, location 과 같이 전달되는 props 중 하나로 라우터 API를 호출할 수 있음.
- 특정 버튼을 눌렀을때 뒤로 가기, 다른 페이지 이동 방지.
import React, { Component } from "react"

class HistorySample extends Component {
  //뒤로가기
  handleGoBack = () => {
    this.props.history.goBack()
  }

  //홈으로 이동

  handleGoHome = () => {
    this.props.history.push("/")
  }

  componentDidMount() {
    //페이지에 변화가 생기고 나갈건지 질문함
    this.unblock = this.props.history.block("정말 떠나실건가요?")
  }

  componentWillUnmount() {
    //컴포넌트가 언마운트되면 질문을 멈춤
    if (this.unblock) {
      this.unblock()
    }
  }

  render() {
    return (
      <div>
        <button onClick={this.handleGoBack}>뒤로</button>
        <button onClick={this.handleGoHome}>홈으로</button>
      </div>
    )
  }
}

export default HistorySample
withRouter
withRouter 는 HOC (Higher order Component)으로 match,location,history 를 접근하게 해준다.
언제/ 왜 사용해야 하는지 구글에 읽어보니 component가 route에 연결해야 할때 사용하는것이라고 나온다... 🧐 실제 프로젝트때 한번 적용해보고 블로깅해보자...
import React from "react"
import { withRouter } from "react-router-dom"

const WithRouterSample = ({ location, match, history }) => {
  return (
    <div>
      <h4>location</h4>
      <textarea value={JSON.stringify(location, null, 2)} rows={7} readOnly={true} />
      <h4>match</h4>
      <textarea value={JSON.stringify(match, null, 2)} rows={7} readOnly={true} />
      <button onClick={() => history.push("/")}>홈으로</button>
    </div>
  )
}

export default withRouter(WithRouterSample)
Switch
Switch 는 여러 Route를 감싸서 그중 일차하는 단 하나의 라우트만을 렌더링 시켜주는 것이다.
mport React from "react"
import Home from "./Home"
import About from "./About.js"
import { Route, Link, Switch } from "react-router-dom"
import HistorySample from "./HistorySample"
import Profiles from "./Profiles"
const App = () => {
return (
<div>
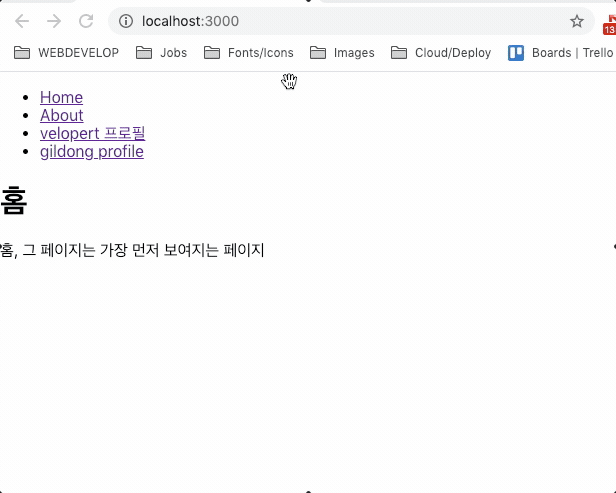
<ul>
<li>
<Link to="/">Home</Link>
</li>
<li>
<Link to="/about">About</Link>
</li>
<li>
<Link to="/history">History</Link>
</li>
<li>
<Link to="/profiles"> 프로필</Link>
</li>
</ul>
<Switch>
<Route path="/" component={Home} exact={true} />
<Route path={["/about", "info"]} component={About} />
<Route path="/history" component={HistorySample} />
<Route path="/profiles" component={Profiles} />
<Route
render={({ location }) => (
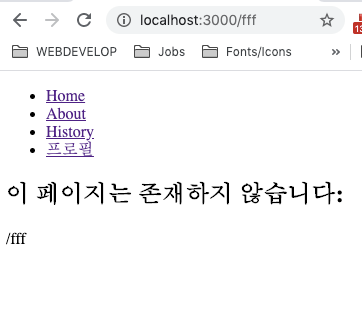
<div>
<h2>이 페이지는 존재하지 않습니다:</h2>
<p>{location.pathname}</p>
</div>
)}
/>
</Switch>
</div>
)
}
export default App
NavLink
NavLink 는 Link와 비슷함. 현재 경로와 Link 에서 사용하는 경로가 일치하지 않을경우 특정 스타일 혹은 CSS클래스를 적용할 수 있는 컴포넌트.
React Router 도 Hooks 가 있다...
https://reacttraining.com/react-router/web/api/Hooks
참고하여 공부해야겠다..