💻 답변 등록하기
💾 답변 등록 버튼 만들기
<h1 th:text="${question.subject}"></h1>
<div th:text="${question.content}"></div>

<form th:action="@{|/answer/create/${question.id}|}" method="post">
    <textarea name="content" id="content" rows="15"></textarea>
    <input type="submit" value="답변등록">
</form>- 타임리프의
"th:action"속성 : <답변등록> 버튼을 누르면 전송되는 form의 action생성태그의 action 속성은 폼 데이터(form data)를 서버로 보낼 때 해당 데이터가 도착할 URL을 명시합니다.
- name : 텍스트 입력 영역의 이름을 설정함.
- id : 텍스트 영역에 속한 폼 아이디를 설정함.
- rows : 텍스트 입력 영역 중 보이는 영역의 라인수를 설정함. <input type=" ">속성
: type="submit"<input>을 form handler에 데이터를 제출하기 위한 버튼으로 지정한다. form handler는 보통 데이터를 처리하는 서버단 페이지로 지정된다.
버튼에 value 속성을 지정할 수 있다.
💻"http://localhost:8080/question/detail/1" 접속해보기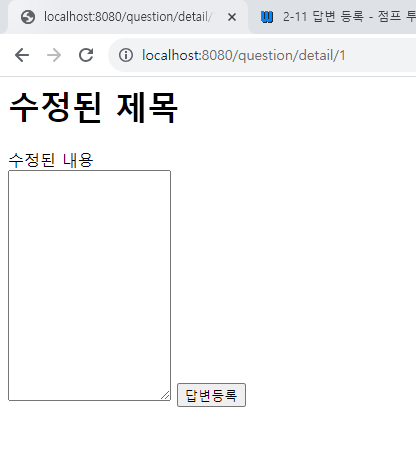
이제 <답변등록> 버튼을 누르면 POST 방식으로 /answer/create/<질문id> URL이 호출(submit)될 것이다.
아직 /answer/create/<질문id> URL에 대한 매핑이 없으므로 답변컨트롤러를 생성해 url을 매핑해주자!
💾 AnswerController 만들기
package com.mysite.sbb.answer;

import org.springframework.stereotype.Controller;
import org.springframework.ui.Model;
import org.springframework.web.bind.annotation.PathVariable;
import org.springframework.web.bind.annotation.PostMapping;
import org.springframework.web.bind.annotation.RequestMapping;
import org.springframework.web.bind.annotation.RequestParam;

import com.mysite.sbb.question.Question;
import com.mysite.sbb.question.QuestionService;

import lombok.RequiredArgsConstructor;

@RequestMapping("/answer") // 프리픽스 고정
@RequiredArgsConstructor // 생성자 자동생성
@Controller // 컨트롤러임
public class AnswerController {

	private final QuestionService questionService;
	private final AnswerService answerService;

	@PostMapping("/create/{id}") // POST 요청만 받아들일 경우에 사용
	public String createAnswer(Model model, @PathVariable("id") Integer id, @RequestParam String content) {
		Question question = this.questionService.getQuestion(id); // 변화하는 id의 question을 받아옴
		this.answerService.create(question, content); // 답변서비스와, create메소드를 생성해야함
		return String.format("redirect:/question/detail/%s", id);
	}
}@PostMapping: POST요청만 받아들일 경우에 사용
"/answer/create/{id}"와 같은 URL 요청시 createAnswer 메서드가 호출되도록 으로 매핑했다.
@RequestParam String content: 템플릿에서 답변으로 입력한 내용(content)을 얻기 위해 추가. 템플릿의 답변 내용에 해당하는 textarea의 name 속성명이 content이기 때문에 여기서도 변수명을 content로 사용해야 한다.
템플릿에서 답변으로 입력한 내용을 저장할 수 있는 답변 서비스와, 메소드를 생성해야 한다!
💾 AnswerService 만들기
package com.mysite.sbb.answer;

import java.time.LocalDateTime;
import org.springframework.stereotype.Service;
import com.mysite.sbb.question.Question;
import lombok.RequiredArgsConstructor;

@RequiredArgsConstructor // 생성자 자동생성
@Service // 서비스임
public class AnswerService {

	private final AnswerRepository answerRepository; // 레포지터리 선언

  	// create 메소드 생성
	public void create(Question question, String content) {
		Answer answer = new Answer(); // answer 인스턴스 생성
		answer.setContent(content); //파라미터로 받은 content(템플릿으로부터)를 저장한다
		answer.setCreateDate(LocalDateTime.now()); //현재시간 저장
		answer.setQuestion(question); //파라미터로 받은 question을 저장
		this.answerRepository.save(answer); // save한다
	}
}
여기까지 답변은 잘 저장되었다. 이제 템플릿을 수정하여 저장된 답변을 보여줄 수 있도록 하자!
💾 저장된 답변 불러오도록 템플릿 수정하기
<h1 th:text="${question.subject}"></h1>
<div th:text="${question.content}"></div>
<h5 th:text="|${#lists.size(question.answerList)}개의 답변이 있습니다.|"></h5>
<div>
    <ul>
        <li th:each="answer : ${question.answerList}" th:text="${answer.content}"></li>
    </ul>
</div>
<form th:action="@{|/answer/create/${question.id}|}" method="post">
    <textarea name="content" id="content" rows="15"></textarea>
    <input type="submit" value="답변등록">
</form>
🔍 추가된 부분
<h5 th:text="|${#lists.size(question.answerList)}개의 답변이 있습니다.|"></h5>
<div>
  <ul>
    <li th:each="answer : ${question.answerList}" th:text="${answer.content}"></li>
  </ul>
</div>- #lists.size(이터러블객체) : 타임리프가 제공하는 유틸리티 객체의 길이를 반환
#lists.size(question.answerList)}는 답변 개수를 의미하며 답변은 question 객체의 answerList를 순회하여 <li> 엘리먼트로 표시했다.
💻 "http://localhost:8080/question/detail/1" 접속해보기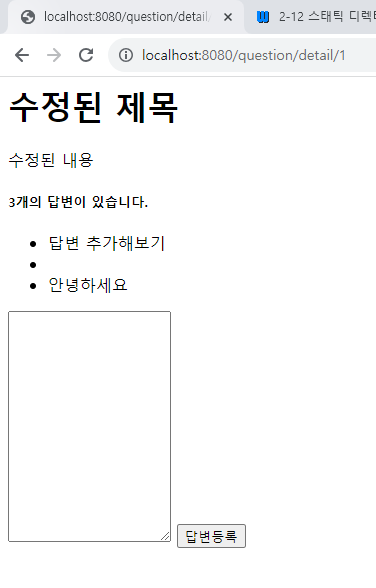
저장된 답변이 나타난다!
