Thymeleaf의 레이아웃 기능은 크게 2가지 형태로 사용한다.
- JSP의 include와 같이 특정 부분을 외부 혹은 내부에서 가져와서 포함하는 형태
- 특정한 부분을 파라미터로 전달해서 내용에 포함하는 형태
include 방식의 처리
- th:include -> 현재 deprecated 되었다(3버전 부터 사용불가능)
- th:replace -> 기존의 내용을 완전히 '대체'
- th:insert -> 기존의 내용에 '추가'
tamplates에 fragments 폴더 생성
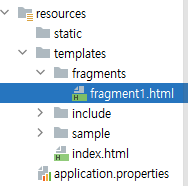
▼ fragment1에서 작성
<!DOCTYPE html>
<html lang="ko" xmlns:th="http://www.thymeleaf.org">
<head>
    <meta charset="UTF-8">
    <title>Title</title>
</head>
<body>
<div th:fragment="part1">
    <h2>Part 1</h2>
</div>
<div th:fragment="part2">
    <h2>Part 2</h2>
</div>
<div th:fragment="part3">
    <h2>Part 3</h2>
</div>
</body>
</html>
Sample에 exLayout.html 파일 생성
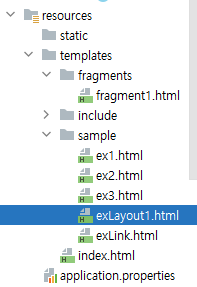
▼ exLayout에서 작성
<!DOCTYPE html>
<html lang="ko" xmlns:th="http://www.thymeleaf.org">
<head>
    <meta charset="UTF-8">
    <title>exLayout1</title>
</head>
<body>
<h1>Fragment Test</h1>

<h1>Layout 1 - 1</h1>
<div th:replace="~{/fragments/fragment1 :: part1}"></div>

<h1>Layout 1 - 2</h1>
<div th:insert="~{/fragments/fragment1 :: part2}"></div>

<h1>Layout 1 - 3</h1>
<th:block th:replace="~{/fragments/fragment1 :: part3}"></th:block>
</body>
</html>
index와 sampleController에도 다음과 같은 내용을 추가한다.
- index.html에는 exLayout1을 추가해준다.
<!DOCTYPE html>
<html lang="ko" xmlns:th="http://www.thymeleaf.org">
<head>
    <meta charset="UTF-8">
    <title>index</title>
</head>
<body>
<h1>Chapter 03</h1>
<hr>
<a href="/sample/ex1">/sample/ex1</a><br>
<a href="/sample/ex2">/sample/ex2</a><br>
<a href="/sample/ex3">/sample/ex3</a><br>
<a href="/sample/exInline">/sample/exInline</a><br>
<a href="/sample/exLink">/sample/exLink</a><br>
<a href="/sample/exLayout1">/sample/exLayout1</a><br>
</body>
</html>- SampleController에는 /exLayout1을 추가해준다.
    @GetMapping({"/ex3","/exLayout1"})
    public void ex3(){
        log.info("ex3...");
    }
복수니까 ({,}) 중괄호 추가!
실행 결과:
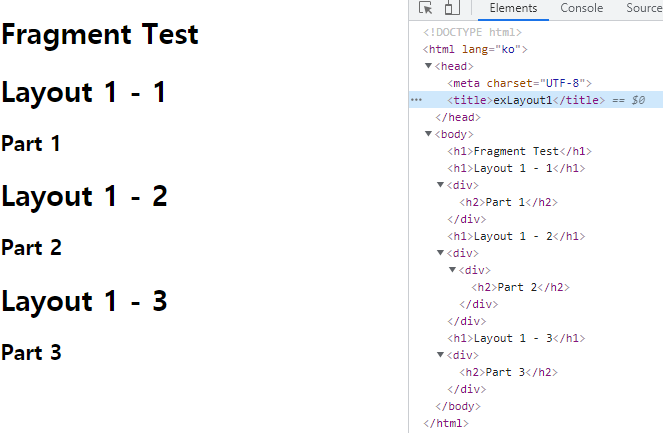
th:block을 대체하는 것이다.
파일 전체를 사용하는 예제
fragments 폴더에 fragment2.html 파일 생성

▼ fragment2에서 작성
<!DOCTYPE html>
<html lang="ko" xmlns:th="http://www.thymeleaf.org">
<head>
    <meta charset="UTF-8">
    <title>fragment 2</title>
</head>

<body>
<hr>
<h2>Fragment2 File</h2>
<h2>Fragment2 File</h2>
<h2>Fragment2 File</h2>
<hr>
</body>
</html>
▼ Sample폴더의 exLayout1에 작성
<!DOCTYPE html>
<html lang="ko" xmlns:th="http://www.thymeleaf.org">
<head>
    <meta charset="UTF-8">
    <title>exLayout1</title>
</head>
<body>

<h1>Fragment Test</h1>

<div style="border: 1px solid blue">
    <th:block th:replace="~{fragments/fragment2}"></th:block>
</div>

</body>
</html>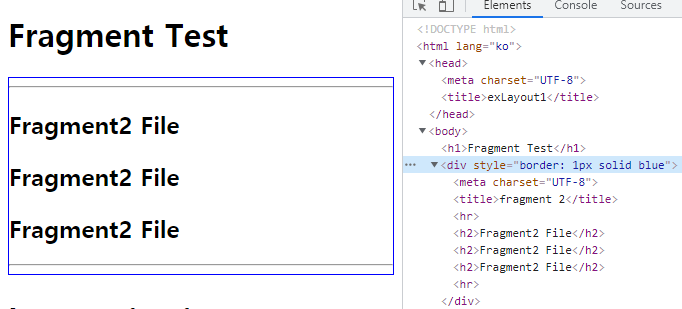
th:replace="~{fragments/fragment2}" 부분에 ::로 처리되는 부분이 없으면 전체의 내용을 반영하게 된다.
th:block을 대체하는 것이다.
파라미터 방식의 처리
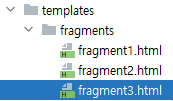
fragments 폴더에 fragment3.html 파일 생성
▼ fragment3에서 작성
<!DOCTYPE html>
<html lang="ko" xmlns:th="http://www.thymeleaf.org">
<head>
    <meta charset="UTF-8">
    <title>fragment 3</title>
</head>
<body>
<div th:fragment="target(first, second)">
    <style>
        .c1{background-color:red;}
        .c2{background-color:blue;}
    </style>
    <div class = "c1"><th:block th:replace="${first}"></th:block></div>
    <div class = "c2"><th:block th:replace="${second}"></th:block></div>
</div>
</body>
</html>
Sample폴더에 exLayout2.html 파일 생성

▼ exLayout2 에서 작성
<!DOCTYPE html>
<html lang="ko" xmlns:th="http://www.thymeleaf.org">
<head>
    <meta charset="UTF-8">
    <title>exLayout2</title>
</head>
<body>
<th:block th:replace=
     "~{/fragments/fragment3 :: target(~{this::#ulFirst},~{this::#ulSecond})}">
    <ul id="ulFirst">
        <li>AAA</li>
        <li>BBB</li>
        <li>CCC</li>
    </ul>
    <ul id="ulSecond">
        <li>111</li>
        <li>222</li>
        <li>333</li>
    </ul>
</th:block>
</body>
</html>
exLayout2.html은 화면구성과 관련된 기능이 없다. 하지만 상단에 target을 사용할 때 파라미터를 2개 사용한 것을 볼 수 있다.
this:#ulFirst - this는 현재 페이지를 의미할 때 사용하는데 #처럼 id값 처럼 생략이 가능하다. #ulFirst는 CSS의 id 선택자와 같다.
target(th:fragement="target~~this.ulfirst,ulsecond)을 들고온다.
layout2 에서 th:replace로 fragment3에 있는 target을 들고온다 ul의 li를 애들을 각각 first와 second 매개변수로 던진다
그리고 th:block을 ul의 li로 바꾸는 것임.
- SampleController에서 exLayout2 추가
    @GetMapping({"/exLayout1","/exLayout2"})
    public void exLayout(){
        log.info("exLayout...");
    }
- index.html에 exLayout2 추가
<!DOCTYPE html>
<html lang="ko" xmlns:th="http://www.thymeleaf.org">
<head>
    <meta charset="UTF-8">
    <title>index</title>
</head>
<body>
<h1>Chapter 03</h1>
<hr>
<a href="/sample/ex1">/sample/ex1</a><br>
<a href="/sample/ex2">/sample/ex2</a><br>
<a href="/sample/ex3">/sample/ex3</a><br>
<a href="/sample/exInline">/sample/exInline</a><br>
<a href="/sample/exLink">/sample/exLink</a><br>
<a href="/sample/exLayout1">/sample/exLayout1</a><br>
<a href="/sample/exLayout2">/sample/exLayout1</a><br>
</body>
</html>
**참고로 이렇게 계속 index에 넣는건 그냥
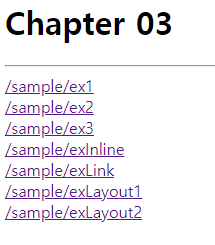
그냥 이렇게 모아서 보려고 :) 따로 주소에 쳐서 들어가도 된다.
실행 결과:
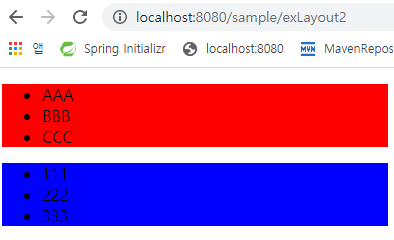
최종 결과는 fragments/fragment3.html의 내용의 일부로 전달된 #ulFirst(red), #ulSecond(blue)를 사용하게 된다.
실행 결과를 확인해보면 fragment3.html의 코드에 exLayout2.html에서 전달된 태그(ABC,123 li태그)들이 포함되서 출력되었다.
레이아웃 템플릿 만들기
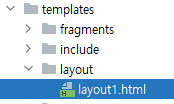
<!DOCTYPE html>
<html lang="ko" xmlns:th="http://www.thymeleaf.org">
<head>
    <meta charset="UTF-8">
    <title>layout1</title>
    <style>
        * { padding:0; margin:0;}
        .header { width:100vw; height: 20vh; background: pink;}
        .content { width:100vw; height: 70vh; background: lightGray;}
        .footer { width:100vw; height: 10vh; background: brown;}
    </style>
</head>
<body>
<div class="header"><h1>HEADER</h1></div>
<div class="content"><h1>CONTENT</h1></div>
<div class="footer"><h1>FOOTER</h1></div>
</body>
</html>
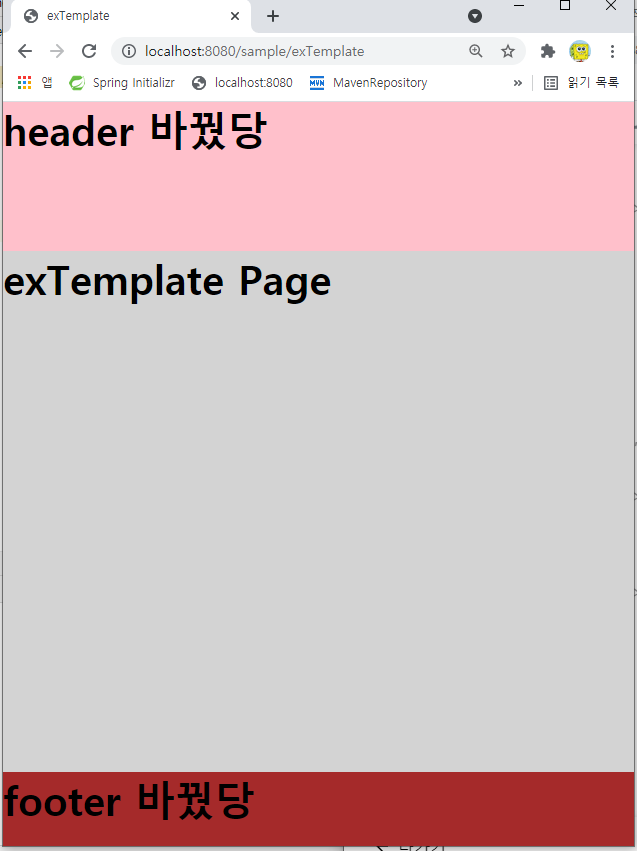
이번엔 바로 옆에 뜨는 크롬을 눌러서 연다.
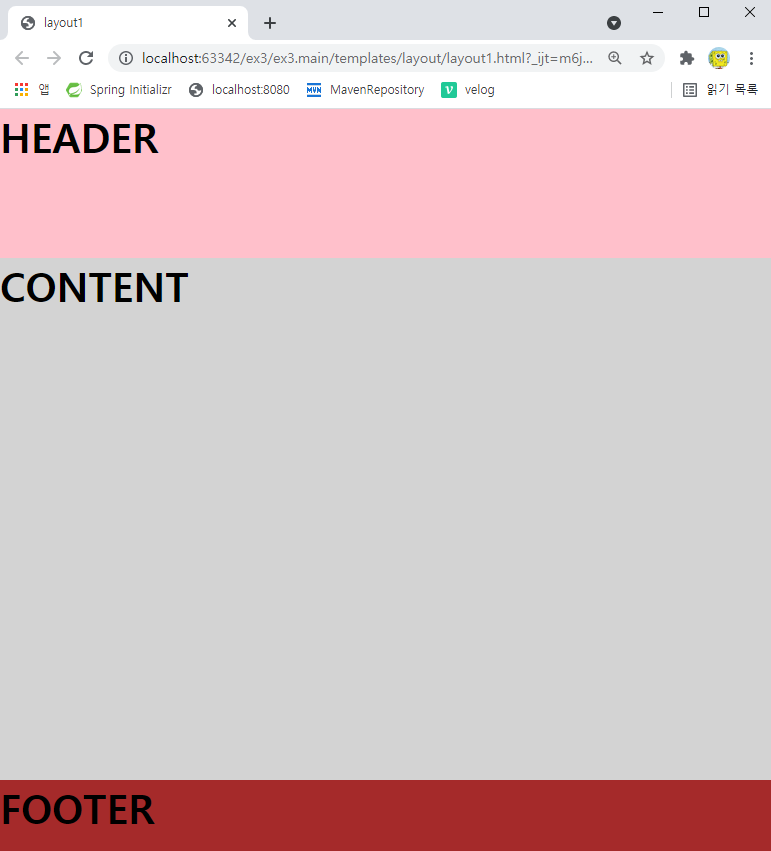
이렇게 100 꽉차게 header와 content, footer를 넣을 수 잇다.
자 이번엔 content 안에서 작업하기 위해 th:block을 넣어보겟다.
<!DOCTYPE html>
<html lang="ko" xmlns:th="http://www.thymeleaf.org">
<!--content 안에서 작업하기 위해서-->
<th:block th:fragment="setContent(content)">
    <head>
        <meta charset="UTF-8">
        <title>layout1</title>
        <style>
        * { padding:0; margin:0;}
        .header { width:100vw; height: 20vh; background: pink;}
        .content { width:100vw; height: 70vh; background: lightGray;}
        .footer { width:100vw; height: 10vh; background: brown;}
        </style>
    </head>
    <body>
    <div class="header"><h1>HEADER</h1></div>
    <!--content 안에서 작업하기 위해서-->
    <div class="content"><th:block th:replace="${content}"></th:block></div>
    <div class="footer"><h1>FOOTER</h1></div>
    </body>
</th:block>
</html>
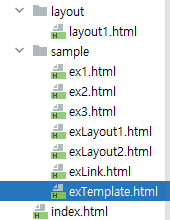
SampleController 추가
    @GetMapping("/exTemplate")
    public void exTemplate(){
        log.info("exTemplate...");
    }
▼ exTemplate에 추가
<!DOCTYPE html>
<html lang="ko" xmlns:th="http://www.thymeleaf.org">
<head>
    <meta charset="UTF-8">
    <title>exTemplate</title>
</head>
<body>
<th:block th:replace = "~{/layout/layout1 :: setContent(~{this::content})}">

    <th:block th:fragment="content">
        <h1>exTemplate Page</h1>
    </th:block>
</th:block>
</body>
</html>
layout1에 있는 th:fragment="setContent(content 안에 있는 th:block)"을 exTemplate로 가져와서 ~{this::content} 즉 this 여기(extemplate)에 있는 content에 h1태그를 Layout1에 매개변수(content)로서 다시 보낸다. 그리고 그 매개변수가 body에 있는 ${content}로 가서 바뀌며 적용되는 것이다.
extemplate에서 h1태그 위에 <th:fragment="content"> 있는 것은 그 매개변수({this::content})가 여기 있다는 것을 알려주기 위해서 쓴 것이다.
th:block -> 안에 내용만 남고 자기 자신은 사라진다.
th:fragment -> 해당 부분을 fragment로 선언한다는 의미
나머지 header와 footer는 따로 include 폴더를 만들어서 해볼 것임
templates폴더에 include 하위 폴더 추가
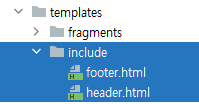
▼ Layout1에서 작성
<!DOCTYPE html>
<html lang="ko" xmlns:th="http://www.thymeleaf.org">
<th:block th:fragment="setContent(content)">
    <head>
        <meta charset="UTF-8">
        <title>layout1</title>
        <style>
        * { padding:0; margin:0;}
        .header { width:100vw; height: 20vh; background: pink;}
        .content { width:100vw; height: 70vh; background: lightGray;}
        .footer { width:100vw; height: 10vh; background: brown;}
        </style>
    </head>
    <body>
    <div class="header"><th:block th:replace="~{/include/header::header}" /></div>
    <div class="content"><th:block th:replace="${content}"></th:block></div>
    <div class="footer"><th:block th:replace="~{/include/footer::footer}" /></div>
    </body>
</th:block>
</html>
<th:block th:fragment="setContent(content)">로 감싸져 있기 때문에
"${content}" 로 $를 이용하고
header와 footer는 틸트를 이용해
"~{/include/footer::footer}"로 작성
▼ header에서 작성
<!DOCTYPE html>
<html lang="ko" xmlns:th="http://www.thymeleaf.org">
<head>
    <meta charset="UTF-8">
    <title>header</title>
</head>
<body>
<div th:fragment="header">
    <h1>header 바꿨당</h1>
</div>
</body>
</html>
▼ footer에서 작성
<!DOCTYPE html>
<html lang="ko" xmlns:th="http://www.thymeleaf.org">
<head>
    <meta charset="UTF-8">
    <title>footer</title>
</head>
<body>
<div th:fragment="footer">
    <h1>footer 바꿨당</h1>
</div>
</body>
</html>
div대신 th:block으로 작성해도 무관!
div를 아예 빼고 h1에 th:fragment="footer"를 추가해도 무관!
