-
Goal: allow users to keep track of their todos
-
User Stories (functionalities, features):
-users can view their list of todo items
-users can create a new todo item
-users can delete a current todo item -
Flow
- client load - get todo items - show todo items
- input new todo item - submit - add item to DB - reload (goes back to 1 )
- click delete button - delete from DB - redirect to current list
- Django Setting Up
setting up
Bootstrap
Setting up for templates
Template Inheritance
1.Bootstrap CDN include inside head element
base.html
<!DOCTYPE html>
<html lang="en">
<head>
    <meta charset="UTF-8">
    <title>{% block title %}{% endblock %}</title>
     <style>
    {% block styling %}
    h1{
        color: red;
    }
    {% endblock %}
    </style>

    <!-- CSS only -->
<link href="https://cdn.jsdelivr.net/npm/bootstrap@5.0.0-beta2/dist/css/bootstrap.min.css"
      rel="stylesheet" integrity="sha384-BmbxuPwQa2lc/FVzBcNJ7UAyJxM6wuqIj61tLrc4wSX0szH/Ev+nYRRuWlolflfl"
      crossorigin="anonymous">
<!-- JavaScript Bundle with Popper -->
<script src="https://cdn.jsdelivr.net/npm/bootstrap@5.0.0-beta2/dist/js/bootstrap.bundle.min.js"
        integrity="sha384-b5kHyXgcpbZJO/tY9Ul7kGkf1S0CWuKcCD38l8YkeH8z8QjE0GmW1gYU5S9FOnJ0"
        crossorigin="anonymous"></script>

</head>

<body>
{% block content %}{% endblock content %}
</body>

</html>
index.html
{% extends "base.html" %}
{% block title %}Todo App{% endblock %}
{% block content %}
		<h1> hello </h1>
{% endblock content %}
2. Navbar
inside body element
brand
The .navbar-brand can be applied to most elements, but an anchor works best, as some elements might require utility classes or custom styles.
<nav class="navbar navbar-light bg-dark">
  <div class="container-fluid">
    <a class="navbar-brand" style="color:white;" href="#">ToDo App</a></div>
</nav>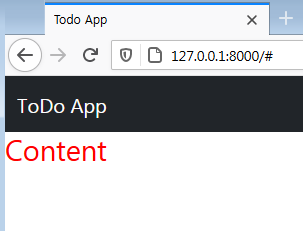
3. Container
under navbar
<div class="container">
{% block content %}{% endblock %}
</div>
4. Form
<form action="add_todo" method="POST"
class="row row-cols-lg-auto g-3 align-items-center">
 {% csrf_token %}
    <div class="col-12">
        <input type="text"
        class="form-control"
        name="content" placeholder="What are you going to do?">
    </div>
   <div class="col-12">
        <button type="submit" class="btn btn-primary">Add</button>
   </div>
</form>
5. List Group
-
row : limitless
-
column: 12 limits
-
div: with css, box
-
span: text
<div class="row">
<div class="col" style="padding-top: 10px;">
        <ul class="list-group">
          <li class="list-group-item" aria-current="true">
          An active item
          </li>
        </ul>
</div>
</div>
Django
1. Form input data
request & response objects in django.http module
For processing conventional form data, use HttpRequest.POST
Django uses request and response objects to pass state through the system.
When a page is requested, Django creates an HttpRequest object that contains metadata about the request. Then Django loads the appropriate view, passing the HttpRequest as the first argument to the view function. Each view is responsible for returning an HttpResponse object.
def add_todo(request):
    print(request.POST)
    return render(request, 'index.html')
print: I typed '1234' in the form, It shows the form input data.
<QueryDict: {'csrfmiddlewaretoken': ['MSa~gmFSn10LBfD5Dnvhb'],
'content': ['1234']}>
2. Use print frequently to test the app!
TEST
from django.utils import timezone

def add_todo(request):

    #capture the added time
    added_date = timezone.now()

    # getting hold of form input data
    content = request.POST["content"]

    print(added_date)
    print(content)

return render(request, 'index.html')2021-03-04 09:36:41.090923+00:00
content of todolist3. create()
No need to make a model instance and save into DB. Create() does all at once.
def add_todo(request):
    current_date = timezone.now()
    content = request.POST["content"]
    todo =Todo.objects.create(
        added_date=current_date,
        text=content
    )
    return HttpResponseRedirect("/")
TEST
To check DB works fine.
This returns total number of objects in DB.
    lenghth_of_todos = Todo.objects.all().count()
    print(lenghth_of_todos)
4. delete()
html: using form element instead of a href to get hold of id when button clicked
<form action="delete_todo/{{todo.id}}" action="post">
	<button type="submit"
    	class="btn btn-sm btn-danger">Delete</button>
</form>
5. Bonus
1. order_by
minus before 'added_date' to make it by latest
    todo =Todo.objects.create(
        added_date=current_date,
        text=content
    )
todo_items = Todo.objects.all().order_by("-added_date")
2. timezone
capture the time
from django.utils import timezone
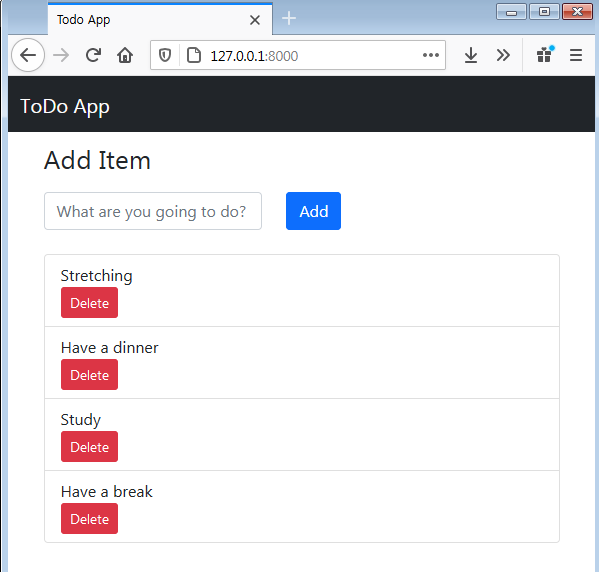
current_date = timezone.now() Result
I couldn't move Delete button to the right. I used div class="float-right" it didn't work. Other than that, It works fine.
Difference btw redirect and HttpResponseRedirect?
- long article
https://realpython.com/django-redirects/
- There is a difference between the two:
In the case of HttpResponseRedirect the first argument can only be a url.
redirect which will ultimately return a HttpResponseRedirect can accept a model, view, or url as it's "to" argument. So it is a little more flexible in what it can "redirect" to.
I also like how redirect is shorter. So I'd use redirect over HttpResponseRedirect.
Both are fine to use though.
https://stackoverflow.com/questions/13304149/what-the-difference-between-using-django-redirect-and-httpresponseredirect
