- django: 서비스를 편리하게 제공해주기 위한 도구 일 뿐.
- DRF: Django REST Framework
REST (Representational State Transfer)

사용 목적
- HTTP Protocol을 사용한다.
- 자원 관리를 편리하게 해준다.
- 플랫폼에 종속되면 안된다.
개발 환경
- VSC 환경 (1.69.2)
- Python 설치
- virtual enviroment 설치
- pip3 install virtualenv
참고) pip: python library 관리자 (npm 이랑 비슷)
Django 세팅
# 프로젝트 폴더 생성
mkdir night
cd night
# 가상 환경 세팅
python3 -m venv djangovenv
# 가상 환경 접속 (djangovenv 에 들어가지말고)
source djangovenv/bin/activate

# 장고 설치
python3 -m pip install django
## 제일 밑에 warning 사인이 뜨는데,
pip install --upgrade pip # 를 이용해 pip을 업그레이드 해주면 해결할 수 있다!

# 사용할 수 있는 django 명령어 조회
django-admin

# 현재 위치에 pragmatic_drf 라는 django 프로젝트 생성 (얘가 메인 장고 프로젝트)
django-admin startproject pragmatic_drf .

# manage.py 를 실행시켜 서버 가동 (127.0.0.1:8000 접속)
python manage.py runserver
Django Framework 세팅
pip install djangorestframework
pip install markdown             # browser를 통해 api를 테스트 하기 위함

# settings 파일 설정
# pragmatic_drf/settings.py
INSTALLED_APPS = [
    ...
    'rest_framework',
]

# url 파일 설정
# pragmatic_drf/url.py
path('api-auth/', include('rest_framework.urls'))
urlpatterns = [
    ...
		# browser를 통해 테스트할 때 인증을 위한 과정이 필요해서
	  # 파일을 가져올 땐 include 쓴다
    path('api-auth/', include('rest_framework.urls'))
]
django 패턴
: MVC (x) MVT (o) = Model-View-Template 패턴
- Model: DB 관리
- ORM (Object Relational Mapping) 자동 제공
- View: Controller 역할
- Template: 화면
import : Command + .
Routing
python manage.py startapp accountapp  # 라우팅을 위해 accountapp 폴더 생성

# url.py
path('accounts/', include('accountapp.urls'))

# settings.py
INSTALLED_APPS = [
	...
    'accountapp',
]
/night/accountapp
- urls.py 파일 생성
from django.urls import path

from accountapp.views import hello_world, hello_world_drf

urlpatterns = [

    path('hello/', hello_world),

    path('hello_drf/', hello_world_drf),

]- views.py 내
from urllib import response
from django.http import HttpRequest, HttpResponse
from django.shortcuts import render
from rest_framework.decorators import api_view
from rest_framework.response import Response
# Create your views here.

# 기존 장고 방식
def hello_world(requset):
    return HttpResponse('Hello World!')

# DRF 방식
@api_view()
def hello_world_drf(request):
    return Response("Hello DRF")
기존 장고 방식 출력

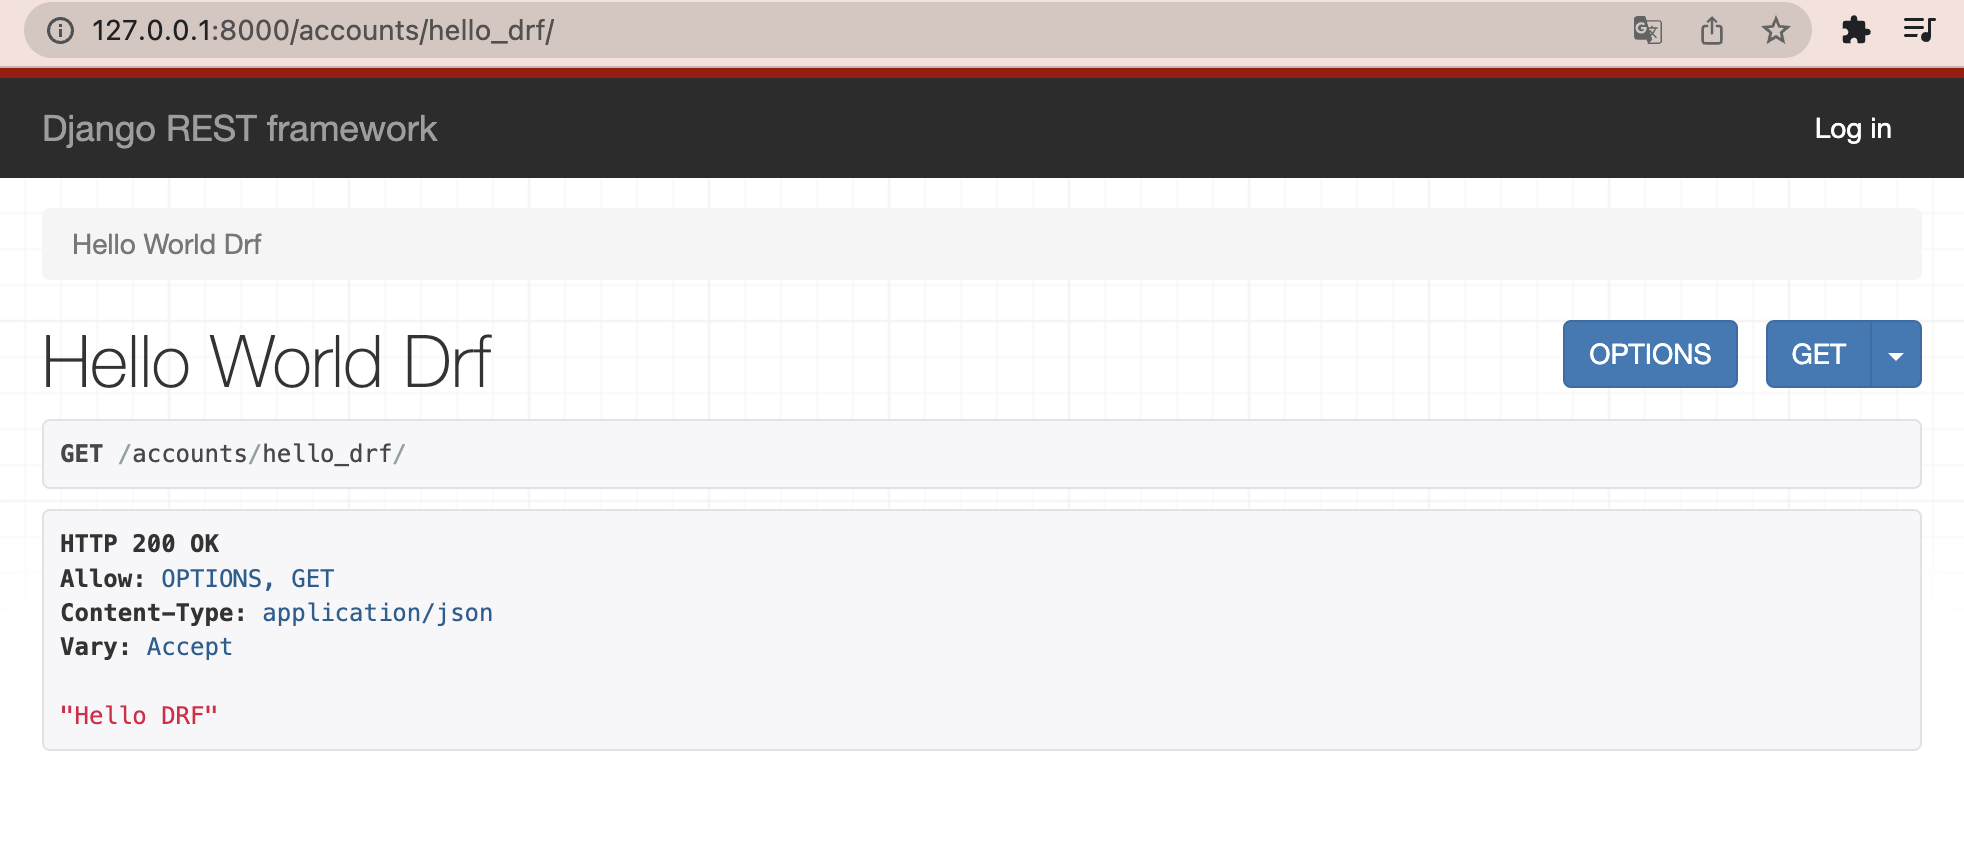
DRF 방식 출력
참고

https://www.youtube.com/watch?v=whoDs0KRc7k&t=1s