fragment와 FrameLayout 태그
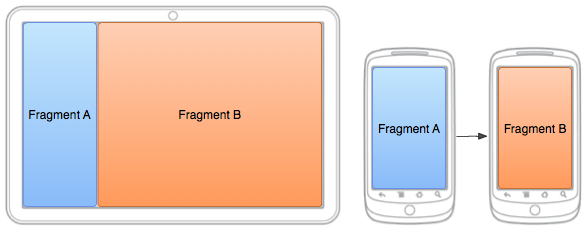
FrameLayout
- programmatically하게 프래그먼트를 로드해서 사용한다.
- replace()로 프래그먼트를 추가, 교체할 수 있다.
보통 Fragment를 나타낼 때 xml에서 FrameLayout 태그를 이용한다.
나는 주로 bottomNavigation을 표시하기 위해 Fragment를 자주 사용하고, 메뉴에 따라 적절한 프래그먼트를 보여주어야 하기 때문에 xml에서 그 범위를 FrameLayout으로 표시한다.
<?xml version="1.0" encoding="utf-8"?>
<layout xmlns:android="http://schemas.android.com/apk/res/android"
  xmlns:app="http://schemas.android.com/apk/res-auto"
  xmlns:tools="http://schemas.android.com/tools"
  tools:context=".view.MainActivity">

  <androidx.constraintlayout.widget.ConstraintLayout
      android:layout_width="match_parent"
      android:layout_height="match_parent">

      <FrameLayout
          android:id="@+id/main_content"
          android:layout_width="match_parent"
          android:layout_height="0dp"
          app:layout_constraintVertical_weight="0.9"
          app:layout_constraintTop_toTopOf="parent"
          app:layout_constraintBottom_toTopOf="@id/nav"/>


      <com.google.android.material.bottomnavigation.BottomNavigationView
          android:id="@+id/nav"
          android:layout_width="match_parent"
          android:layout_height="0dp"
          app:menu="@menu/bottom_nav"
          app:layout_constraintVertical_weight="0.1"
          app:layout_constraintBottom_toBottomOf="parent" />
  </androidx.constraintlayout.widget.ConstraintLayout>


</layout>
xml에서 위와 같이 표시하고, 액티비티에서 메뉴별 적절한 프래그먼트를 연결한다.
private fun navigation(item: MenuItem): Boolean{
        when(item.itemId){
            R.id.nav_home -> {
                supportFragmentManager.beginTransaction().replace(R.id.main_content, HomeFragment(application)).commit()
                return true
            }
            R.id.nav_add ->{
                val intent=Intent(this@MainActivity, AddActivity::class.java)
                launcher.launch(intent)
                return true
            }
            R.id.nav_account ->{
                supportFragmentManager.beginTransaction().replace(R.id.main_content, AccountFragment()).commit()
                return true
            }
            else -> return false
        }
    }
위와 같이 프래그먼트를 추가, 교체하는 상황이 필요하다면 FrameLayout을 쓰는 것이 맞고, 그렇지 않은 경우는 fragment 태그를 사용해도 무방하다.
fragment
- 즉각적으로 Fragment를 띄울 때 사용한다.
- replace()로 교체가 불가능하다.
액티비티 하나의 화면을 프래그먼트 부분 화면으로 쪼개서 사용할 때 쓴다.
<?xml version="1.0" encoding="utf-8"?>
<layout xmlns:android="http://schemas.android.com/apk/res/android"
    xmlns:tools="http://schemas.android.com/tools"
    xmlns:app="http://schemas.android.com/apk/res-auto"
    tools:context=".view.HomeFragment">


    <androidx.constraintlayout.widget.ConstraintLayout
        android:layout_width="match_parent"
        android:layout_height="match_parent"
        android:padding="20dp">

        <TextView
            android:id="@+id/tv_hello"
            android:layout_width="wrap_content"
            android:layout_height="wrap_content"
            android:text="Good morning,"
            android:textSize="30sp"
            app:layout_constraintBottom_toTopOf="@id/tv_name"
            app:layout_constraintLeft_toLeftOf="parent"/>

        <TextView
            android:id="@+id/tv_name"
            android:layout_width="wrap_content"
            android:layout_height="wrap_content"
            android:text="Jack"
            android:textSize="30sp"
            android:textStyle="bold"
            app:layout_constraintTop_toBottomOf="@id/tv_hello"
            app:layout_constraintLeft_toLeftOf="parent"/>

        <androidx.viewpager2.widget.ViewPager2
            android:id="@+id/viewpager"
            android:layout_width="match_parent"
            android:layout_height="wrap_content"
            app:layout_constraintTop_toBottomOf="@id/tv_name"/>


        <TextView
            android:id="@+id/tv_task"
            android:layout_width="wrap_content"
            android:layout_height="wrap_content"
            android:text="Today's tasks"
            app:layout_constraintTop_toBottomOf="@id/viewpager"
            app:layout_constraintBottom_toTopOf="@id/frag_task"
            app:layout_constraintLeft_toLeftOf="parent"
            android:layout_marginTop="10dp"
            android:layout_marginBottom="10dp"/>

        <fragment
            android:id="@+id/frag_task"
            android:layout_width="match_parent"
            android:layout_height="0dp"
            android:name="com.toy.mytodo.view.TaskFragment"
            app:layout_constraintTop_toBottomOf="@id/tv_task"
            app:layout_constraintBottom_toBottomOf="parent"/>


    </androidx.constraintlayout.widget.ConstraintLayout>


</layout>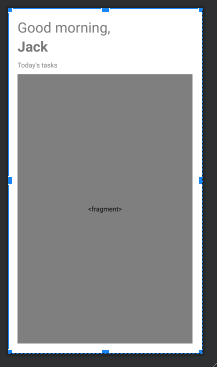
이때 fragment는 TaskFragment만 띄우기 때문에-다른 프래그먼트로 교체할 일이 없다- FrameLayout을 사용하지 않았다.
FragmentManager로 replace() 코드를 추가하지 않고 xml에서 name 또는 class 애트리뷰트로 바로 프래그먼트를 지정할 수 있다.
참고
- Android: when / why should I use FrameLayout instead of Fragment?
https://stackoverflow.com/questions/19453530/android-when-why-should-i-use-framelayout-instead-of-fragment - What can be the difference of using a fragment and frameLayout in android? Can both be used interchangeably?
https://stackoverflow.com/questions/43474860/what-can-be-the-difference-of-using-a-fragment-and-framelayout-in-android-can-b

😎