Node를 공부하기 전에, 프론트엔드와 관련된 자바스크립트를 알아야한다.
따라서, 이번 포스팅에서는 1. AJAX, 2.FormData, 3. encodeURIComponent, decodeURIComponent, 4. 데이터 속성과 dataset을 다뤄보겠다.
책 Node.js 교과서(개정 2판) 책의 2강의 2.2 내용을 참고했다.
+github 주소
1. AJAX
+VSCode에서 live server을 install한 후 테스트하면 된다.
AJAX
- Asynchronous Javascript And XML
- 비동기적 웹 서비스를 개발할 때 사용하는 통신 기법
- 페이지 이동 없이 서버에 요청을 보내고 응답을 받는 기술
- XML을 꼭 사용해야하는 것은 아님(요즘은 JSON을 많이 사용)
AJAX요청은 jQuery나 axios 같은 라이브러리를 이용해 보낸다.
브라우저에서 기본적으로 XMLHttpRequest 객체를 제공하지만, 사용 방법이 복잡하고 서버에서는 사용할 수 없어 axios를 위주로 사용하겠다.
프론트엔드에서 사용하려면 HTML 파일에 script 태그를 추가한다.
axios 라이브러리를 사용한 기본 틀 EXAMPLE )
Git [1_ajax/front.html]
<html>
<head></head>
<body>
<script src="https://unpkg.com/axios/dist/axios.min.js"></script>
<script>
    // 코드
</script>
</body>
</html>
axios 라이브러리 사용 REST API 中 GET 요청 EXAMPLE )
**REST API는 추후에 다루겠다.
Git [1_ajax/axios_get.html]
입력
<html>
<head></head>
<body>
<script src="https://unpkg.com/axios/dist/axios.min.js"></script>
<script>
   axios.get('https://www.zerocho.com/api/get') // 해당 서버로부터 정보를 받아온다
   .then((res)=> { // axios도 내부에 new Promise가 들어있어 then과 catch의 사용이 가능하다
       console.log(res);
       console.log(res.data); // {}
   })
   .catch((error)=>{
       console.error(error);
   });
</script>
</body>
</html>
출력(console)
{}Git [1_ajax/axios_get.html]을 async/await 방식으로 변경한 EXAMPLE )
Git [1_ajax/axios_get_async_await.html]
<html>
<head></head>
<body>
<script src="https://unpkg.com/axios/dist/axios.min.js"></script>
<script>
    (async()=> {
        try {
            const result = await axios.get('https://www.zerocho.com/api/get');
            console.log(result);
            console.log(result.data); // {}
        } catch(error){
            console.error(error);
        }
    })
</script>
</body>
</html>
Git [1_ajax/axios_get_async_await.html]을 post 방식으로 변경한 EXAMPLE )
**post 요청은 데이터를 서버로 전송
Git [1_ajax/axios_post_async_await.html]
<html>
<head></head>
<body>
<script src="https://unpkg.com/axios/dist/axios.min.js"></script>
<script>
    (async()=> {
        try {
            const result = await axios.get('https://www.zerocho.com/api/get');
            console.log(result);
            console.log(result.data); // {}
        } catch(error){
            console.error(error);
        }
    })
</script>
</body>
</html>
2. FormData
FormData
- HTML form 태그의 데이터를 동적으로 제어할 수 있는 기능
- 주로 AJAX와 함께 사용됨
FormData의 메소드
- append : 키-값 형식의 데이터를 저장 가능
- has : 주어진 키에 해당하는 값이 있는지 여부를 알려줌
- get : 주어진 키에 해당하는 값 하나를 가져옴
- getAll : 해당하는 모든 값을 가져옴
- delete : 현재 키를 제거
- set : 현재 키를 수정
Formdata로 객체 생성 EXAMPLE )
Git [2_formdata/formdata.html]
<html>
<head></head>
<body>
<script src="https://unpkg.com/axios/dist/axios.min.js"></script>
<script>
 const formData = new FormData();
 formData.append('name','zerocho');
 formData.append('item','orange');
 formData.append('item','melon');
 formData.has('item'); // true
 formData.has('money'); //false;
 formData.get('item'); // orange
 formData.getAll('item'); // ['orange', 'melon'];
 formData.append('test',['hi','zero']);
 formData.get('test'); // hi, zero
 formData.delete('test');
 formData.get('test'); // null
 formData.set('item', 'apple');
 formData.getAll('item'); // ['apple'];
</script>
</body>
</html>
axios로 폼 데이터를 서버에 보내고 응답을 받는 EXAMPLE )
Git [2_formdata/formdata2.html]
입력
<html>
<head></head>
<body>
<script src="https://unpkg.com/axios/dist/axios.min.js"></script>
<script>
 const formData = new FormData();
 formData.append('name','zerocho');
 formData.append('item','orange');
 formData.append('item','melon');
 formData.has('item'); // true
 formData.has('money'); //false;
 formData.get('item'); // orange
 formData.getAll('item'); // ['orange', 'melon'];
 formData.append('test',['hi','zero']);
 formData.get('test'); // hi, zero
 formData.delete('test');
 formData.get('test'); // null
 formData.set('item', 'apple');
 formData.getAll('item'); // ['apple'];

  // 여기부터 추가내용
 (async () => {
     try {
         const formData = new FormData();
         formData.append('name', 'zerocho');
         formData.append('birth', 1994);
         const result = await axios.post('https://www.zerocho.com/api/post/formdata', formData); // 두 번째 인수에 데이터를 넣어서 보냄
         console.log(result);
         console.log(result.data);
     }
     catch(error){
         console.error(error);
     }
 })();
</script>
</body>
</html>
출력(console)
{message: '폼데이터를 전송받았습니다'}3. encodeURIComponent, decodeURIComponent
encodeURIComponent
- 주소에 한글이 들어가는 경우 이용
- window 객체의 메소드(노드에서도 사용 가능)
- 한글 주소 부분만 이 메소드로 감쌈
axios로 폼 데이터를 서버에 보내고 응답을 받는 EXAMPLE )
Git [3_encodeURIComponent_decodeURIComponent/encodeURIComponent.html]
<html>
<head></head>
<body>
<script src="https://unpkg.com/axios/dist/axios.min.js"></script>
<script>
   (async () => {
    try {
        const result = await axios.get(`https://www.zerocho.com/api/search/${encodeURIComponent('노드')}`); // 노드라는 한글주소가 %EB%85%B8%EB%93%9C라는 문자열로 변환됨
        console.log(result);
        console.log(result.data); // {}
    } catch(error){
        console.error(error);
    }
   })();
</script>
</body>
</html>
decodeURIComponent
incode로 변환되었던 문자열을 다시 한글로 변환시킴
decodeURIComponent EXAMPLE )
decodeURIComponent('%EB%85%B8%EB%93%9C'); //노드4. 데이터 속성과 dataset
노드를 웹 서버로 사용하는 경우, 프론트엔드와 빈번히 데이터를 주고 받는다. 자바스크립트 변수에 저장해도 되지만, 다른 공식적인 방법을 소개하겠다.
데이터 속성
- HTML5에 있는 HTML과 관련된 데이터를 저장하는 공식적인 방법
- HTML 태그의 속성으로 data-로 시작하는 것을 넣음
- 화면에는 나타나지 않지만 웹 애플리케이션 구동에 필요한 데이터들
- 이 데이터를 사용해 서버에 요청을 보냄
장점
Javascript로 쉽게 접근 가능
데이터속성 EXAMPLE )
Git [4_dataset/dataset.html]
입력
<html>
<head></head>
<body>
    <script src="https://unpkg.com/axios/dist/axios.min.js"></script>
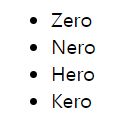
    <ul>
        <li data-id="1" data-user-job="programmer">Zero</li>
        <li data-id="2" data-user-job="designer">Nero</li>
        <li data-id="3" data-user-job="programmer">Hero</li>
        <li data-id="4" data-user-job="ceo">Kero</li>
    </ul>
<script>
    console.log(document.querySelector('li').dataset); // script 태그에서 dataset 속성을 통해 li 태그의 데이터 속성에 접근하고 있음
    // { id: '1', userJob: 'programmer' } // 이름에 data- 가 사라짐
</script>
</body>
</html>
출력(console)
DOMStringMap {id: '1', userJob: 'programmer'}출력(실행 화면)

기본적인 환경 설정 및 자바스크립트에 대해 공부했다. 앞으로 본격적인 Node 공부를 시작하게 된다.
