
본격적으로 서버를 통해 http에 띄워보자.
이번 포스팅에서는 1. 요청-응답, 2. REST-라우팅, 3. 쿠키-세션, 4. https-http2, 5. cluster를 다루겠다.
책 Node.js 교과서(개정 2판) 책의 4강의 내용을 참고했다. 내용이 너무 많아, 중요한 일부만 포스팅했다.
+모든 코드는 github주소에 있다.
1. 요청-응답
요청 : 클라이언트 -> 서버
응답 : 서버 -> 클라이언트
기본적인 형식의 http 모듈 사용 서버 생성 EXAMPLE )
Git [CreateServer.js]
// http 모듈 사용(http 서버가 있어야 웹 브라우저의 요청 처리 가능)
const http = require('http');

// 서버 생성
http.createServer((req,res) => { // req : 요청, res : 응답
    // 여기에 어떻게 응답할지 적습니다.
});
이벤트 리스너를 생성한 서버 EXAMPLE )
** 이벤트 리스너는 클라이언트로부터 요청이 왔을 때 어떤 작업을 수행할지 나타냄
Git [server1.js]
const http = require('http');

http.createServer((req,res)=> {
    res.writeHead(200, {'Content-Type': 'text/html; charset=utf-8'});
    res.write('<h1>Hello Node!</h1>');
    res.end('<p>Hello Server!</p>');
})
// 이벤트 리스너 생성, 서버를 계속 열어둠!
 .listen(8080, () => { // 서버연결
    console.log('8080번 포트에서 서버 대기 중입니다!');
});
입력(console)
node sever1실행화면(console)

실행화면(웹 브라우저)
아래의 둘 중 하나에 접속하면 됨

html 파일을 여는 서버 EXAMPLE )
** 두 파일이 같은 폴더에 존재해야 함
Git [server2.html]
<!DOCTYPE html>
<html>
    <head><meta charset="utf-8" />
    <title>Node.js 웹 서버</title>
</head>
<body>
    <h1>Hello Node!</h1>
    <p>Hello Server!</p>
</body>
</html>
Git [server2.js]
const http = require('http');
const fs = require('fs').promises;

http.createServer(async (req, res) => {
    try {
        const data = await fs.readFile('./server2.html');
     //   res.writeHead(200, { 'Content-Type' :  'text/html; charset=utf-8'});
        res.end(data);
    } catch(err){
        console.error(err);
        res.writeHead(500, {'Content-Type': 'text/plain; charset=utf-8'});
        res.end(err.message);
    }
})
 .listen(8081, () => {
     console.log('8081번 포트에서 서버 대기중입니다!');
 });
** 웹 브라우저 실행 결과는 위와 동일
2. REST-라우팅
REST
- REpresentational State Transfer의 약자
- 서버의 자원(서버가 행할 수 있는 것)을 정의하고 자원에 대한 주소를 지정하는 방법
- RESTful : REST를 따르는 서버
대표적인 REST 메소드
GET: 서버 자원을 가져오고자 할 때 사용POST: 서버에 자원을 새로 등록하고자 할 때 사용PUT: 서버의 자원을 요청에 들어있는 자원으로 치환PATCH: 서버 자원의 일부만 수정DELETE: 서버의 자원을 삭제OPTIONS: 요청을 하기 전 통신 옵션을 설명
REST(GET, POST, PUT, DELETE) EXAMPLE )
프론트엔드
Git [rest/restFront.css]
a { color : blue; text-decoration: none; }Git [rest/restFront.html]
<!DOCTYPE html>
<html>
    <head>
        <meta charset="utf-8"/>
        <title>RESTful SERVER</title>
        <link rel="stylesheet" href="./restFront.css" />
    </head>
    <body>
        <nav>
            <a href="/">Home</a>
            <a href="/about">About</a>
        </nav>
        <div>
            <form id ="form">
                <input type="text" id="username">
                <button type="submit">등록</button>
            </form>
        </div>
        <div id="list">
        </div>
        <script src ="https://unpkg.com/axios/dist/axios.min.js"></script>
        <script src="./restFront.js"></script>
    </body>
</html>
Git [rest/restFront.js]
async function getUser(){ // 로딩 시 사용자 정보를 가져오는 함수
     try{
         const res = await axios.get('/users');
         const users = res.data;
         const list = document.getElementById('list'); // restFront.html에서 list라는 이름의 id를 가져옴
         list.innerHTML = '';
         // 사용자마다 반복적으로 화면 표시 및 이벤트 연결
         Object.keys(users).map(function (key){ // map이 반복문
             const userDiv = document.createElement('div');
             const span = document.createElement('span');
             span.textContent = users[key];
             const edit = document.createElement('button');
             edit.textContent = '수정';
             edit.addEventListener('click', async() => { // 수정 버튼 클릭
                 const name = prompt('바꿀 이름을 입력하세요');
                 if(!name){
                     return alert('이름을 반드시 입력하셔야 합니다');
                 }
                 try {
                     await axios.put('/user/' + key,{name});
                     getUser();
                 }catch(err){
                     console.error(err);
                 }
             });
             const remove = document.createElement('button');
             remove.textContent = '삭제';
             remove.addEventListener('click', async () => { // 삭제 버튼 클릭
                try {
                    await axios.delete('/user/' + key);
                    getUser();
                } catch(err){
                    console.error(err);
                }
             });
             userDiv.appendChild(span);
             userDiv.appendChild(edit);
             userDiv.appendChild(remove);
             list.appendChild(userDiv);
             console.log(res.data);
         });
     } catch (err){
         console.error(err);
     }
}

window.onload = getUser; // 화면 로딩 시 getUser 호출
// 폼 제출(submit) 시 실행
document.getElementById('form').addEventListener('submit', async (e) => {
    e.preventDefault();
    const name = e.target.username.value;
    if(!name){
        return alert('이름을 입력하세요');
    }
    try {
        await axios.post('/user', {name});
        getUser();
    } catch(err){
        console.error(err);
    }
    e.target.username.value = '';
});
Git [rest/about.html] - 소개 페이지
<!DOCTYPE html>
<html>
    <head>
        <meta charset="utf-8"/>
        <title>RESTful SERVER</title>
        <link rel="stylesheet" href="./restFront.css">
    </head>
    <body>
        <nav>
            <a href="/">Home</a>
            <a href="/about">About</a>
        </nav>
        <div>
            <h2>소개 페이지입니다.</h2>
            <p>사용자 이름을 등록하세요!</p>
        </div>
    </body>
</html>
백엔드
Git [rest/restServer.js]
const http = require('http');
const fs = require('fs').promises;

const users = {};

http.createServer(async (req, res) => {
    console.log(req.method, req.url);
    try {
        console.log(req.method, req.url);
        if(req.method === 'GET'){
            if(req.url === '/'){
                const data = await fs.readFile('./restFront.html');
                res.writeHead(200, {'Content-Type': 'text/html; charset=utf-8'});
                return res.end(data);
            }else if(req.url === '/about'){
                const data = await fs.readFile('./about.html');
                res.writeHead(200, {'Content-Type': 'text/html; charset=utf-8'});
                return res.end(data);
            } else if(req.url === '/users'){
                res.writeHead(200, {'Content-Type' : 'text/plain; charset=utf-8'});
                return res.end(JSON.stringify(users));
            }
            // 주소가 /도 /about도 아니면
            try{
                const data = await fs.readFile(`.${req.url}`);
                return res.end(data);
            }catch(err){
                //주소에 해당하는 라우트를 못 찾았다는 404 Not fOUND error 발생
            }
        } else if (req.method === 'POST') {
            if(req.url === '/user'){
                let body = '';
                // 요청의 body를 stream 형식으로 받음
                req.on('data', (data) => {
                    body += data;
                });
                // 요청의 body를 다 받은 후 실행됨
                return req.on('end', () => {
                    console.log('POST 본문(Body):', body);
                    const { name } = JSON.parse(body);
                    const id = Date.now();
                    users[id] = name;
                    res.writeHead(201);
                    res.end('등록 성공');
                });
            }
        } else if (req.method === 'PUT'){
            if(req.url.startsWith('/user/')){
                const key = req.url.split('/')[2];
                let body = '';
                req.on('data', (data) => {
                    body += data;
                });
                return req.on('end', () => {
                    console.log('PUT 본문(Body):', body);
                    users[key] = JSON.parse(body).name;
                    return res.end(JSON.stringify(users));
                });
            }
        } else if (req.method === 'DELETE'){
            if(req.url.startsWith('/user/')){
                const key = req.url.split('/')[2];
                delete users[key];
                return res.end(JSON.stringify(users));
            }
        }
        res.writeHead(404);
        return res.end('NOT FOUND');
    } catch (err){
        console.error(err);
        res.writeHead(500);
        res.end(err.message);
    }
})
    .listen(8082, () => {
        console.log('8082번 포트에서 서버 대기 중입니다')
    });
입력(console)
node restServer실행화면(console)

실행화면(웹 브라우저)
-
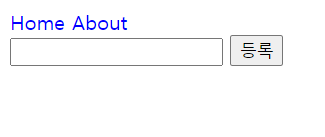
서버 실행 시, 맨 처음 나오는 화면(Home)

-
About 클릭

-
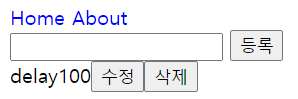
"백지연" 등록

-
"수정" 클릭 ->
restFront.js의 prompt 반응
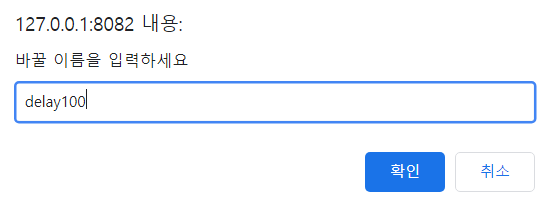
(수정 됨)
-
"삭제" 클릭
3. 쿠키-세션
로그인 구현 시, 쿠키와 세션에 대해 알고 있어야 한다. 로그인 후 새로운 요청(새로고침)을 해도 로그아웃이 되지 않게 하기 위함이다.
쿠키
- 유효 기간이 있음
- '키-값'의 쌍
- 서버로부터 쿠키가 오면, 브라우저가 쿠키를 저장
- 서버는 요청에 있는 쿠키를 읽어 사용자가 누군지 파악
cookie EXAMPLE )
** 해당 예제는 쿠키가 노출되어 있기 때문에 실무에서 사용하면 안 됨 (개념만 알고 넘어갈 것)
프론트엔드
Git [cookie/cookie2.html]
<!DOCTYPE html>
<html>
    <head>
        <meta charset = "utf-8">
        <title>쿠키&세션 이해하기</title>
    </head>
    <body>
        <form action ="/login">
            <input id="name" name="name" placeholder="이름을 입력하세요"/>
            <button id="login">로그인</button>
        </form>
    </body>
    </html>
백엔드
Git [cookie/cookie2.js]
const http = require('http');
const fs = require('fs').promises;
const url = require('url');
const qs= require('querystring');

// parseCookies : 문자열을 객체로 바꿔줌, 실행 결과 : {mycookie : 'test'}
const parseCookies = (cookie = '') =>
    cookie
        .split(';')
        .map(v => v.split('='))
        .reduce((acc, [k,v]) => {
            acc[k.trim()] = decodeURIComponent(v);
            return acc;
        }, {});

http.createServer(async (req, res) => {
    const cookies = parseCookies(req.headers.cookie);

    // 주소가 /login으로 시작하는 경우
    if(req.url.startsWith('/login')){
        const { query } = url.parse(req.url);
        const { name } = qs.parse(query);
        const expires = new Date();
        // 쿠키 유효 시간을 현재 시간 + 5분으로 결정
        expires.setMinutes(expires.getMinutes() +5);
        res.writeHead(302, {
            Location: '/',
            'Set-Cookie' : `name=${encodeURIComponent(name)}; Expires=${expires.toGMTString()}; HttpOnly; Path=/`,
        });
        res.end();

        // name이라는 쿠키가 있는 경우
    } else if (cookies.name) {
        res.writeHead(200, {'Content-Type' : 'text/plain; charset=utf-8'});
        res.end(`${cookies.name}님 안녕하세요`);
    } else {
        try {
            const data = await fs.readFile('./cookie2.html');
            res.writeHead(200, {'Content-Type': 'text/html; charset=utf-8'});
            res.end(data);
        }
        catch(err){
            res.writeHead(500, {'Content-Type': 'text/plain; charset=utf-8'});
            res.end(err.message);
        }
    }
})
    .listen(8084, () => {
        console.log('8084번 포트에서 서버 대기 중입니다!');
    });
입력(console)
node cookie2실행화면(console)
실행화면(웹 브라우저)
- 서버 실행 시, 맨 처음 나오는 화면

- 이름 입력

- 5분이 지난 후(cookie 유효시간 종료)
세션
- 유효 기간이 있음
- 서버가 사용자의 정보를 저장
- 쿠키를 이용해 세션을 주고 받는 경우가 많음
- 세션 쿠키: 세션을 위해 사용되는 쿠키
session EXAMPLE )
** 해당 예제는 DB와 서버의 메모리 문제 때문에, 실무에서 사용하면 안 됨 (개념만 알고 넘어갈 것)
프론트엔드
Git [session/cookie2.html]
<!DOCTYPE html>
<html>
    <head>
        <meta charset = "utf-8">
        <title>쿠키&세션 이해하기</title>
    </head>
    <body>
        <form action ="/login">
            <input id="name" name="name" placeholder="이름을 입력하세요"/>
            <button id="login">로그인</button>
        </form>
    </body>
    </html>
백엔드
Git [session/session.js]
const http = require('http');
const fs = require('fs').promises;
const url = require('url');
const qs = require('querystring');

const parseCookies = (cookie = '') => cookie
    .split(';')
    .map(v => v.split('='))
    .reduce((acc, [k, v]) => {
        acc[k.trim()] = decodeURIComponent(v);
        return acc;
    }, {});

const session = {};

http
    .createServer(async (req, res) => {
        const cookies = parseCookies(req.headers.cookie);
        if (req.url.startsWith('/login')) {
            const {query} = url.parse(req.url);
            const {name} = qs.parse(query);
            const expires = new Date();
            expires.setMinutes(expires.getMinutes() + 5);
            const uniqueInt = Date.now();
            session[uniqueInt] = {
                name,
                expires
            };
            res.writeHead(302, {
                Location: '/',
                'Set-Cookie': `session=${uniqueInt}; Expires=${expires.toGMTString()}; HttpOnly; Path=/`
            });
            res.end();
            // 세션 쿠키가 존재하고, 만료 기간이 지나지 않았다면
        } else if (cookies.session && session[cookies.session].expires > new Date()) {
            res.writeHead(200, {'Content-Type': 'text/plain; charset=utf-8'});
            res.end(`${session[cookies.session].name}님 안녕하세요`);
        } else {
            try {
                const data = await fs.readFile('./cookie2.html');
                res.writeHead(200, {'Content-Tpye': 'text/html; charset=utf-8'});
                res.end(data);
            } catch (err) {
                res.writeHead(500, {'Content-Type': 'text/plain; charset=utf-8'});
                res.end(err.message);
            }
        }
    })
    .listen(8085, () => {
        console.log('8085번 포트에서 서버 대기 중입니다!');
    });
4. https-http2
핵심
- https = http + SSL 암호화
- http2 = http/2 + SSL 암호화
** http/2 : www에서 쓰이는 HTTP 프로토콜의 두 번째 버전
아래와 같이, 브라우저 주소창에서 https 적용을 간단히 확인할 수 있다.
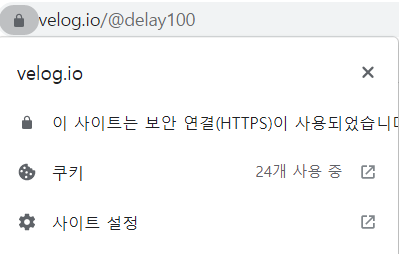
실제 SSL 암호화를 위해서는 인증 기관(CA)에서 인증서를 구입해야한다.
https EXAMPLE )
Git [server1-3.js]
// https
const https = require('https');
const fs = require('fs');

https
    .createServer({
        cert: fs.readFileSync('도메인 인증서 경로'),
        key: fs.readFileSync('도메인 비밀키 경로'),
        ca: [fs.readFileSync('상위 인증서 경로'), fs.readFileSync('상위 인증서 경로')]
    }, (req, res) => {
        res.writeHead(200, {'Content-Type': 'text/html; charset=utf-8'});
        res.write('<h1>Hello Node!</h1>');
        res.end('<p>Hello Server!</p>');
    })
    .listen(443, () => {
        console.log('443번 포트에서 서버 대기 중입니다!');
    });
http2 EXAMPLE )
Git [server1-4.js]
// http2

const http2 = require('http2');
const fs = require('fs');

http2.createSecureServer({
    cert: fs.readFileSync('도메인 인증서 경로'),
    key: fs.readFileSync('도메인 비밀키 경로'),
    ca: [
        fs.readFileSync('상위 인증서 경로'),
        fs.readFileSync('상위 인증서 경로'),
    ],
}, (req, res) => {
    res.writeHead(200, { 'Content-Type': 'text/html; charset=utf-8'});
    res.write('<h1>Hello Node!</h1>');
    res.end('<p>Hello Server!</p>');
})
 .listen(443, () => {
     console.log('443번 포트에서 서버 대기 중입니다!');
 });
5. cluster
cluster
싱글 프로세스로 동작하는 노드가 CPU 코어를 모두 사용할 수 있게 해주는 모듈
- 장점: 코어 하나 당 노드 프로세스 하나를 돌아가게 함(성능 개선)
- 단점: 코어를 여러개 사용하면 메모리를 공유하지 못함, 세션을 메모리에 저장하는 경우 문제가 됨
cluster EXAMPLE )
Git [cluster/cluster.js]
const cluster = require('cluster');
const http = require('http');
const numCPUs = require('os').cpus().length;

if(cluster.isMaster){
    console.log(`마스터 프로세스 아이디: ${process.pid}`);
    // CPU 개수만큼 워커를 생산
    for (let i=0; i<numCPUs; i+=1){
        cluster.fork(); // 워커 프로세스
    }
    // 워커가 종료되었을 때
    cluster.on('exit', (worker, code, signal) => {
        console.log(`${worker.process.pid}번 워커가 종료되었습니다.`);
        console.log('code', code, 'signal', signal);
        cluster.fork(); // 워커 프로세스 생성
    });
} else {
    // 워커들이 포트에서 대기
    http.createServer((req, res) => {
        res.writeHead(200, { 'Content-Type': 'text/html; charset=utf-8'});
        res.write('<h1>Hello Node</h1>');
        res.end('<p>Hello Cluster!</p>');
        setTimeout(() => {//워커가 존재하는지 확인하기 위해 1초마다 강제 종료
            process.exit(1);
        }, 1000);
    }).listen(8086);
    console.log(`${process.pid}번 워커 실행`);
}
출력(console)
** 컴퓨터의 CPU 사양에 따라 개수가 다르게 나옴 / 워커 프로세스 번호는 실행마다 다를 수 있음
마스터 프로세스 아이디: 12488
4884번 워커 실행
13256번 워커 실행
8976번 워커 실행
18304번 워커 실행
15576번 워커 실행
4588번 워커 실행
12716번 워커 실행
9764번 워커 실행
출력(console) - http://127.0.0.1:8086/ 서버에서 새로고침을 1번 한 경우
마스터 프로세스 아이디: 12488
4884번 워커 실행
13256번 워커 실행
8976번 워커 실행
18304번 워커 실행
15576번 워커 실행
4588번 워커 실행
12716번 워커 실행
9764번 워커 실행
9764번 워커가 종료되었습니다.
code 1 signal null
15928번 워커 실행+cluster.js 출력 추가 설명
- 계속 1개의 워커가 꺼질 때마다 새로운 워커를 생성하므로, 서버는 오류가 있어도 절대 꺼지지 않음
- 워커 프로세스가 종료되었을 떄 , 워커 프로세스를 생성하는 코드를 제거하면 CPU 개수만큼 새로고침을 하면 서버가 꺼짐
잘못된 정보 수정 및 피드백 환영합니다!!