DB Master & Slave 실습
linux 에서 docker compose로 mysql db 두 대를 띄운다.
아래 절차에 따라 하면 된다.
1️⃣ Docker & Docker Compose 설치
# 패키지 업데이트
sudo yum update -y

# docker 설치
sudo amazon-linux-extras enable docker
sudo yum install -y docker

# docker 시작 및 부팅 시 자동 실행
sudo systemctl start docker
sudo systemctl enable docker

# ec2-user를 docker 그룹에 추가 (sudo 없이 실행 가능)
sudo usermod -aG docker ec2-user
# ⚠️ 이 작업 후에는 재로그인 해야 반영됨

# docker compose plugin 설치 (Amazon Linux 2는 v2 권장)
DOCKER_CONFIG=${DOCKER_CONFIG:-$HOME/.docker}
mkdir -p $DOCKER_CONFIG/cli-plugins
curl -SL https://github.com/docker/compose/releases/download/v2.29.2/docker-compose-linux-x86_64 \
  -o $DOCKER_CONFIG/cli-plugins/docker-compose
chmod +x $DOCKER_CONFIG/cli-plugins/docker-compose

# 설치 확인
docker --version
docker compose version
2. 디렉토리 구조
mkdir -p ~/mysql-replication/{master_conf,slave_conf}
cd ~/mysql-replication
~/mysql-replication/
├─ docker-compose.yml
├─ master_conf/
│ └─ my.cnf
└─ slave_conf/
└─ my.cnf3. docker-compose.yml 작성
version: '3.9'
services:
  master:
    image: mysql:8.0
    container_name: mysql-master
    restart: always
    environment:
      MYSQL_ROOT_PASSWORD: rootpass
      MYSQL_DATABASE: testdb
    ports:
      - "3306:3306"
    command: --default-authentication-plugin=mysql_native_password
    volumes:
      - ./master_conf:/etc/mysql/conf.d
      - ./master_data:/var/lib/mysql

  slave:
    image: mysql:8.0
    container_name: mysql-slave
    restart: always
    environment:
      MYSQL_ROOT_PASSWORD: rootpass
    ports:
      - "3307:3306"
    command: --default-authentication-plugin=mysql_native_password
    depends_on:
      - master
    volumes:
      - ./slave_conf:/etc/mysql/conf.d
      - ./slave_data:/var/lib/mysql
4. 설정 파일
master_conf/my.cnf
[mysqld]
server-id=1
log-bin=mysql-bin
binlog-do-db=testdb

# 메모리 줄이기
innodb_buffer_pool_size=64M
innodb_log_buffer_size=8M
max_connections=50
slave_conf/my.cnf
[mysqld]
server-id=2
relay-log=relay-log-bin

# 메모리 줄이기
innodb_buffer_pool_size=64M
innodb_log_buffer_size=8M
max_connections=50
Master Slave DB 설정
- 컨테이너 실행
docker compose up -d- 마스터 접속 → 복제 계정 생성
CREATE USER 'repl'@'%' IDENTIFIED BY 'replpass';
GRANT REPLICATION SLAVE ON *.* TO 'repl'@'%';
FLUSH PRIVILEGES;

SHOW MASTER STATUS;
→ File / Position 값 확인 (예: mysql-bin.000001, 154) <- 중요
- 슬레이브 접속 → 복제 연결
docker exec -it mysql-slave mysql -uroot -prootpassCHANGE REPLICATION SOURCE TO
SOURCE_HOST='master',
SOURCE_USER='repl',
SOURCE_PASSWORD='replpass',
SOURCE_LOG_FILE='mysql-bin.000001', # 2번에서 확인한 값
SOURCE_LOG_POS=154; # 2번에서 확인한 값
START REPLICA;
SHOW REPLICA STATUS\G;- SHOW SLAVE STATUS 를 통해 SLAVE 설정이 잘 되었는 지 확인 가능하다.
Replication URL을 활용한 Mater Slave DB 사용
1. Spring Boot에서 JDBC Replication URL 설정
application.yml (또는 application.properties)에 아래처럼 적는다.
spring:
  datasource:
    url: jdbc:mysql:replication://master:3306,slave:3306/testdb
    username: root
    password: rootpass
    driver-class-name: com.mysql.cj.jdbc.Driver
2. Connection의 readOnly 여부 확인하기
JDBC 드라이버는 Connection.setReadOnly(true/false) 기준으로 Master/Slave를 선택한다.
예제 코드:
import java.sql.Connection;
import java.sql.ResultSet;
import java.sql.Statement;
import javax.sql.DataSource;
import org.springframework.beans.factory.annotation.Autowired;
import org.springframework.boot.CommandLineRunner;
import org.springframework.stereotype.Component;
@Component
public class ReplicationTest implements CommandLineRunner {
@Autowired
private DataSource dataSource;
@Override
public void run(String... args) throws Exception {
try (Connection conn = dataSource.getConnection()) {
// 1. 기본 모드 (readOnly=false) → Master
System.out.println("Default readOnly = " + conn.isReadOnly());
try (Statement stmt = conn.createStatement()) {
stmt.executeUpdate("INSERT INTO test_table (name) VALUES ('master-write')");
System.out.println("✅ INSERT 성공 (Master)");
}
// 2. readOnly=true → Slave
conn.setReadOnly(true);
System.out.println("Now readOnly = " + conn.isReadOnly());
try (Statement stmt = conn.createStatement();
ResultSet rs = stmt.executeQuery("SELECT COUNT(*) FROM test_table")) {
if (rs.next()) {
System.out.println("✅ SELECT 성공 (Slave) → row count: " + rs.getInt(1));
}
}
// 3. readOnly=true 상태에서 쓰기 시도 → 실패 (Slave는 쓰기 불가)
try (Statement stmt = conn.createStatement()) {
stmt.executeUpdate("INSERT INTO test_table (name) VALUES ('slave-write')");
} catch (Exception e) {
System.out.println("🚨 Slave에 쓰기 시도 실패 = " + e.getMessage());
}
}
}
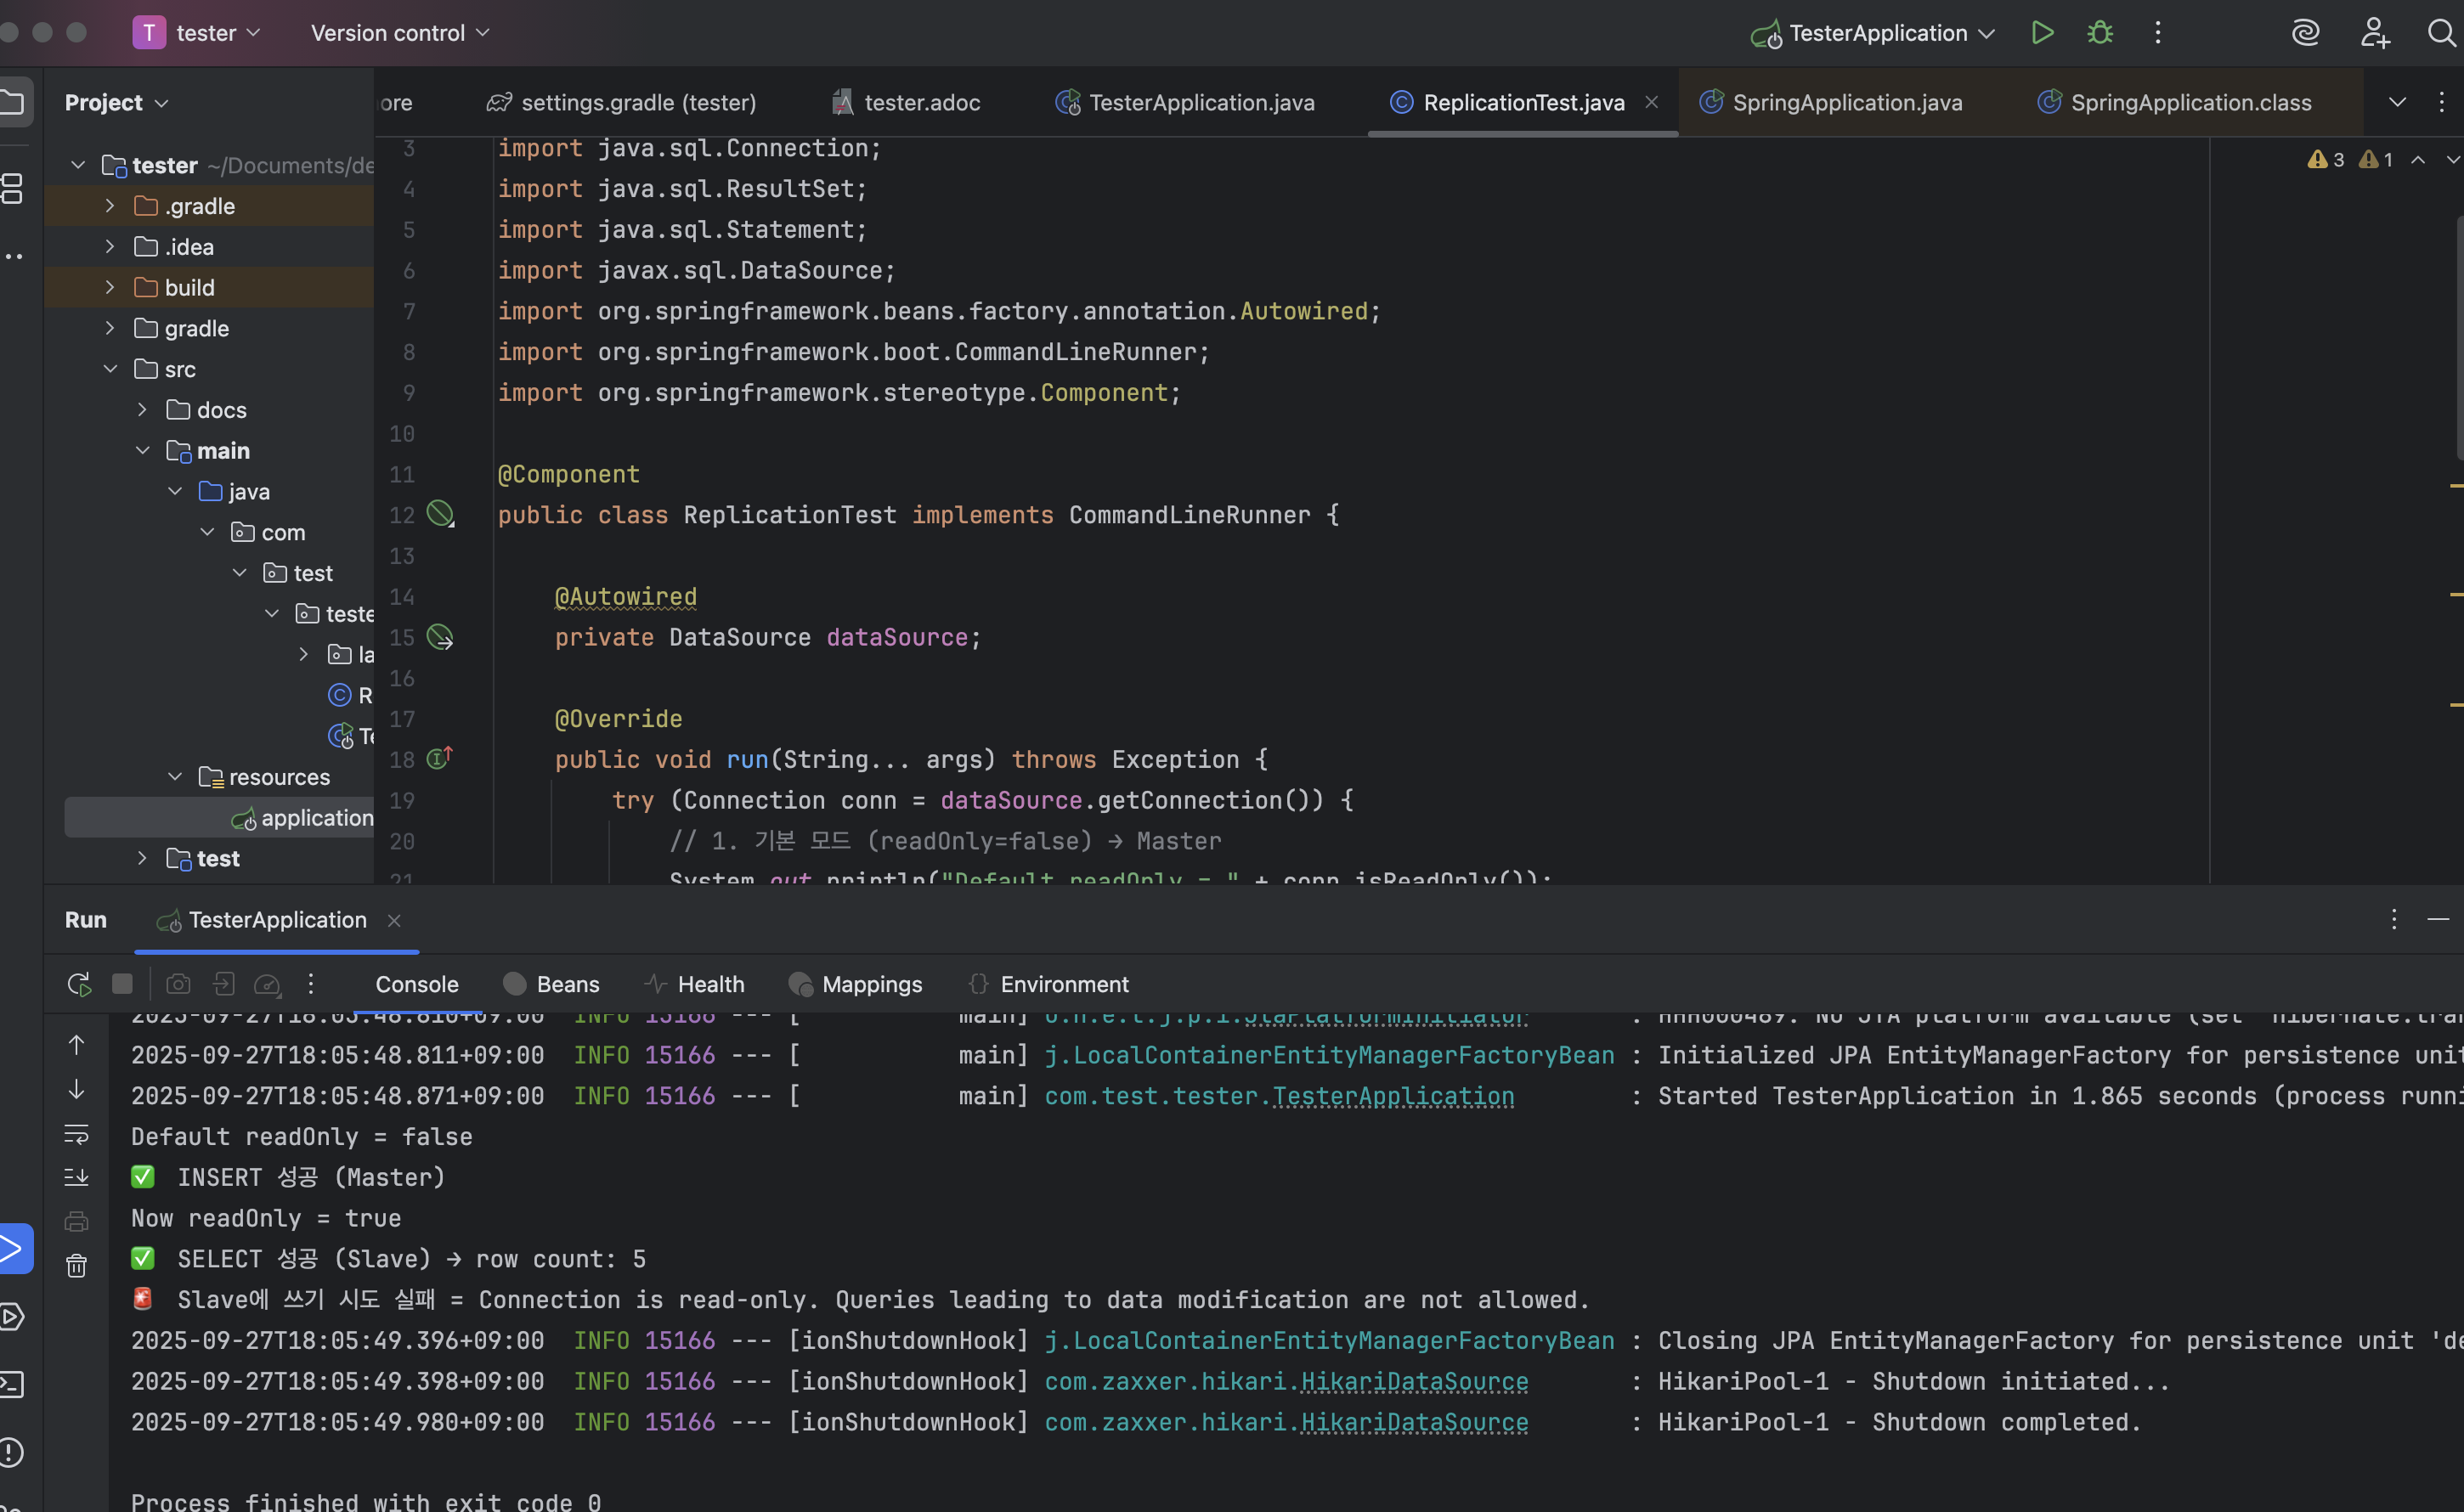
}3. 기대 결과
- conn.setReadOnly(false) 상태 → Master에서 INSERT 성공
- conn.setReadOnly(true) 상태 → Slave에서 SELECT 정상 동작
- conn.setReadOnly(true) 상태에서 INSERT 시도 → 에러 발생 (The MySQL server is running with the --read-only option so it cannot execute this statement)
이렇게 되면 Replication URL이 정상적으로 Master/Slave를 구분해서 사용하고 있다는 걸 검증할 수 있다.
Master Slave 직접 구축 시의 어려움
직접 Master-Slave 구조에서 자동 승격을 구현하려면 다음과 같은 추가 도구가 필요하다:
- Orchestrator: MySQL 전용 클러스터 관리 도구. 장애 감지 및 자동 승격 지원
- MHA (Master High Availability Manager): MySQL Master 장애 복구 도구
- ProxySQL / HAProxy: DB Proxy를 두어 애플리케이션 연결을 자동으로 새로운 Master로 라우팅
이런 도구들을 직접 설치하고 운영하면:
- 장애 감지 속도와 정확성 튜닝 필요
- 네트워크 분할(파티션) 같은 복잡한 장애 상황 처리 필요
- 운영자가 직접 모니터링 및 유지보수 해야 함
따라서 학습 목적이 아니라면 직접 구현은 높은 운영 비용과 리스크를 수반한다.
CSP 서비스를 활용한 접근
AWS, GCP, Azure 같은 클라우드 서비스 제공업체(CSP)에서는 자동 승격 기능을 이미 서비스 형태로 제공합니다.
예를 들어:
- AWS RDS / Aurora: 장애 시 자동 Failover 지원, DNS 레벨에서 연결 자동 전환
- Google Cloud SQL: 고가용성 모드(HA)에서 자동 승격 제공
- Azure Database for MySQL: 자동 장애 감지 및 Failover 기능 포함
이를 활용하면:
- 운영 부담 최소화: 장애 감지, 승격, 연결 전환을 CSP가 대신 처리
- 검증된 안정성: 이미 대규모 서비스 환경에서 사용되는 기술을 그대로 사용 가능
- 비용 대비 효율성: 직접 운영팀을 두는 것보다 훨씬 효율적

개발 블로그