
스스로 구축하는 AWS 클라우드 인프라 - 기본편을 수강하며 AWS 인프라를 Terraform으로 작성한 내용입니다.
AWS 콘솔을 이용한 Custom AMI
AWS 콘솔에서 Custom AMI 만들기
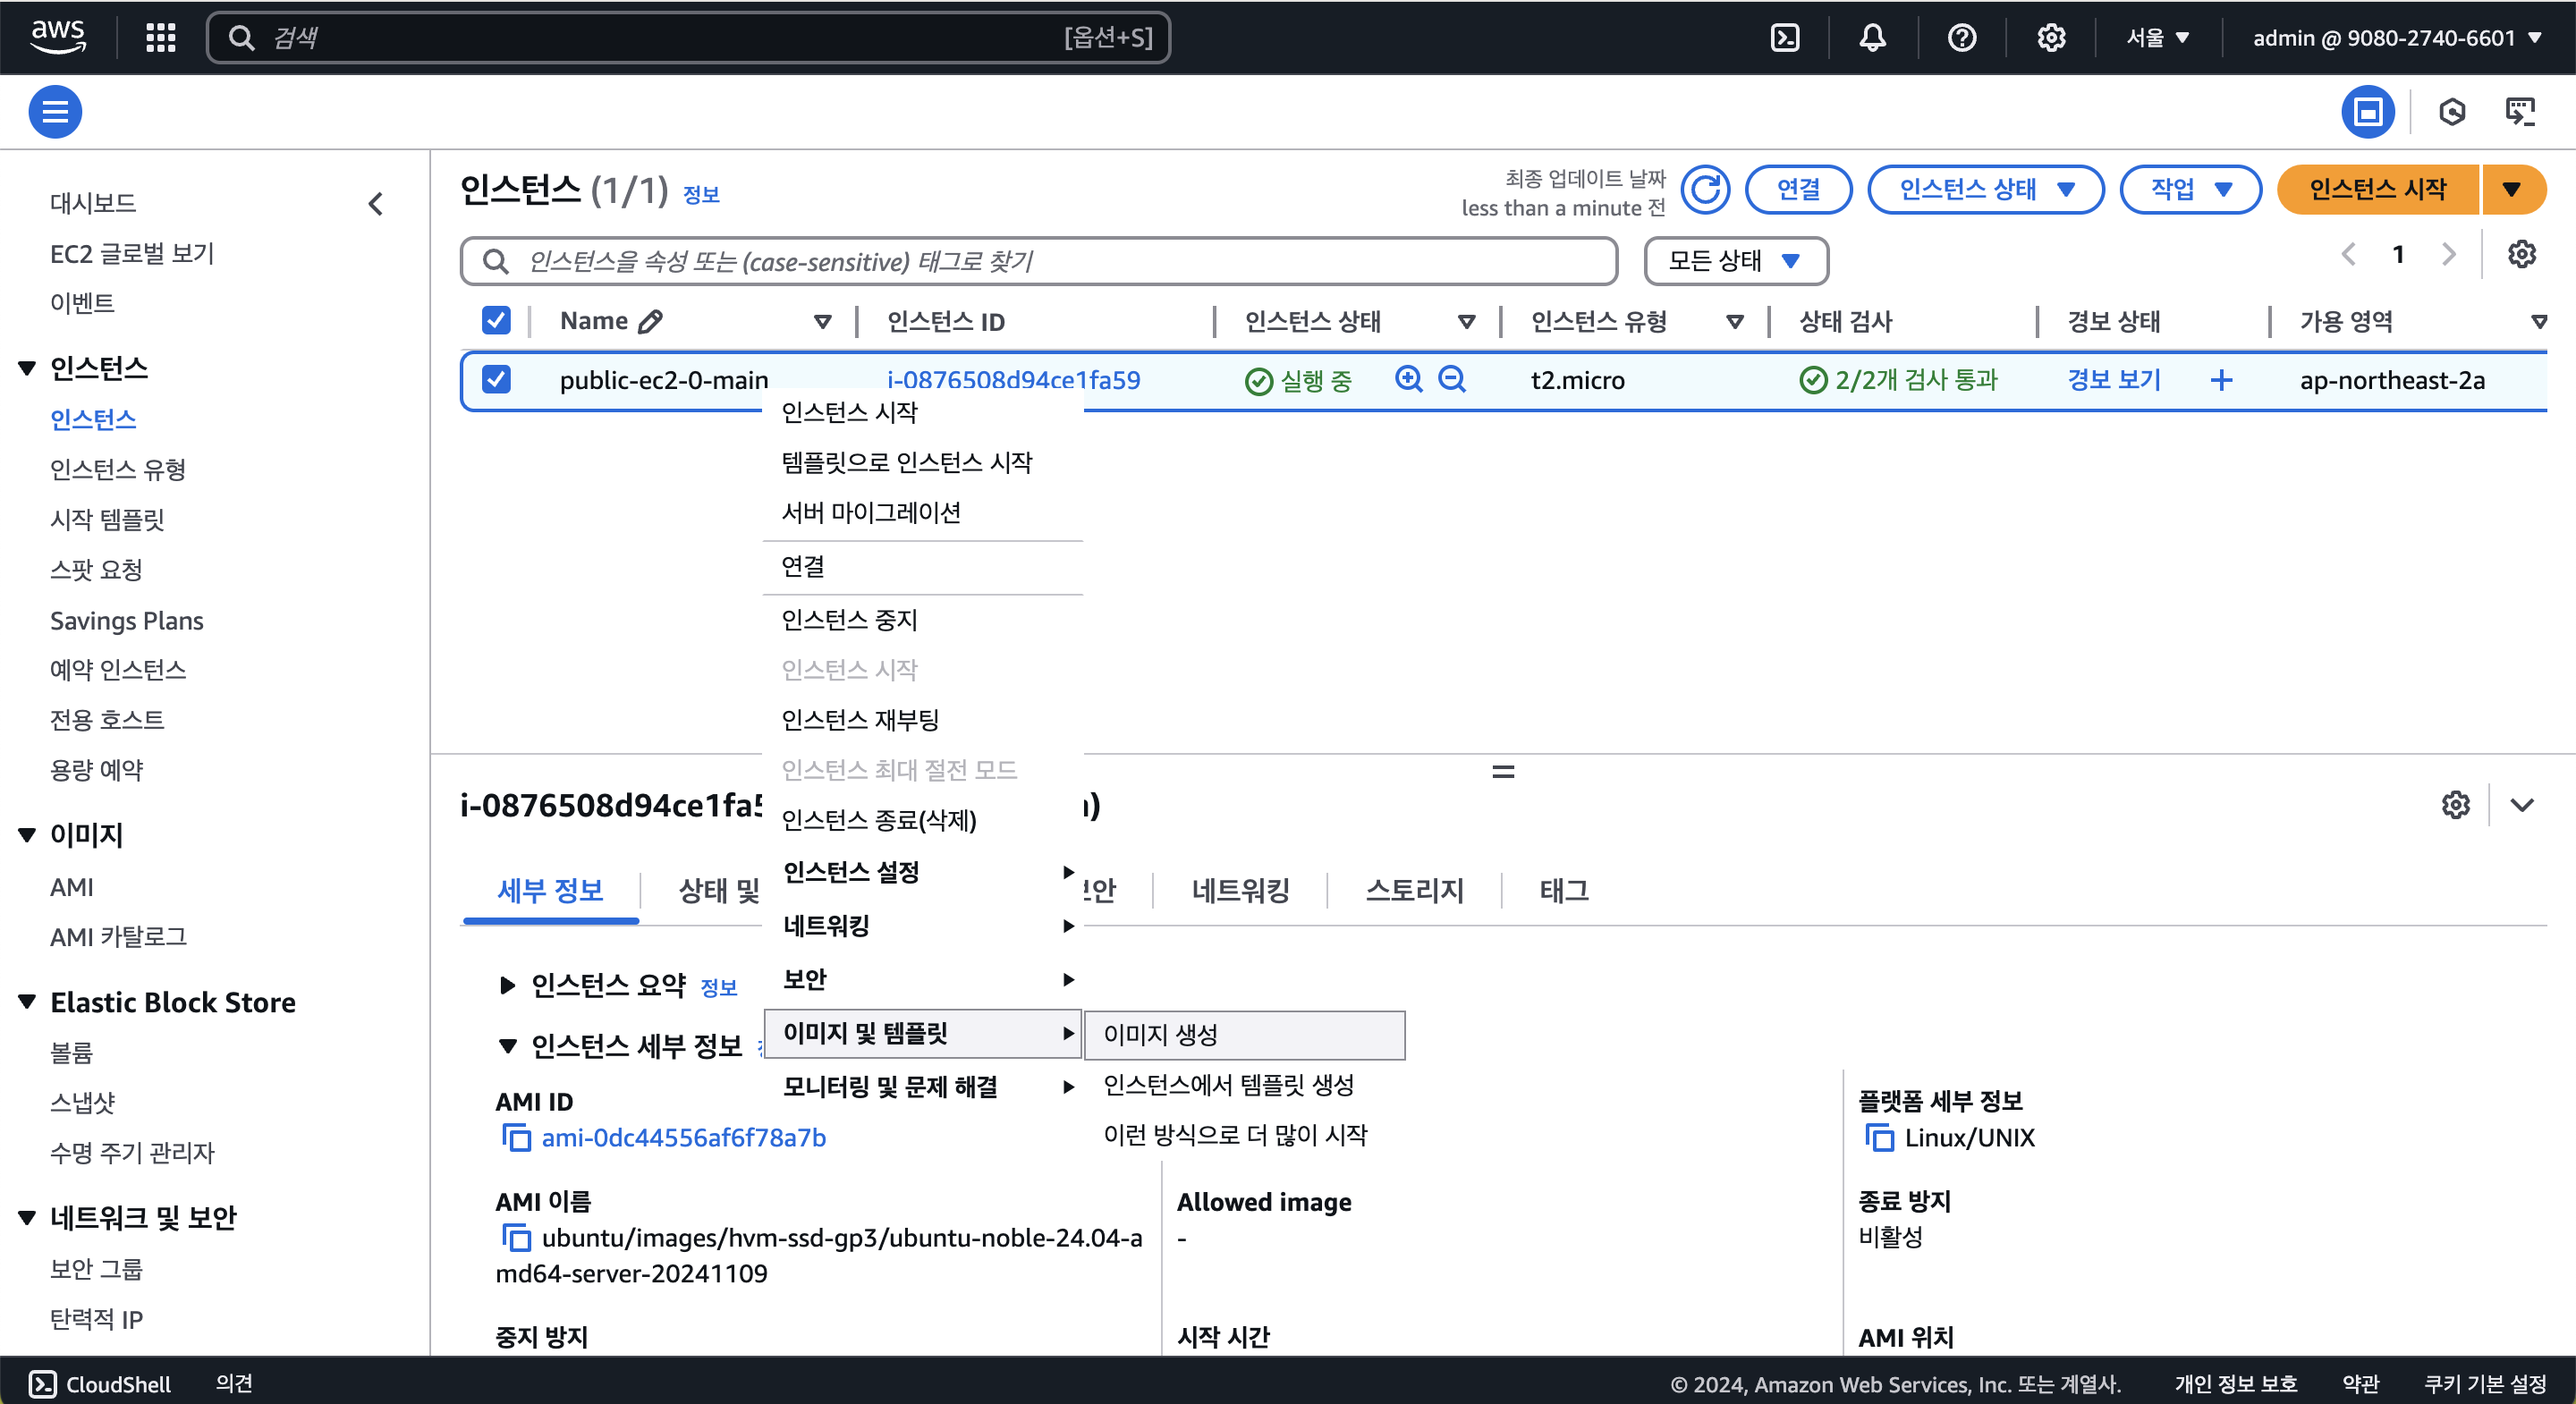
- Custom AMI로 만들 인스턴스에서 마우스 오른쪽 클릭 > 이미지 및 템플릿 클릭 > 이미지 생성 클릭
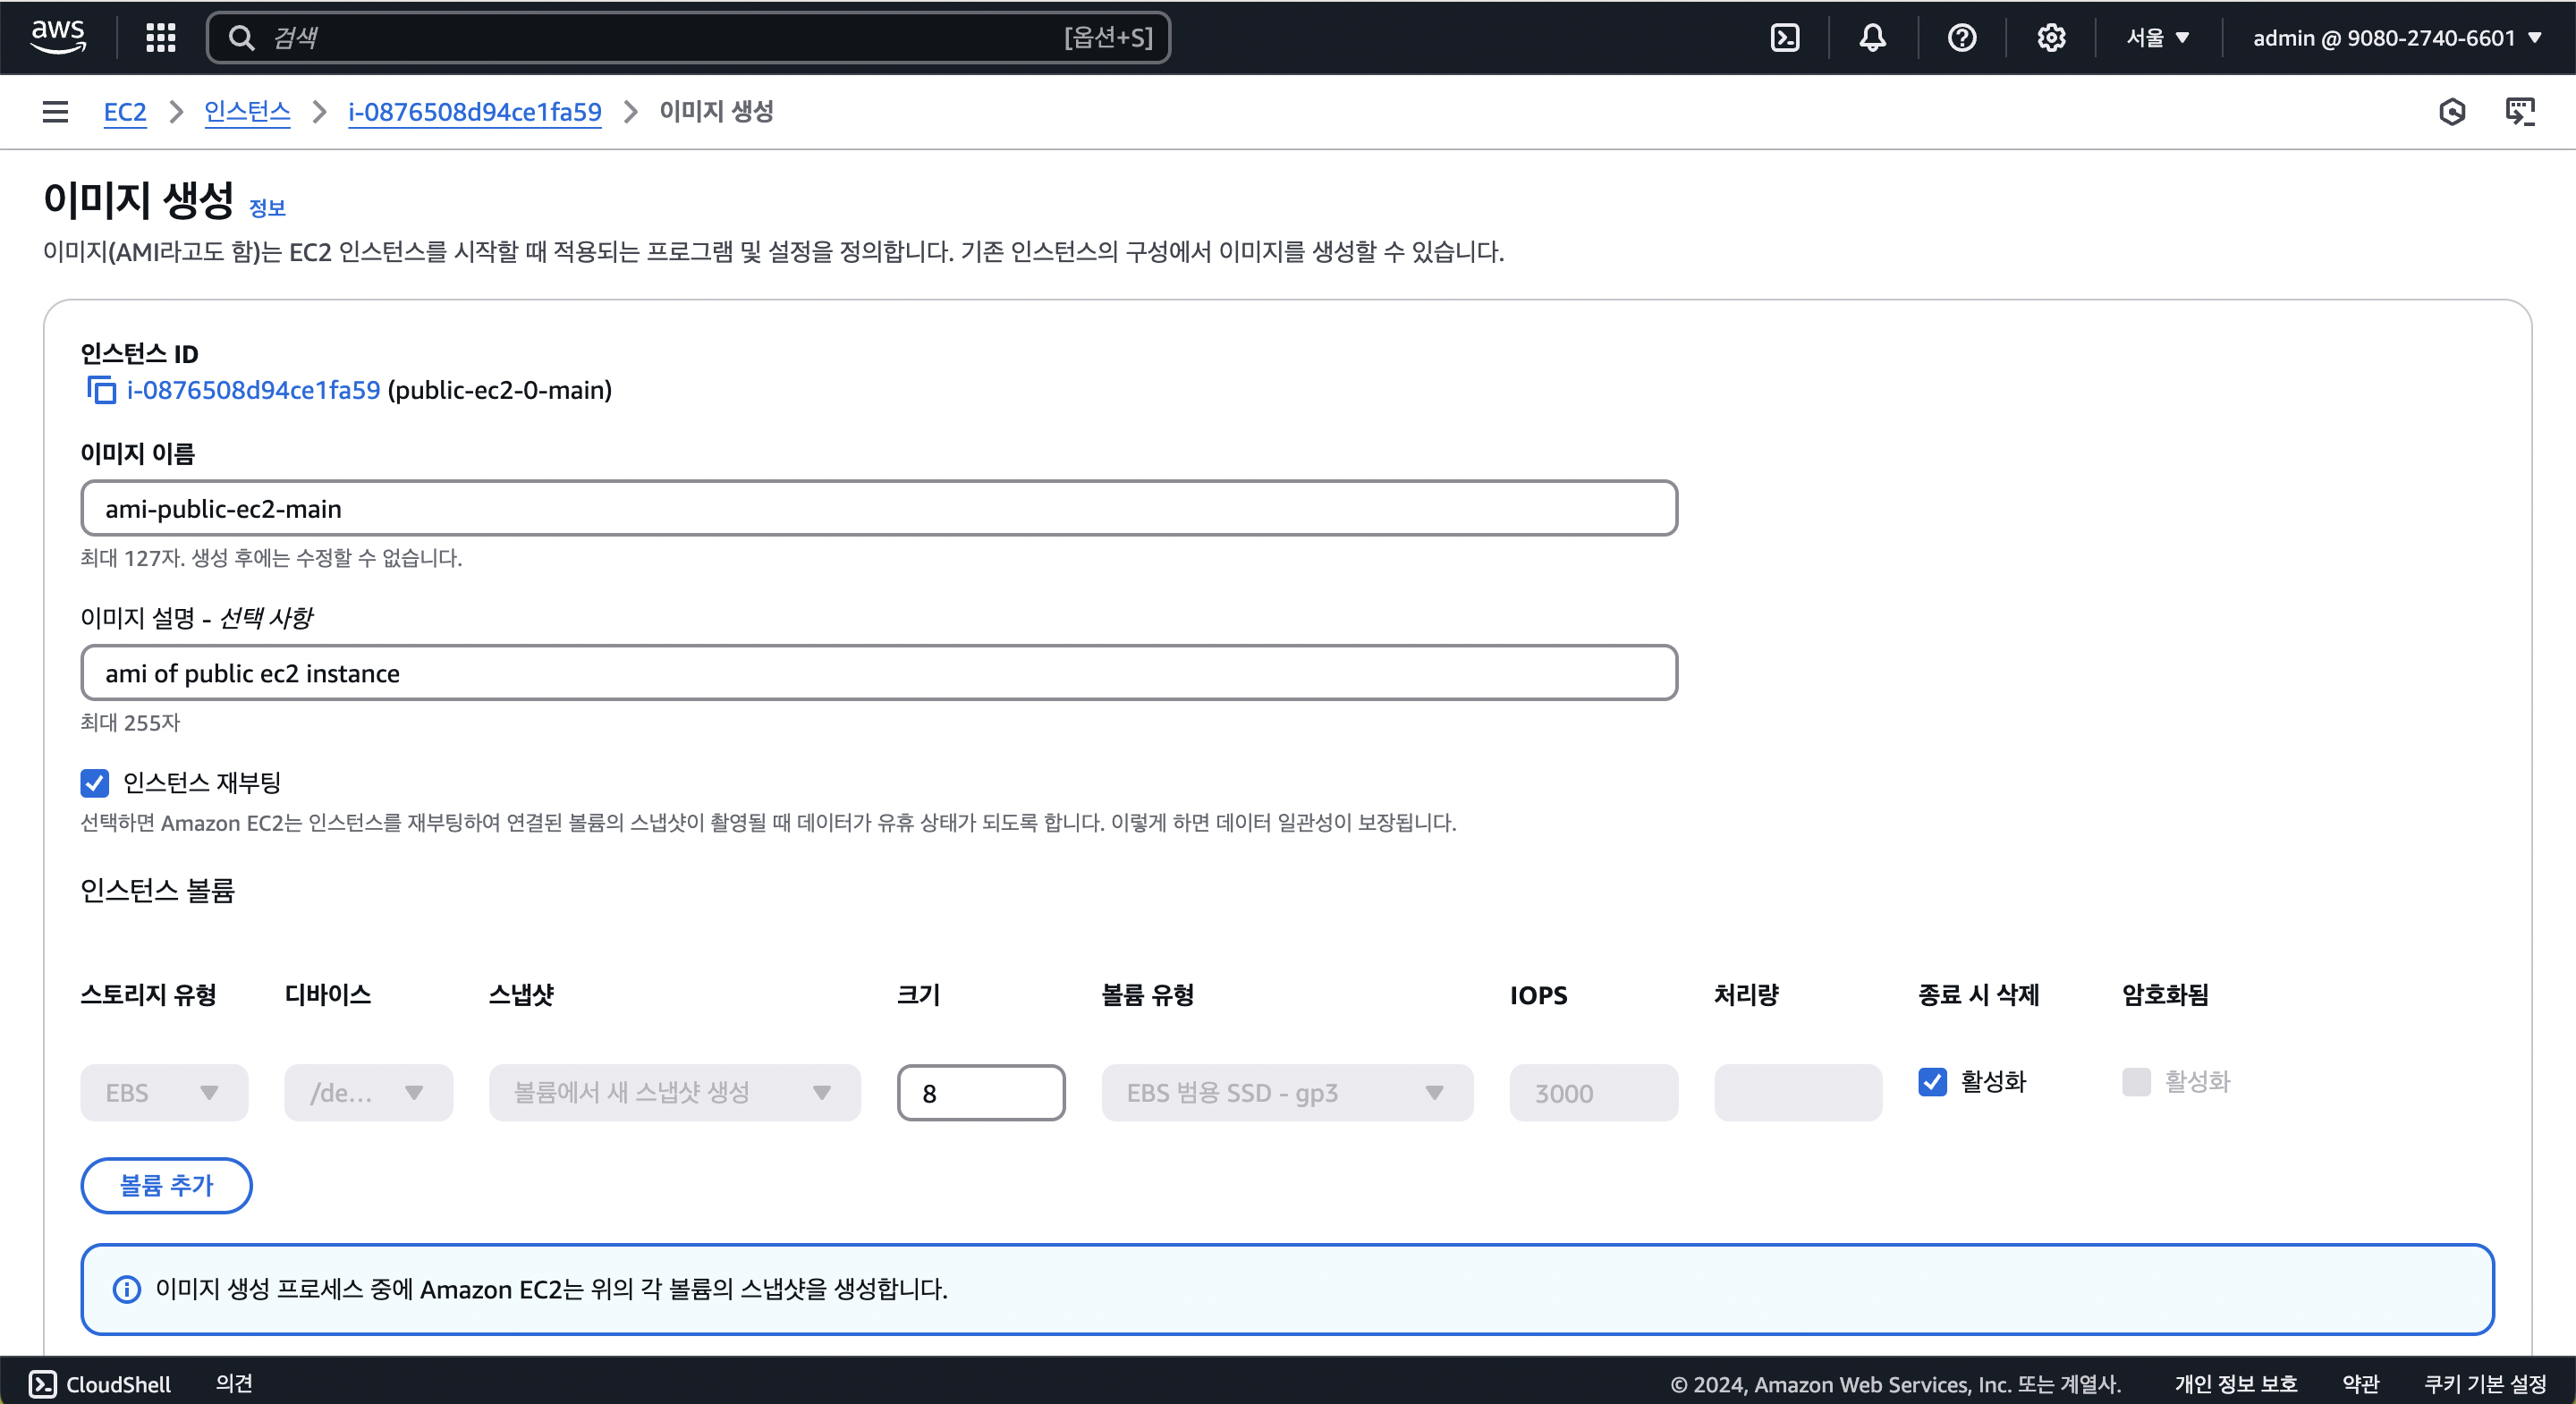
- AMI 생성 페이지에서 이미지 이름, 설명 기입 후 인스턴스 재부팅 활성화
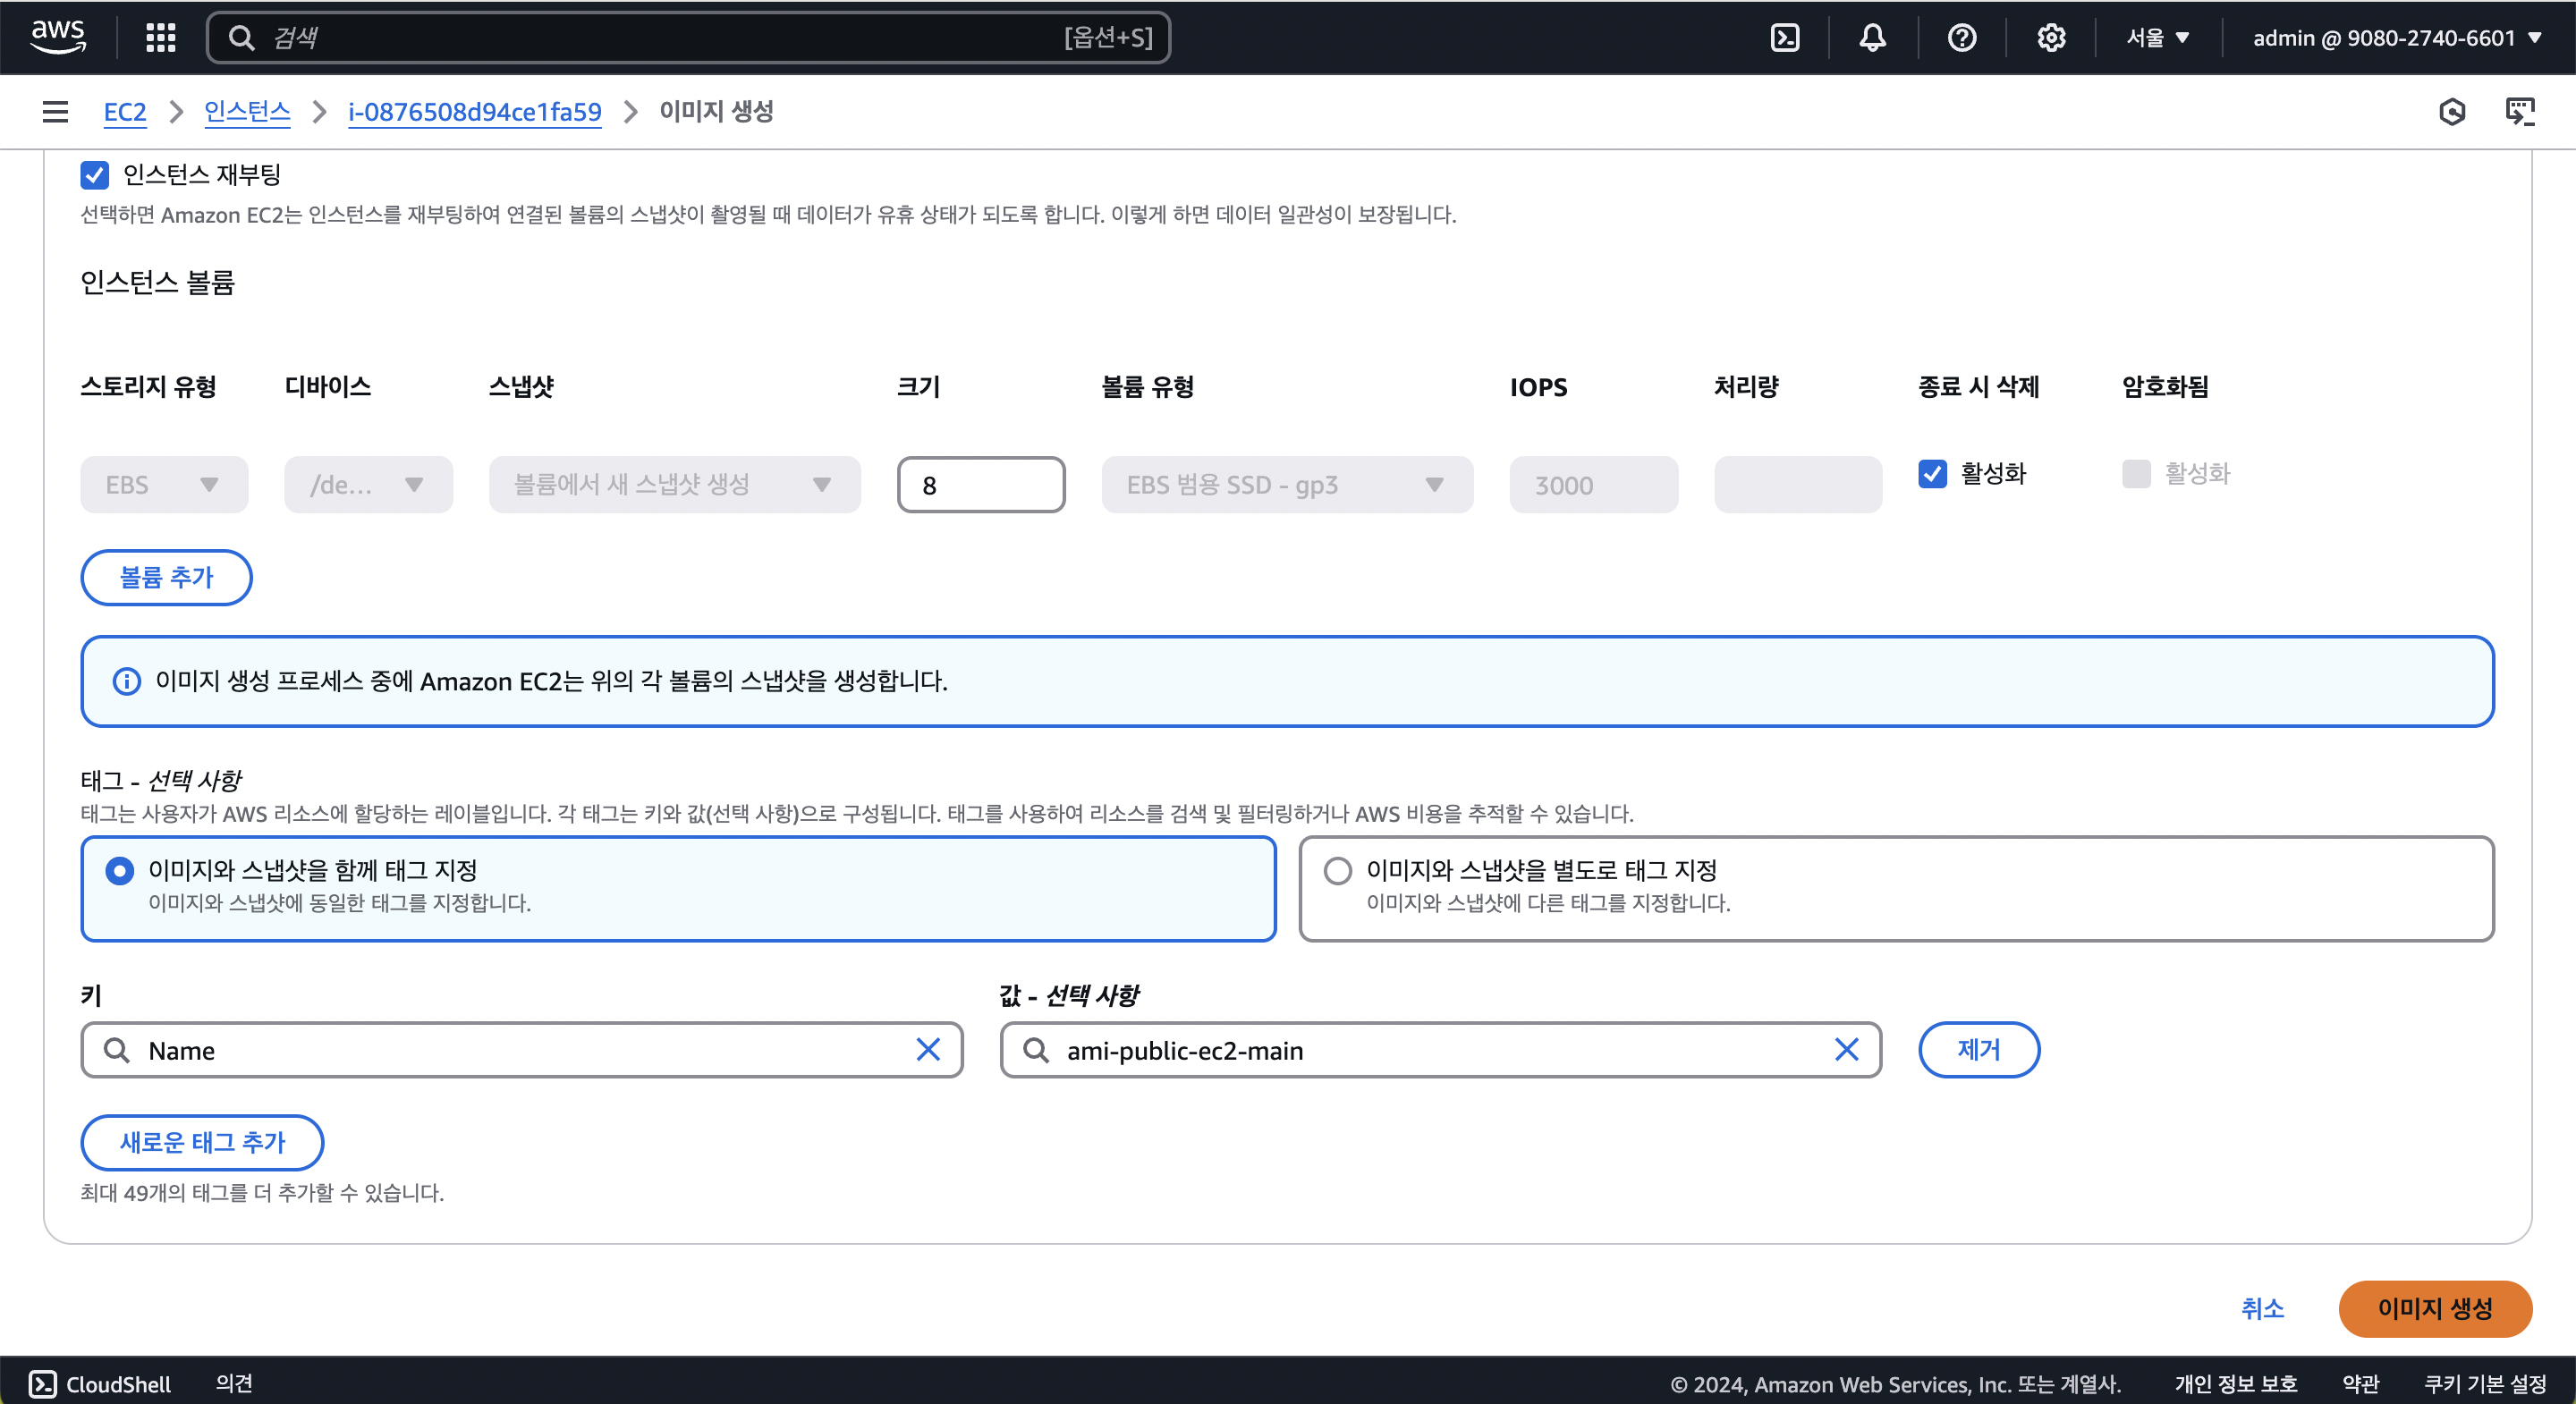
- 태그에
Name을 추가하고 이미지 생성 클릭
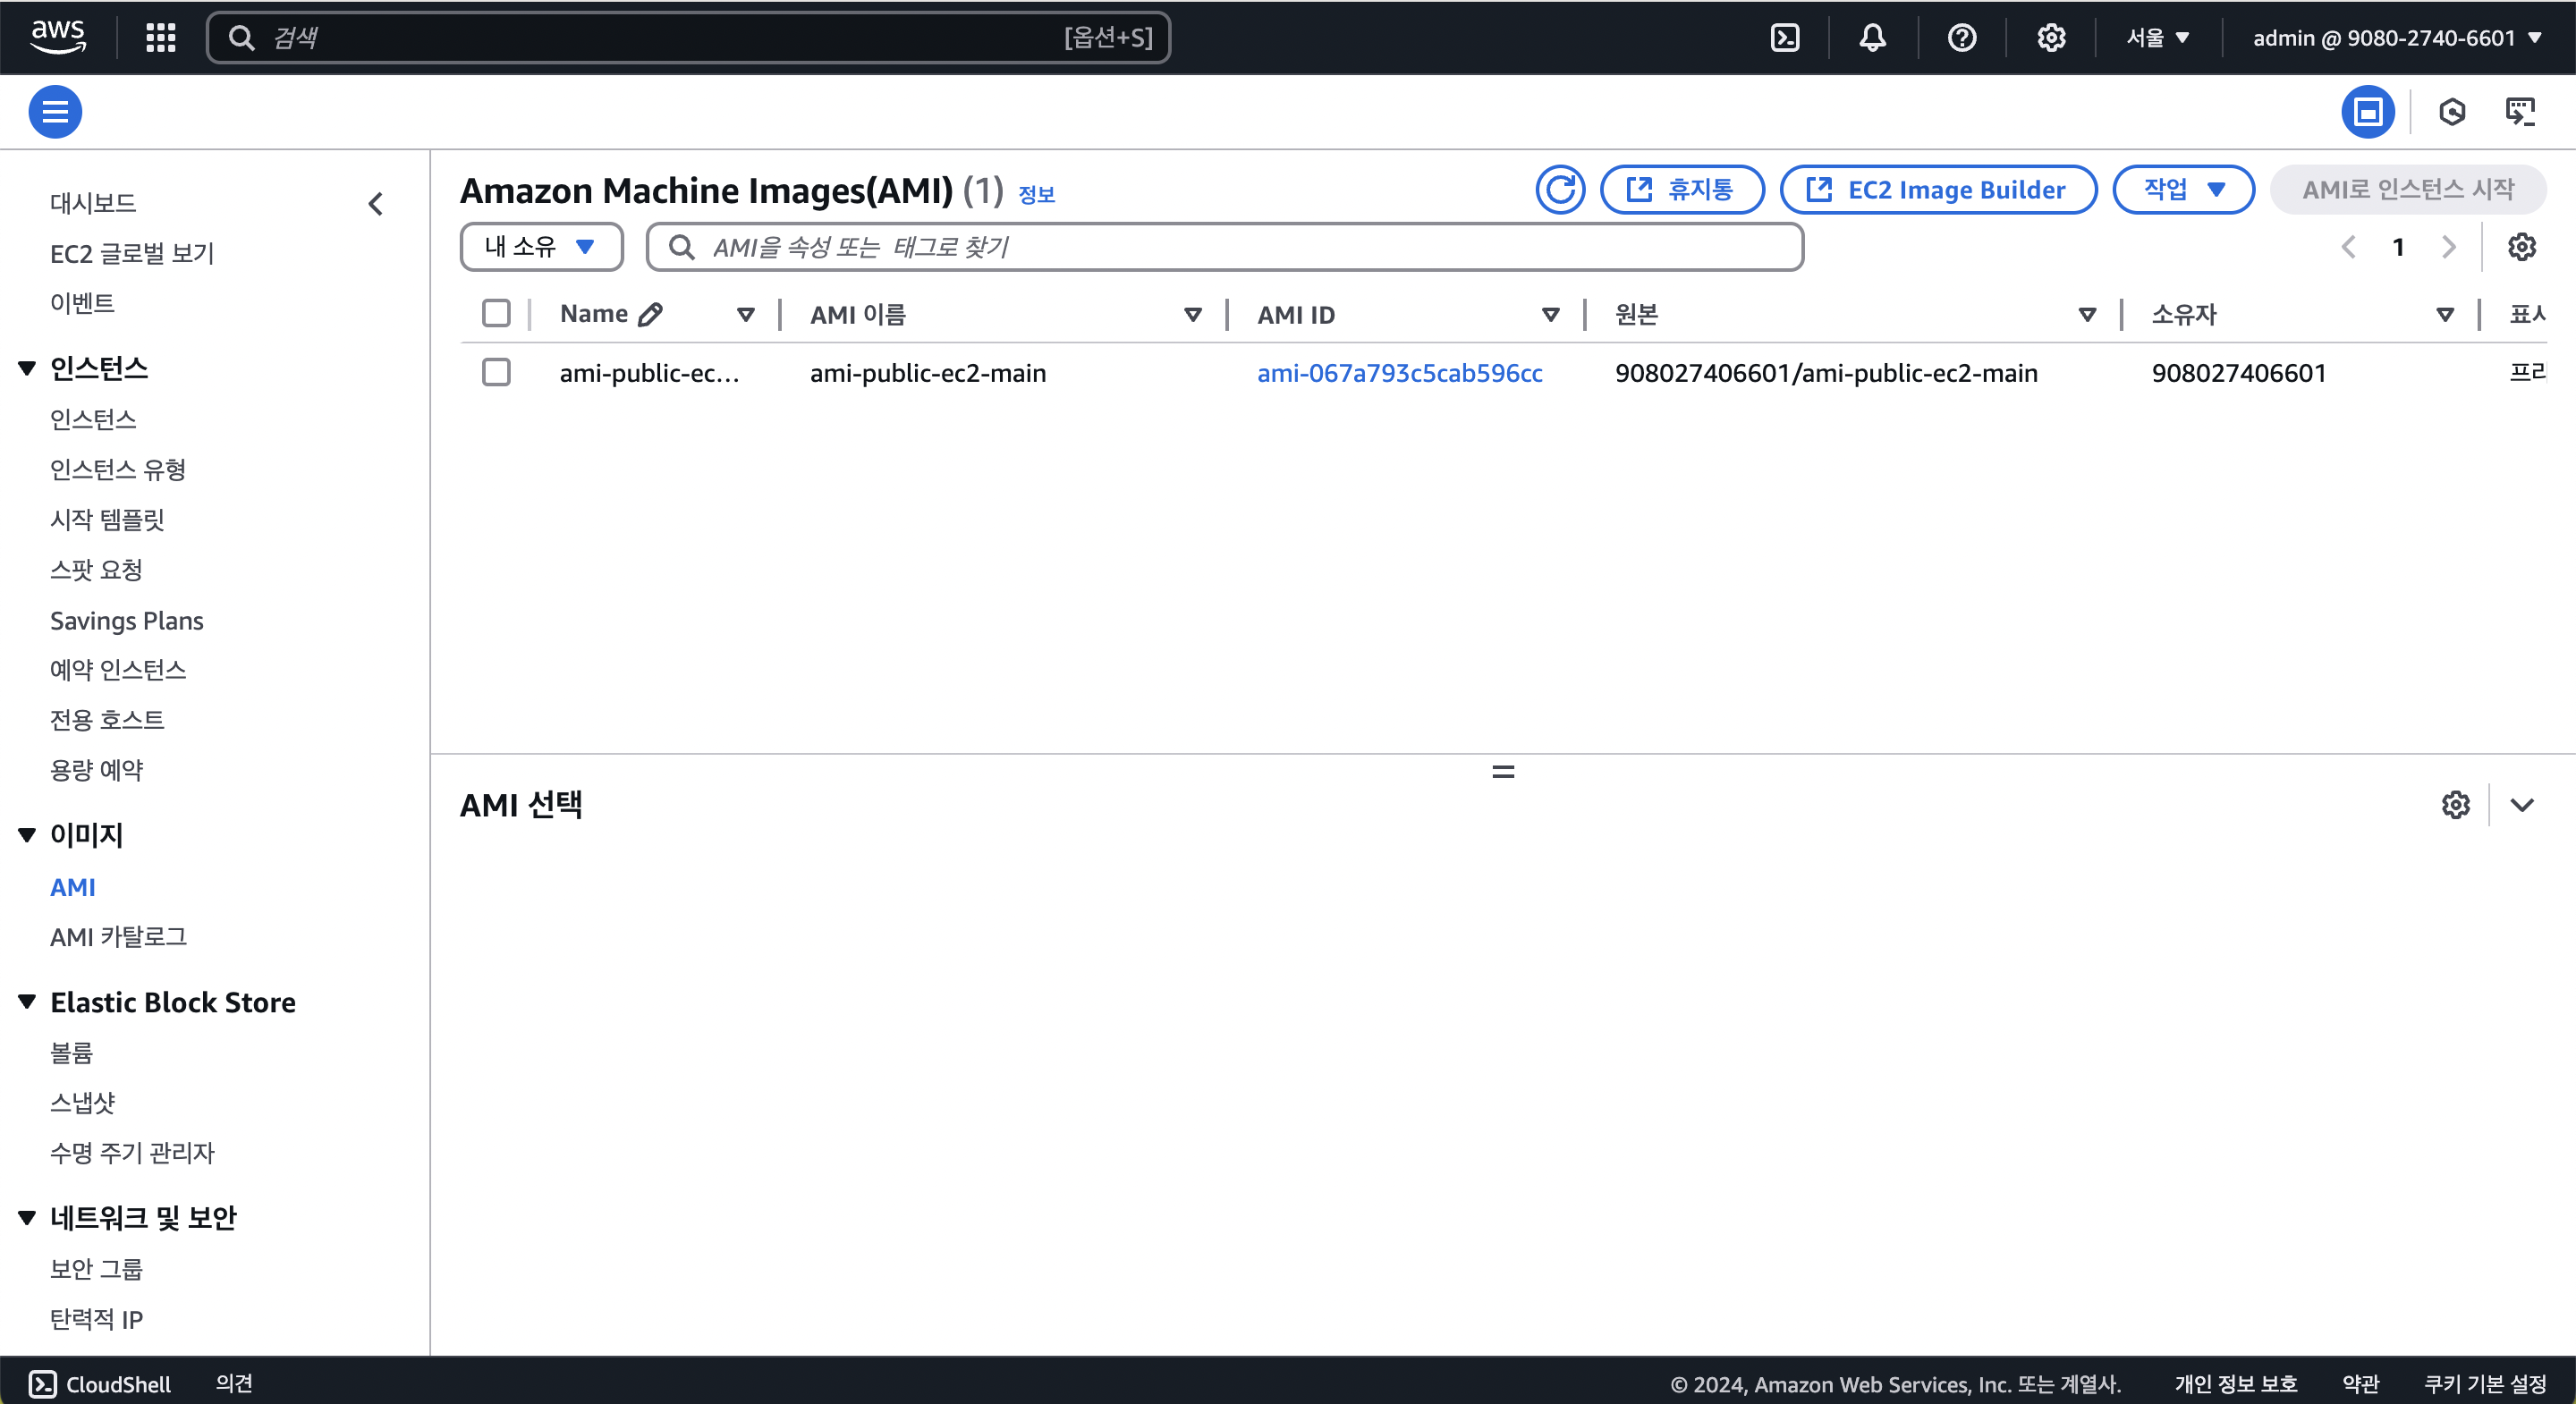
- AMI 메뉴에 접속해서 목록의 필터를 '내 소유'로 변경하면 새로 생성한 이미지를 볼 수 있음
Terraform state로 관리
ami.tf파일 만들기
resource "aws_ami" "ami_public_ec2_main" {}- 아래 명령어를 실행하여 인프라 리소스를
terraform.tfstate파일로 가져오기
terraform import aws_ami.ami_public_ec2_main ami-067a793c5cab596ccami.tf파일을 인프라의 상태에 맞춰 수정
# AMI
resource "aws_ami" "ami_public_ec2_main" {
  name = "ami-public-ec2-main"
  boot_mode = "uefi-preferred"
  description = "ami of public ec2 instance"
  ena_support = true
  image_location = "908027406601/ami-public-ec2-main"
  imds_support = "v2.0"
  root_device_name = "/dev/sda1"
  virtualization_type = "hvm"

  ebs_block_device {
    delete_on_termination = true
    device_name = "/dev/sda1"
    encrypted = false
    iops = 3000
    snapshot_id = "snap-0b14d206dc33b052b" # EBS snapshot
    throughput = 125
    volume_size = 8
    volume_type = "gp3"
  }

  ephemeral_block_device {
    device_name  = "/dev/sdb"
    virtual_name = "ephemeral0"
  }

  ephemeral_block_device {
    device_name  = "/dev/sdc"
    virtual_name = "ephemeral1"
  }

  tags = {
    Name = "ami-public-ec2-main"
  }
}
Custom AMI로 EC2 인스턴스 생성
ec2.tf파일에 새로운 EC2 인스턴스 내용 추가
- LAMP 스택이 이미 설치된 인스턴스로 만든 AMI를 이용했기 때문에
user_data는 별도로 추가하지 않음
# Public-ec2-1
resource "aws_instance" "public_ec2_1" {
  ami = aws_ami.ami_public_ec2_main.id # Custom AMI
  instance_type = "t2.micro"
  key_name = aws_key_pair.ec2_key_pair.key_name
  vpc_security_group_ids = [ aws_security_group.public_ec2_sg.id ]
  subnet_id = aws_subnet.public[1].id

  tags = {
    Name = "public-ec2-1-${var.vpc_name}"
  }

  metadata_options {
    http_endpoint = "enabled"
    http_put_response_hop_limit = 1
    http_tokens = "optional"
    instance_metadata_tags = "enabled"
  }
}eip.tf파일에 아래 내용 추가
# Elastic IP for public-ec2-1
resource "aws_eip" "public_ec2_1" {
  instance = aws_instance.public_ec2_1.id
  domain = "vpc"

  tags = {
    Name = "eip-public-ec2-1"
  }
}
Terraform을 이용한 Custom AMI
aim_from_instance.tf파일을 만들고 아래와 같이 작성
resource "aws_ami_from_instance" "public_ec2_ami" {
  name = "public-ec2-ami"
  source_instance_id = aws_instance.public_ec2_0.id
  snapshot_without_reboot = false
}ec2.tf파일에 새로운 EC2 인스턴스 내용 추가
# Public-ec2-1
resource "aws_instance" "public_ec2_1" {
  ami = aws_ami_from_instance.public_ec2_ami_0.id # Custom AMI
  instance_type = "t2.micro"
  key_name = aws_key_pair.ec2_key_pair.key_name
  vpc_security_group_ids = [ aws_security_group.public_ec2_sg.id ]
  subnet_id = aws_subnet.public[1].id

  tags = {
    Name = "public-ec2-1-${var.vpc_name}"
  }

  metadata_options {
    http_endpoint = "enabled"
    http_put_response_hop_limit = 1
    http_tokens = "optional"
    instance_metadata_tags = "enabled"
  }
}eip.tf파일에 아래 내용 추가
# Elastic IP for public-ec2-1
resource "aws_eip" "public_ec2_1" {
  instance = aws_instance.public_ec2_1.id
  domain = "vpc"

  tags = {
    Name = "eip-public-ec2-1"
  }
}
전부인 것처럼, 전부가 아닌 것처럼