<form> tag
사용자가 입력한 데이터를 수집하기 위해 사용되며 input, textarea, button, select, checkbox, radio button, submit button 등의 입력 양식 tag를 포함할 수 있다.
<form>
...
form elements (input, checkbox, radio button, submit button...)
...
</form>
다음의 attribute가 함께 쓰인다.
<action>: 입력 데이터가 전송될 URL을 지정한다.<method>: 입력 데이터의 전달 방식을 지정한다. GET 혹은 POST
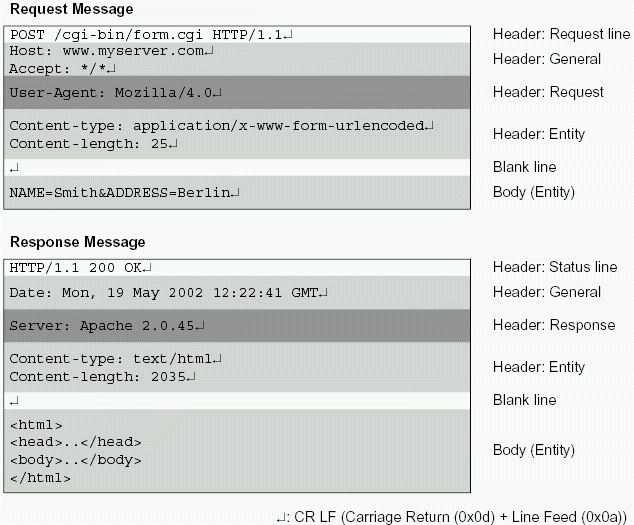
GET과 POST
HTTP 프로토콜을 이용해서 사용자 입력 데이터를 서버에 전달하는 방식을 나타내며, HTTP request method라고 부른다.
GETmethod- 전송 URL에 입력 데이터를 쿼리스트링으로 보내는 방식이다.
- 전송 URL 바로 뒤에 ?를 통해 데이터의 시작을 알려주고, key-value 형태의 데이터를 추가한다. 1개 이상의 전송 데이터는 &로 구분한다.
- ex) http://jsonplaceholder.typicode.com/posts?userId=1&id=1
- URL에 전송 데이터가 모두 노출되기 때문에 보안에 문제가 있으며, 전송할 수 있는 데이터양의 한계가 있다. 최대 255자.
POSTmethod- Request body에 입력 데이터를 담아 보내는 방식이다.
- ex) http://jsonplaceholder.typicode.com/posts
- URL에 전송 데이터가 모두 노출되지 않지만, GET에 비해 속도가 느리다.
<form> tag 예시
<!DOCTYPE html>
<html>
  <body>
    <form action="http://jsonplaceholder.typicode.com/users" method="get">
      ID: <input type="text" name="id" value="1"><br>
      username: <input type="text" name="username" value="Bret"><br>
      <input type="submit" value="Submit">
    </form>
  </body>
</html>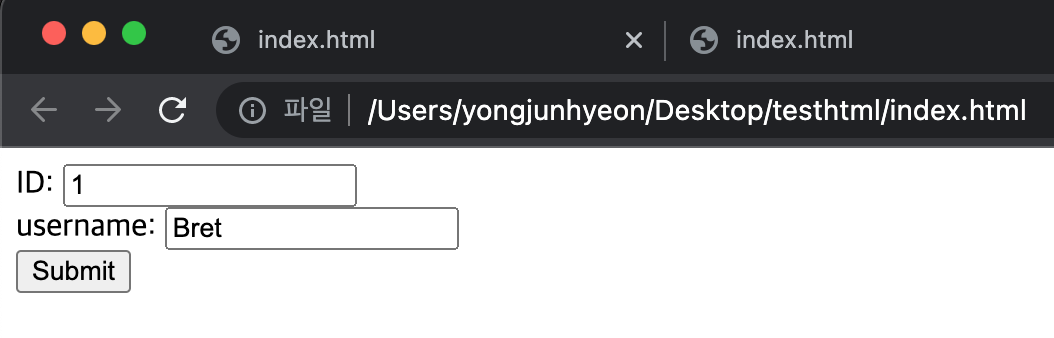
submit button이 클릭되면, input tag에 입력된 데이터가 form tag의 method attribute에 지정된 방식으로 action attribute에 지정된 URL에 전달된다.
<input> tag
사용자로부터 데이터를 입력받기 위해 사용된다. input tag는 다양한 종류가 있는데, type attribute의 값에 따라 지정된다.
form tag 내에 존재해야 입력 데이터를 전송할 수 있으나, ajax를 사용할 시에는 form tag 내에 존재하지 않아도 된다.
서버에 전송되는 데이터는 name attribute를 key로, value attribute를 value로 하여 key=value 형태로 전송된다.
type attribute에 지정할 수 있는 값들은 다음과 같으며, 브라우저마다 지원하는 type이 다르다.
- button : 버튼 생성
- checkbox : 체크박스 생성
- color : 컬러 선택 생성
- date : 날짜 생성
- email : 이메일 입력 form 생성. submit 시 자동 검증한다.
- file : 파일 선택 form 생성
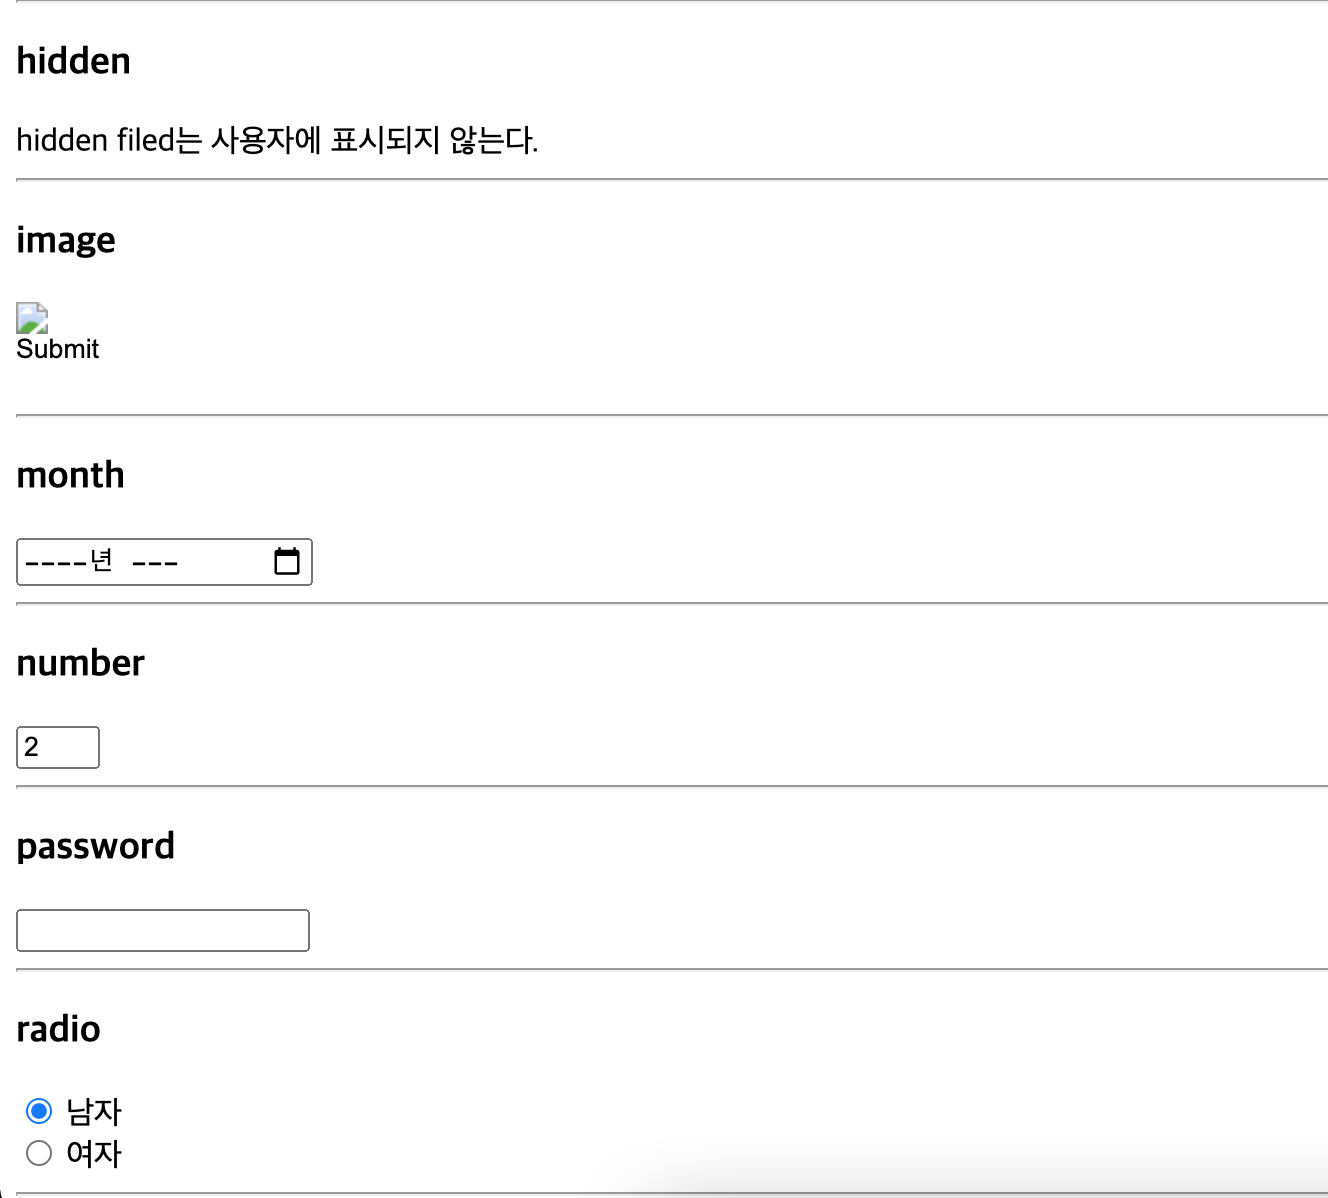
- hidden : 화면에 표시되지 않고 감춰지는 form 생성
- image : 이미지로 된 submit button 생성
- month : 월 선택 form 생성
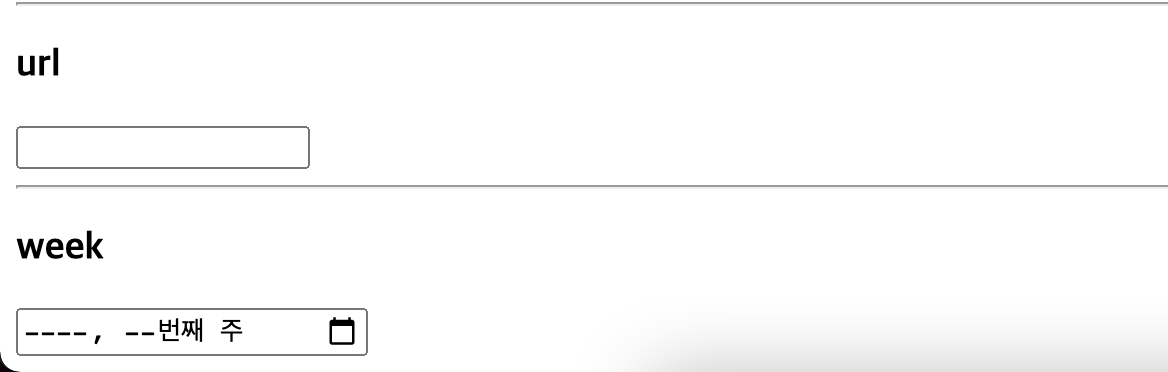
- week : 주 선택 form 생성
- number : 숫자 입력 form 생성
- password : password 입력 form 생성
- radio : 라디오 입력 버튼 생성
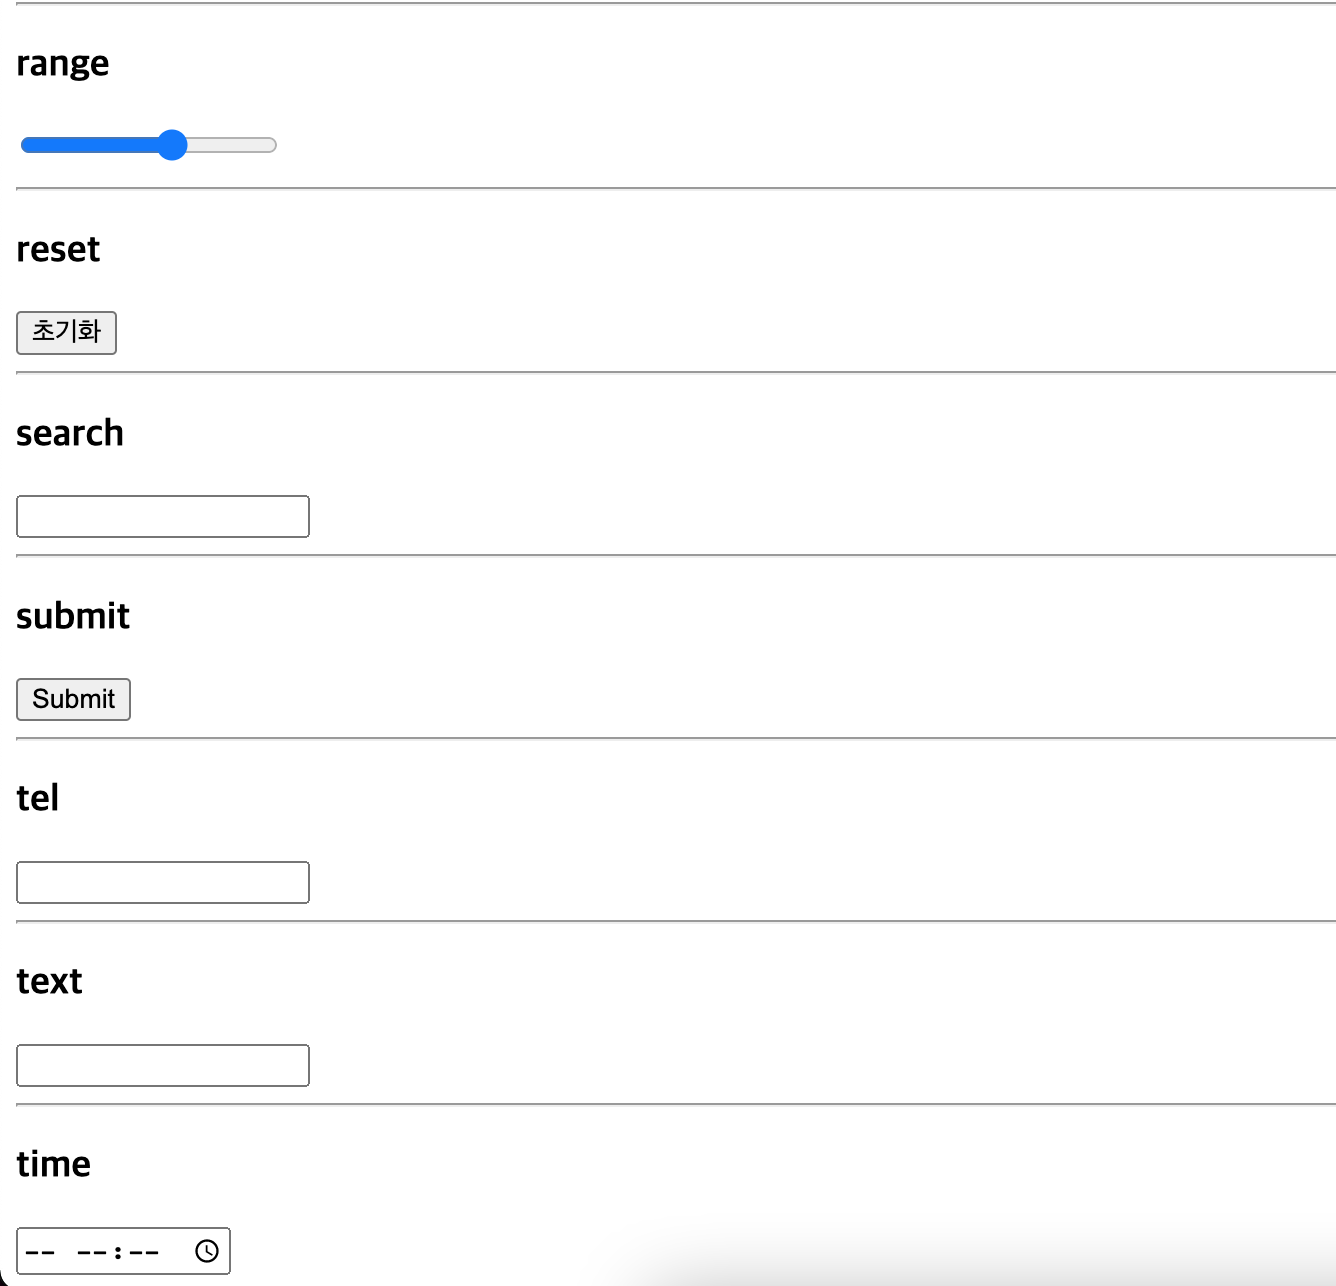
- range : 범위 선택 form 생성
- reset : 초기화 버튼 생성
- search : 검색어 입력 form 생성
- submit : 제출 버튼 생성
- tel : 전화번호 입력 form 생성
- text : 텍스트 입력 form 생성
- time : 시간 선택 form 생성
- url : url 입력 form 생성
<!DOCTYPE html>
<html>
  <body>
    <h3>button</h3>
    <input type="button" value="Click me" onclick="alert('Hello world!')">
    <hr>

    <h3>checkbox</h3>
    <input type="checkbox" name="fruit1" value="apple" checked> 사과<br>
    <input type="checkbox" name="fruit2" value="grape"> 포도<br>
    <input type="checkbox" name="fruit3" value="peach"> 복숭아<br>
    <hr>

    <h3>color</h3>
    <input type="color" name="mycolor">
    <hr>

    <h3>date</h3>
    <input type="date" name="birthday">
    <hr>

    <h3>email</h3>
    <input type="email" name="useremail">
    <hr>

    <h3>file</h3>
    <input type="file" name="myfile">
    <hr>

    <h3>hidden</h3>
    <input type="hidden" name="country" value="Norway">
    hidden filed는 사용자에 표시되지 않는다.
    <hr>

    <h3>image</h3>
    <input type="image" src="img/img_submit.gif" alt="Submit" width="48" height="48">
    <hr>

    <h3>month</h3>
    <input type="month" name="birthdaymonth">
    <hr>

    <h3>number</h3>
    <input type="number" name="quantity" min="2" max="10" step="2" value="2">
    <hr>

    <h3>password</h3>
    <input type="password" name="pwd">
    <hr>

    <h3>radio</h3>
    <input type="radio" name="gender" value="male" checked> 남자<br>
    <input type="radio" name="gender" value="female"> 여자<br>
    <hr>

    <h3>range</h3>
    <input type="range" name="points" min="0" max="10" step="1" value="5">
    <hr>

    <h3>reset</h3>
    <input type="reset">
    <hr>

    <h3>search</h3>
    <input type="search" name="googlesearch">
    <hr>

    <h3>submit</h3>
    <input type="submit" value="Submit">
    <hr>

    <h3>tel</h3>
    <input type="tel" name="mytel">
    <hr>

    <h3>text</h3>
    <input type="text" name="myname">
    <hr>

    <h3>time</h3>
    <input type="time" name="mytime">
    <hr>

    <h3>url</h3>
    <input type="url" name="myurl">
    <hr>

    <h3>week</h3>
    <input type="week" name="week_year">
  </body>
</html>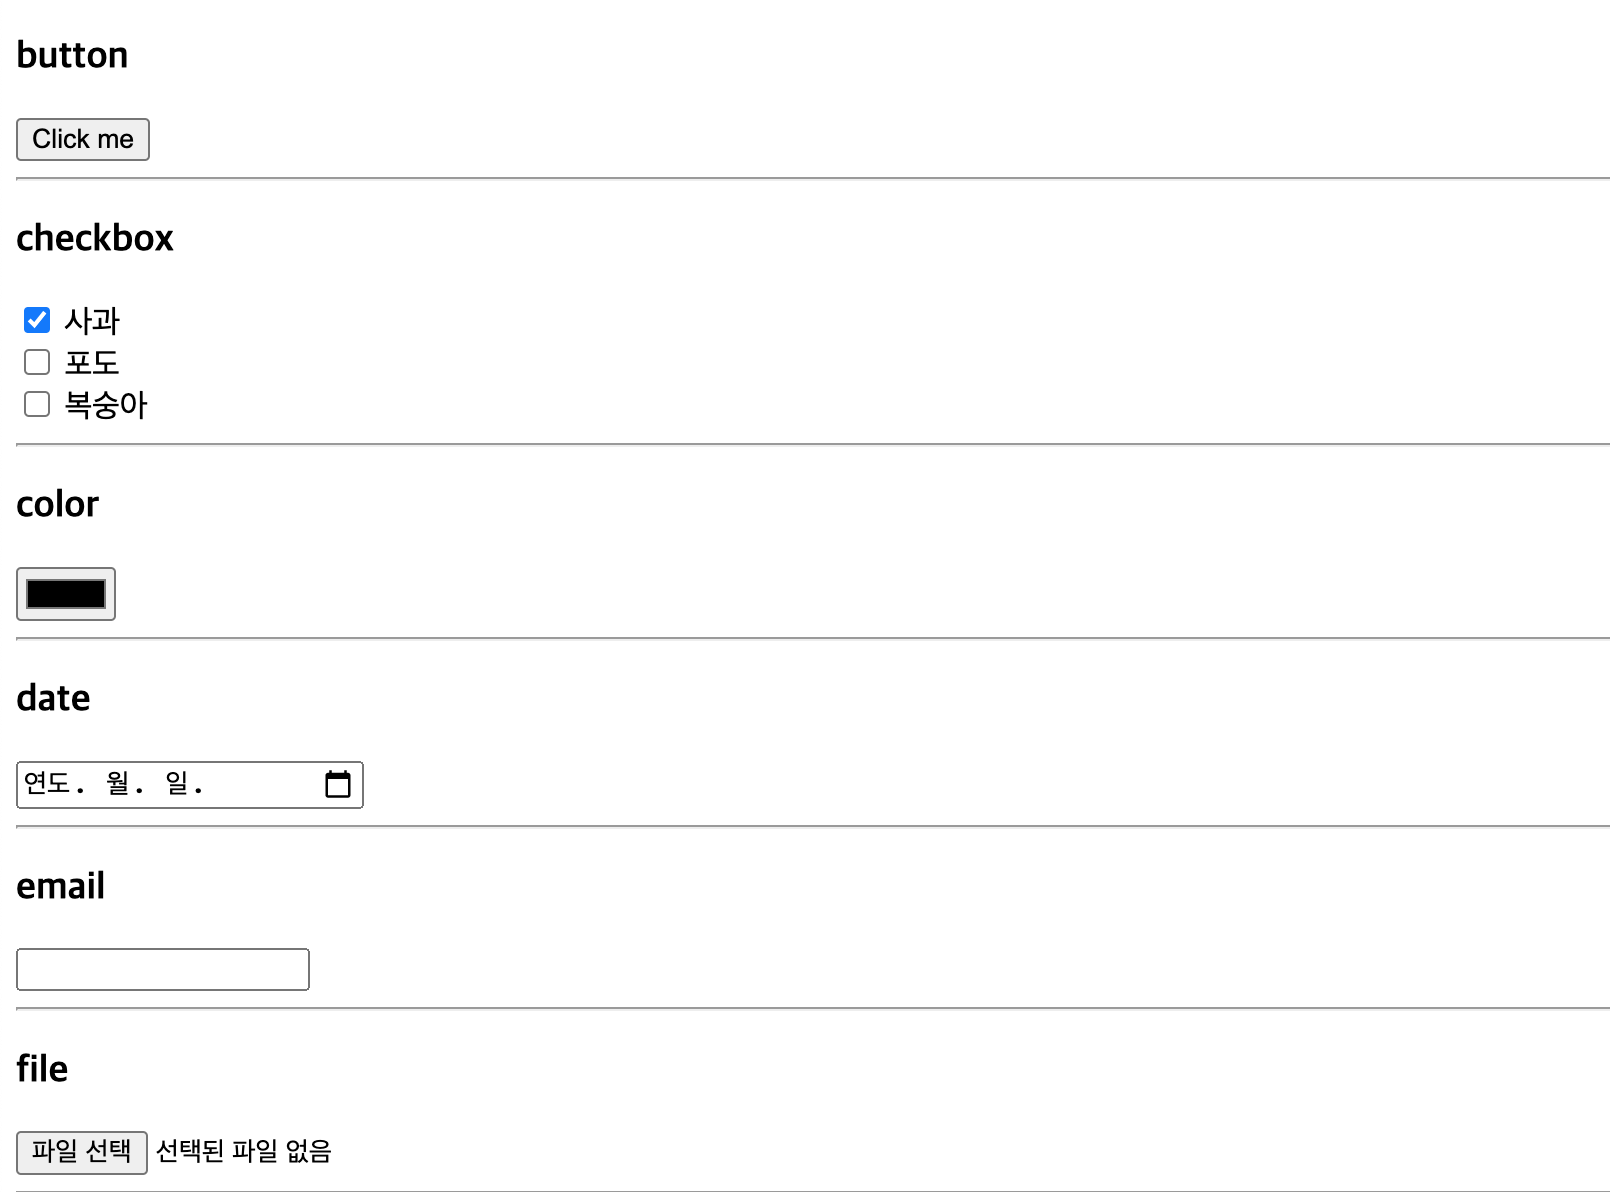
<seclect> tag
select form을 생성하며, 다수의 리스트에서 다수의 항목을 선택할 때 사용한다.
함께 사용할 수 있는 tag는 다음과 같다.
<option>: option 생성<optgroup>: option을 그룹화한다.
URL로 전송되는 데이터는 select tag의 name attribute를 key로, option tag의 value attribute를 value로 하여, key=value 형태로 전송된다.
<!DOCTYPE html>
<html>
  <body>
    <select name="cars1">
      <option value="volvo" selected>Volvo</option>
      <option value="saab" disabled>Saab</option>
      <option value="fiat">Fiat</option>
      <option value="audi">Audi</option>
    </select>

    <select name="cars2" size="4" multiple>
      <option value="volvo">Volvo</option>
      <option value="saab">Saab</option>
      <option value="fiat">Fiat</option>
      <option value="audi" selected>Audi</option>
    </select>

    <select name="cars3">
      <optgroup label="Swedish Cars">
        <option value="volvo">Volvo</option>
        <option value="saab">Saab</option>
      </optgroup>
      <optgroup label="German Cars" disabled>
        <option value="mercedes">Mercedes</option>
        <option value="audi">Audi</option>
      </optgroup>
    </select>
  </body>
</html>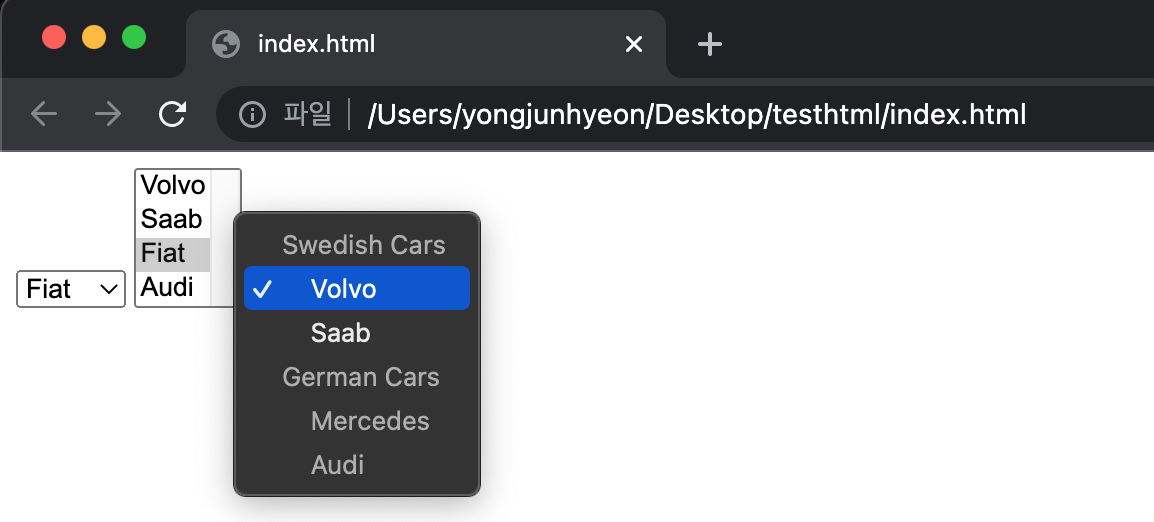
<textarea> tag
여러 줄의 글자를 입력할 때 사용한다.
<!DOCTYPE html>
<html>
  <body>
    <textarea name="message" rows="10" cols="30">Write something here</textarea>
  </body>
</html>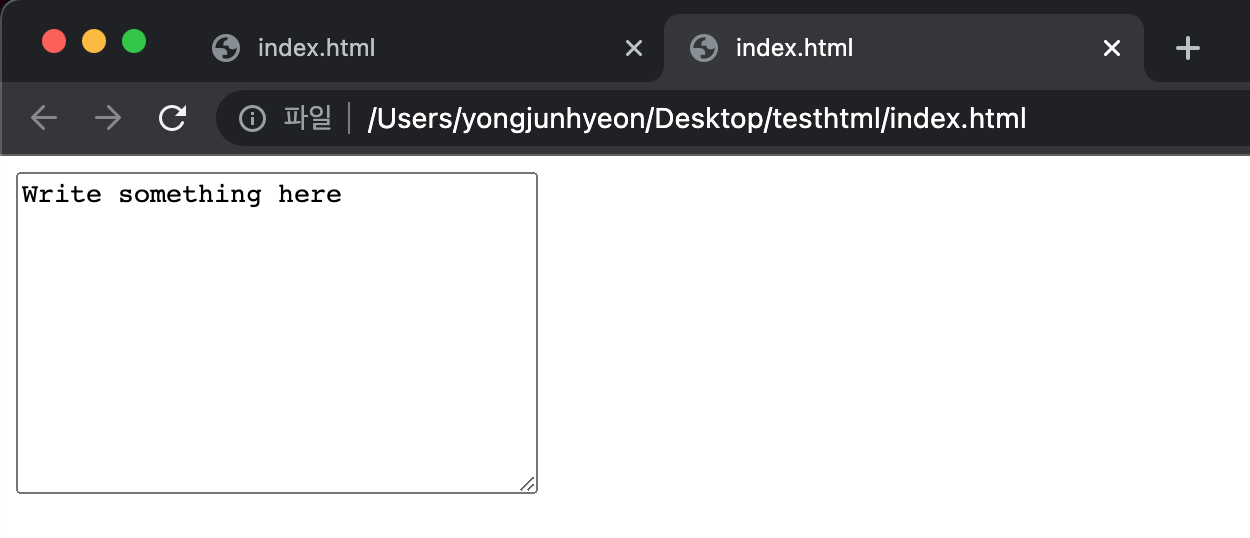
<button> tag
클릭할 수 있는 버튼을 생성한다.
위에서 살펴 본 <input type="button">과 유사하지만 input tag는 empty element인 반면에, button tag는 아니다. 따라서, button element에는 텍스트나 이미지 같은 content를 사용할 수 있다.
type attribute는 반드시 지정하는 것이 바람직하며, 값으로 button, reset, submit을 지정할 수 있다.
<!DOCTYPE html>
<html>
  <body>
    <button type="button" onclick="alert('Hello World!')">Click Me!</button>

    <input type="button" value="Click Me!" onclick="alert('Hello world!')">
  </body>
</html>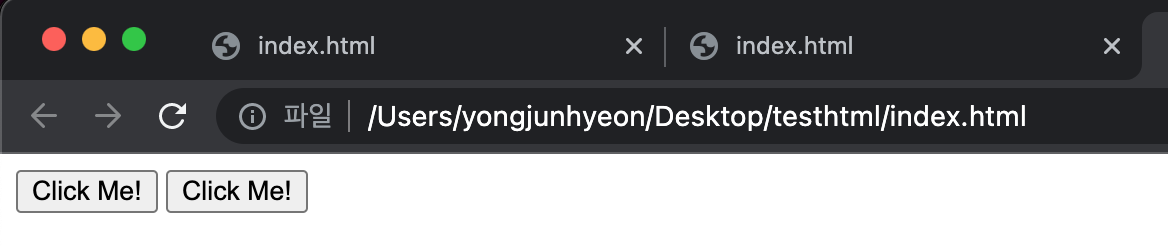
<input> tag와 차이점?
<input> tag는 value attribute에 지정된 값이 전달되는 값이면서 동시에 버튼에 표시되는 값이다.
반면, <button> tag는 value attribute에 지정되는 값과 별개로, content로 문자열은 물론 HTML element도 받아서 버튼을 표현할 수 있다.
다만, 주의할 점은 구버전의 IE의 경우 submit되는 값이 다를 수 있다. 따라서, input tag를 사용하는게 바람직하다.
<fieldset> tag와 <legend> tag
fieldset tag는 관련된 입력 양식들을 그룹화할 때 사용한다.
legend tag는 fieldset tag 내에서 사용되어야 하며, 그룹화된 fieldset의 제목을 정의한다.
<!DOCTYPE html>
<html>
  <head>
    <meta charset="UTF-8">
  </head>
  <body>
      <fieldset>
        <legend>Login</legend>
        Username <input type="text" name="username">
        Password <input type="text" name="password">
      </fieldset>
  </body>
</html>
참고문헌
