이 가이드는 Spring Cloud Config Server에서 구성을 시작하고 사용하는 과정을 안내합니다.
무엇을 구축할 것인가
구성 서버(Config Server)를 설정하고 시작 시 구성을 사용한(consume) 다음 클라이언트를 다시 시작하지 않고 구성을 새로 고치는(refresh) 클라이언트를 구축합니다.
요약
이 코드와 설정 파일은 Spring Cloud Config를 사용하여 외부 Git 저장소에서 설정을 가져와 클라이언트 애플리케이션에 제공하는 예제입니다.
-
configuration-service/resources/application.properties:
- Config 서비스의 포트를 8888로 설정합니다.
- Spring Cloud Config 서버가 사용할 Git 저장소의 URI를
${HOME}/Desktop/config로 지정합니다.
-
configuration-client/resources/application.properties:
- 이 클라이언트 애플리케이션의 이름을
a-bootiful-client로 설정합니다. - 외부 구성 서버에서 설정을 가져오기 위해
spring.config.import속성을 사용합니다. 여기서는configserver의 HTTP 엔드포인트인http://localhost:8888/을 사용하여 설정을 가져오도록 설정합니다. - 모든 management 엔드포인트를 노출하도록 설정됩니다.
- 이 클라이언트 애플리케이션의 이름을
-
home/config/a-bootiful-client.properties:
- 외부 Git 저장소에 위치한
a-bootiful-client.properties파일입니다. - 이 파일은 실제 설정을 포함하며, 여기서는
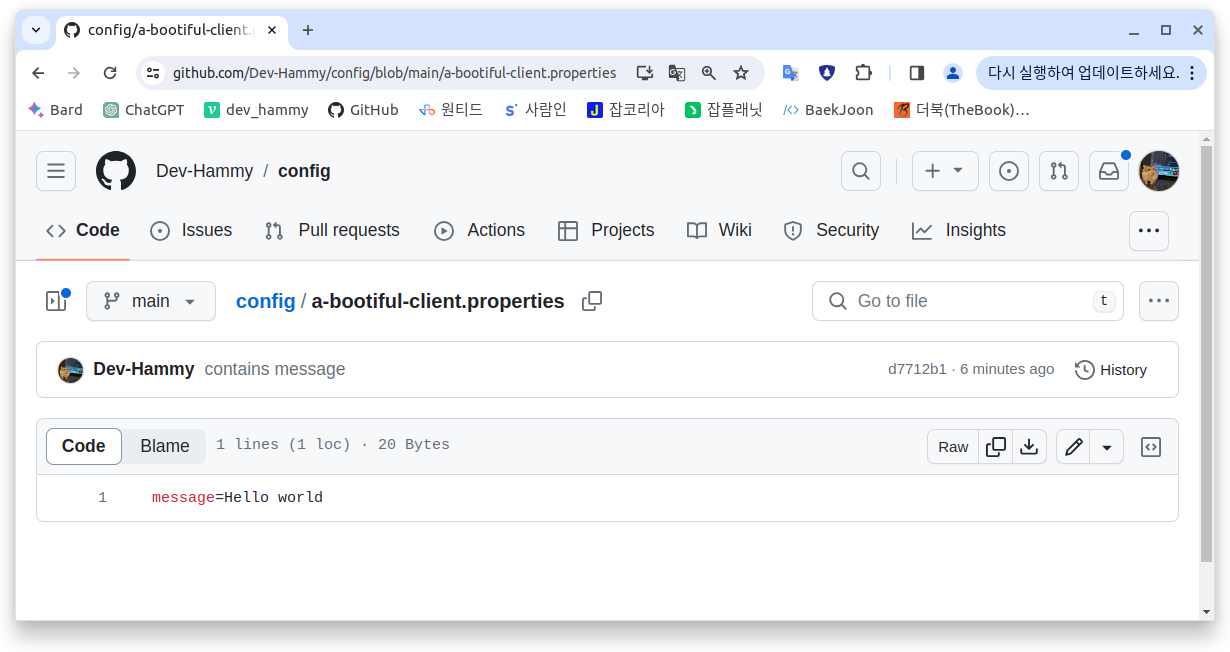
message=Hello world로 정의된 간단한 메시지를 가지고 있습니다.
- 외부 Git 저장소에 위치한
-
configuration-service/ConfigurationServiceApplication.java:
- Config 서비스를 구성하기 위한 메인 애플리케이션 클래스입니다.
@EnableConfigServer어노테이션을 사용하여 Config 서버를 활성화합니다.
-
configuration-client/ConfigurationClientApplication.java:
- 클라이언트 애플리케이션의 메인 애플리케이션 클래스입니다.
@RefreshScope를 사용하여 새로운 설정을 동적으로 적용할 수 있도록 설정됩니다.MessageRestController클래스는/message엔드포인트를 제공하며, 해당 엔드포인트로 요청이 오면message값을 반환합니다.
이 설정은 configuration-service가 외부 Git 저장소에서 설정을 읽어와 configuration-client에게 제공하고, configuration-client는 해당 설정을 사용하여 애플리케이션을 구성합니다. 클라이언트 애플리케이션에서 /message 엔드포인트에 접근하면 message 값을 반환하는데, 여기서는 외부 설정에 정의된 Hello world 메시지를 반환할 것입니다.
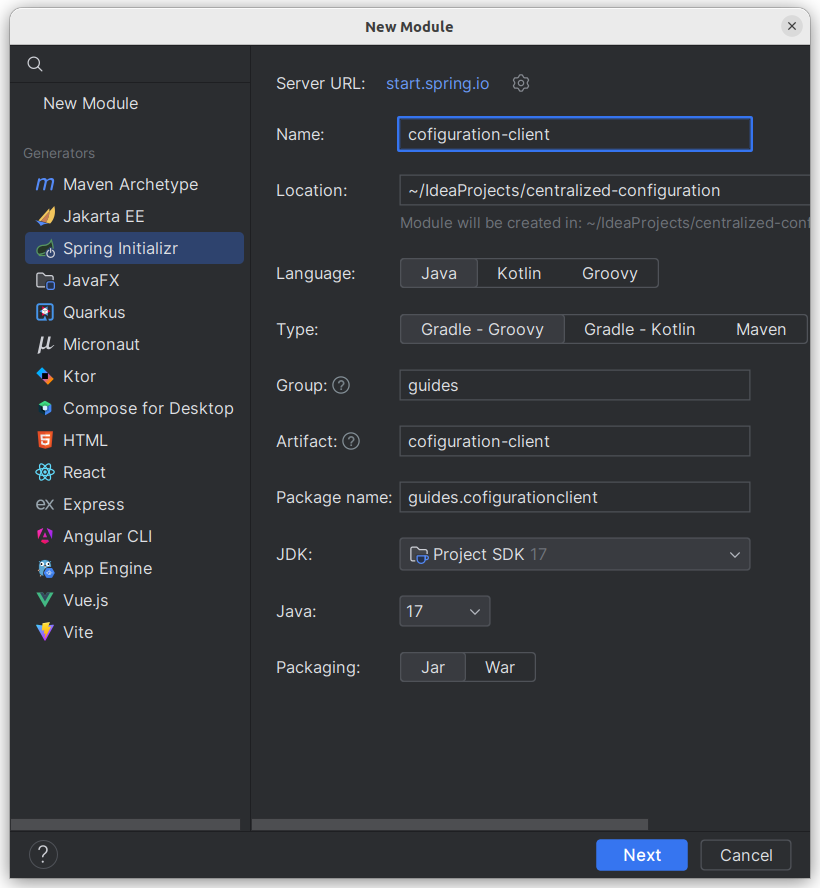
Starting with Spring Initializr
build.gradle (configuration-client)
plugins {
	id 'java'
	id 'org.springframework.boot' version '3.2.1'
	id 'io.spring.dependency-management' version '1.1.4'
}

group = 'guides'
version = '0.0.1-SNAPSHOT'

java {
	sourceCompatibility = '17'
}

repositories {
	mavenCentral()
}

ext {
	set('springCloudVersion', "2023.0.0")
}

dependencies {
	implementation 'org.springframework.boot:spring-boot-starter-actuator'
	implementation 'org.springframework.boot:spring-boot-starter-web'
	implementation 'org.springframework.cloud:spring-cloud-starter-config'
	testImplementation 'org.springframework.boot:spring-boot-starter-test'
}

dependencyManagement {
	imports {
		mavenBom "org.springframework.cloud:spring-cloud-dependencies:${springCloudVersion}"
	}
}

tasks.named('test') {
	useJUnitPlatform()
}
build.gradle (configuration-service)
plugins {
    id 'java'
    id 'org.springframework.boot' version '3.2.1'
    id 'io.spring.dependency-management' version '1.1.4'
}

group = 'guides'
version = '0.0.1-SNAPSHOT'

java {
    sourceCompatibility = '17'
}

repositories {
    mavenCentral()
}

ext {
    set('springCloudVersion', "2023.0.0")
}

dependencies {
    implementation 'org.springframework.cloud:spring-cloud-config-server'
    testImplementation 'org.springframework.boot:spring-boot-starter-test'
}

dependencyManagement {
    imports {
        mavenBom "org.springframework.cloud:spring-cloud-dependencies:${springCloudVersion}"
    }
}

tasks.named('test') {
    useJUnitPlatform()
}
Stand up a Config Server 구성 서버 구축
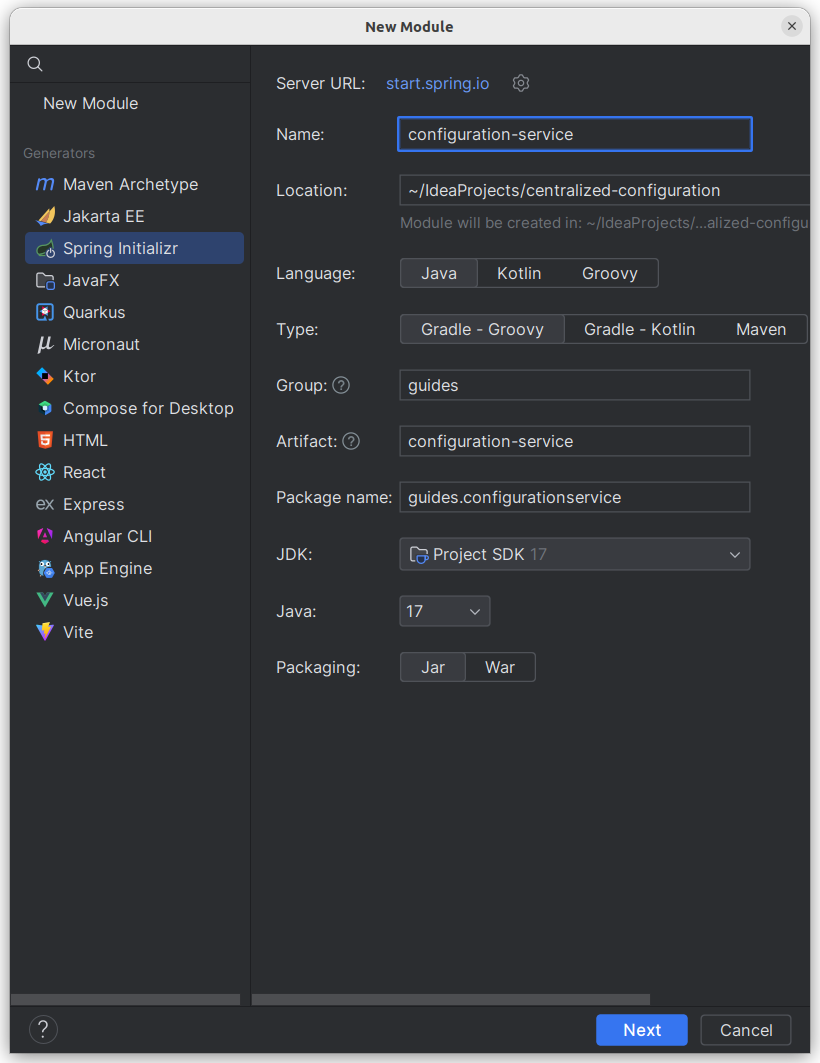
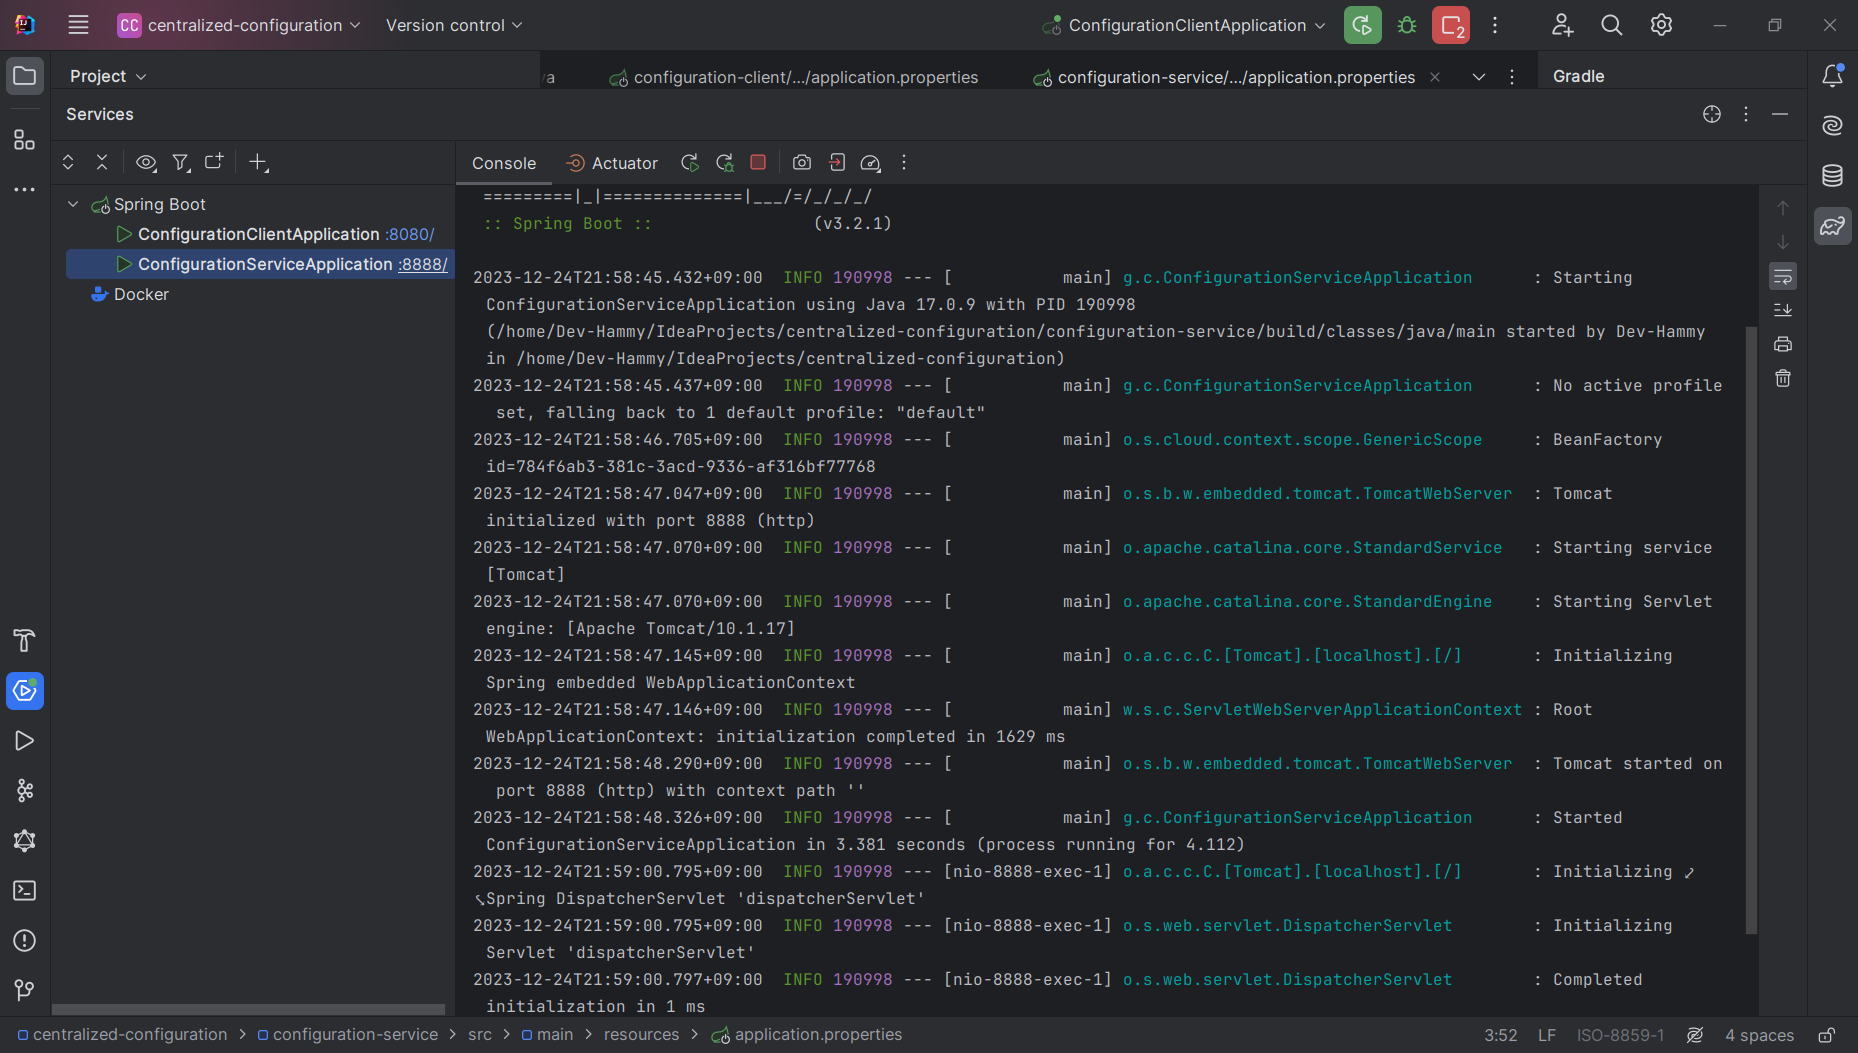
먼저 Spring 애플리케이션과 (일반적으로) 버전 제어 구성 파일 저장소 사이에서 일종의 중개자 역할을 하는 구성 서비스가 필요합니다. Spring Cloud의 @EnableConfigServer를 사용하여 다른 애플리케이션과 통신할 수 있는 구성 서버를 가동할 수 있습니다. 이는 구성 서버를 활성화하기 위해 하나의 주석이 추가된 일반 Spring Boot 애플리케이션입니다. 다음 목록(configuration-service/src/main/java/guides/configurationservice/ConfigurationServiceApplication.java의)은 이러한 애플리케이션을 보여줍니다.
package guides.configurationservice;

import org.springframework.boot.SpringApplication;
import org.springframework.boot.autoconfigure.SpringBootApplication;
import org.springframework.cloud.config.server.EnableConfigServer;

@EnableConfigServer
@SpringBootApplication
public class ConfigurationServiceApplication {

    public static void main(String[] args) {
        SpringApplication.run(ConfigurationServiceApplication.class, args);
    }

}
구성 서버는 관리할 저장소를 알아야 합니다. 여기에는 몇 가지 선택 사항이 있지만 Git 기반 파일 시스템 저장소로 시작하십시오. 구성 서버를 Github 또는 GitLab 저장소로 쉽게 지정할 수 있습니다.
파일 시스템에서 새 디렉터리를 만들고 그 디렉터리에서 git init을 실행합니다.
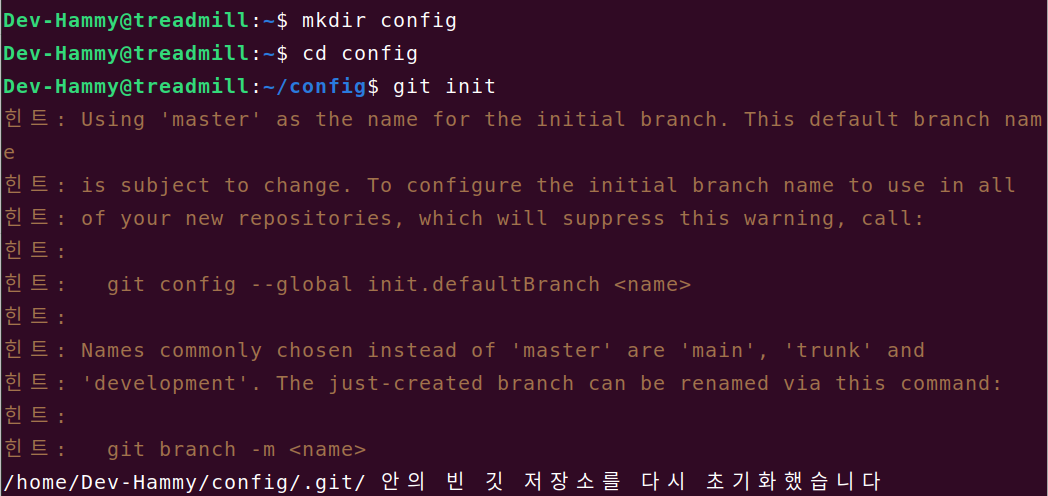
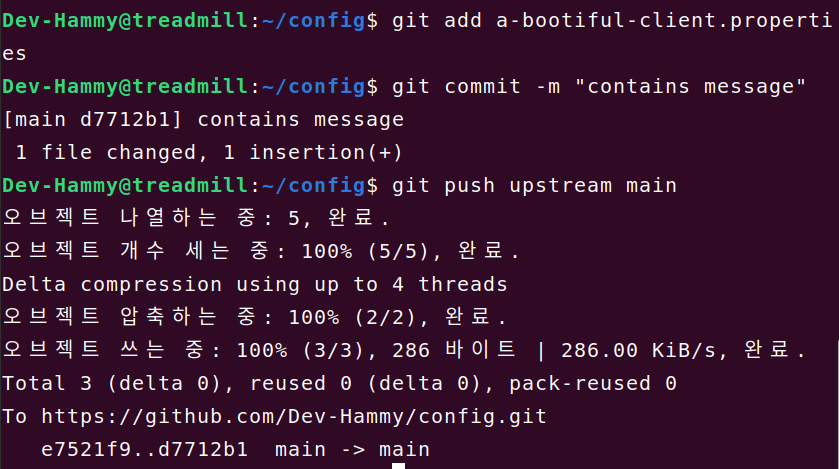
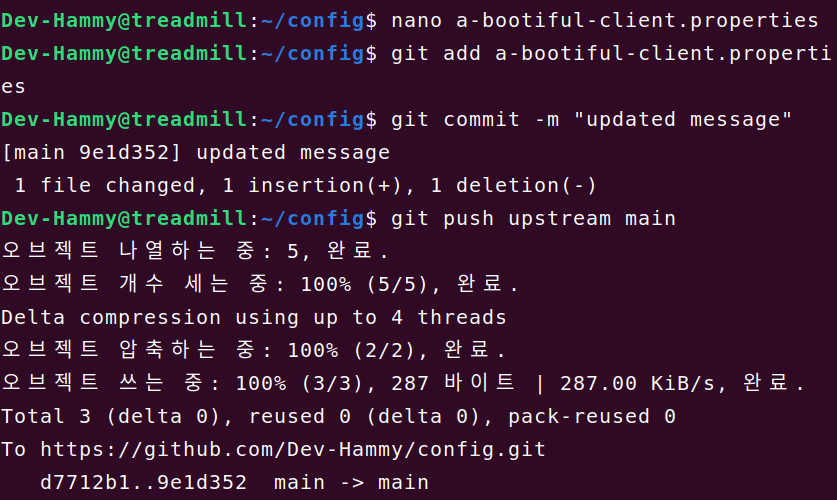
그런 다음 a-bootiful-client.properties라는 파일을 Git 리포지토리에 추가합니다.
그런 다음 git commit을 실행하십시오.

나중에 spring.application.name 속성이 Config Server에 대한 a-bootiful-client로 식별되는 Spring Boot 애플리케이션을 사용하여 Config Server에 연결합니다. 이는 구성 서버가 특정 클라이언트에 보낼 구성 세트를 아는 방법(어떤 구성 세트를 보내야 할 지)입니다.
또한 Git 리포지토리에 있는 application.properties 또는 application.yml이라는 파일의 모든 값을 보냅니다. 보다 구체적으로 명명된 파일(예: a-bootiful-client.properties)의 속성 키는 application.properties 또는 application.yml의 속성 키를 재정의합니다.
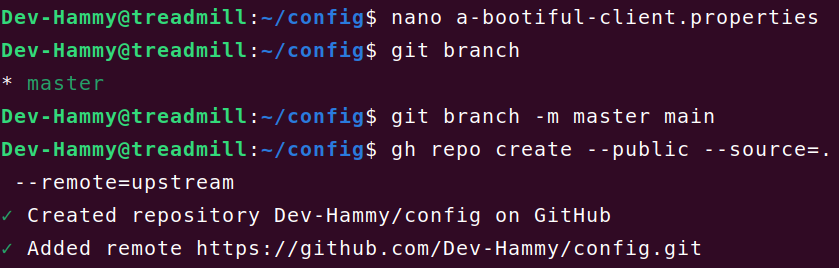
새로 생성된 a-bootiful-client.properties 파일에 간단한 속성과 값(message = Hello world)을 추가한 다음 git commit이 변경 사항을 커밋합니다.

configuration-service/src/main/resources/application.properties에서 spring.cloud.config.server.git.uri 속성을 지정하여 Git 리포지토리 경로를 지정합니다.
또한 이 서버와 다른 Spring Boot 애플리케이션을 동일한 시스템에서 실행할 때 포트 충돌을 방지하려면 다른 server.port 값을 지정해야 합니다. 다음 목록(configuration-service/src/main/resources/application.properties)은 그러한 application.properties 파일을 보여줍니다.
server.port=8888

spring.cloud.config.server.git.uri=${HOME}/Desktop/config
이 예에서는 ${HOME}/Desktop/config에 있는 파일 기반 git 저장소를 사용합니다. 새 디렉터리를 만들고 그 안에 있는 속성과 YAML 파일에 대해 git commit을 실행하여 쉽게 만들 수 있습니다. 다음 명령 세트가 이 작업을 수행합니다.
저는 spring.cloud.config.server.git.uri=https://github.com/Dev-Hammy/config 라고 입력했습니다.
$ cd ~/Desktop/config
$ find .
./.git
...
./application.yml
또는 애플리케이션의 구성 파일(Configuration file)을 대신 가리키도록 변경하는 경우 원격 Git 저장소(예: Github)를 사용할 수 있습니다.
Reading Configuration from the Config Server by Using the Config Client
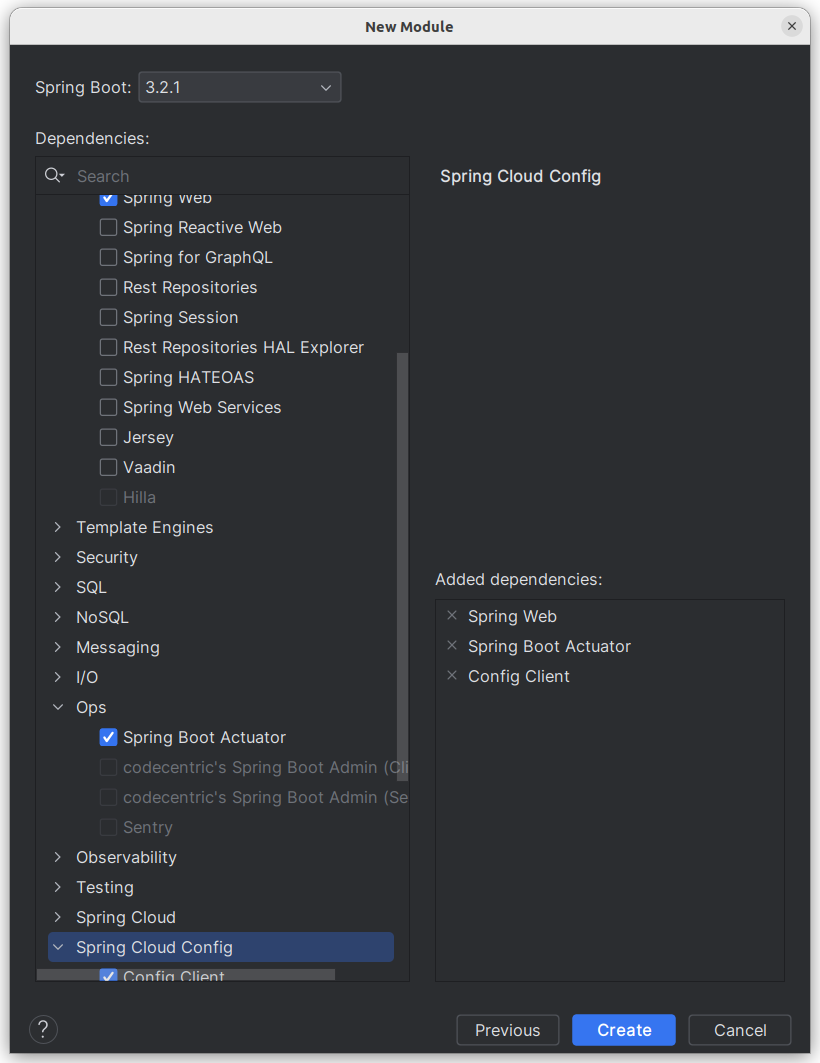
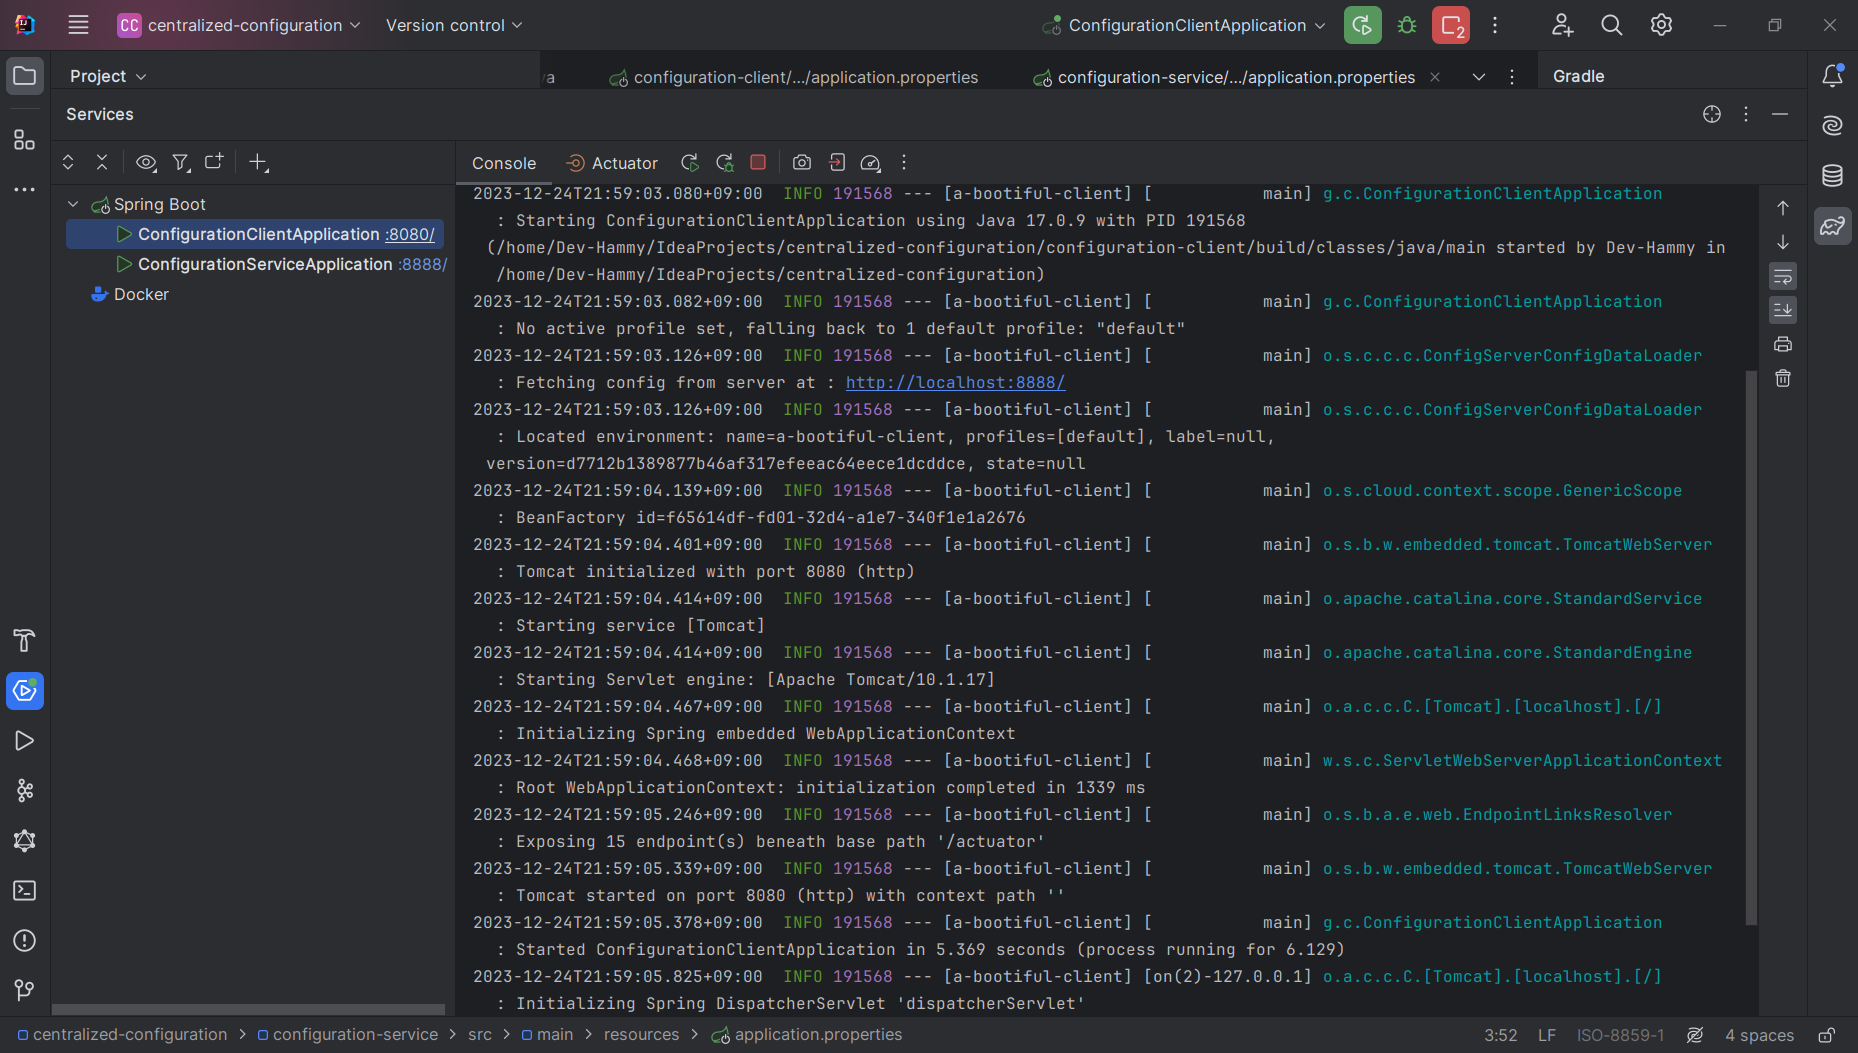
이제 구성 서버를 구축했으므로 구성 서버를 사용하여 자체 구성을 로드하고 JVM을 다시 시작하지 않고 필요에 따라 구성 서버에 대한 변경 사항을 반영하도록 구성을 새로 고치는(refresh) 새로운 Spring Boot 애플리케이션을 구축해야 합니다. 이렇게 하려면 org.springframework.cloud:spring-cloud-starter-config 종속성을 추가하여 구성 서버에 연결하세요. Spring은 application.properties나 application.yml 또는 다른 PropertySource에서 로드된 속성 파일과 마찬가지로 구성 속성 파일을 봅니다.
Config Client를 구성하는 속성은 Spring Boot 애플리케이션에 대한 일반적인 방법으로 설정할 수 있습니다. 클라이언트의 spring.application.name을 a-bootiful-client로 지정하고 configuration-client/src/main/resources/application.properties에 구성 서버(spring.config.import)의 위치를 지정합니다. 다음 목록은 해당 파일을 보여줍니다.
configuration-client/src/main/resources/application.properties
spring.application.name=a-bootiful-client
spring.config.import=optional:configserver:http://localhost:8888/
management.endpoints.web.exposure.include=*
또한 동적 구성 변경을 보여주기 위해 /refresh 엔드포인트를 활성화하려고 합니다. 위 목록은 management.endpoints.web.exposure.include 속성을 통해 이를 수행하는 방법을 보여줍니다.
클라이언트는 기존 메커니즘(예: @ConfigurationProperties 또는 @Value("${…}") 또는 Environment 추상화를 통해)을 사용하여 구성 서버의 모든 값에 액세스할 수 있습니다. 이제 해결된(resolved) 메시지 속성 값을 반환하는 Spring MVC REST 컨트롤러를 생성해야 합니다. Spring MVC 및 Spring Boot를 사용하여 REST 서비스를 구축하는 방법에 대해 자세히 알아보려면 RESTful 웹 서비스 구축 가이드를 참조하세요.
기본적으로 구성 값은 클라이언트 시작 시 읽혀지며 다시 읽혀지지 않습니다. Spring Cloud Config @RefreshScope로 MessageRestController에 주석을 추가한 다음 새로 고침(refresh) 이벤트를 트리거하여 Bean이 구성을 새로 고치도록(즉, 구성 서버에서 업데이트된 값을 가져오도록) 강제할 수 있습니다. 다음 목록(configuration-client/src/main/java/guides/configurationclient/ConfigurationClientApplication.java)은 이를 수행하는 방법을 보여줍니다.
package guides.cofigurationclient;

import org.springframework.beans.factory.annotation.Value;
import org.springframework.boot.SpringApplication;
import org.springframework.boot.autoconfigure.SpringBootApplication;
import org.springframework.cloud.context.config.annotation.RefreshScope;
import org.springframework.web.bind.annotation.RequestMapping;
import org.springframework.web.bind.annotation.RestController;

@SpringBootApplication
public class CofigurationClientApplication {

	public static void main(String[] args) {
		SpringApplication.run(CofigurationClientApplication.class, args);
	}

}

@RefreshScope
@RestController
class MessageRestController {

	@Value("${message:Hello default}")
	private String message;

	@RequestMapping("/message")
	String getMessage() {
		return this.message;
	}
}
애플리케이션 테스트
먼저 구성 서비스(Config-service)를 시작한 다음 서비스가 실행되면 클라이언트(Config-client)를 시작하여 엔드투엔드 결과를 테스트할 수 있습니다.
-
config-service 시작
-
config-client 시작
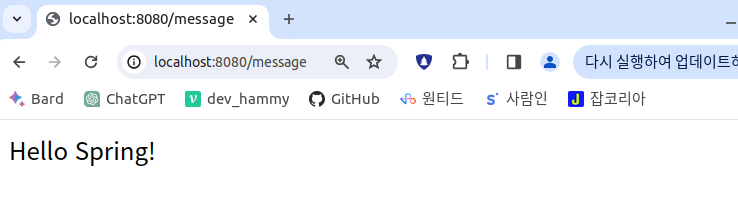
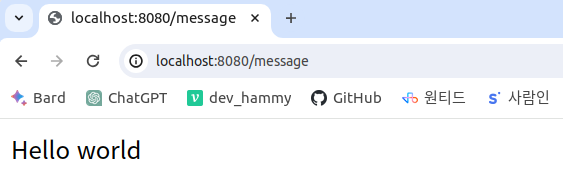
http://localhost:8080/message의 브라우저에서 클라이언트 앱을 방문하세요. 거기에서 응답에 Hello world가 표시되어야 합니다.
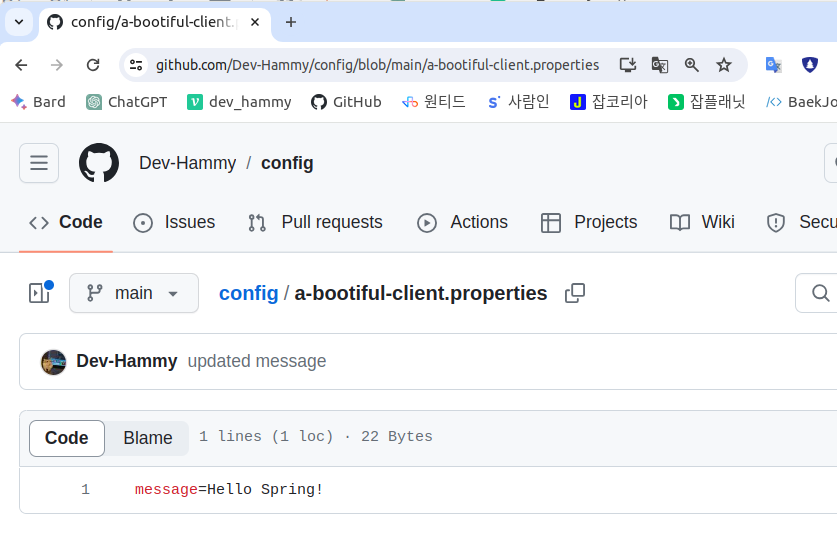
Git 저장소에 있는 a-bootiful-client.properties 파일의 메시지 키를 다른 것으로 변경합니다(Hello Spring!, 아마도?).
http://localhost:8888/a-bootiful-client/default를 방문하여 구성 서버에 변경 사항이 표시되는지 확인할 수 있습니다.
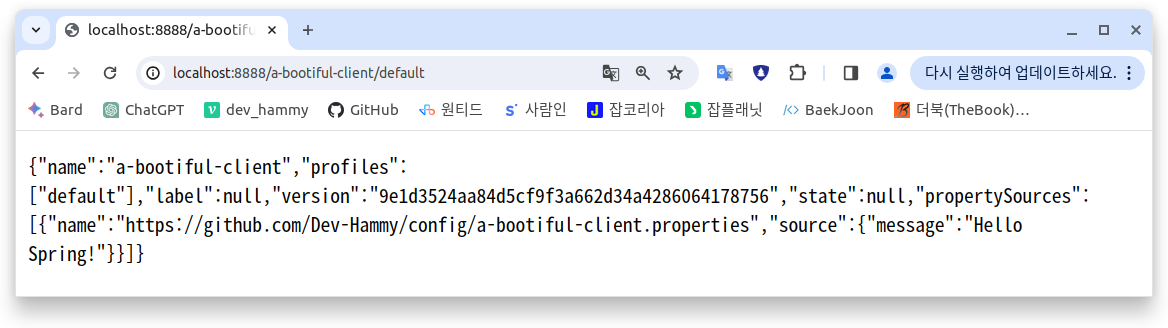
{"name":"a-bootiful-client","profiles":["default"],"label":null,"version":"9e1d3524aa84d5cf9f3a662d34a4286064178756","state":null,"propertySources":[{"name":"https://github.com/Dev-Hammy/config/a-bootiful-client.properties","source":{"message":"Hello Spring!"}}]}클라이언트가 강제로 자체를 새로 고치고 새 값을 가져오도록 하려면 새로 고침(refresh) Spring Boot Actuator 엔드포인트를 호출(invoke)해야 합니다. Spring Boot의 Actuator는 애플리케이션에 대한 운영(operational) 엔드포인트(예: 상태 확인 및 환경 정보)를 노출합니다. 이를 사용하려면 클라이언트 애플리케이션의 classpath에 org.springframework.boot:spring-boot-starter-actuator를 추가해야 합니다.
다음 명령은 액추에이터의 새로 고침 명령을 호출합니다.
$ curl localhost:8080/actuator/refresh -d {} -H "Content-Type: application/json"
빈(empty) HTTP POST를 클라이언트의 새로 고침 (refresh) 엔드포인트(http://localhost:8080/actuator/refresh)으로 보내 새로 고침 액추에이터 끝점을 호출할 수 있습니다.
제 경우는 이 작업 실행시 브라우저에서 white label을 출력합니다.
테스트하기 쉽도록 클라이언트 애플리케이션에서
management.endpoints.web.exposure.include=*를 설정했습니다(Spring Boot 2.0부터 Actuator 엔드포인트는 기본적으로 노출되지 않습니다). 기본적으로 플래그를 설정하지 않으면 JMX를 통해 계속 액세스할 수 있습니다.
그런 다음 http://localhost:8080/message 엔드포인트를 방문하여 제대로 작동하는지 확인할 수 있습니다.