
이번 글에서는 기존 Spring Boot 프로젝트에서 사용하던 HTML 템플릿을 Vue 프론트엔드로 옮기고, 백엔드와 연동하는 과정을 정리합니다.
1. 개발 환경
| 도구 | 버전 |
|---|---|
| Java | 17 |
| Spring Boot | 3.4.7 |
| Node.js | 20.19.4 |
| npm | 10.8.2 |
| Vue | 3.5.18 |
| Vite | 7.1.1 |
2. Node.js 설치
Vue 프로젝트를 생성하려면 Node.js가 필요합니다.
Node.js 공식 홈페이지에서 LTS 버전을 설치합니다.
- 설치 후 버전 확인 명령어
node -v
npm -v
3. Vue 프로젝트 생성
Spring Boot 프로젝트 루트와는 별도로 frontend 폴더를 만들어 Vue 프로젝트를 생성합니다.
npm create vite@latest simple-app- 프로젝트 이름: simple-app
- 프레임워크: Vue
- Variant: JavaScript
D:\>npm create vue@latest simple-app
> npx
> create-vue simple-app
T Vue.js - The Progressive JavaScript Framework
|
o Select features to include in your project: (↑/↓ to navigate, space to select, a to toggle all, enter to confirm)
| Router (SPA development), Pinia (state management)
|
o Select experimental features to include in your project: (↑/↓ to navigate, space to select, a to toggle all, enter to
confirm)
| none
|
o Skip all example code and start with a blank Vue project?
| Yes
Scaffolding project in D:\simple-app...
|
— Done. Now run:
cd simple-app
npm install
npm run dev
| Optional: Initialize Git in your project directory with:
git init && git add -A && git commit -m "initial commit"
D:\>cd simple-app
D:\simple-app>npm install
added 152 packages, and audited 153 packages in 10s
47 packages are looking for funding
run `npm fund` for details
found 0 vulnerabilities
D:\simple-app>npm run dev
> simple-app@0.0.0 dev
> vite
VITE v7.1.1 ready in 722 ms
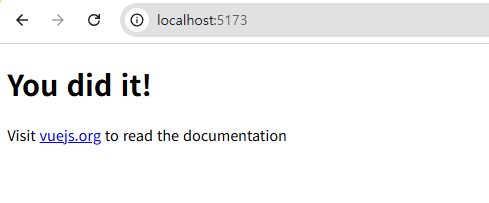
➜ Local: http://localhost:5173/
➜ Network: use --host to expose
➜ Vue DevTools: Open http://localhost:5173/__devtools__/ as a separate window
➜ Vue DevTools: Press Alt(⌥)+Shift(⇧)+D in App to toggle the Vue DevTools
➜ press h + enter to show help4. 프로젝트 실행
cd simple-app
npm install
npm run dev
기본적으로 http://localhost:5173에서 Vue 개발 서버가 실행됩니다.
5. Bootstrap 설치
기존 HTML에서 Bootstrap을 사용했다면, Vue 프로젝트에도 설치합니다.
npm install bootstrapmain.js에 CSS를 추가:
import { createApp } from 'vue'
import App from './App.vue'
import 'bootstrap/dist/css/bootstrap.min.css'
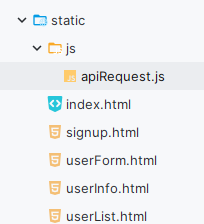
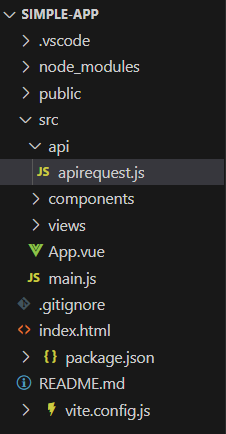
createApp(App).mount('#app')6. 프로젝트 구조
simple-app/
├── public/            # 정적 파일들 (index.html, 이미지 등)
├── src/
│   ├── assets/        # 이미지, 스타일 등 자원
│   ├── components/    # Vue 컴포넌트들
│   ├── router/        # Vue Router 설정 (SPA 라우팅)
│   ├── api/           # API 요청 관련 모듈 (apiRequest.js)
│   ├── App.vue        # 최상위 컴포넌트
│   └── main.js        # 진입점 스크립트
├── package.json
├── vite.config.js
└── ...
7. HTML → Vue 컴포넌트 변환
기존 Spring Boot resources/templates의 HTML 파일들을 Vue 컴포넌트로 변환합니다.
예: login.html → Login.vue
<template>
  <div class="login-page">
    <h1>로그인</h1>
    <form @submit.prevent="handleLogin">
      <input type="text" v-model="username" placeholder="아이디" />
      <input type="password" v-model="password" placeholder="비밀번호" />
      <button type="submit">로그인</button>
    </form>
  </div>
</template>

<script>
export default {
  data() {
    return {
      username: '',
      password: ''
    }
  },
  methods: {
    handleLogin() {
      console.log('로그인 요청', this.username, this.password)
    }
  }
}
</script>
8. API 호출 공통 함수 만들기 (apiRequest.js)
src/js/apiRequest.js 생성:
export async function apiRequest(url, options = {}) {
  let accessToken = localStorage.getItem("accessToken");

  options.headers = {
    ...options.headers,
    "Content-Type": "application/json",
    "Authorization": accessToken ? `Bearer ${accessToken}` : undefined
  };

  let response = await fetch(url, options);

  if (response.status === 401) {
    console.error("인증 실패");
  }

  return response.json();
}
9. Vite에서 백엔드 API 프록시 설정
vite.config.js
import { defineConfig } from 'vite'
import vue from '@vitejs/plugin-vue'
import path from 'path'

export default defineConfig({
  plugins: [vue()],
  resolve: {
    alias: {
      '@': path.resolve(__dirname, './src'),
    },
  },
  server: {
    proxy: {
      '/api': {
        target: 'http://localhost:8080',
        changeOrigin: true,
      },
    },
  },
})
10. Spring Boot CORS 설정
백엔드 @Configuration에 다음 설정 추가:
@Bean
public WebMvcConfigurer corsConfigurer() {
    return new WebMvcConfigurer() {
        @Override
        public void addCorsMappings(CorsRegistry registry) {
            registry.addMapping("/**")
                    .allowedOrigins("http://localhost:5173")
                    .allowedMethods("GET", "POST", "PUT", "DELETE", "OPTIONS")
                    .allowCredentials(true);
        }
    };
}
11. 실행 및 테스트
- 백엔드: ./gradlew bootRun (포트: 8080)
- 프론트엔드: npm run dev (포트: 5173)
브라우저에서 Vue 페이지 접속 후 API 요청이 정상적으로 작동하는지 확인합니다.
12. 마이그레이션 시 팁
- HTML을 Vue로 옮길 때, 템플릿 구조 + CSS 클래스는 그대로 두고, id/onclick 대신 Vue의 v-model, @click 등을 사용합니다.
- 공통 CSS는 src/assets에 넣고 main.js에서 import합니다.
- Vue Router를 사용하면 기존 HTML 페이지 전환을 SPA 방식으로 처리할 수 있습니다.
이렇게 하면 기존 Spring Boot HTML 기반 프론트를 Vue로 완전히 분리하고, API 연동까지 마칠 수 있습니다.

낭만감자