💎 들어가며
자체 제작 테마가 완성되었습니다~!🙌🙌
테마를 만들면서 경험했던 내용을 공유하고자 합니다.
테마를 만들어 GitHub에 Public Repo로 공유하고 있습니다.💖
제가 만든 테마는 하위 링크에서 소스 및 데모페이지를 보실 수 있습니다.😎
이번 포스팅에서는 Pelican의 구조와 템플릿 만드는 방법, 템플릿 별 설명 및 구현 화면, 커스텀 템플릿 추가 등 테마에 커스텀할 수 있는 것들에 대해 설명해볼까합니다.
1. Pelican Structure
1.1 File Structure
테마를 개발하기 위해서는 아래의 파일 구조를 따라야합니다.
├── static
│   ├── css
│   └── images
└── templates
    ├── archives.html         // to display archives
    ├── article.html          // processed for each article
    ├── author.html           // processed for each author
    ├── authors.html          // must list all the authors
    ├── categories.html       // must list all the categories
    ├── category.html         // processed for each category
    ├── index.html            // the index (list all the articles)
    ├── page.html             // processed for each page
    ├── period_archives.html  // to display time-period archives
    ├── tag.html              // processed for each tag
└── tags.html // must list all the tags. Can be a tag cloud.static폴더: css, js 등 정적 리소스templates폴더: 콘텐츠 생성에 사용될 템플릿 목록들
템플릿
템플릿은 Pelican에서 직접 만들어주는 페이지로, 해당 페이지에 [1.2] Pelican 변수를 사용할 수 있습니다.
- 템플릿 파일이 꼭 있을 필요는 없습니다.
- 또,
html을 추가한다고 해서 템플릿으로 생성되는 것은 아닙니다.
중요도에 따라 템플릿을 정리해보면 다음과 같습니다.
템플릿 목록
index: (필수) 메인 페이지 (포스트 목록)article: (필수) 포스트 별 내부 페이지categories: 카테고리 목록 보여주는 화면category: 카테고리 별 페이지 (포스트 목록)tags: 태그 목록 보여주는 화면tag: 태그 별 페이지 (포스트 목록)archives: date 순 포스트 목록 페이지 (포스트 목록)period_archives: 기간별 포스트 목록 페이지 (포스트 목록)
1.2 Pelican Variable
Pelican Template에서 사용할 수 있는 변수 목록들입니다. Pelican Docs에서 자세히 볼 수 있습니다.
변수는 너무 많고, 설명이 부족해서 이해안되는 부분들이 많아서 최대한 이해하고 사용해보고, 다른 테마들의 소스 코드를 참고하였습니다.😂
Jekyll이나 기술처럼 알려지지 않았다보니 레퍼런스가 거의 없는게 아쉬웠습니다..
Common Variable
모든 템플릿에서 사용할 수 있는 변수 목록들입니다.
| Variable | type | Description |
|---|---|---|
| output_file | string | 현재 페이지 파일명 |
| articles | List<Article> | 게시글 목록 |
| dates | List<Article> | date로 오름차순 정렬된 게시글 목록 |
| hidden_articles | List<Article> | 숨겨진 게시글 목록 |
| drafts | List<Article> | 작성중인 게시글 목록 |
| authors | Tuple<Tuple<Author, List<Articles>> | 모든 저자와 저자가 쓴 게시글 목록 |
| categories | Tuple<Tuple<Category, List<Articles>> | 모든 카테고리와 카테고리 별 게시글 목록 |
| tags | Tuple<Tuple<Tag, List<Articles>>> | 모든 태그와 태그 별 게시글 목록 |
| pages | List<Page> | 페이지 목록 |
| hidden_pages | List<Page> | 숨겨진 페이지 목록 |
| draft_pages | List<Page> | 초안 페이지 목록 |
Page Variable
Pagination이 활성화 되어있다면, 아래와 같은 변수를 쓸 수 있습니다.
| Variable | Description |
|---|---|
| articles_paginator | Paginator |
| articles_page | 현재 페이지 정보 |
| articles_previous_page | 이전 페이지 정보 |
| articles_next_page | 다음 페이지 정보 |
| dates_paginator | (오름차순 정렬) Paginator |
| dates_page | (오름차순 정렬) 현재 페이지 정보 |
| dates_previous_page | (오름차순 정렬) 이전 페이지 정보 |
| dates_next_page | (오름차순 정렬) 다음 페이지 정보 |
| page_name | 현재 페이지명 (index) |
1.3 Pelican Objects
Article
Article에 담긴 정보입니다.
| Attribute | Description |
|---|---|
| title | Title of the article. |
| slug | Page slug. |
| url | URL to the article page. |
| author | The Author of this article. |
| authors | A list of Authors of this article. |
| category | The Category of this article. |
| status | The article status, can be any of ‘published’ or ‘draft’. |
| summary | Rendered summary content. |
| tags | List of Tag objects. |
| translations | List of translations Article objects. |
| content | The rendered content of the article. |
| date | Datetime object representing the article date. |
| date_format | Either default date format or locale date format. |
| locale_date | Date formatted by the date_format. |
| template | Template name to use for rendering. |
| default_template | Default template name. |
| lang | Language of the article. |
| in_default_lang | Boolean representing if the article is written in the default language. |
| metadata | Article header metadata dict. |
| save_as | Location to save the article page. |
| source_path | Full system path of the article source file. |
| relative_source_path | Relative path from PATH to the article source file. |
Author / Category / Tag
| Attribute | Description |
|---|---|
| name | Name of this object |
| page_name | Author page name. |
| save_as | Location to save the author page. |
| slug | Page slug. |
| url | URL to the author page. |
1.4 Template Extension
Jinja의 핵심은 상속에 있습니다. 상위 템플릿을 상속받아 하위 템플릿을 구성합니다.
Base Template
base.html 파일을 생성하고, 모든 템플릿에서 이 파일을 상속받도록 했습니다.
<!DOCTYPE html>
<html lang="{{ DEFAULT_LANG }}">
<head>
    {% block head %}
        <title>{% block title %}{{ SITENAME }}{% endblock title %}</title>
        {% block include %}
            {% include "components/_include.html" %}
        {% endblock %}
    {% endblock head %}
</head>
<body>
{# Header #}
{% block header %}
    {% include "components/_header.html" %}
{% endblock %}
<main>
	{# Sidebar #}
	{% block sidebar %}
		{% include "components/_sidebar.html" %}
	{% endblock %}

	{# Content #}
	<section>{% block content %}{% endblock %}</section>
</main>

{# Footer #}
{% block footer %}
    {% include "components/_footer.html" %}
{% endblock %}
</body>
</html>
block 구문을 이용하여 위와 같이 템플릿을 구성했습니다.
아래 영역들은 어느 템플릿 엔진을 쓰던간에 제가 주로 지정하는 영역들입니다.🤗
템플릿 영역
head: head 영역include: include 영역; static 파일 import 영역header: 헤더 영역;<header>tagfooter: 푸터 영역;<footer>tagsidebar: 메뉴 링크 영역;<aside>tagcontent: 실제 페이지 마다 내용이 삽입되는 영역
Sub Template
하위 템플릿 페이지에서 아래와 같이 작성합니다. 아래는 authors.html 템플릿 예시입니다.
{% extends "base.html" %}
{% block content %}
    <ul>
        {% for author, articles in authors %}
            <li><a href="{{ SITEURL }}/{{ author.url }}">
              {{ author.name }} ({{ articles|length }})
            </a></li>
        {% endfor %}
    </ul>
{% endblock %}
하위 템플릿에서 block 구문을 이용하면 간편하게 상위 템플릿인 base.html에서 사용한 block 영역을 대체할 수 있습니다.
2. Template Implementation
저는 아래와 같은 페이지들을 구현했습니다.
구현한 템플릿
index: (필수) 메인 페이지 (포스트 목록)article: (필수) 포스트 별 내부 페이지categories: 카테고리 목록 보여주는 화면category: 카테고리 별 페이지 (포스트 목록)tags: 태그 목록 보여주는 화면tag: 태그 별 페이지 (포스트 목록)archives: date 순 포스트 목록 페이지 (포스트 목록)
겹치는 페이지는 index, category, tag, archives는 포스트 목록을 보여주는 페이지기 때문에 화면이 거의 유사하여 따로 설명하지 않겠습니다.
아래는 주요 구현한 화면들입니다.
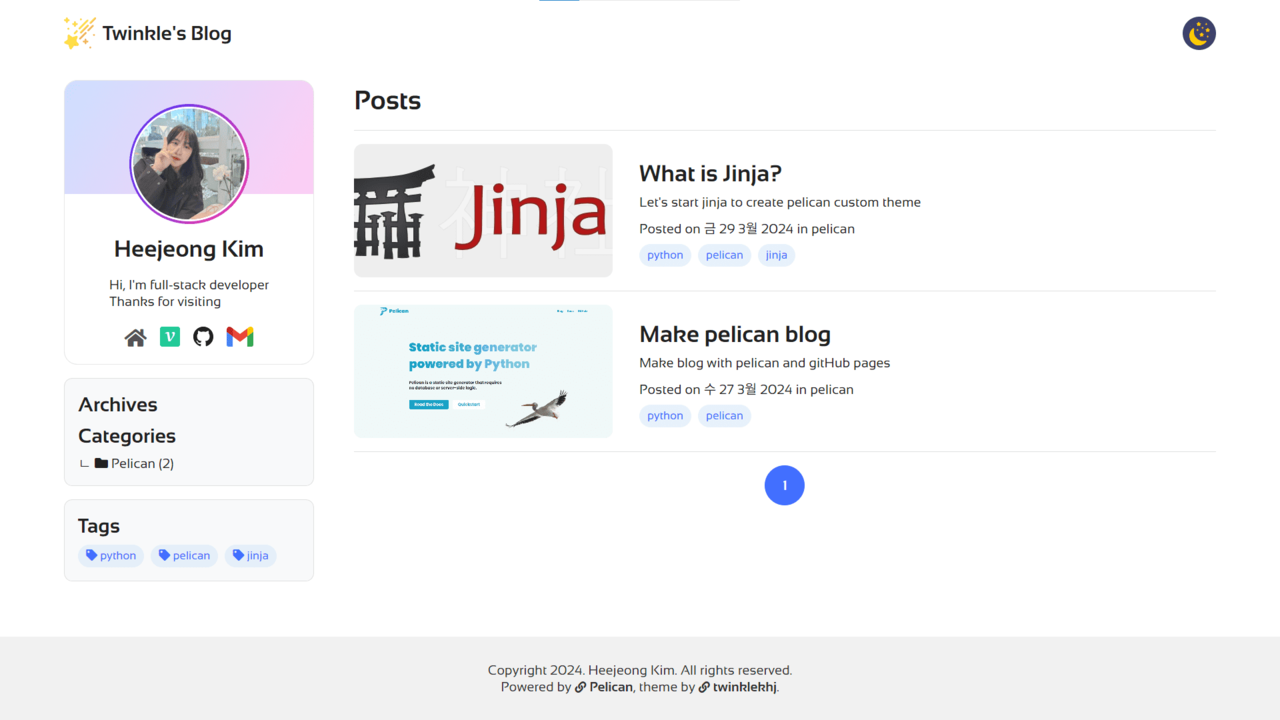
2.1 index.html
index.html은 블로그의 초기 페이지입니다.
'/'로 들어오는 메인페이지기 때문에 가장 핵심⭐ 페이지입니다.
Header, Sidebar, Content, Footer 영역을 조합하여 아래와 같이 페이지를 구성하였습니다.
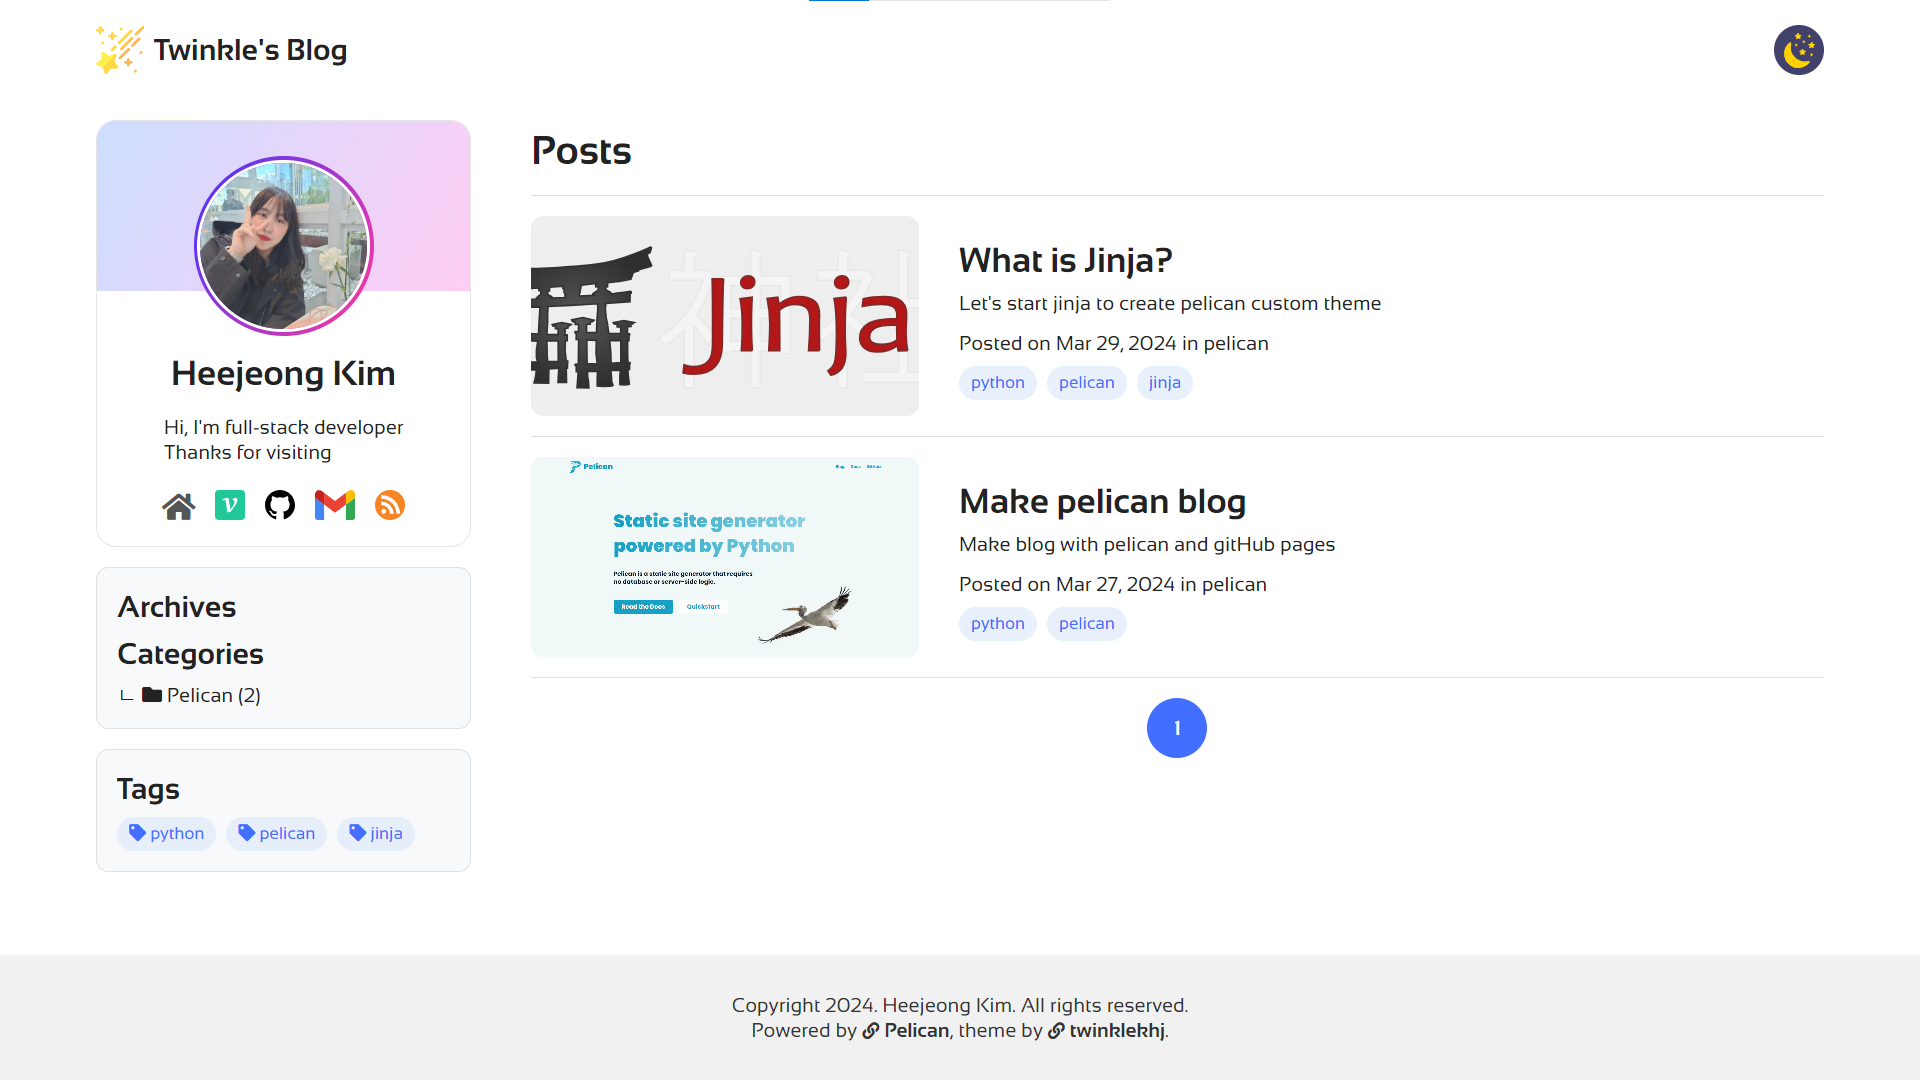
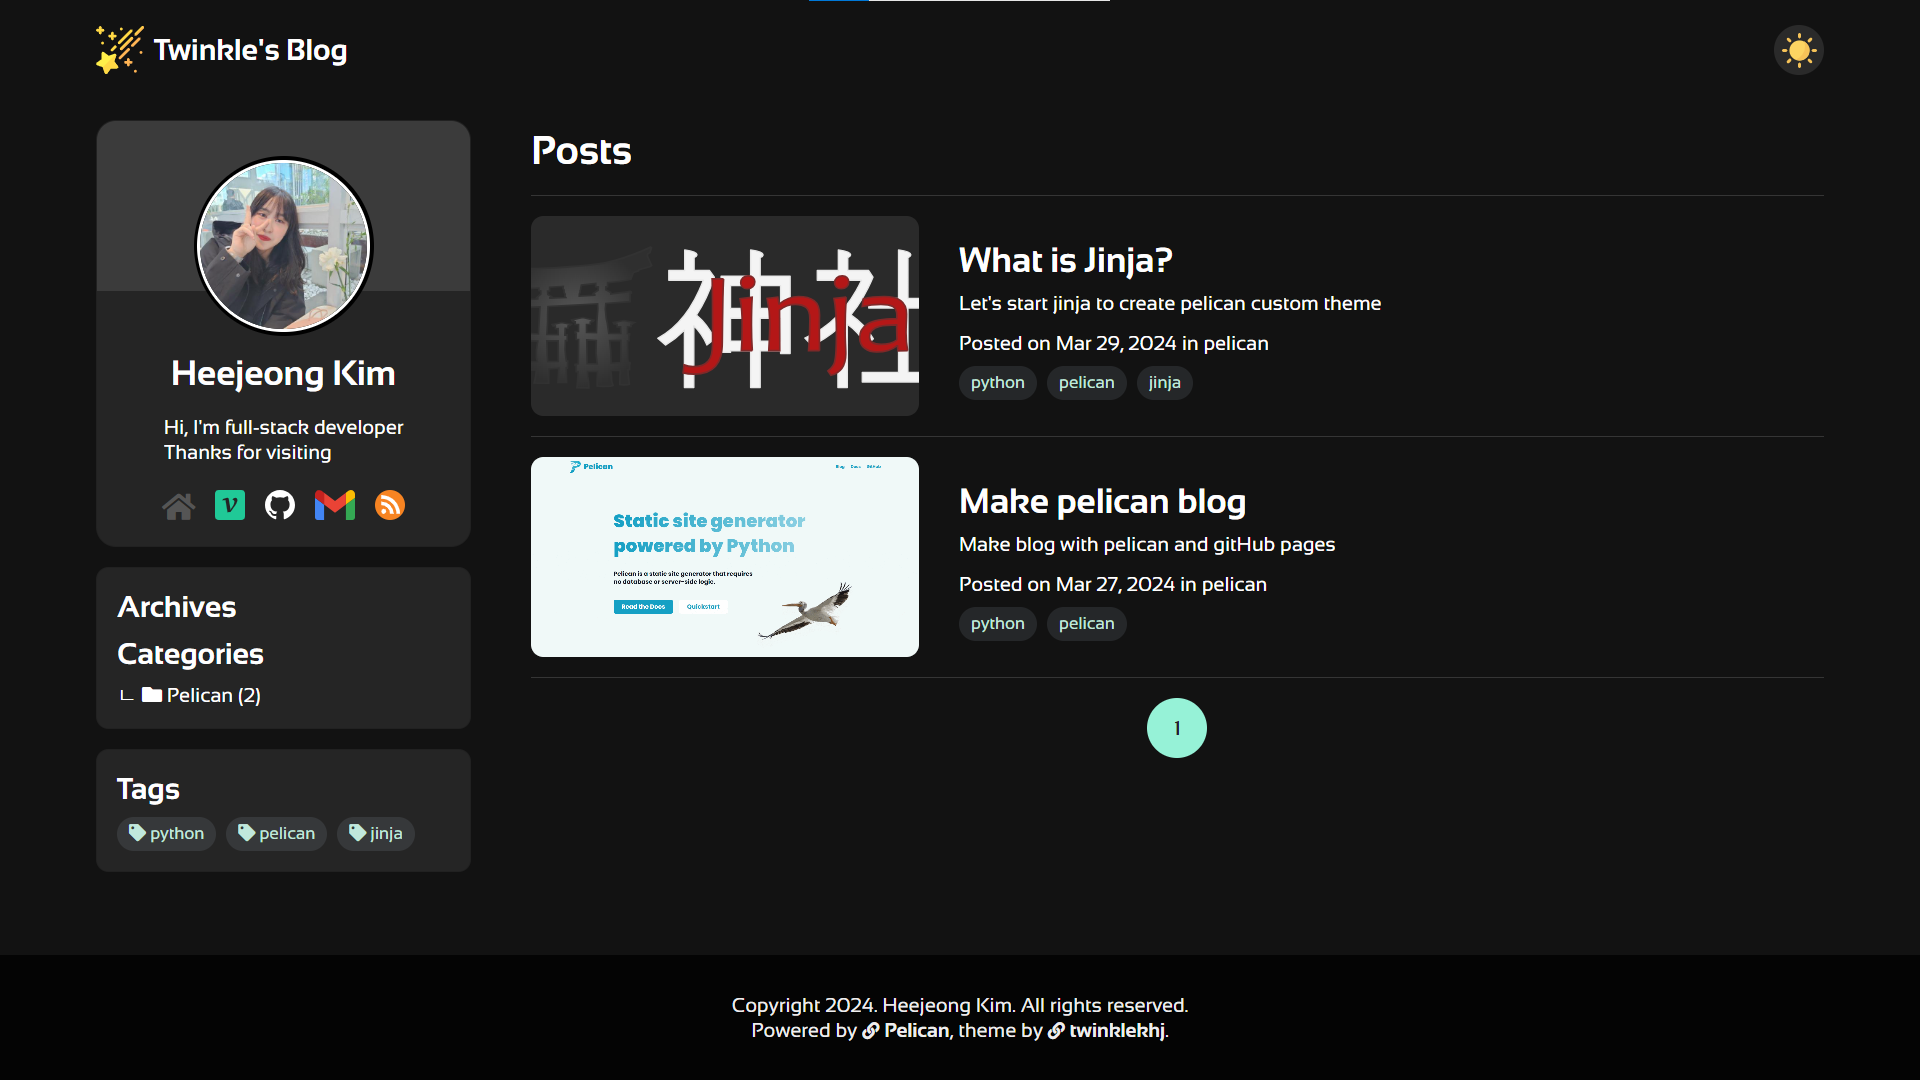
Header 영역의 우측 아이콘을 클릭하면 Dark 모드로도 전환할 수 있습니다.
2.2 article.html
article.html은 게시글 상세 페이지입니다. content 폴더 밑에 작성한 게시글(.rst, .md 파일들)을 보여주는 화면입니다.
주요 기능은 스타일링 + 플러그인을 이용하여 아래와 같이 구현하였습니다.
주요 기능
- 게시글 상세
- 코드 블럭 (맥 스타일, Syntax Highlighting)
- 공유 기능
- 이전/다음 포스트 이동 기능
- 코멘트 기능
| Light | Dark |
|---|---|
 |  |
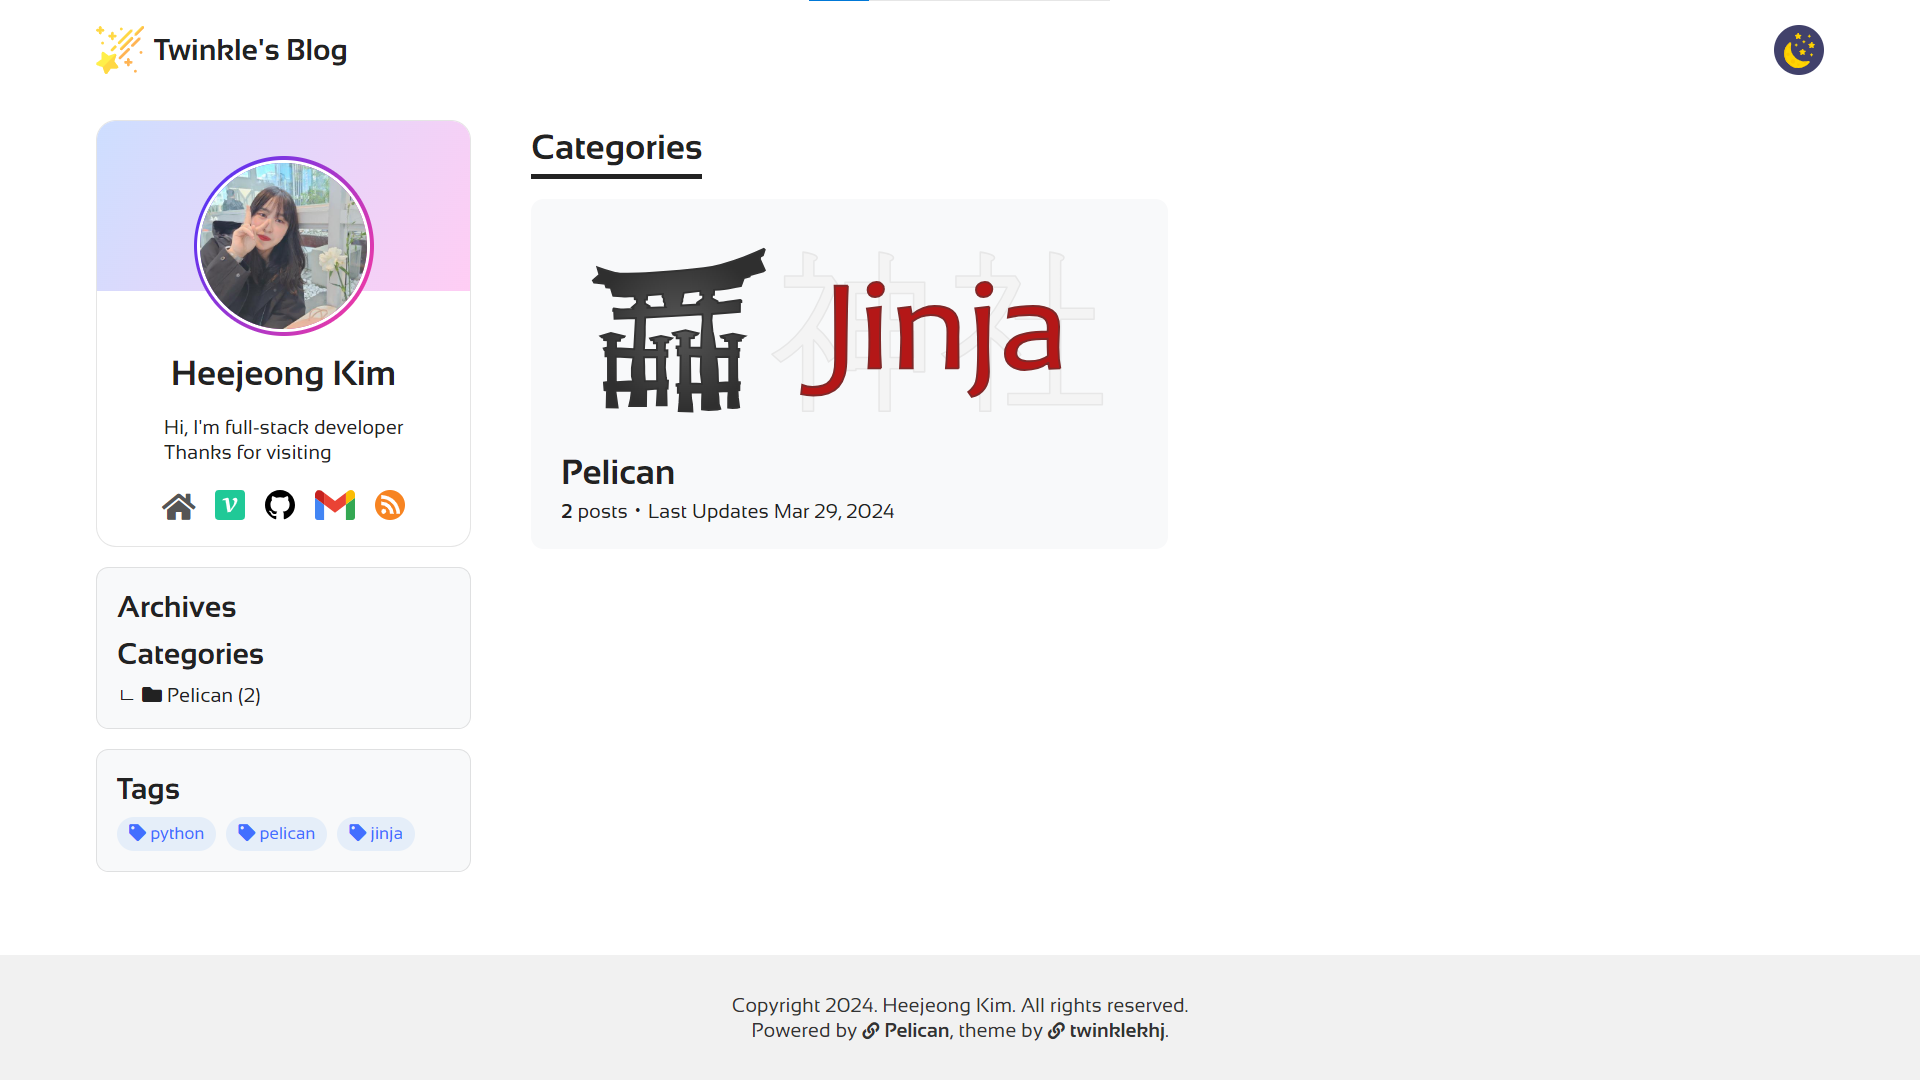
2.3 categories.html
categories.html은 카테고리 목록을 보여주는 화면입니다.
Category 목록은 이미 사이드바에 있기 때문에 다른 화면이 필요했고, velog의 시리즈 기능을 모티브로 categories 화면을 구상하였습니다.
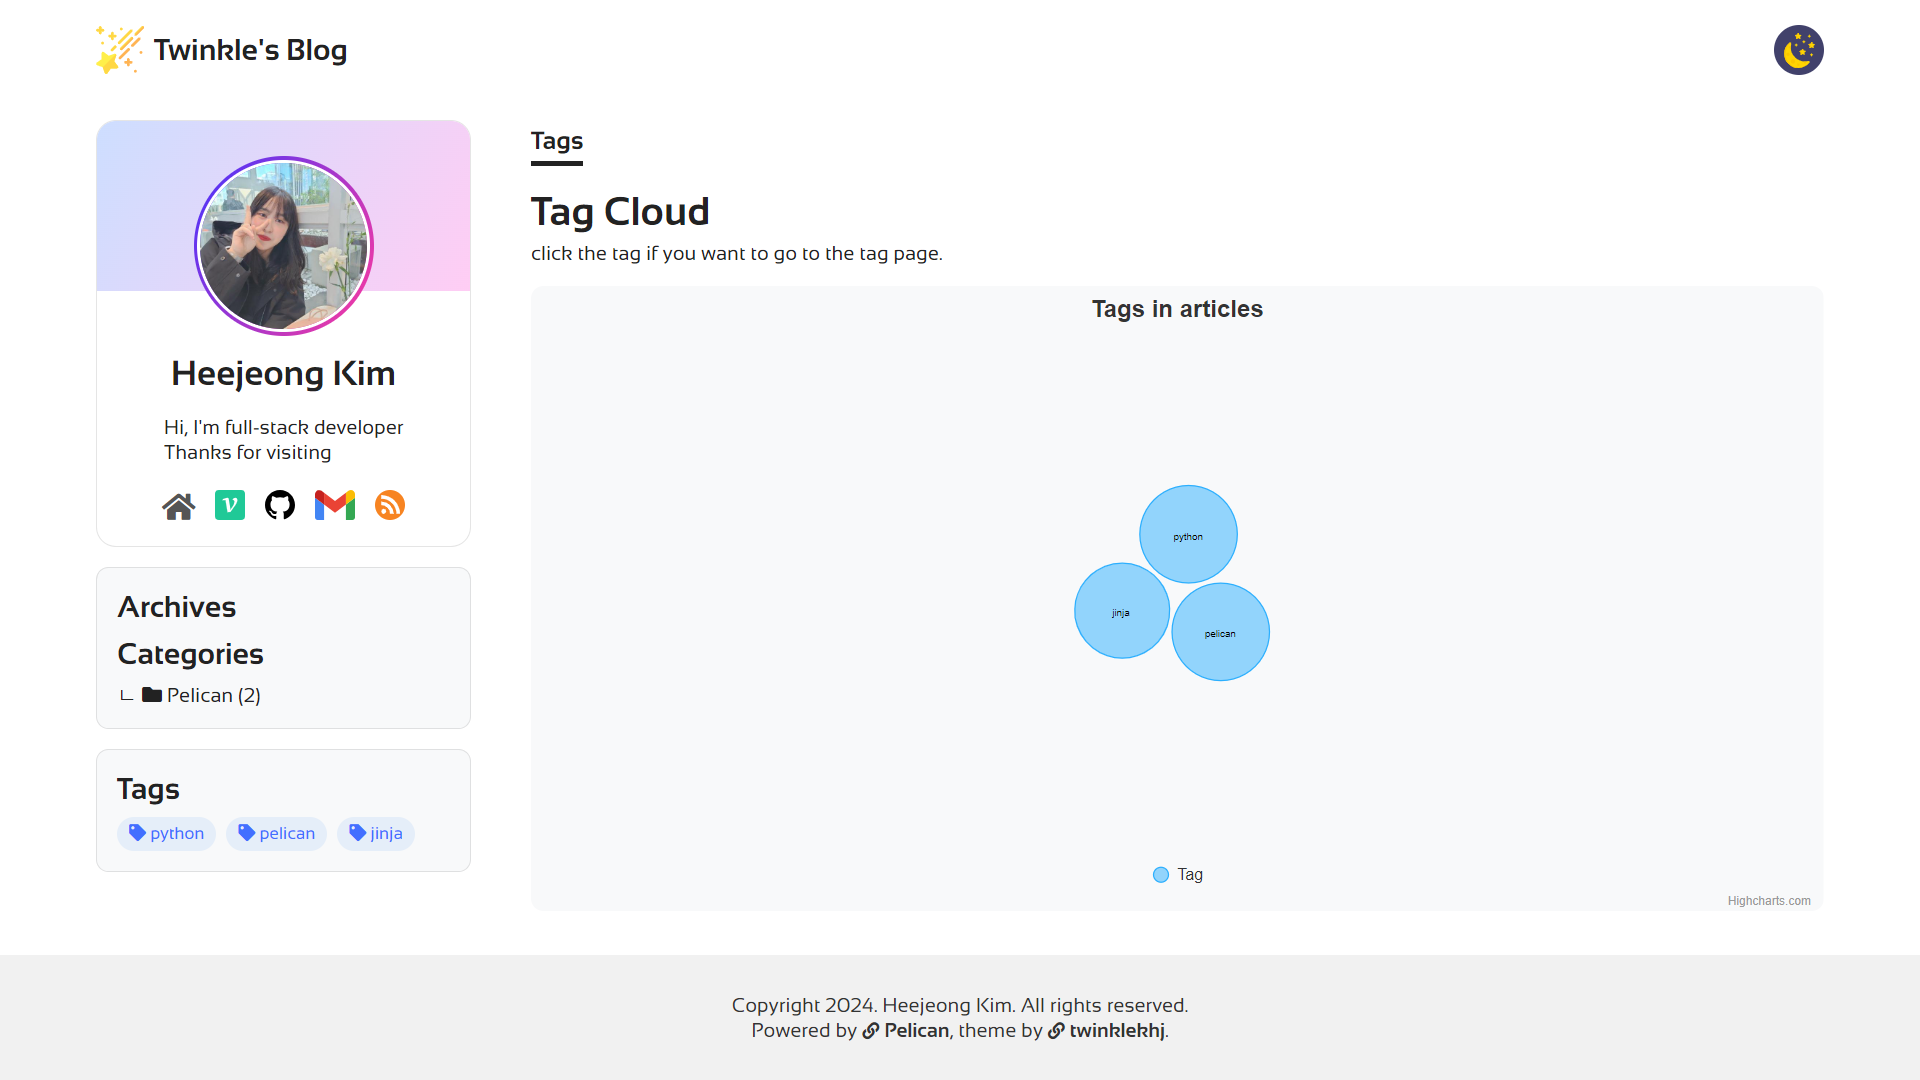
2.4 tags.html
tags.html은 태그 목록을 보여주는 화면입니다.
Tag 목록도 이미 사이드바에 있기 때문에, Highcharts 라이브러리를 이용하여 Bubble 형태의 차트로 화면을 구상하였습니다.
Highcharts
아래 코드를 참고했습니다.
3. Custom Template
블로그 테마를 만들다보니 문득 궁금해졌습니다.
- 포스트 목록외에는 경로를 내맘대로 지정할 수는 없는건가?
- html 파일을 추가하면 나만의 홈페이지 경로를 추가할 수는 없는건가?
콘텐츠에 메타 정보를 이용해서 커스텀 템플릿을 만들 수 있습니다.
3.1 md 파일 생성
content 폴더에 md 파일을 생성하여 원하는 커스텀 정보로 수정합니다.
수정할 메타 정보
url: 접근할 urlsave_as: content 파일 생성 경로template: 사용할 템플릿 파일
저는 drafts 목록을 볼수 있도록 커스텀 페이지를 추가로 만들었습니다.
Title: Drafts
Slug: drafts
Date: 2024-04-02
url: drafts/
Save_as: drafts/index.html
Template: custom/drafts
3.2 Template 파일 생성
template 메타 정보에 적은 파일을 생성합니다.
<!-- 파일 위치: templates/custom/drafts.html -->
{% extends "template/base.html" %}
{% block title %}{{ super() }} - Drafts{% endblock %}
{% block content_title %}
    <h6 class="desc">Drafts</h6>
    <h3 class="title">Posts</h3>
{% endblock %}
{% block content %}
    <ol class="post-list">
        {% for article in drafts %}
            {{ section(article) }}
        {% endfor %}
    </ol>
{% endblock content %}
3.3 Demo
이제 커스텀 url로 접근하면 렌더링한 페이지를 볼 수 있습니다.

💎 References
💎 마치며
Insights
만들다보니 여러가지 추가적인 인사이트를 얻을 수 있었습니다.
정적 사이트 동작원리
당연하게도 정적 사이트 생성기 프로그램을 분석했으니, 대강의 흐름을 알 수 있었습니다.
- 형식에 맞춰 포스팅 작성
- 빌드 & 실행 &배포
- 커스터마이징하는 방법
아마 유사한 프로그램인 Jekyll을 파보다보면 비슷할 거 같다는 느낌을 받았습니다.😁
RSS Feed
RSS라는 것을 전혀 몰랐는데 사이트에 RSS 기능 추가해보고, 다른 사이트 RSS 구해보기도 하고 굉장히 신선한 기술을 알게되었습니다.
velog도 RSS를 지원하구요. 현재 블로그 RSS: https://api.velog.io/atom/@developer_khj/
Store 기능 Vanilla로 구현하기
theme 기능을 구현하면서 전역 상태 관리가 필요해졌습니다. 요즘에 react를 쓰면서 전역상태 관리를 redux로 했더니, 없이 하려니까 없인 못살겠다 싶었습니다 🤦♀️
Vailla JS에서 순수 Store를 만들면서 redux가 얼마나 편리한 라이브러리인지, 어떤 원리로 동작하는지 조금 더 깨닫게 되는 계기가 되었습니다
Conclusion
갑자기 신기술에 꽂혀 목매고 있는 나 자신...
velog에 포스팅을 하면서 블로그를 만드는 나 자신...
GitHub Blog는 개발자의 숙원이라 불릴 만큼 대단한 일이라고 생각하며, 열심히 기술을 연마해보았습니다. 기술 분석에 대한 스킬이 한층 더 업그레이드 된 기분입니다.🤗