토큰의 일종인 JSON Web Token 을 이용하여 토큰방식 인증을 구현해보았다. 이번 스프린트를 통해 토큰의 개념을 이해하고, 쿠키/세션 방식과의 차이를 알아보았다.
스프린트 시작 전 아래와 같이 상황을 설명하고 있다.
현재 서버에서는 세션을 이용한 인증방식을 사용하고 있습니다.
하지만 서버의 반응이 느려지는 등 서버에 가해지는 부하가 굉장한 상태입니다.
회사에서는 당장 서버의 확장은 어렵다는 입장입니다.
이제 책임자로서 여러분은 이제 조금이라도 부하를 줄이기 위해 인증방식을 토큰인증 방식으로 다시 구현해야 합니다.
Server
서버 최상단(index.js)
cookie parser가 사용되었다. 요청된 쿠키를 쉽게 추출할 수 있도록 도와주는 미들웨어이다. 간단히 구글링하여 쿠키의 CRUD 사용법을 알아보았다. https://jw910911.tistory.com/59
//쿠키조회기능: req.cookies.[cookie name]
//쿠키생성기능: 'hasVisited'가 key, '1' 이 value 입니다.
// res.cookie('hasVisited', '1', {
//   maxAge: 60*60*1000,
//   httpOnly: true,
//   path:'/visitors'
// });
//삭제기능: res.clearCookie('hasVisited', {path: '/visitors'}) require("dotenv").config();
const fs = require("fs");
const https = require("https");
const cors = require("cors");
const cookieParser = require("cookie-parser");
const express = require("express");
const app = express();
const controllers = require("./controllers");
app.use(express.json());
app.use(express.urlencoded({ extended: false }));
app.use(
cors({
origin: ["https://localhost:3000"],
credentials: true,
methods: ["GET", "POST", "OPTIONS"],
})
);
app.use(cookieParser());
app.post("/login", controllers.login);
app.get("/accesstokenrequest", controllers.accessTokenRequest);
app.get("/refreshtokenrequest", controllers.refreshTokenRequest);
const HTTPS_PORT = process.env.HTTPS_PORT || 4000;
// 인증서 파일들이 존재하는 경우에만 https 프로토콜을 사용하는 서버를 실행합니다.
// 만약 인증서 파일이 존재하지 않는경우, http 프로토콜을 사용하는 서버를 실행합니다.
// 파일 존재여부를 확인하는 폴더는 서버 폴더의 package.json이 위치한 곳입니다.
let server;
if(fs.existsSync("./key.pem") && fs.existsSync("./cert.pem")){
const privateKey = fs.readFileSync(__dirname + "/key.pem", "utf8");
const certificate = fs.readFileSync(__dirname + "/cert.pem", "utf8");
const credentials = { key: privateKey, cert: certificate };
server = https.createServer(credentials, app);
server.listen(HTTPS_PORT, () => console.log("server runnning"));
} else {
server = app.listen(HTTPS_PORT)
}
module.exports = server;controller
아래와 같은 요청을 처리하는 코드를 작성하였다.
1. controllers/login.js (POST /login)
- request로부터 받은 userId, password와 일치하는 유저가 DB에 존재하는지 확인합니다.
- 일치하는 유저가 없을 경우:
- 로그인 요청을 거절합니다. - 일치하는 유저가 있을 경우:
- 필요한 데이터를 담은 두 종류의 JWT(access, refresh)를 생성합니다.
- 생성한 JWT를 적절한 방법으로 반환합니다.
- access token은 클라이언트에서 react state로 다루고 있습니다.
- refresh token은 클라이언트의 쿠키에서 다루고 있습니다.
jsonwebtoken 라이브러리를 사용해 토큰을 생성하는 방법은 아래와 같다.
const jwt = require('jsonwebtoken');
const token = jwt.sign(토큰에_담을_값, ACCESS_SECRET, { 옵션1: 값, 옵션2: 값, ... });
jwt.sign() 함수에 들어가는 4가지 인자는 아래와 같다.
- userInfo : 아이디, 비밀번호 등 사용자 정보가 들어간 object이다. 형식은 상관없음.
- secretKey : 여러가지 복잡한 문자열로 되어있는 키.
- options: 토큰에 대한 여러가지 정보를 설정한다. expiresIn은 토큰 만료일, issuer, subject는 토큰에 대한 정보이다. 외에도 options가 더 있다.
- 4번째 인자로 들어가는 익명함수 : token 생성결과를 4번째 인자의 콜백함수로 받을 수 있으므로 넣어준 함수.
    //...
	// DB에서 사용자가 입력한 id & pw와 일치하는 레코드를 조회해온 다음
    const {id, userId, email, createdAt, updatedAt} = userInfo; //위에서 찾은 1개의 user데이터(객체형태)
    const accessToken = jwt.sign(
      {id, userId, email, createdAt, updatedAt},
      process.env.ACCESS_SECRET,
      {expiresIn: '1h'}
      );
    const refreshToken = jwt.sign(
      {id, userId, email, createdAt, updatedAt},
      process.env.REFRESH_SECRET,
      {expiresIn: '7d'}
      );

// 쿠키에 refresh token을 담아 보내고
    res.cookie('refreshToken', refreshToken, { //(쿠키이름, 쿠키 내 들어가야할 payload, {옵션...})
      sameSite: 'None',
      httpOnly: 'true',
      secure: 'true'
    });

// 응답으로 access token을 담아 보낸다
    res.status(200).json({
      data: {
        accessToken: accessToken
      },
      message: "ok"
    })
2. controllers/accesstokenrequest.js (GET /accesstokenrequest)
- authorization header에 담긴 토큰이 서버에서 생성한 JWT인지 확인합니다.
- 서버에서 생성한 유효한 토큰일 경우, 유효하지 않은 토큰일 경우 각각 다른 응답을 반환합니다.
jsonwebtoken 라이브러리를 사용해 토큰을 verify(해독, 검증) 하는 방법은 아래와 같다.
const jwt = require('jsonwebtoken');

const authorization = req.headers['authorization'];
const token = authorization.split(' ')[1];
const data = jwt.verify(token, ACCESS_SECRET);
jwt.verify() 함수에 들어가는 매개변수 3개는 아래와 같다.
- token: client에게서 받은 token
- secretkey : token 생성 시 사용했던 secretKey
- 3번째 인자로 들어간 익명함수 : 유효성 검사 결과를 처리할 callback 함수
예시)
jwt.verify(token, process.env.ACCESS_SECRET, async(err, data)=>{
    if(err){ //해독할 시 에러..(해독할 수 없는 것)
      res.status(400).json({
        data: null,
        message: 'invalid access token'
      });
    } else{
      const userInfo = await Users.findOne({
        where: { userId: data.userId } //해독하여 얻은 payload의 userId 속성.
      });
      if (!userInfo) {
        // 일치하는 유저가 없을 경우
        res.status(400).json({
          data: null,
          message: 'access token has been tempered'
        });
      } else {
        // 일치하는 유저가 있을 경우 필요한 데이터(id, userId, email, createdAt, updatedAt)를 응답에 담아 반환합니다.
        const { id, userId, email, createdAt, updatedAt } = userInfo;
        res.status(200).json({
          data: {
            userInfo: { id, userId, email, createdAt, updatedAt }
          },
          message: 'ok'
        });
      }
    }
  });
3. .controllers/refreshtokenrequest (GET /refreshtokenrequest)
- 요청에 담긴 refresh token이 유효하다면 새로운 access token을 발급해줌과 동시에 유저가 요청한 정보를 반환합니다.
- 요청에 담긴 refresh token이 유효하지 않거나, 조작된 토큰일 경우 각각 다른 응답을 반환합니다.
const refreshToken = req.cookies['refreshToken'];
//요청에 담긴 refresh token은 사실 쿠키안에 들어있다. 쿠키명으로 일단 쿠키를 조회한다(READ)

  if(!refreshToken){// 쿠키 내 refresh token이 존재하지 않으면
    res.status(400).json({
      data: null,
      message: "refresh token not provided"
    })
  }

  //refresh token이 유효한지, 서버가 가지고 있는 비밀 키로 생성한 것이 맞는지 확인합니다.(verify 메소드)
  jwt.verify(refreshToken, process.env.REFRESH_SECRET, async(err, data)=>{
    if(err){ //유효한 토큰이 아닐 경우...
      res.status(400).json({
        data: null,
        message: "invalid refresh token, please log in again"
      })
    } else{
      const userInfo = await Users.findOne({
        where: { userId: data.userId } //해독하여 얻은 payload의 userId 속성.
      });

      if(!userInfo){ //일치하는 유저가 없을 경우:
        res.status(400).json({
          data: null,
          message: "refresh token has been tempered"
        })
      } else { //일치하는 유저가 있을 경우: 필요한 데이터(id, userId, email, createdAt, updatedAt)를 응답에 담아 반환합니다.
        const { id, userId, email, createdAt, updatedAt } = userInfo;
        const accessToken = jwt.sign(
          {id, userId, email, createdAt, updatedAt},
          process.env.ACCESS_SECRET,
          {expiresIn: '1h'}
          );

        res.status(200).json({
          data: {
            accessToken,
            userInfo: { id, userId, email, createdAt, updatedAt }
          },
          message: 'ok'
        });
      }
    }
  });
Client
- Login 컴포넌트의 loginRequestHandler메소드를 사용하여 상위 컴포넌트인 App 컴포넌트의 state를 적절히 변경시킵니다.
- App 컴포넌트에 정의된 메소드를 사용하여 App의 state를 변경하세요. - App 컴포넌트의 isLogin 상태에 따라 Mypage 혹은 Login 컴포넌트를 렌더링합니다.
- 적절한 props를 Mypage/Login 컴포넌트에 전달합니다. - Mypage 컴포넌트 accessTokenRequest, refreshTokenRequest 메소드를 구현합니다.
Login 컴포넌트
아래와 같이 로그인 버튼을 클릭하면 state를 변경하는 함수를 구현해주었다. 다만 전달인자로 들어가는 정보(access token)를 AJAX 요청의 결과값에서 끌어내었다.(AJAX 요청 보낼 때 쿠키를 같이 보내야 하므로 withCredentials: true 속성을 이번에도 추가해주었다)
loginRequestHandler() {
    /*
    TODO: Login 컴포넌트가 가지고 있는 state를 이용해 로그인을 구현합니다.
    로그인을 담당하는 api endpoint에 요청을 보내고, 받은 데이터로 상위 컴포넌트 App의 state를 변경하세요.
    초기 App:
    state = { isLogin: false, accessToken: "" }
    로그인 요청 후 App:
    state = { isLogin: true, accessToken: 서버에_요청하여_받은_access_token }
    */
    axios.post('https://localhost:4000/login', {
      userId: this.state.userId,
      password: this.state.password
    }, {
      withCredentials: true
    })
    .then(res => {
      this.props.loginHandler(res.data); //res.data = { data: { accessToken: 'fakeAccessToken' } }
    })
    .catch(err => {
      //console.log(err);
    })
  }
props로 받은 loginHandler 함수는 부모컴포넌트에서 아래와 같이 정의되어 있다.
loginHandler(data) { //this.state.isLogin 값을 바꿔줌, data = { data: { accessToken: 'fakeAccessToken' } }
    this.setState({
      isLogin: true,
      accessToken: data.data.accessToken
    });
  }
Mypage 컴포넌트
accessTokenRequest과 refreshTokenRequest 버튼이 존재하는 컴포넌트이다. 각각의 버튼을 클릭하면 GET요청을 보내고, 받은 데이터로 state를 변경시켜야 한다.
accessTokenRequest 함수내에서 아래를 구현하였다.
1. get요청 보내기(accessToken props를 authorization header에 담아)
2. 받은 데이터로 Mypage 내 state를 변경시키기
토큰이 포함된 AJAX요청을 보낼 때에는 Header의 authorization 속성에 실어서 보내야 한다.
accessTokenRequest() {
    /*
    TODO: 상위 컴포넌트인 App에서 받은 props를 이용해 accessTokenRequest 메소드를 구현합니다.
    access token을 처리할 수 있는 api endpoint에 요청을 보내고, 받은 데이터로 Mypage 컴포넌트의 state (userId, email, createdAt)를 변경하세요
    초기 Mypage:
    state = { userId: "", email: "", createdAt: "" }
    accessTokenRequest 후 Mypage:
    state = { userId: "특정유저id", email: "특정유저email", created: "특정유저createdAt" }

    ** 주의사항 **
    App 컴포넌트에서 내려받은 accessToken props를 authorization header에 담아 요청을 보내야 합니다.
    */
    axios.get('https://localhost:4000/accesstokenrequest', {
      headers: {
        authorization: `Bearer ${this.props.accessToken}`
      }}, {
      withCredentials: true
    })
    .then(res => {
      //console.log(res);
      const {userId, email, createdAt} = res.data.data.userInfo;
      this.setState({
        userId: userId,
        email: email,
        createdAt: createdAt
      })
    })
    .catch(err => {
      //console.log(err);
    })

  }
refreshTokenRequest 함수에서는 아래를 구현하였다.
1. get요청 보내기
2. 받은 데이터로 Mypage 내 state를 변경시키기
3. 상위 컴포넌트의 state도 변경시키기
refreshTokenRequest() {
    /*
    TODO: 쿠키에 담겨져 있는 refreshToken을 이용하여 refreshTokenRequest 메소드를 구현합니다.
    refresh token을 처리할 수 있는 api endpoint에 요청을 보내고, 받은 데이터로 2가지를 구현합니다.
    1. Mypage 컴포넌트의 state(userId, email, createdAt)를 변경
    2. 상위 컴포넌트 App의 state에 accessToken을 받은 새 토큰으로 교환
    */
    axios.get('https://localhost:4000/refreshtokenrequest', {
      withCredentials: true
    })
    .then(res => {
      //console.log(res);
      const {userId, email, createdAt} = res.data.data.userInfo;
      this.setState({
        userId: userId,
        email: email,
        createdAt: createdAt
      })
      this.props.issueAccessToken(res.data.data.accessToken)
    })
    .catch(err => {
      //console.log(err);
    })

  }
props로 받은 issueAccessToken 함수는 아래와 같이 부모컴포넌트 내에서 정의되어 있다.
 issueAccessToken(token) { //accessTocken 추가!
    this.setState({
      accessToken: token
    })
  }
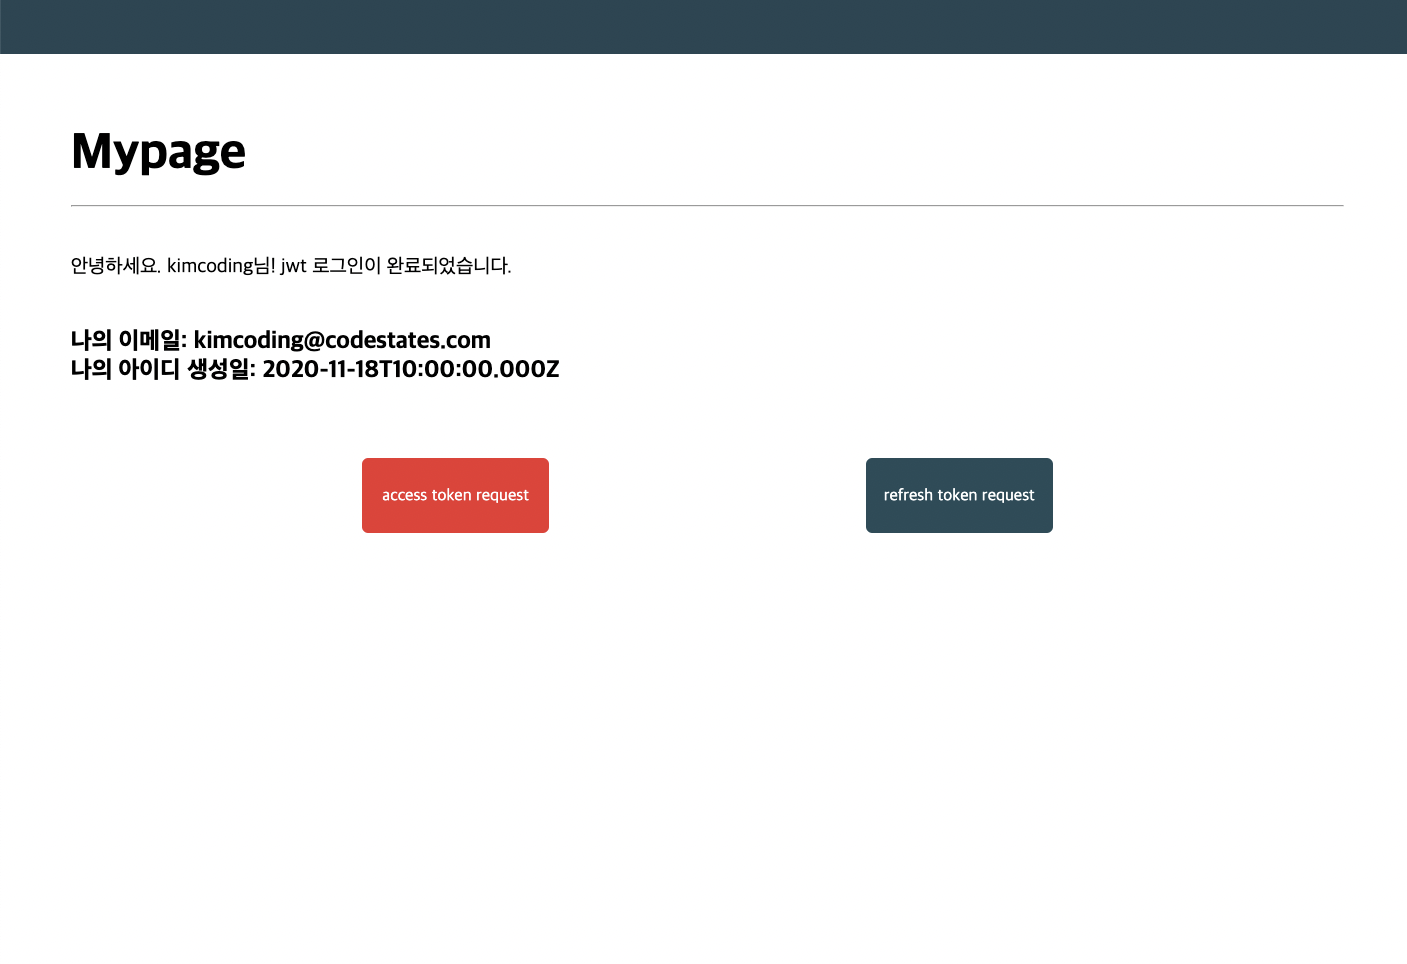
성공적으로 로그인 한다면 아래와 같은 화면이 나타나고(Mypage 컴포넌트)
버튼 클릭 시 아래와 같이 변경된 state의 정보가 렌더링된다.