spring initializr로 프로젝트 생성
프로젝트 이름은 Farmer's Story이다.
아래의 화면과 같이 설정했다.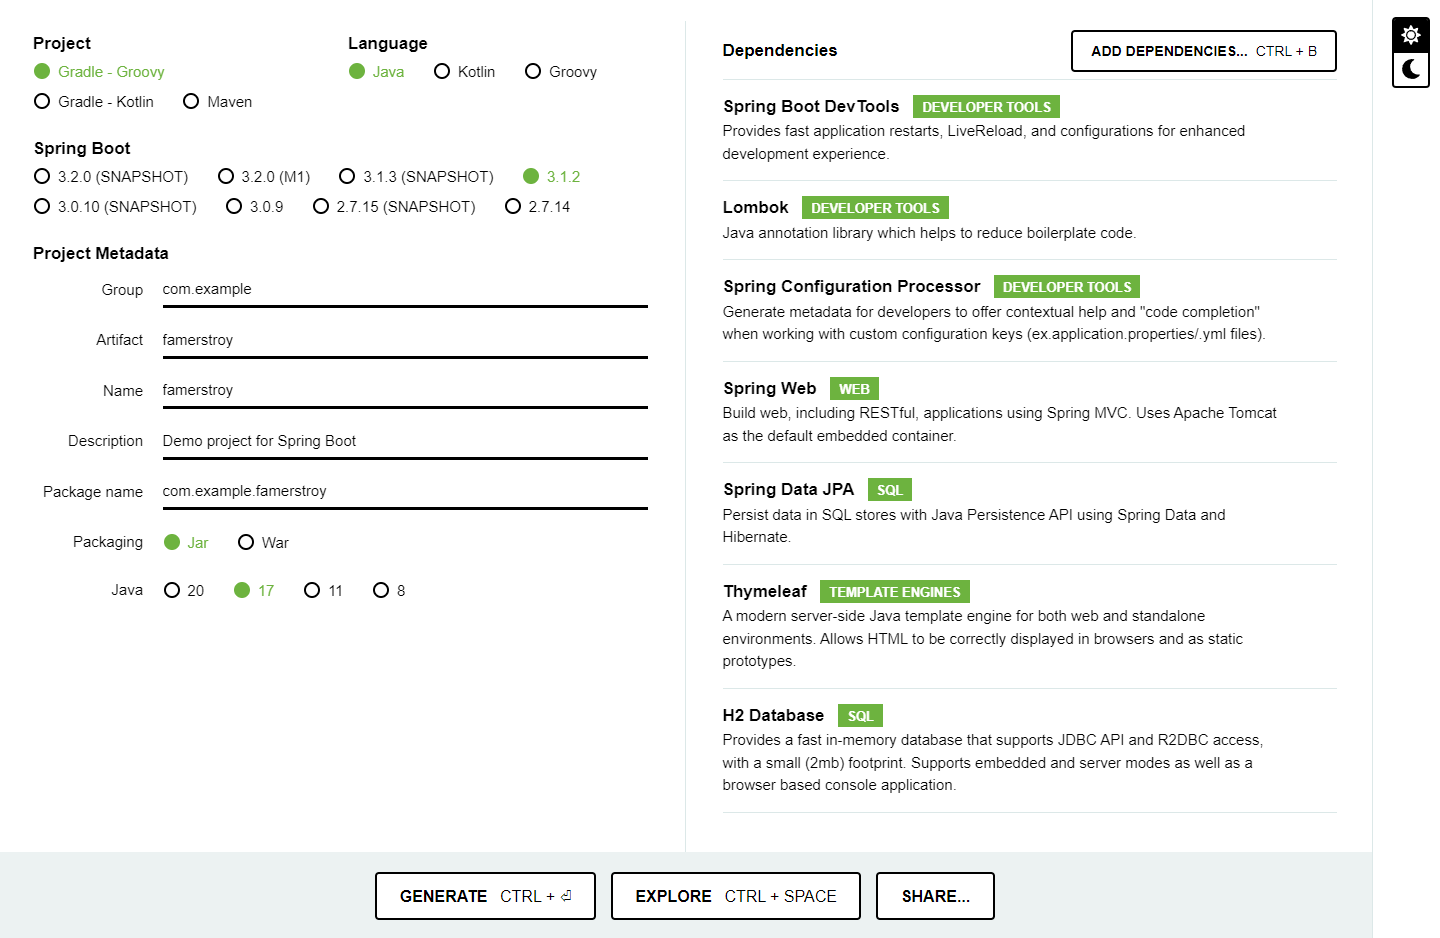
zip폴더가 다운로드 되면 자기가 원하는 폴더 안에 압축을 풀어준다.
들어가면 기능, 화면, DB설계에 대해 적혀있다.
farmer's story 프로젝트 구성
프로젝트 폴더 구조이다.
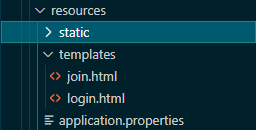
화면만들기
templates에 html을 넣어준다.
static은 정적이기 때문에 안에 css또는 js파일을 넣어준다.
회원가입페이지
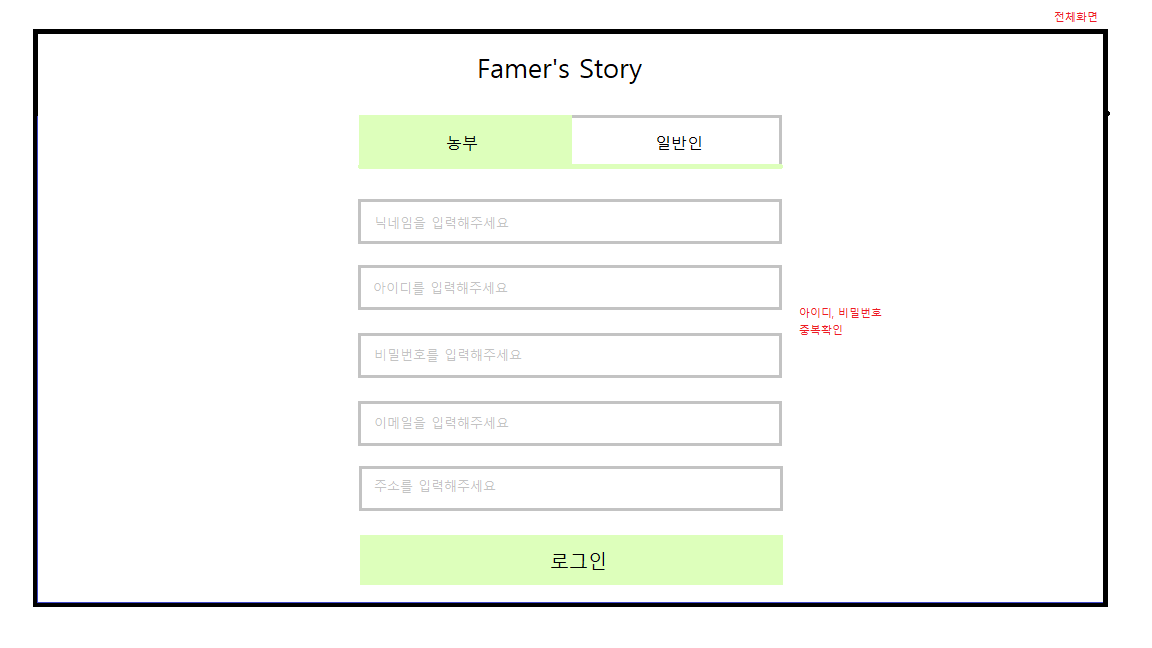
내가 설계한대로 만들어본다.
일단 html로 필요한 것들만 적어준다.
<!DOCTYPE html>
<html xmlns:th="http://www.thymeleaf.org">
<head>
    <meta charset="UTF-8">
    <meta name="viewport" content="width=device-width, initial-scale=1.0">
    <title>회원가입</title>
</head>
<body>
    <section class="mainSection">
        <div>
            <h1>Farmer's Story</h1>
        </div>
        <div class="userAuthority">
            <button>
                <h5>농부</h5>
            </button>
            <button>
                <h5>일반인</h5>
            </button>
        </div>
        <div class="inputTextfields">
            <div>
                <input type="text" placeholder="닉네임(이름)을 입력해주세요">
                <button type="button" class="checkBtn">중복확인</button>
            </div>
            <div>
                <input type="text" placeholder="아이디를 입력해주세요">
                <button type="button" class="checkBtn">중복확인</button>
            </div>
            <div>
                <input type="password" placeholder="비밀번호를 입력해주세요">
            </div>
            <div>
                <input type="password" placeholder="비밀번호를 확인해주세요">
            </div>
            <div>
                <input type="text" placeholder="이메일을 입력해주세요">
            </div>
            <div>
                <input type="file">
            </div>
            <div>
                <button class="joinBtn">가입하기</button>
            </div>
        </div>
    </section>
</body>
</html>
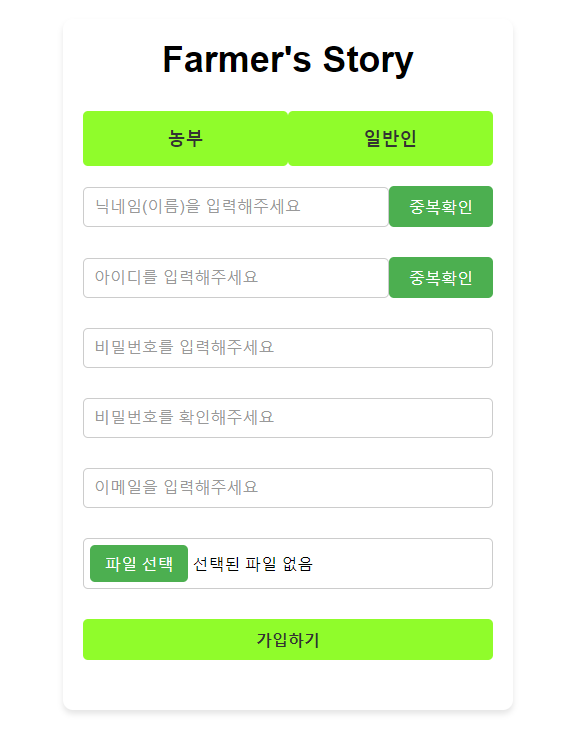
그럼 이렇게 이상하지만..ㅋㅋㅋ필요한 것은 다 넣은 회원가입 페이지를 만들었다.
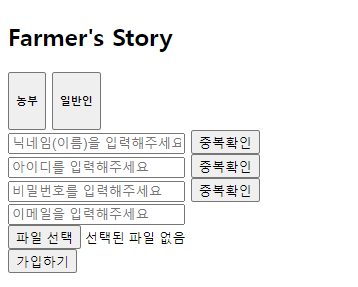
CSS파일을 적용해준다.
* {
    margin: 0;
    padding: 0;
    box-sizing: border-box;
}

body {
    font-family: Arial, sans-serif;
}

section {
    display: flex;
    flex-direction: column;
    justify-content: center;
    padding: 20px;
    background-color: #fff;
    border-radius: 10px;
    box-shadow: 0 4px 6px rgba(0, 0, 0, 0.1);
    max-width: 450px;
    margin: 0 auto;
    margin-top: 80px;
    text-align: center;
}

h1 {
    font-size: 36px;
    margin-bottom: 30px;
}

.userAuthority {
    display: flex;
    justify-content: space-between;
    width: 100%;
    margin-bottom: 20px;
}

.userAuthority button {
    flex: 1;
    padding: 10px;
    background-color: #90FC2B;
    border: none;
    border-radius: 5px;
    cursor: pointer;
}

.userAuthority button h5 {
    font-size: 18px;
    color: #333;
    margin: 5px 0;
}

.inputTextfields {
    display: flex;
    flex-direction: column;
    align-items: center;
}

.inputTextfields div {
    margin-bottom: 30px;
    width: 100%;
    display: flex;
    align-items: center;
}

input[type="text"],
input[type="password"],
input[type="file"] {
    flex: 1;
    padding: 10px;
    border: 1px solid #ccc;
    border-radius: 5px;
    font-size: 16px;
}

input[type="text"]::placeholder,
input[type="password"]::placeholder {
    color: #999;
}

input[type="file"] {
    padding: 6px;
}

input[type="file"]::-webkit-file-upload-button {
    background-color: #4CAF50;
    color: #fff;
    padding: 8px 15px;
    border: none;
    border-radius: 5px;
    cursor: pointer;
}

input[type="file"]::-webkit-file-upload-button:hover {
    background-color: #45a049;
}

input[type="file"]::-webkit-file-upload-button:active {
    background-color: #3e9142;
}

.checkBtn {
    background-color: #4CAF50;
    color: #fff;
    padding: 10px 20px;
    border: none;
    border-radius: 5px;
    cursor: pointer;
    font-size: 16px;
}

.joinBtn {
    background-color: #90FC2B;
    color: #333;
    padding: 10px 20px;
    border: none;
    border-radius: 5px;
    cursor: pointer;
    font-size: 16px;
    width: 100%;
    font-weight: bold;
}

.joinBtn:hover {
    background-color: #55E61C;
}

.joinBtn:active {
    background-color: #55E61C;
}
적용하면 짜라란~~👍
로그인페이지
자 로그인을 만들어보자
<!DOCTYPE html>
<html xmlns:th="http://www.thymeleaf.org">
<head>
    <meta charset="UTF-8">
    <meta name="viewport" content="width=device-width, initial-scale=1.0">
    <title>Document</title>
</head>
<body>
    <section>
        <div>
            <h1>Farmer's Story</h1>
        </div>
        <div class="inputTextfields">
            <div>
                <input type="text" placeholder="아이디를 입력해주세요">
            </div>
            <div>
                <input type="password" placeholder="비밀번호를 입력해주세요">
            </div>
            <div>
                <button class="loginBtn">로그인하기</button>
            </div>
        </div>
    </section>
</body>
</html>
실행하면 요렇게 귀엽게 나온다!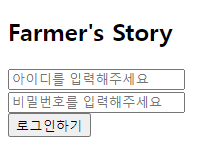
CSS를 적용해본다!
* {
    margin: 0;
    padding: 0;
    box-sizing: border-box;
}

section {
    display: flex;
    flex-direction: column;
    justify-content: center;
    padding: 20px;
    background-color: #fff;
    border-radius: 10px;
    box-shadow: 0 4px 6px rgba(0, 0, 0, 0.1);
    max-width: 450px;
    margin: 0 auto;
    margin-top: 300px;
    margin-bottom: 300px;
    text-align: center;
}

h1 {
    font-size: 36px;
    margin-bottom: 30px;
}

.userAuthority {
    display: flex;
    justify-content: space-between;
    width: 100%;
    margin-bottom: 20px;
}

.inputTextfields {
    display: flex;
    flex-direction: column;
    align-items: center;
}

.inputTextfields div {
    margin-bottom: 30px;
    width: 100%;
    display: flex;
    align-items: center;
}
input[type="text"],
input[type="password"]{
    flex: 1;
    padding: 10px;
    border: 1px solid #ccc;
    border-radius: 5px;
    font-size: 16px;
}

input[type="text"]::placeholder,
input[type="password"]::placeholder {
    color: #999;
}

.loginBtn {
    background-color: #90FC2B;
    color: #333;
    padding: 10px 20px;
    border: none;
    border-radius: 5px;
    cursor: pointer;
    font-size: 16px;
    width: 100%;
    font-weight: bold;
}

.loginBtn:hover {
    background-color: #55E61C;
}

.loginBtn:active {
    background-color: #55E61C;
}
쨔라란!!😎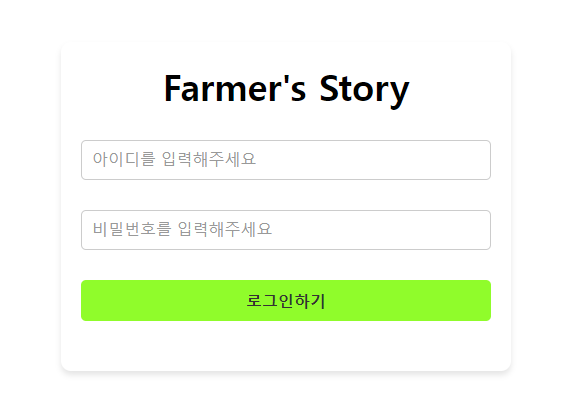
하지만 아직 넣지 않은 것이 있다..
ID / PW 찾기와 회원가입으로 넣어갈 부분을 만들어줘야 한다..
만들어본다..
아 하기전에 css와 html을 분리해줬다!!
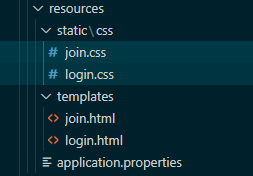
login html을 바꿔줬다
            <div class="passwordText">
                <input type="password" placeholder="비밀번호를 입력해주세요">
            </div>
            <div class="linkText">
                <h5>회원가입</h5>
                <h5>비밀번호찾기</h5>
            </div>
css도 만들어본다
.inputTextfields div {
    margin-bottom: 20px;
    width: 100%;
    display: flex;
    align-items: center;
}

.inputTextfields .passwordText{
    margin-bottom: 15px;
    width: 100%;
    display: flex;
    align-items: center;
}

.inputTextfields .linkText h5{
    font-weight: 100;
    color: gray;
}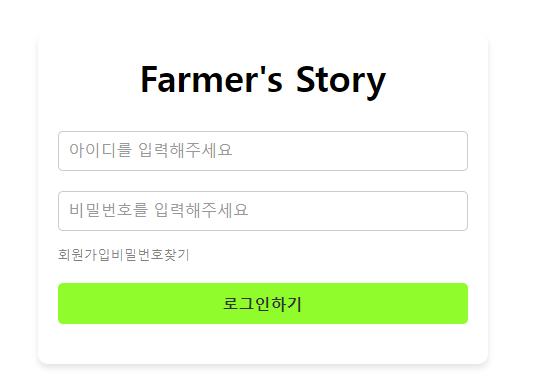
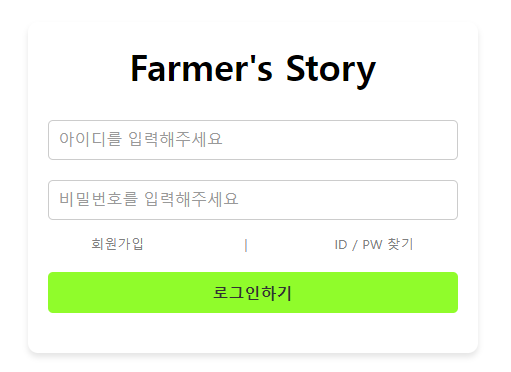
보기 싫으니 중앙정렬을 해본다.
.linkText {
    display: flex;
    justify-content: space-around;
}

.linkText h5 {
    font-weight: 500;
    color: gray;
    cursor: pointer;
    transition: color 0.2s ease-in-out;
    position: relative;
}

.linkText h5:not(:last-child)::after {
    content: "|";
    margin-left: 100px;
}

.linkText h5:hover {
    color: #555;
}
CSS의 속성 transition
transition: color 0.2s ease-in-out;요소의 색상 속성에 부드러운 전환 효과를 적용하는 CSS 규칙이다.
transition: 요소의 서로 다른 상태 간에 부드러운 전환을 만들 수 있는 CSS 속성. 전환될 속성을 정의.
color: 전환의 대상이 되는 특정 속성. 이 경우 클래스 h5내부 요소 의 텍스트 색상을 나타냄
0.2s: 초 단위로 지정된 전환 기간. 이 경우 지속 시간은 0.2초로 설정했음. 따라서 색상 속성이 변경되면 전환이 완료되는 데 0.2초가 걸린다.
ease-in-out: 시간 경과에 따른 전환 속도를 제어하는 타이밍 기능. 이렇게 하면 전환이 쉽게 들어오고 나가는 부드러운 효과가 생성되어 보다 자연스럽게 보인다.
라이브 서버로 켜보면 요렇게 나온당!!
오늘은 여기까지..
다음 프로젝트 실행하는 거 가져오보겠음..