react-formik
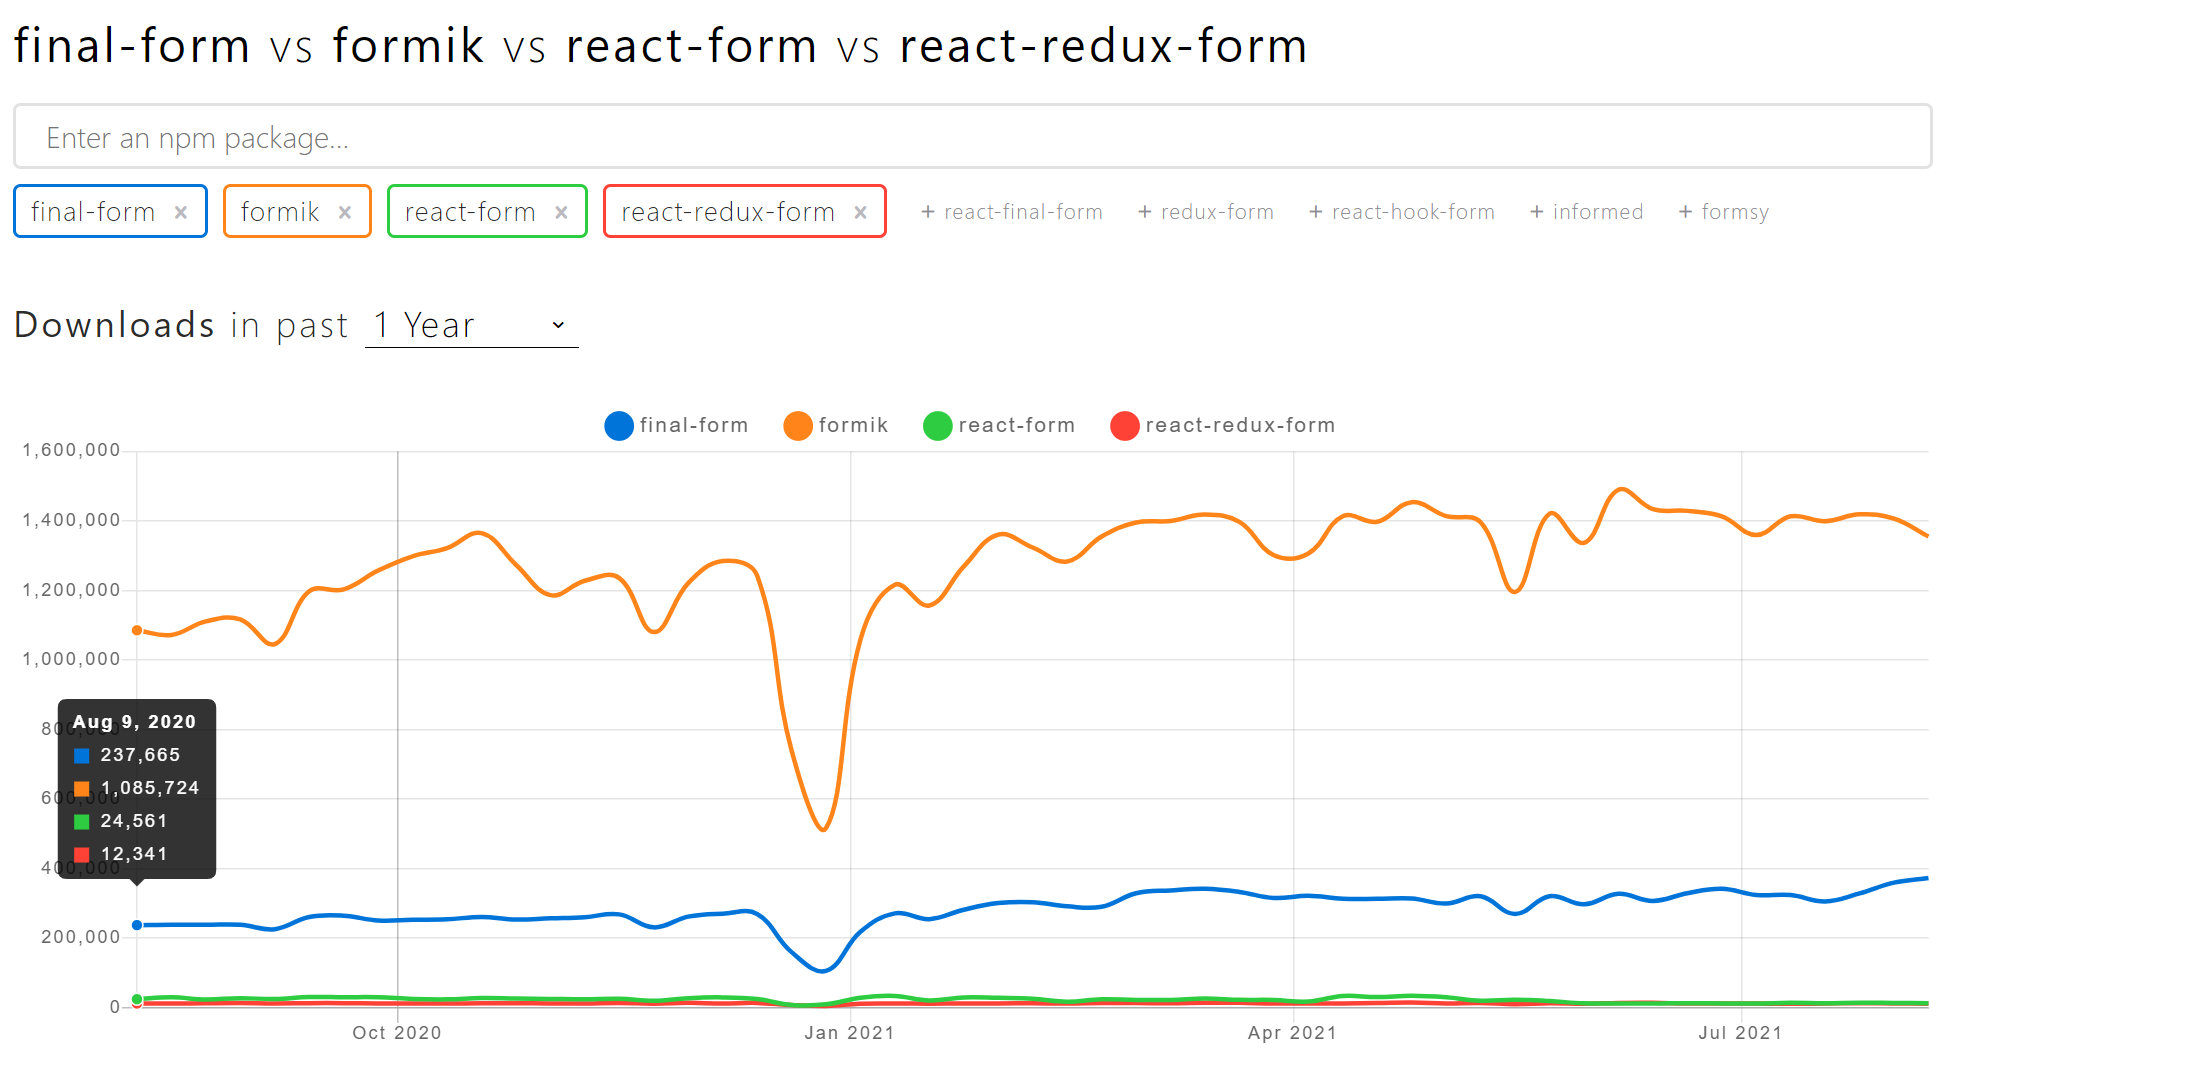
웹 어플리케이션을 만들다 보면 다양한 폼을 사용하게 되는데, 그러한 여러가지 폼들과 여러 폼들을 사용했다면 state를 관리를 해야하는데, 수 많은 useState와 handler들이 만들어질거고 이러한 것들을 좀 더 편리하고 깔끔하게 해주는 redux-form, react-hook-form, formik 라이브러리 등이 있는데 현재 가장 많이 사용하고 있는 formik에 대해 사용해보려고 합니다.

다음과 같은 3가지 부분에 도움을 줄 수 있습니다.
- 양식 상태 안팎에서 값 가져오기
- 유효성 검사 및 오류 메시지
- 양식 제출 처리
Installation
설치는 다음과 같은 명령어를 이용해 설치를 하실 수 있습니다.
formik
npm install formik --save
yarn add formik
yup
npm install yup --save
yarn add yup
formik
formik를 사용하는 방법과 useFormik를 사용하는 방법이 있는데, 공식문서를 보고 formik을 먼저 사용해 봤고,
formik를 사용하면서 validation도 Yup을 이용해 깔끔하고 처리를 하는 것과, 에러 메세지 같은 경우에도 좀 더 간결하게 처리할 수 있다는 점이다.
formik 라이브러리에서 Field 컴포넌트는 그야말로 신세계였다...
<formik 공식문서 Field>
The
<Field>component by default will render an<input>component that, given a name prop, will implicitly grab the respective onChange, onBlur, value props and pass them to the element as well as any props you pass to it.
필드 컴포넌트는 기본적으로 name을 prop으로 주면, 암묵적으로 onChange, onBlur, value를 모든 prop에 전달을 한다는 것이다. 하지만 주의할 점은 initialValue 키 값과 name value 값은 동일해야 한다는 점이다.
<Form>
        <div>
          <label htmlFor="email">email</label>
          <Field name="email" type="text" />
          <div>
            <ErrorMessage name="email" />
          </div>
        </div>

        <label htmlFor="password">password</label>
        <Field name="password" type="password" />
        <div>
          <ErrorMessage name="password" />
        </div>
        <button type="submit">Submit</button>
</Form>
결론
이번에 처음 폼 라이브러리를 사용해봤지만 Formik은 굉장히 직관적이면서 유연하다고 느꼈고, 신세계를 경험해 본 기분이다. input들이 많을 수록 관리하기가 곤란하였고, onChange 및 state 관리도 점점 더 까다롭게 관리를 했지만 이번 Formik 라이브러리를 통해 좀 더 깔끔한 코드와 유지보수를 하기에 좋다고 생각했고 이후 사이드프로젝트를 할 때 formik를 사용해봐야겠다.
출처:
https://www.npmtrends.com/final-form-vs-formik-vs-react-form-vs-react-redux-form
