Vanilla js에서는 scorll event를 dom element 에 붙인다.
React js에서는 직접 element에 event를 붙일 수 없고, onScroll props를 붙이면 event가 붙는다.
(onClick 과 마찬가지라고 생각하면 됨)
과제
codesandbox
key press를 아래로, 위로 하다가 scroll이 넘어가게 되면, scroll이 따라가도록 하는 것을 만들자
| 처음 화면 | 이동 시 |
|---|---|
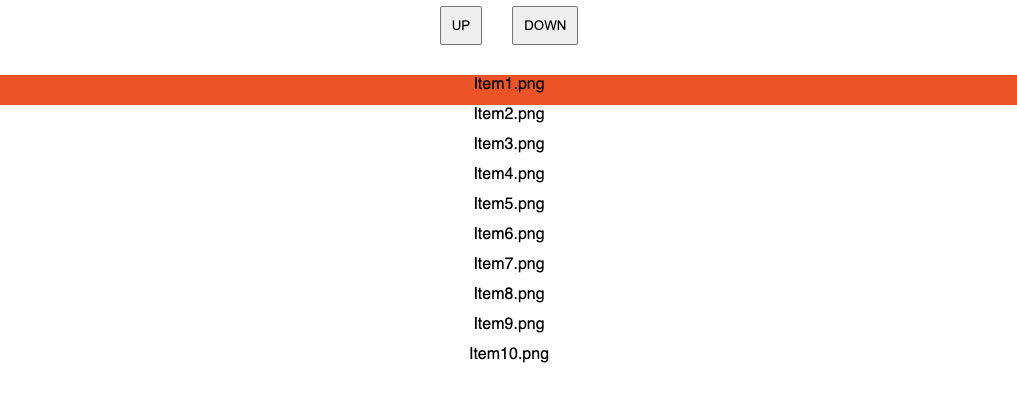 | 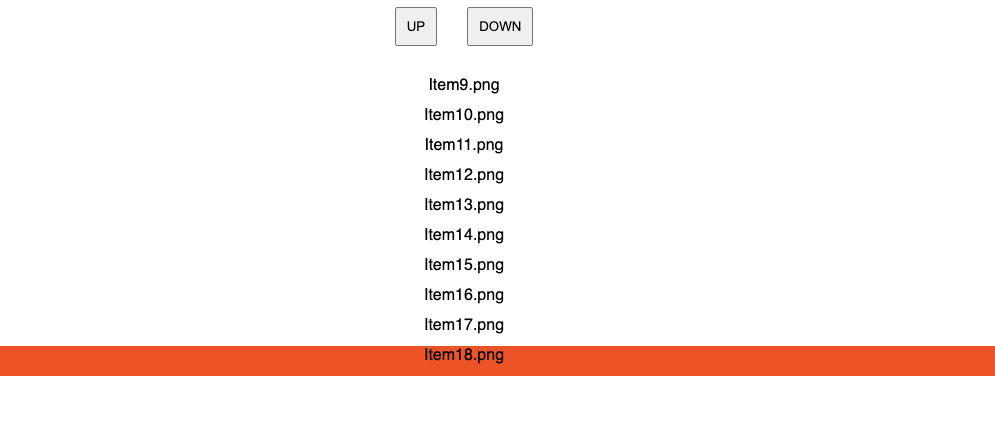 |
알아야 할 것들
html ref
- ref는 DOM의 element이다. useRef에 ref를 넘겨줘서
textInput.current로 접근할 수 있게 된다. 예를 들면textInput.current.focus()를 할 수 있다.
아래와 같이 쓰면, ref를 직접 current에 넘겨줄 수 있다.
const textInput = useRef(null);
return (
	<input ref={(ref) => textInput.current = {myElement: ref, name: 'cho'} } />
)
If you pass a ref object to React with
<div ref={myRef} />, React will set its .current property to the corresponding DOM node whenever that node changes.
- 공식 문서를 보면 arguement에 ref을 바로 넣으면, current에 자동으로 ref를 셋팅해준다.
아래 두 코드는 동일하다.
const textInput = useRef(null);
return (
	<input ref={textRef} />
)
const textInput = useRef(null);
return (
<input ref={ref => textRef(ref)} />
)useRef 사용하는 이유
Syntax
const refContainer = useRef(initialValue);- 값 저장 : 현재 저장하고 싶은 값을 re-rendering없이 저장할 수 있다. (react life-cycle과 분리되어 있다고 생각하면 됨)
- DOM 참조 : DOM을 참조할 수 있다. 현재 DOM에서 element의 scroll위치, image의 size 등을 참조할 수 있다.
(참고 : useState로 관리하게 되면, rendering이 계속 발생하므로 비효율적이고, 코드짜기가 어려워진다.)
onScroll
Syntax
function callbackFunc = (e) => {
  console.log(e.target.scrollTop)
}
return (
  <div onScroll={callbackFunc})> File.png </div>
)- scroll이 발생하면, callback이 실행된다.
- jsx의 element에 scroll event를 붙일 수 있다.
- event가 parameter로 들어간다.
scrollTop, scrollLeft
Syntax
Element.scrollTop- scroll event에 있는 값이다.
- scroll로 가려진 부분까지 포함된 전체 범위에서 Top위치, Left위치를 알 수 있다.
- Bottom은 따로 없기 때문에, 계산값으로 만들어 줘야한다.
scrollTo
Syntax
Element.scrollTo(x-coord, y-coord)
Element.scrollTo(options)- scroll을 특정좌표위치로 보낼 수 있다.
scrollBy
Syntax
Element.scrollBy(x-coord, y-coord)
Element.scrollBy(options)
scroll을 일정 양만큼 이동시킬 수 있다.
scrollIntoView
Syntax
Element.scrollIntoView(alignToTop) // boolean
Element.scrollIntoView(options)
viewport기준으로 scroll 위치를 정할 수 있다.
옵션에는 기본적으로 {block: 'start'}, {block: 'end'}가 있다. Element를 viewport기준의 첫번째, 끝으로 스크롤을 위치시킨다.
Logic
아래 index [1], [2], ...를 실제 코드에 주석으로 달아놨다.
[1] useRef
맨 아래 example code에 있는 변수명을 괄호에 적음
- 현재 scrollTop, scrollBottom을 저장 (
currentScroll) - 개별 Item의 Top, Bottom값 저장 (
itemRef) - list(container)를 참조 (
containerRef)
[2] 각 Item의 Top, bottom 값 (아래에서는 item position으로 부르겠다.)
- Item의 index값을 알고 있으므로, Item의 heigth * index로 위아래 위치를 계산할 수 있다.
[3] 아래로 이동하는 경우
- item position이 스크롤을 넘는순간부터 다음 Item(nextItem이라고 부르겠다.)에는 scrollIntoView를 호출한다.
- nextItem.scrollIntoView({ block: 'end' })로 다음에 선택되는 아이템들은 모두 스크롤 바닥에 위치하도록 한다.
[4] 위로 이동하는 경우
- item position이 스크롤을 위로 넘는순간부터 다음 Item(prevItem)에 scrollIntoView를 호출한다.
- prevItem.scrollIntoView({ block: 'start' })로 다음에 선택되는 위쪽 아이템들은 모두 스크롤 상단에 위치하도록 한다.
[5] 가장위, 가장아래로 이동
- scrollTo로 특정 위치로 이동시킨다.
import "./styles.css";
import { useEffect, useRef, useState } from "react";

export default function App() {
  const len = 60;
  const listHeight = 300;
  const [selectedItem, setSelectedItem] = useState(1); // item's index number

  /****** [1] ******/
  const itemRef = useRef({});
  const currentScroll = useRef({ scrollTop: 0, scrollBottom: listHeight });
  const containerRef = useRef();

  useEffect(() => {
    const keyPress = (e) => {
      if (e.key === "ArrowLeft") { // 위로 이동할 때
        if (selectedItem === 1) return;
        setSelectedItem((prev) => Number(prev) - 1);
        /****** [2] ******/
        const elementTop = (Number(selectedItem) - 2) * 30;

        /****** [4] ******/
        if (elementTop < currentScroll.current.scrollTop) {
          const prevItem = itemRef.current[selectedItem - 1];
          prevItem && prevItem.scrollIntoView({ block: "start" });
        }
      }
      if (e.key === "ArrowRight") { // 아래로 이동할 때
        if (selectedItem >= len) return;
        setSelectedItem((prev) => Number(prev) + 1);
        /****** [2] ******/
        const elementBottom = (Number(selectedItem) + 2) * 30;

        /****** [3] ******/
        if (elementBottom > currentScroll.current.scrollBottom) {
          const nextItem = itemRef.current[selectedItem + 1];
          nextItem && nextItem.scrollIntoView({ block: "end" });
        }
      }
    };
    window.addEventListener("keydown", keyPress);
    return () => {
      window.removeEventListener("keydown", keyPress);
    };
  }, [selectedItem]);

  const onClickDiv = (e) => {
    setSelectedItem(e.target.id);
  };

  const onScroll = (e) => {
    currentScroll.current = {
      scrollTop: e.target.scrollTop,
      scrollBottom: e.target.scrollTop + listHeight
    };
  };

  /****** [5] ******/
  const goUp = () => {
    setSelectedItem(1);
    containerRef.current.scrollTo(0, 0);
  };

  /****** [5] ******/
  const goDown = () => {
    setSelectedItem(len);
    containerRef.current.scrollTo(0, 5000);
  };

  const renderList = () => {
    let items = [];
    for (let i = 1; i <= len; i++) {
      items.push(
        <div
          key={i}
          className={`item ${Number(selectedItem) === i ? "active" : ""}`}
          id={i}
          onClick={onClickDiv}
          ref={(ref) => {
            itemRef.current = { ...itemRef.current, [i]: ref };
          }}

          /****** [2] ******/
          style={{ height: "30px" }} // 계산할 수 있게 사이즈를 지정했다.
        >
          Item{i}.png
        </div>
      );
    }
    return items;
  };
  return (
    <div className="App">
      <button className="btn btn-up" onClick={goUp}>
        UP
      </button>
      <button className="btn btn-down" onClick={goDown}>
        DOWN
      </button>
      <div className="list-container" onScroll={onScroll} ref={containerRef}>
        {renderList()}
      </div>
    </div>
  );
}
.App {
font-family: sans-serif;
text-align: center;
}
.list-container {
height: 300px;
overflow: scroll;
margin-top: 30px;
}
.active {
background-color: orangered;
}
.btn {
padding: 10px;
}
.btn-down {
margin-left: 30px;
}결론
솔직히 이번에 stackoverflow의 도움이 없었다면.. 할 수 있었을지 모르겠다. 할 수 있더라도, 상당히 삽질을 했을 것 같다. 고민하다가 예제코드를 만들어서 질문을 올렸는데, 생각보다 답변도 빨리 올라오고 내용도 아주 만족스러웠다. stackoverflow 만세!
stackoverflow 질문 링크 GO