라이브러리를 사용하려 했지만 검색 중 유튜브에서 구현하고 싶은 방향으로 캐러셀을 만드는 영상을 발견하고 참고하여 직접 만들어보기로 했다.
이 과정에서 FlatList를 활용한 캐러셀을 완성할 수 있었고, 애니메이션 효과와 Paginator까지 적용하여 깔끔한 온보딩 화면을 만들었습니다.
최종 코드
Intro.tsx
FlatList를 활용하여 수평으로 슬라이드되는 캐러셀을 구현
-> 스크롤 시 onViewableItemsChanged로 현재 보고 있는 아이템의 인덱스를 추적하여 Paginator에서 현재 위치를 표시
import React, {useState, useRef, useCallback} from 'react';
import {
  SafeAreaView,
  View,
  FlatList,
  ViewToken,
  Animated,
  StyleSheet,
  Dimensions,
} from 'react-native';
import IntroItem from './IntroItem';
import Paginator from './Paginator';
import {introData, IntroDataType} from '@/types/intro';
const {width, height} = Dimensions.get('window');

const Intro = () => {
  const [currentIndex, setCurrentIndex] = useState(0);
  const scrollX = useRef(new Animated.Value(0)).current;
  const sliderRef = useRef(null);

  const viewableItemsChanged = useCallback(
    ({viewableItems}: {viewableItems: Array<ViewToken>}) => {
      if (viewableItems.length > 0 && viewableItems[0].index != null) {
        setCurrentIndex(viewableItems[0].index);
      }
    },
    [],
  );

  const viewConfig = useRef({viewAreaCoveragePercentThreshold: 50}).current;

  const renderItem = ({item}: {item: IntroDataType}) => (
    <View style={{backgroundColor: item.backgroundColor}}>
      <IntroItem
        item={item}
        currentIndex={currentIndex}
        totalItems={introData.length}
      />
    </View>
  );

  return (
    <SafeAreaView style={styles.container}>
      <FlatList
        data={introData}
        renderItem={renderItem}
        horizontal
        showsHorizontalScrollIndicator={false}
        pagingEnabled
        bounces={false}
        keyExtractor={item => item.id}
        onScroll={Animated.event(
          [{nativeEvent: {contentOffset: {x: scrollX}}}],
          {
            useNativeDriver: false,
          },
        )}
        onViewableItemsChanged={viewableItemsChanged}
        viewabilityConfig={viewConfig}
        scrollEventThrottle={32}
        ref={sliderRef}
      />
      <Paginator data={introData} scrollX={scrollX} />
    </SafeAreaView>
  );
};

const styles = StyleSheet.create({
  container: {
    flex: 1,
    justifyContent: 'center',
    alignItems: 'center',
    backgroundColor: '#FFF',
  },
  itemContainer: {flex: 1, width, height},
  image: {
    justifyContent: 'center',
    width,
    height,
    resizeMode: 'contain',
  },
});

export default Intro;
IntroItem.tsx - FlatList내부 renderItem
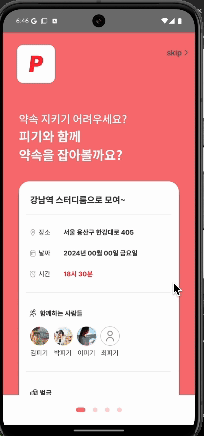
캐러셀 내부의 각 아이템을 렌더링
-> currentIndex가 마지막 페이지에 도달하면 시작 버튼이 나타나며, 그 외에는 'skip' 버튼을 표시
-> 마지막 페이지에서 Animated를 사용해 버튼에 애니메이션 효과를 적용
import React, {useEffect, useRef} from 'react';
import {
  View,
  Image,
  StyleSheet,
  Dimensions,
  TouchableOpacity,
  Text,
  Animated,
} from 'react-native';
import {useNavigation} from '@react-navigation/native';
import {NativeStackNavigationProp} from '@react-navigation/native-stack';
import {RootStackParamList} from '@/types/Router';
import {IntroItemProps} from '@/types/intro';
import {commonStyle} from '@/styles/common';
import PiggyIconSvg from '@/assets/icons/piggyIcon.svg';
import RightArrowSbg from '@/assets/icons/rightArrow.svg';

const startImg = require('@/assets/images/piggyStart.png');
const {width, height} = Dimensions.get('window');

const IntroItem = ({item, currentIndex, totalItems}: IntroItemProps) => {
  const navigation =
    useNavigation<NativeStackNavigationProp<RootStackParamList>>();

  const buttonAnimation = useRef(new Animated.Value(0)).current;

  const handleStart = () => {
    navigation.replace('Main', {screen: 'Home'});
  };

  // 애니메이션 실행
  useEffect(() => {
    if (currentIndex === totalItems - 1) {
      Animated.timing(buttonAnimation, {
        toValue: 1,
        duration: 500,
        delay: 300,
        useNativeDriver: true,
      }).start();
    } else {
      Animated.timing(buttonAnimation, {
        toValue: 0,
        duration: 0,
        useNativeDriver: true,
      }).start();
    }
  }, [currentIndex, totalItems, buttonAnimation]);

  // 애니메이션 opacity, scale 값 설정
  const buttonOpacity = buttonAnimation.interpolate({
    inputRange: [0, 1],
    outputRange: [0, 1],
  });

  const buttonScale = buttonAnimation.interpolate({
    inputRange: [0, 1],
    outputRange: [0.8, 1],
  });

  return (
    <View style={styles.container}>
      {currentIndex === totalItems - 1 ? (
        <Animated.View
          style={[
            styles.startWrapper,
            {
              opacity: buttonOpacity,
              transform: [{scale: buttonScale}],
            },
          ]}>
          <TouchableOpacity onPress={handleStart} activeOpacity={0.6}>
            <Image source={startImg} style={styles.startImage} />
          </TouchableOpacity>
        </Animated.View>
      ) : (
        <TouchableOpacity
          style={styles.skipWrapper}
          onPress={handleStart}
          activeOpacity={0.6}>
          <Text style={[commonStyle.MEDIUM, styles.skipText]}>skip</Text>
          <RightArrowSbg
            width={width * 0.05}
            height={width * 0.05}
            color={'#333'}
          />
        </TouchableOpacity>
      )}
      <PiggyIconSvg
        width={width * 0.2}
        height={width * 0.2}
        style={styles.icon}
      />
      <Image source={item.image} style={styles.image} />
    </View>
  );
};

const styles = StyleSheet.create({
  container: {flex: 1, width, height},
  image: {
    justifyContent: 'center',
    width,
    height,
    resizeMode: 'contain',
  },
  icon: {
    position: 'absolute',
    zIndex: 2,
    top: 26,
    left: 30,
  },
  startWrapper: {
    position: 'absolute',
    bottom: 190,
    right: 100,
    width: 160,
    height: 160,
    zIndex: 3,
  },
  startImage: {
    width: '100%',
    height: '100%',
  },
  skipWrapper: {
    flexDirection: 'row',
    justifyContent: 'center',
    alignItems: 'center',
    position: 'absolute',
    zIndex: 2,
    top: width * 0.04,
    right: width * 0.02,
    width: 52,
    height: 52,
  },
  skipText: {
    color: '#555',
    fontSize: width * 0.04,
  },
});

export default IntroItem;
Intro하단 progressBar
캐러셀 하단에 페이지네이션을 표시하는 Paginator
-> scrollX 값을 받아 현재 페이지에 해당하는 인덱스를 강조하는 애니메이션을 적용
import React from 'react';
import {View, StyleSheet, Animated, Dimensions} from 'react-native';
import {PaginatorProps} from '@/types/intro';

const {width: screenWidth} = Dimensions.get('window');

const Paginator: React.FC<PaginatorProps> = ({data, scrollX}) => {
  return (
    <View style={styles.container}>
      {data.map((item, index) => {
        const inputRange = [
          (index - 1) * screenWidth,
          index * screenWidth,
          (index + 1) * screenWidth,
        ];

        const dotWidth = scrollX.interpolate({
          inputRange,
          outputRange: [10, 20, 10],
          extrapolate: 'clamp',
        });

        const opacity = scrollX.interpolate({
          inputRange,
          outputRange: [0.3, 1, 0.3],
          extrapolate: 'clamp',
        });

        return (
          <Animated.View
            style={[styles.dot, {width: dotWidth, opacity}]}
            key={index.toString()}
          />
        );
      })}
    </View>
  );
};

const styles = StyleSheet.create({
  container: {
    flexDirection: 'row',
    height: 64,
    alignItems: 'center',
  },
  dot: {
    height: 10,
    borderRadius: 5,
    backgroundColor: '#E87D7B',
    marginHorizontal: 8,
  },
});

export default Paginator;
최종 결과