Multi Section
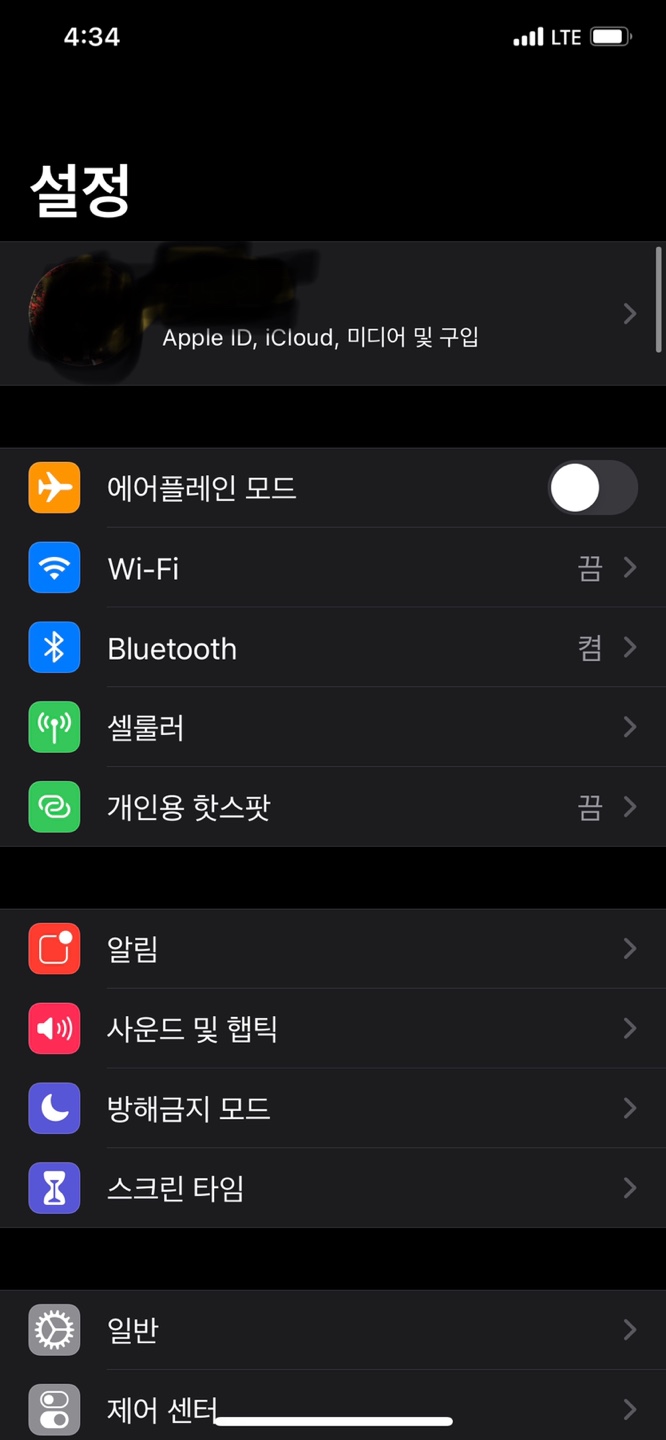
위의 사진 처럼 테이블 뷰에서 2개 이상의 섹션을 표시하는 방법에 대해 알아보도록 하겠습니다.
구현 순서
- 테이블 뷰 추가
- 프로토타입 셀 추가
- Resuse Identifier 설정
- 데이터 소스, 델리게이트 추가
- 구현
import UIKit
enum CellType: String {
case detailTitle
case `switch`
case rightDetail
}
struct SettingItem {
let title: String
let RightDetail: String?
let subTitle: String?
let type: CellType
let on: Bool
var imageName: String?
}
struct SettingSection {
let items: [SettingItem]
let header: String?
static func generateData() -> [SettingSection] {
return [
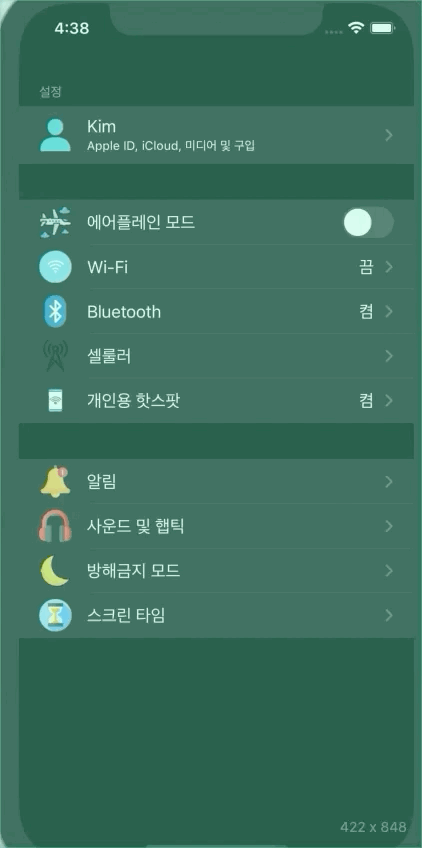
SettingSection(items: [SettingItem(title: "Kim", RightDetail: nil, subTitle: "Apple ID, iCloud, 미디어 및 구입", type: .detailTitle, on: false, imageName: "user")], header: "설정"),
SettingSection(items: [
SettingItem(title: "에어플레인 모드", RightDetail: nil, subTitle: nil, type: .switch, on: false, imageName: "airplane"),
SettingItem(title: "Wi-Fi", RightDetail: "끔", subTitle: nil, type: .rightDetail, on: false, imageName: "wifi"),
SettingItem(title: "Bluetooth", RightDetail: "켬", subTitle: nil, type: .rightDetail, on: false, imageName: "bluetooth"),
SettingItem(title: "셀룰러", RightDetail: nil, subTitle: nil, type: .detailTitle, on: false, imageName: "signal-tower"),
SettingItem(title: "개인용 핫스팟", RightDetail: "켬", subTitle: nil, type: .rightDetail, on: false, imageName: "smartphone")
], header: nil),
SettingSection(items: [
SettingItem(title: "알림", RightDetail: nil, subTitle: nil, type: .detailTitle, on: false, imageName: "ball"),
SettingItem(title: "사운드 및 햅틱", RightDetail: nil, subTitle: nil, type: .detailTitle, on: false, imageName: "headphone"),
SettingItem(title: "방해금지 모드", RightDetail: nil, subTitle: nil, type: .detailTitle, on: false, imageName: "moon"),
SettingItem(title: "스크린 타임", RightDetail: nil, subTitle: nil, type: .detailTitle, on: false, imageName: "hourglass")
], header: nil)
]
}
}
섹션이 하나인 경우에는 섹션을 고려할 필요가 없습니다.
두 개 이상인 경우에는 두 번째 파라미터를 통해 전달된 섹션 인덱스를 활용해서 해당 섹션에 적합한 값을 리턴해야 합니다.
 func numberOfSections(in tableView: UITableView) -> Int {
        return list.count
    }
⌨️ code
import UIKit

class ViewController: UIViewController {

    let list = SettingSection.generateData()

    override func viewDidLoad() {
        super.viewDidLoad()
    }

    @objc func switchChanged(_ sender: UISwitch) {
        print(sender.isOn, sender.tag)
    }
}

extension ViewController: UITableViewDataSource {
    func numberOfSections(in tableView: UITableView) -> Int {
        return list.count
    } // 섹션 숫자

    func tableView(_ tableView: UITableView, numberOfRowsInSection section: Int) -> Int {
        return list[section].items.count
    } // 셀 숫자

    func tableView(_ tableView: UITableView, cellForRowAt indexPath: IndexPath) -> UITableViewCell {
        let target = list[indexPath.section].items[indexPath.row] // 셀에 표시할 데이터를 가져옴
        let cell = tableView.dequeueReusableCell(withIdentifier: target.type.rawValue, for: indexPath)

        switch target.type { // 타입별로 값을 설정
        case .detailTitle:
            cell.textLabel?.text = target.title
            cell.detailTextLabel?.text = target.subTitle
            cell.imageView?.image = UIImage(named: target.imageName!)
        case .switch:
            cell.textLabel?.text = target.title
            cell.imageView?.image = UIImage(named: target.imageName!)
            if let switchView = cell.accessoryView as? UISwitch {
                switchView.isOn = target.on
                switchView.addTarget(self, action: #selector(switchChanged(_:)), for: .valueChanged)
                switchView.tag = indexPath.section
            }
        case .rightDetail:
            cell.textLabel?.text = target.title
            cell.detailTextLabel?.text = target.RightDetail
            cell.imageView?.image = UIImage(named: target.imageName!)
        }
        return cell
    }

    func tableView(_ tableView: UITableView, titleForHeaderInSection section: Int) -> String? {
        return list[section].header
    }
}

iOS Develpoer