본 게시물은 CloudNet@팀 Gasida(서종호) 님이 진행하시는
AWS EKS Workshop Study 내용을 기반으로 작성되었습니다.
NodeGroup
Graviton(ARM) Instance Node Group - Link

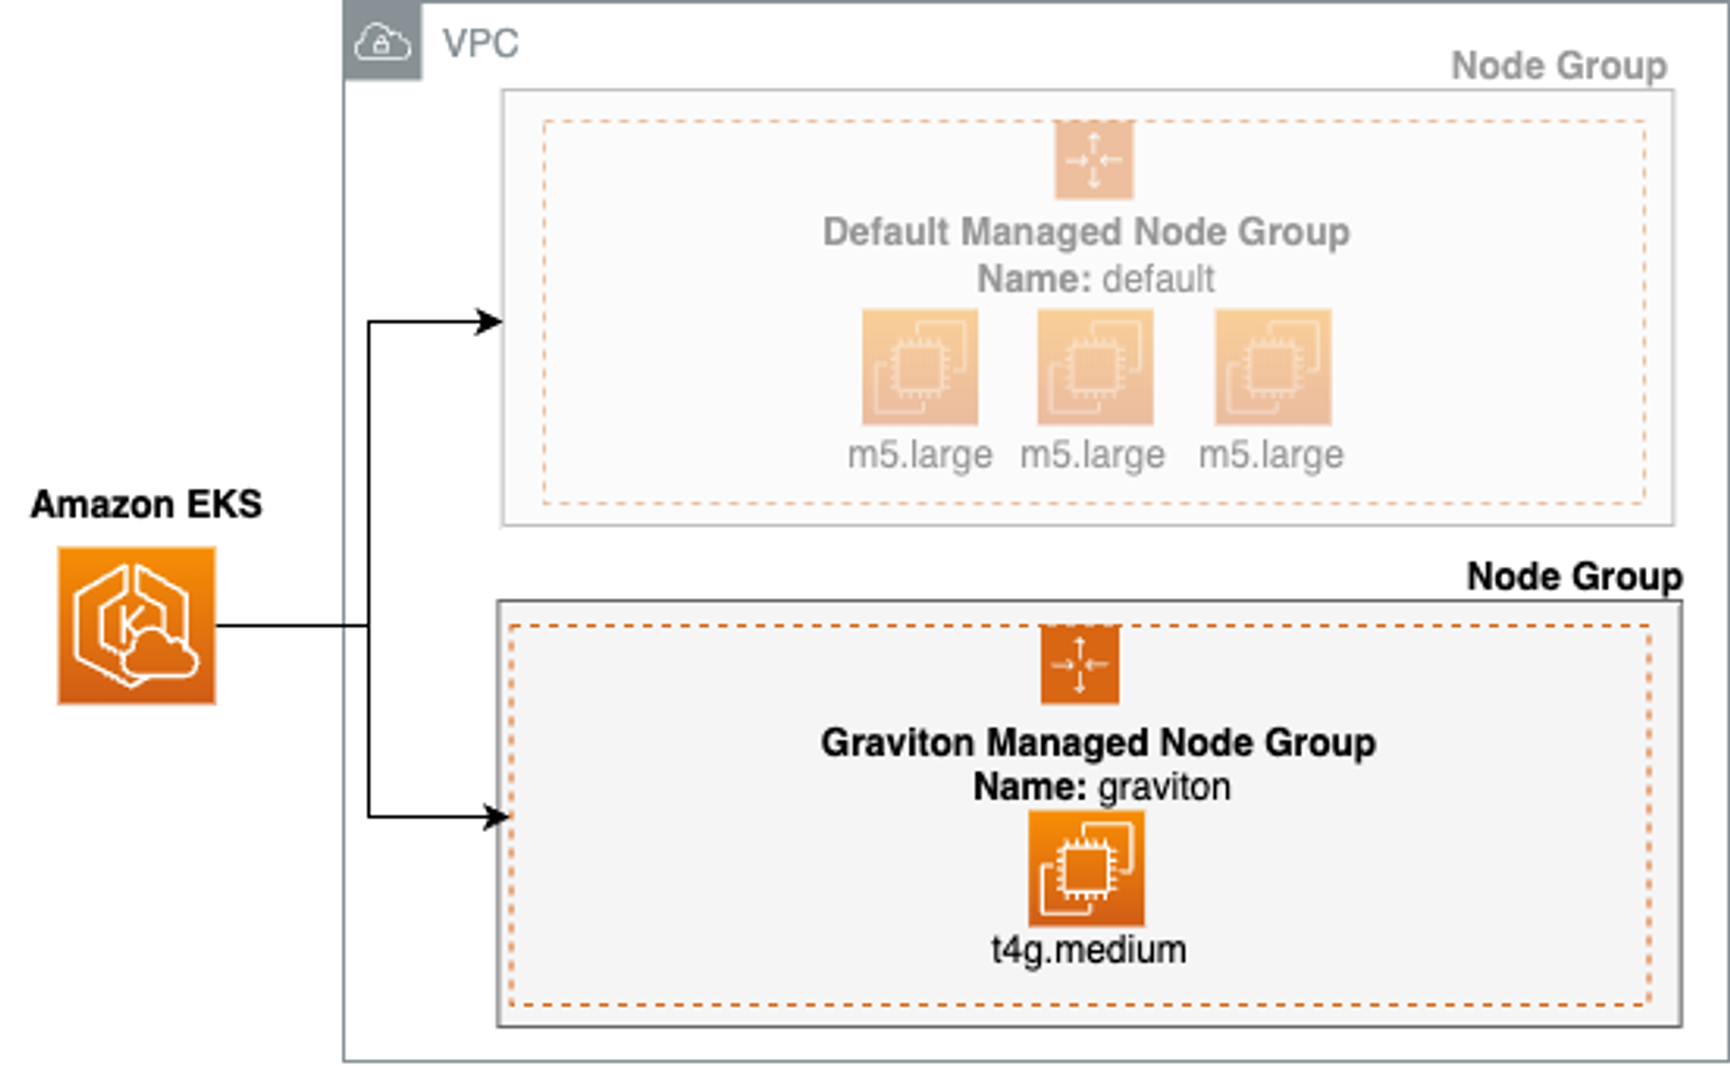
- Graviton Node Group 생성
kubectl get nodes -L kubernetes.io/arch

# 신규 노드 그룹 생성
eksctl create nodegroup --help
eksctl create nodegroup -c $CLUSTER_NAME -r $AWS_DEFAULT_REGION --subnet-ids "$PubSubnet1","$PubSubnet2","$PubSubnet3" --ssh-access \
  -n ng3 -t t4g.medium -N 1 -m 1 -M 1 --node-volume-size=30 --node-labels family=graviton --dry-run > myng3.yaml
eksctl create nodegroup -f myng3.yaml

# 확인
kubectl get nodes --label-columns
NAME                                               STATUS   ROLES    AGE     VERSION               NODEGROUP   ARCH
ip-192-168-1-170.ap-northeast-2.compute.internal   Ready    <none>   4m47s   v1.28.5-eks-5e0fdde   ng3         arm64
ip-192-168-1-171.ap-northeast-2.compute.internal   Ready    <none>   3h16m   v1.28.5-eks-5e0fdde   ng1         amd64
ip-192-168-2-201.ap-northeast-2.compute.internal   Ready    <none>   3h16m   v1.28.5-eks-5e0fdde   ng1         amd64
ip-192-168-3-39.ap-northeast-2.compute.internal    Ready    <none>   3h16m   v1.28.5-eks-5e0fdde   ng1         amd64eks.amazonaws.com/nodegroup,kubernetes.io/arch

kubectl describe nodes --selector family=graviton

aws eks describe-nodegroup --cluster-name $CLUSTER_NAME --nodegroup-name ng3 | jq .nodegroup.taints

# taints 셋팅 -> 적용에 2~3분 정도 시간 소요
aws eks update-nodegroup-config --cluster-name $CLUSTER_NAME --nodegroup-name ng3 --taints "addOrUpdateTaints=[{key=frontend, value=true, effect=NO_EXECUTE}]"

# 확인
kubectl describe nodes --selector family=graviton | grep Taints
Taints:             frontend=true:NoExecute

aws eks describe-nodegroup --cluster-name $CLUSTER_NAME --nodegroup-name ng3 | jq .nodegroup.taints
[
  {
    "key": "frontend",
    "value": "true",
    "effect": "NO_EXECUTE"
  }
]
# NO_SCHEDULE - This corresponds to the Kubernetes NoSchedule taint effect. This configures the managed node group with a taint that repels all pods that don't have a matching toleration. All running pods are not evicted from the manage node group's nodes.
# NO_EXECUTE - This corresponds to the Kubernetes NoExecute taint effect. Allows nodes configured with this taint to not only repel newly scheduled pods but also evicts any running pods without a matching toleration.
# PREFER_NO_SCHEDULE - This corresponds to the Kubernetes PreferNoSchedule taint effect. If possible, EKS avoids scheduling Pods that do not tolerate this taint onto the node.
-
Graviton Node에 Pod 실행
#
cat << EOT > busybox.yaml
apiVersion: v1
kind: Pod
metadata:
 name: busybox
spec:
 terminationGracePeriodSeconds: 3
 containers:
 - name: busybox
   image: busybox
   command:
   - "/bin/sh"
   - "-c"
   - "while true; do date >> /home/pod-out.txt; cd /home; sync; sync; sleep 10; done"
 tolerations:
   - effect: NoExecute
     key: frontend
     operator: Exists
EOT

kubectl apply -f busybox.yaml

# 파드가 배포된 노드 정보 확인
kubectl get pod -owide
NAME      READY   STATUS    RESTARTS   AGE   IP              NODE                                               NOMINATED NODE   READINESS GATES
busybox   1/1     Running   0          54s   192.168.1.168   ip-192-168-1-170.ap-northeast-2.compute.internal   <none>           <none>

# 삭제
kubectl delete pod busybox
eksctl delete nodegroup -c $CLUSTER_NAME -n ng3
Spot instances - Link, Blog
-
Instance type diversification - Link
# ec2-instance-selector 설치 curl -Lo ec2-instance-selector https://github.com/aws/amazon-ec2-instance-selector/releases/download/v2.4.1/ec2-instance-selector-`uname | tr '[:upper:]' '[:lower:]'`-amd64 && chmod +x ec2-instance-selector mv ec2-instance-selector /usr/local/bin/ ec2-instance-selector --version v2.4.1 # 사용 ec2-instance-selector --vcpus 2 --memory 4 --gpus 0 --current-generation -a x86_64 --deny-list 't.*' --output table-wide Instance Type VCPUs Mem (GiB) Hypervisor Current Gen Hibernation Support CPU Arch Network Performance ENIs GPUs GPU Mem (GiB) GPU Info On-Demand Price/Hr Spot Price/Hr (30d avg) c5.large 2 4 nitro true true x86_64 Up to 10 Gigabit 3 0 0 none $0.096 $0.04839 c5a.large 2 4 nitro true false x86_64 Up to 10 Gigabit 3 0 0 none $0.086 $0.0292 c5d.large 2 4 nitro true true x86_64 Up to 10 Gigabit 3 0 0 none $0.11 $0.03285 c6i.large 2 4 nitro true true x86_64 Up to 12.5 Gigabit 3 0 0 none $0.096 $0.03542 c6id.large 2 4 nitro true true x86_64 Up to 12.5 Gigabit 3 0 0 none $0.1155 $0.02768 c6in.large 2 4 nitro true false x86_64 Up to 25 Gigabit 3 0 0 none $0.1281 $0.02754 c7i.large 2 4 nitro true true x86_64 Up to 12.5 Gigabit 3 0 0 none $0.1008 $0.02998 #Internally ec2-instance-selector is making calls to the DescribeInstanceTypes for the specific region and filtering the instances based on the criteria selected in the command line, in our case we filtered for instances that meet the following criteria: #- Instances with no GPUs #- of x86_64 Architecture (no ARM instances like A1 or m6g instances for example) #- Instances that have 2 vCPUs and 4 GB of RAM #- Instances of current generation (4th gen onwards) #- Instances that don’t meet the regular expression t.* to filter out burstable instance types -
Spot Capacity 생성 - Link

# kubectl get nodes -l eks.amazonaws.com/capacityType=ON_DEMAND kubectl get nodes -L eks.amazonaws.com/capacityType NAME STATUS ROLES AGE VERSION CAPACITYTYPE ip-192-168-1-171.ap-northeast-2.compute.internal Ready <none> 3h32m v1.28.5-eks-5e0fdde ON_DEMAND ip-192-168-2-201.ap-northeast-2.compute.internal Ready <none> 3h32m v1.28.5-eks-5e0fdde ON_DEMAND ip-192-168-3-39.ap-northeast-2.compute.internal Ready <none> 3h32m v1.28.5-eks-5e0fdde ON_DEMAND # 생성 : 아래 node-role 은 각자 자신의 노드 role ARN을 입력 # role AWSServiceRoleForAmazonEKSNodegroup 테스트해보자 aws eks create-nodegroup \ --cluster-name $CLUSTER_NAME \ --nodegroup-name managed-spot \ --subnets $PubSubnet1 $PubSubnet2 $PubSubnet3 \ --node-role arn:aws:iam::911283464785:role/eksctl-myeks-nodegroup-ng1-NodeInstanceRole-wvZ2FX2m79Vv \ --instance-types c5.large c5d.large c5a.large \ --capacity-type SPOT \ --scaling-config minSize=2,maxSize=3,desiredSize=2 \ --disk-size 20 # aws eks wait nodegroup-active --cluster-name $CLUSTER_NAME --nodegroup-name managed-spot # 확인 kubectl get nodes -L eks.amazonaws.com/capacityType,eks.amazonaws.com/nodegroup NAME STATUS ROLES AGE VERSION CAPACITYTYPE NODEGROUP ip-192-168-1-171.ap-northeast-2.compute.internal Ready <none> 3h37m v1.28.5-eks-5e0fdde ON_DEMAND ng1 ip-192-168-1-254.ap-northeast-2.compute.internal Ready <none> 41s v1.28.5-eks-5e0fdde SPOT managed-spot ip-192-168-2-201.ap-northeast-2.compute.internal Ready <none> 3h37m v1.28.5-eks-5e0fdde ON_DEMAND ng1 ip-192-168-3-139.ap-northeast-2.compute.internal Ready <none> 40s v1.28.5-eks-5e0fdde SPOT managed-spot ip-192-168-3-39.ap-northeast-2.compute.internal Ready <none> 3h37m v1.28.5-eks-5e0fdde ON_DEMAND ng1 -
Spot 요청 확인

-
Spot Node에 워크로드 실행
#
cat << EOT > busybox.yaml
apiVersion: v1
kind: Pod
metadata:
 name: busybox
spec:
 terminationGracePeriodSeconds: 3
 containers:
  - name: busybox
   image: busybox
   command:
   - "/bin/sh"
   - "-c"
   - "while true; do date >> /home/pod-out.txt; cd /home; sync; sync; sleep 10; done"
 nodeSelector:
   eks.amazonaws.com/capacityType: SPOT
EOT
kubectl apply -f busybox.yaml

# 파드가 배포된 노드 정보 확인
kubectl get pod -owide
NAME      READY   STATUS    RESTARTS   AGE   IP             NODE                                               NOMINATED NODE   READINESS GATES
busybox   1/1     Running   0          63s   192.168.1.10   ip-192-168-1-254.ap-northeast-2.compute.internal   <none>           <none>

# 삭제
kubectl delete pod busybox
eksctl delete nodegroup -c $CLUSTER_NAME -n managed-spot