LazyLoad vs PreLoad

LazyLoad
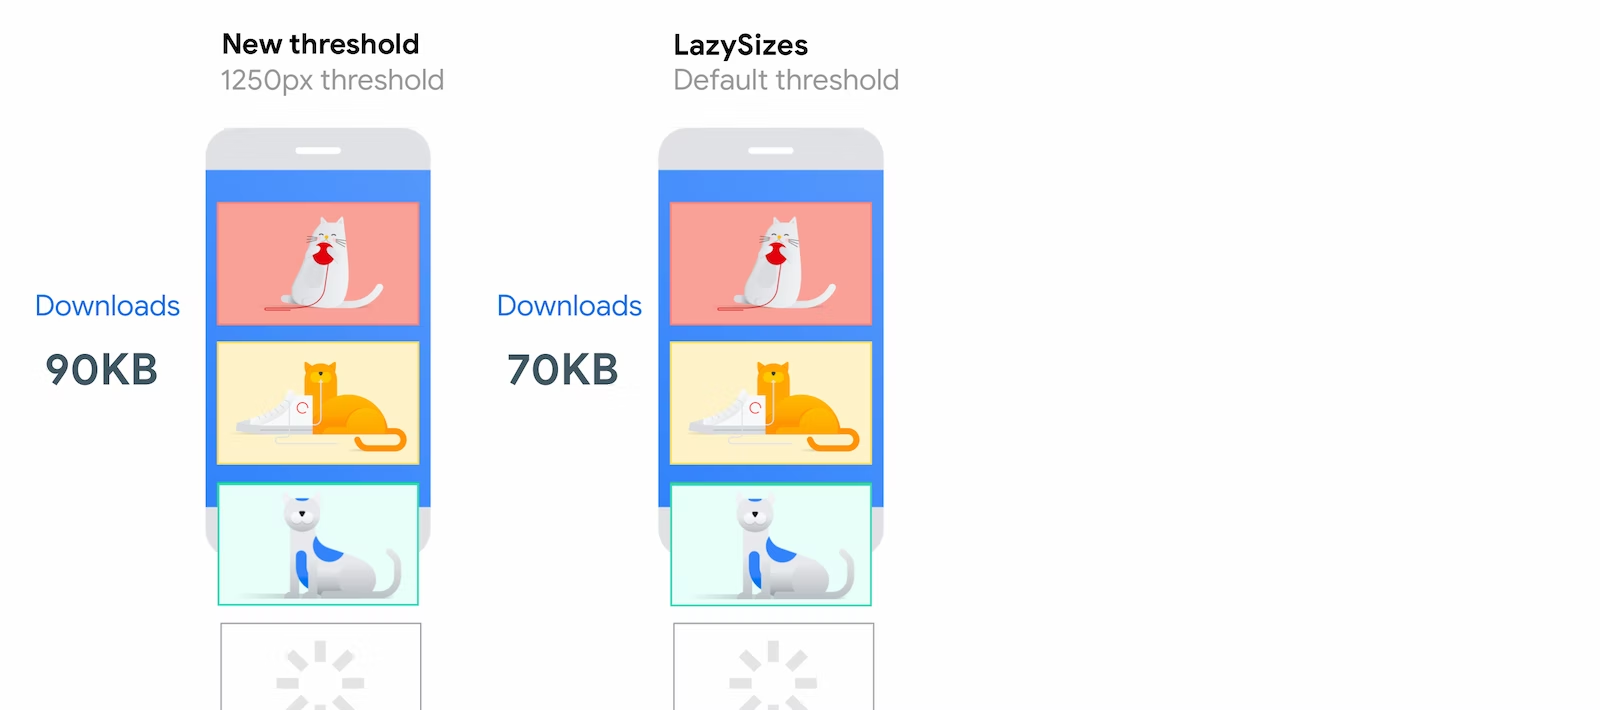
: 웹페이지를 불러올 때, 필요하지 않은 것들은 받아오지 않고 있다가
유저가 스크롤 등을 통해 이동할 때 이미지가 보여지는 시점이 되면 그때 로딩을 한다.
즉, 눈에 보여지지 않는 이미지들의 로딩 시점을 뒤로 미루는 것.
사용하는 이유
당장 불필요한 이미지들까지 웹페이지를 불러오기 할 때 한번에 가지고 오면 로딩 시간은 물론 성능 면에서 떨어지기 떄문이다.
이미지를 받아와서 서버에 저장해야 하기 때문에 비용적인 측면에서도 문제가 됨.
react-lazy-load
npm 에서 react-lazy-load를 통해 설치 할 수 있음 (라이브러리)
import React from "react";
import LazyLoad from "react-lazy-load";

export default function MyComponent() {
  return (
    <div>
      <div className="filler" />
      <LazyLoad height={600} offsetVertical={300}>
        <img
          src="https://cdn.pixabay.com/photo/2017/09/25/13/12/cocker-spaniel-2785074_1280.jpg"
          width={500}
          height={500}
        />
      </LazyLoad>
      <div className="filler" />
      <LazyLoad height={600} offsetVertical={300}>
        <img
          src="https://cdn.pixabay.com/photo/2019/08/19/07/45/dog-4415649_1280.jpg"
          width={500}
          height={500}
        />
      </LazyLoad>
      <div className="filler" />
      <LazyLoad height={600} offsetVertical={300}>
        <img
          src="https://cdn.pixabay.com/photo/2016/10/31/14/55/rottweiler-1785760_1280.jpg"
          width={500}
          height={500}
        />
      </LazyLoad>
      <div className="filler" />
      <LazyLoad height={600} offsetVertical={300}>
        <img
          src="https://cdn.pixabay.com/photo/2016/01/05/17/51/maltese-1123016_1280.jpg"
          width={500}
          height={500}
        />
      </LazyLoad>
      <div className="filler" />
      <LazyLoad height={600} offsetVertical={300}>
        <img
          src="https://cdn.pixabay.com/photo/2016/12/13/05/15/puppy-1903313_1280.jpg"
          width={500}
          height={500}
        />
      </LazyLoad>
      <div className="filler" />
      <LazyLoad height={600} offsetVertical={300}>
        <img
          src="https://cdn.pixabay.com/photo/2014/12/10/05/50/english-bulldog-562723__480.jpg"
          width={500}
          height={500}
        />
      </LazyLoad>
      <div className="filler" />
      <LazyLoad height={600} offsetVertical={300}>
        <img
          src="https://cdn.pixabay.com/photo/2016/11/21/00/47/view-1844110__480.jpg"
          width={500}
          height={500}
        />
      </LazyLoad>
      <div className="filler" />
      <LazyLoad height={600} offsetVertical={300}>
        <img
          src="https://cdn.pixabay.com/photo/2018/05/17/06/22/dog-3407906__480.jpg"
          width={500}
          height={500}
        />
      </LazyLoad>
      <div className="filler" />
      <LazyLoad height={600} offsetVertical={300}>
        <img
          src="https://cdn.pixabay.com/photo/2016/11/22/20/10/dog-1850465__480.jpg"
          width={500}
          height={500}
        />
      </LazyLoad>
      <div className="filler" />
      <LazyLoad height={600} offsetVertical={300}>
        <img
          src="https://cdn.pixabay.com/photo/2019/11/07/08/40/dog-4608266__480.jpg"
          width={500}
          height={500}
        />
      </LazyLoad>
    </div>
이미지를 하드코딩해서 넣어주었고, 이코드를 실행하면 스크롤을 내릴때 마다 개발자도구 네트워크 탭에서 각 화면에 필요한 이미지를 차례로 다운받아 오는 것을 확인할 수 있음
PreLoad
: 브라우저에서 현재 페이지에서 필요한 리소스를 빠르게 가져오게함.
이미지를 미리 로드하는 경우 편리함.
예제
<link rel="preload" as="..."\>let images = [];
function preload() {
for(let i = 0; i < preload.arguments.lenght; i++) {
images[i] = new Image();
images[i].src = preload.arguments.src;
}
}
preload(
"./images1.jpg",
"./images2.jpg",
"./images3.jpg",
"./images4.jpg"
)