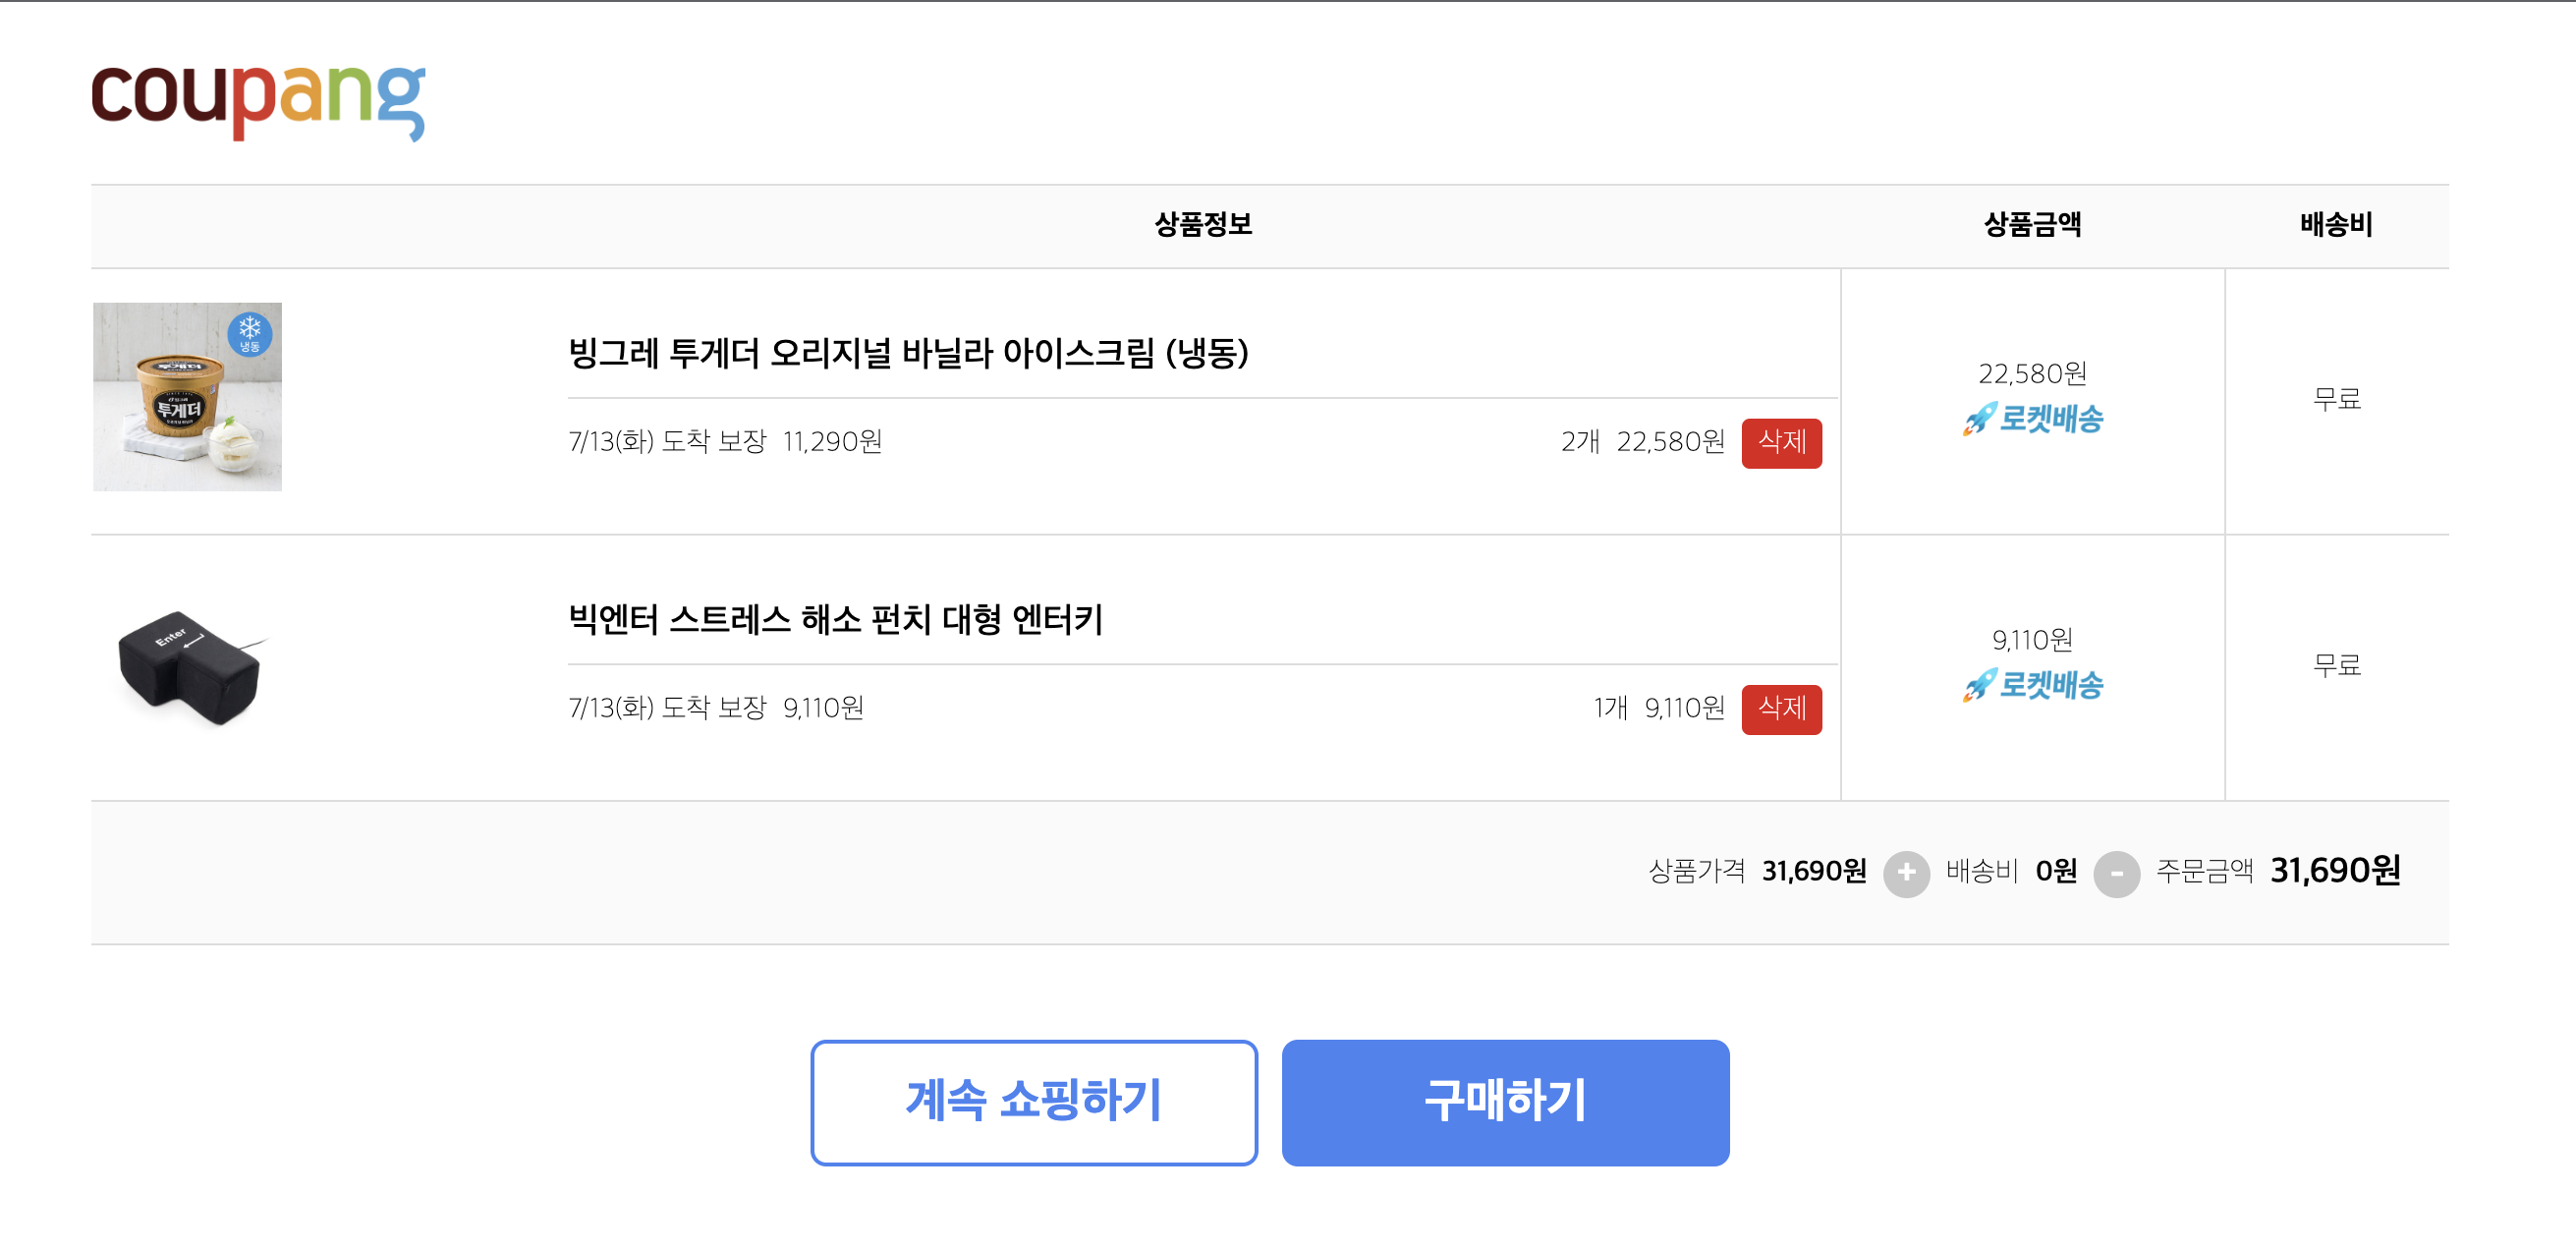
삭제 구현을 해보자.
class="delete"

현재 삭제버튼을 누르면 이 주소로 간다.
http://localhost:8080/shopping/cart/delete?index=110
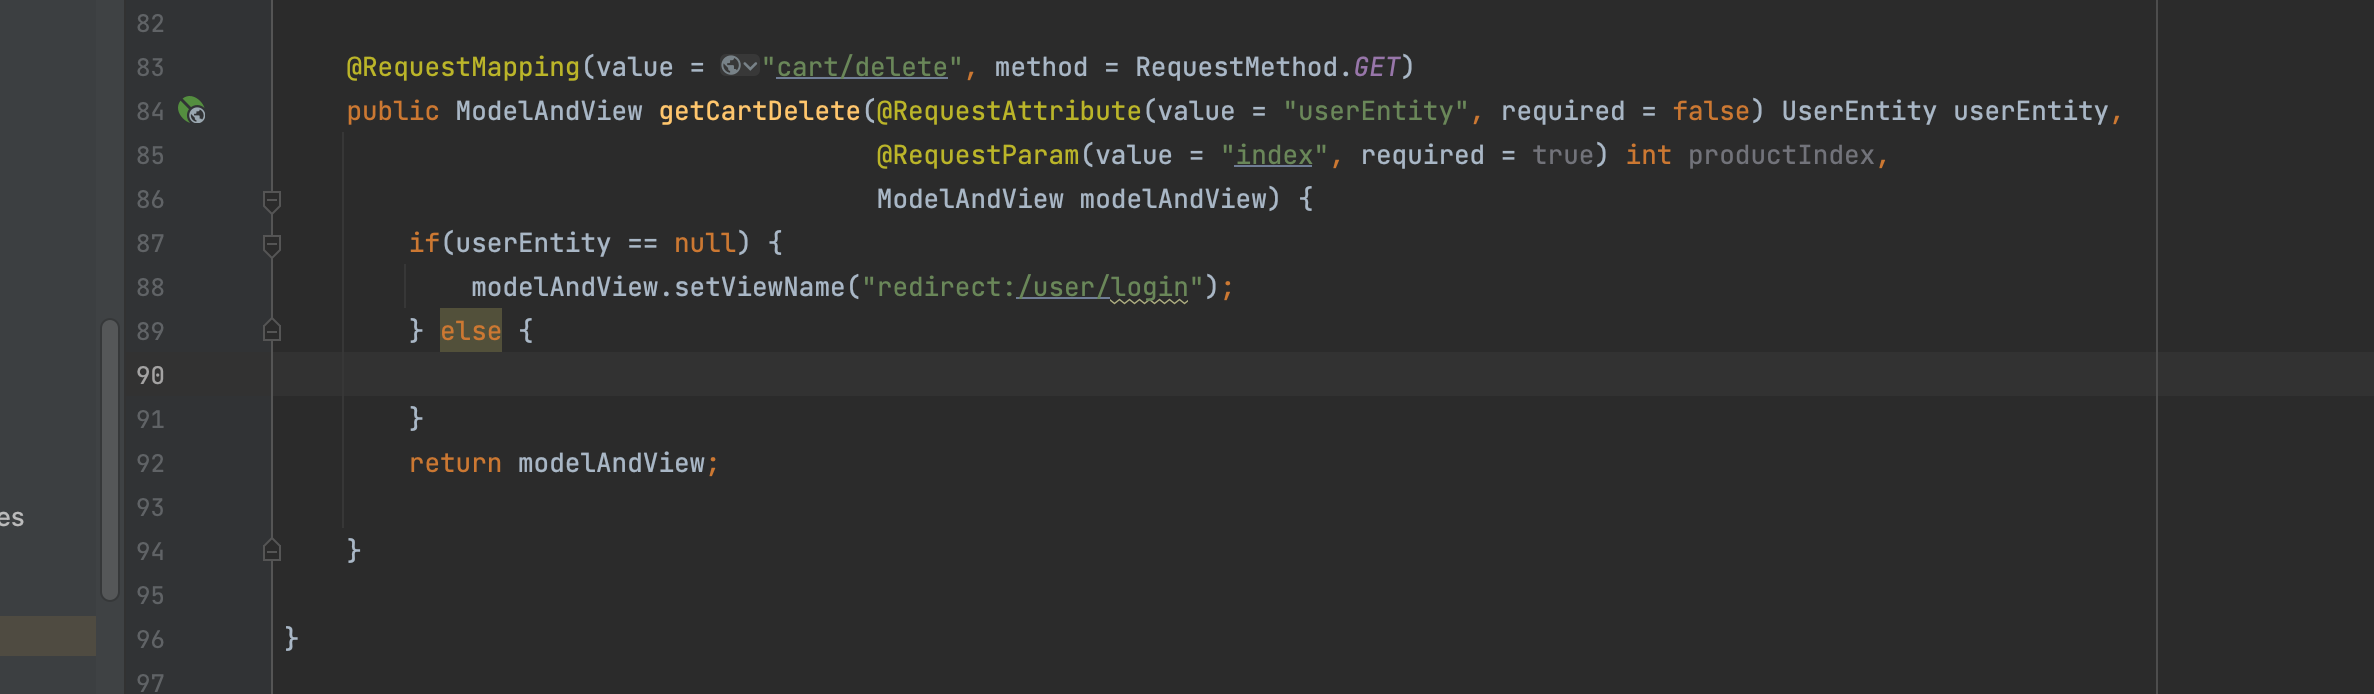
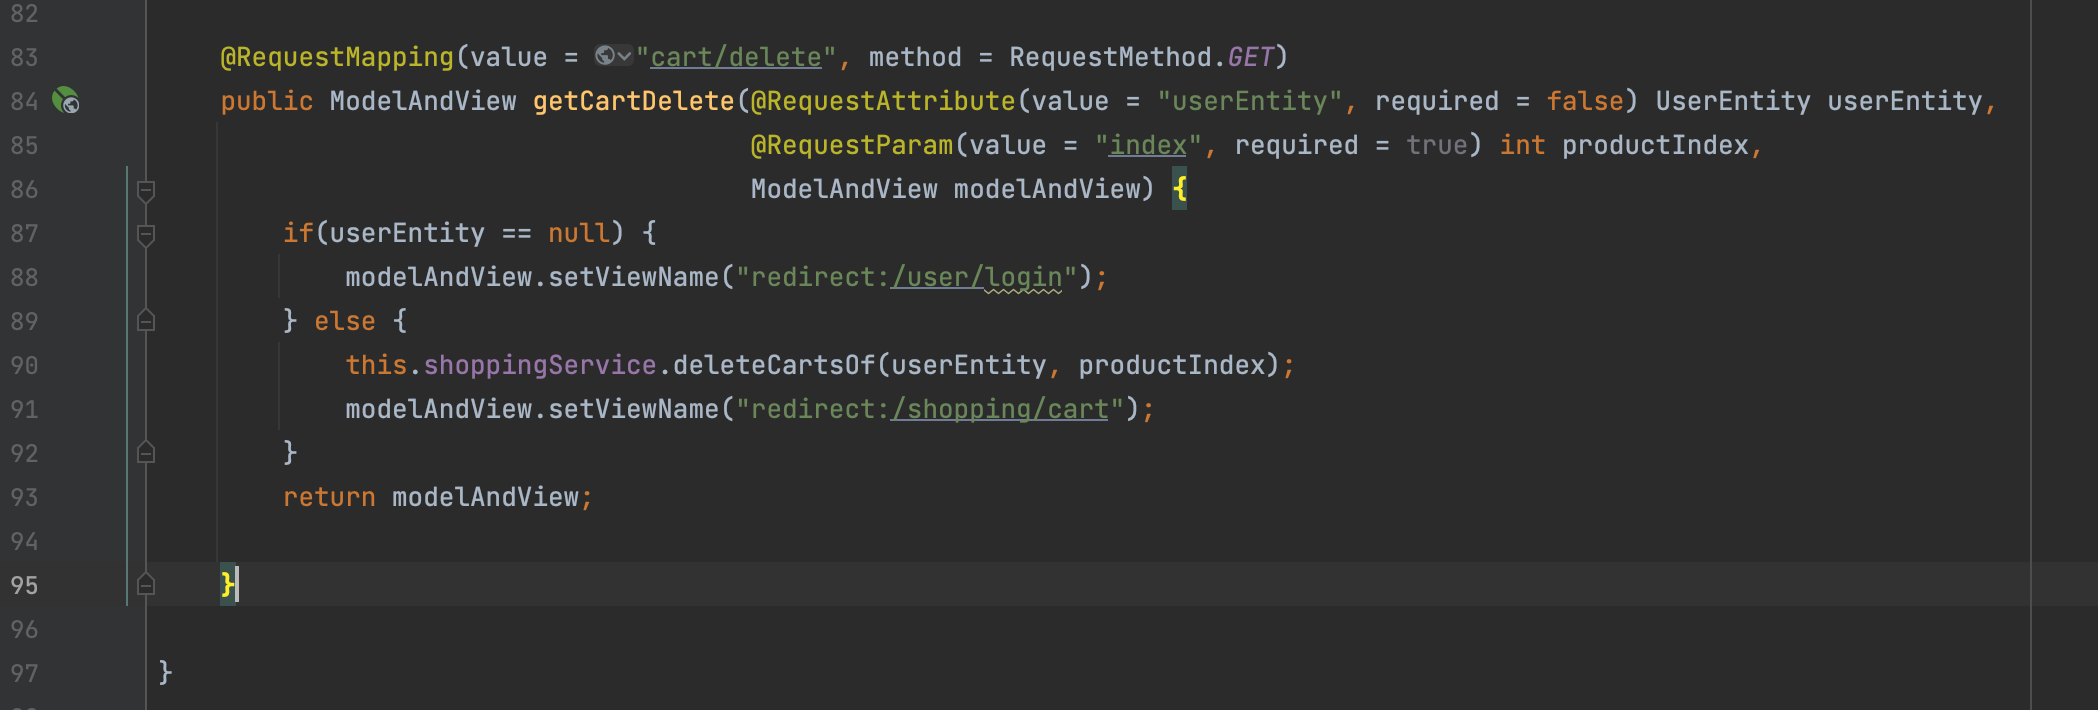
ShoppingController
ShoppingService

ShoppingController
IShoppingMapper

xml

ShoppingService

이제 장바구니 상품에 삭제 버튼을 누르면 삭제가 된다.
1개씩 삭제를 위해 만들었던 delete xml 에 LIMIT 1을 걸어주자.
이번엔 구매를 해보자.
구매는 현재 두 군데에 있다.
detail.html 바로 구매하기
cart.html 구매하기 맵핑은 현재 /shopping/order
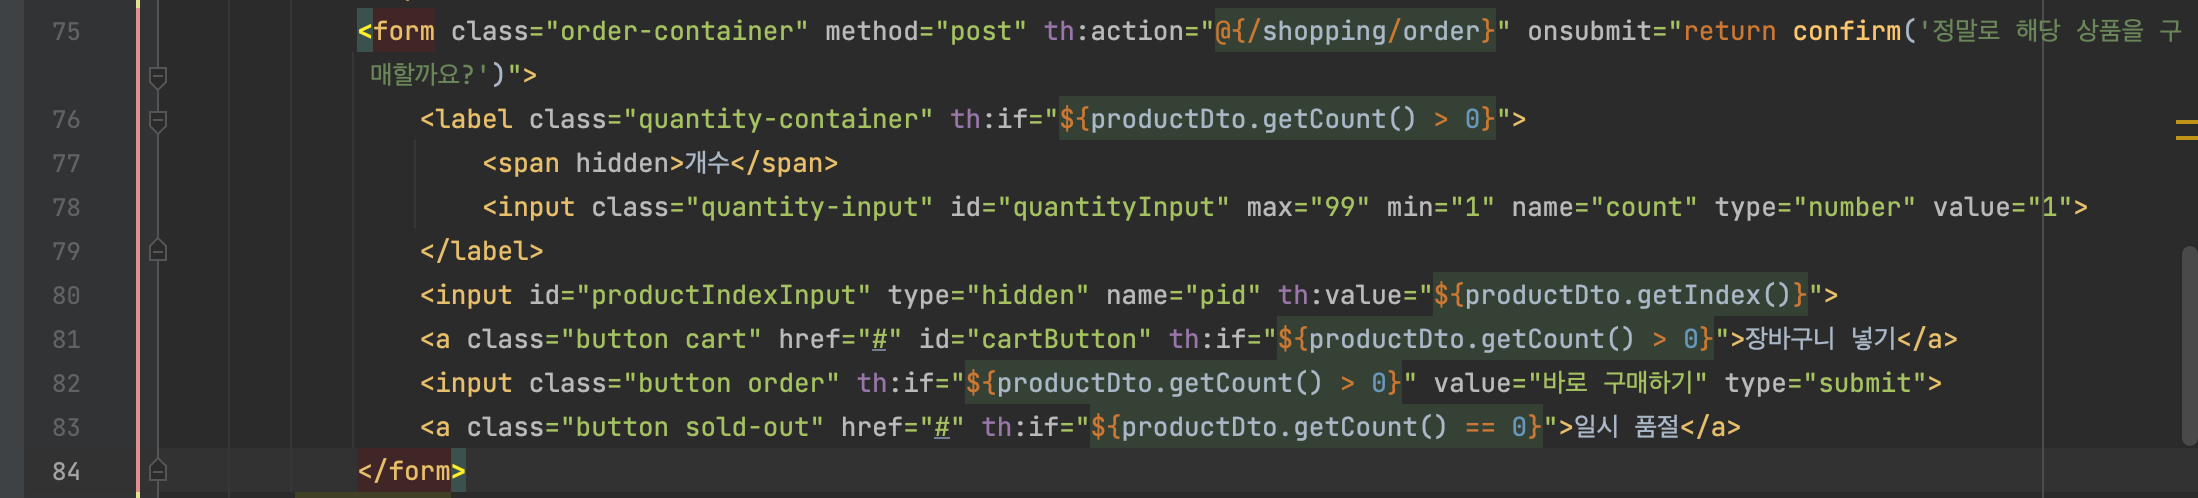
구매버튼을 누르면 '정말로 구매할건가요?' 라는 confirm이 뜨고 구매를 진행할 것.
/shopping/order?pid=14%count=3
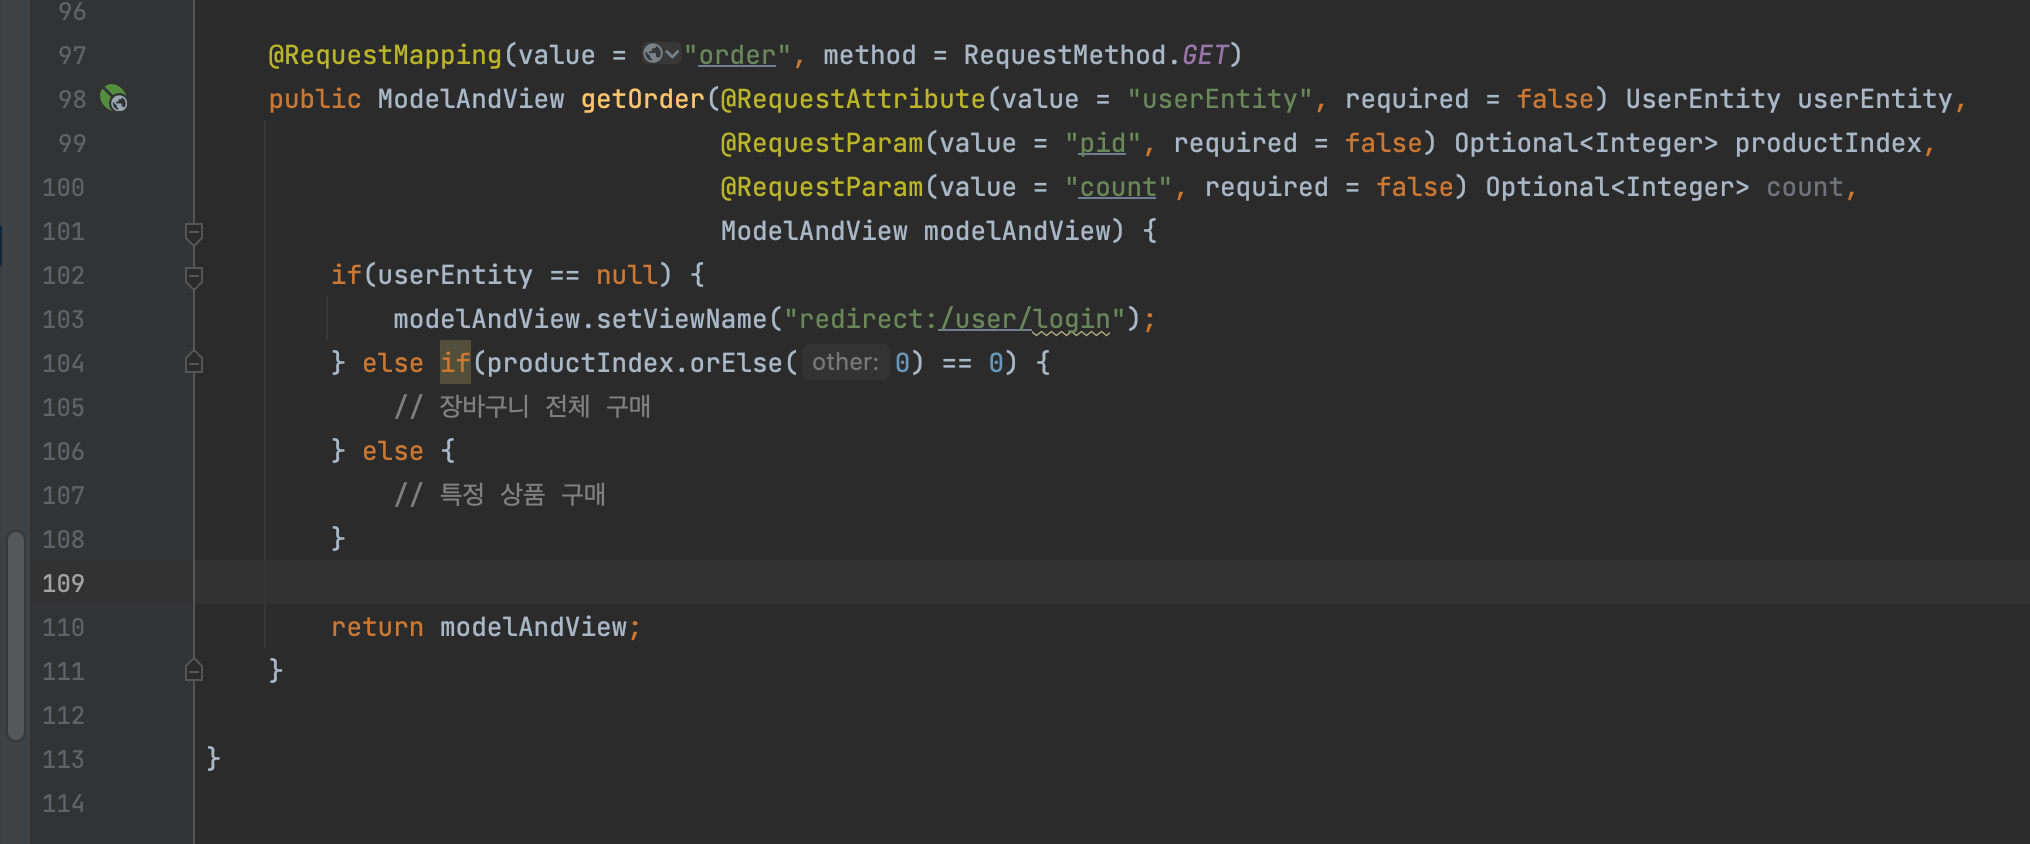
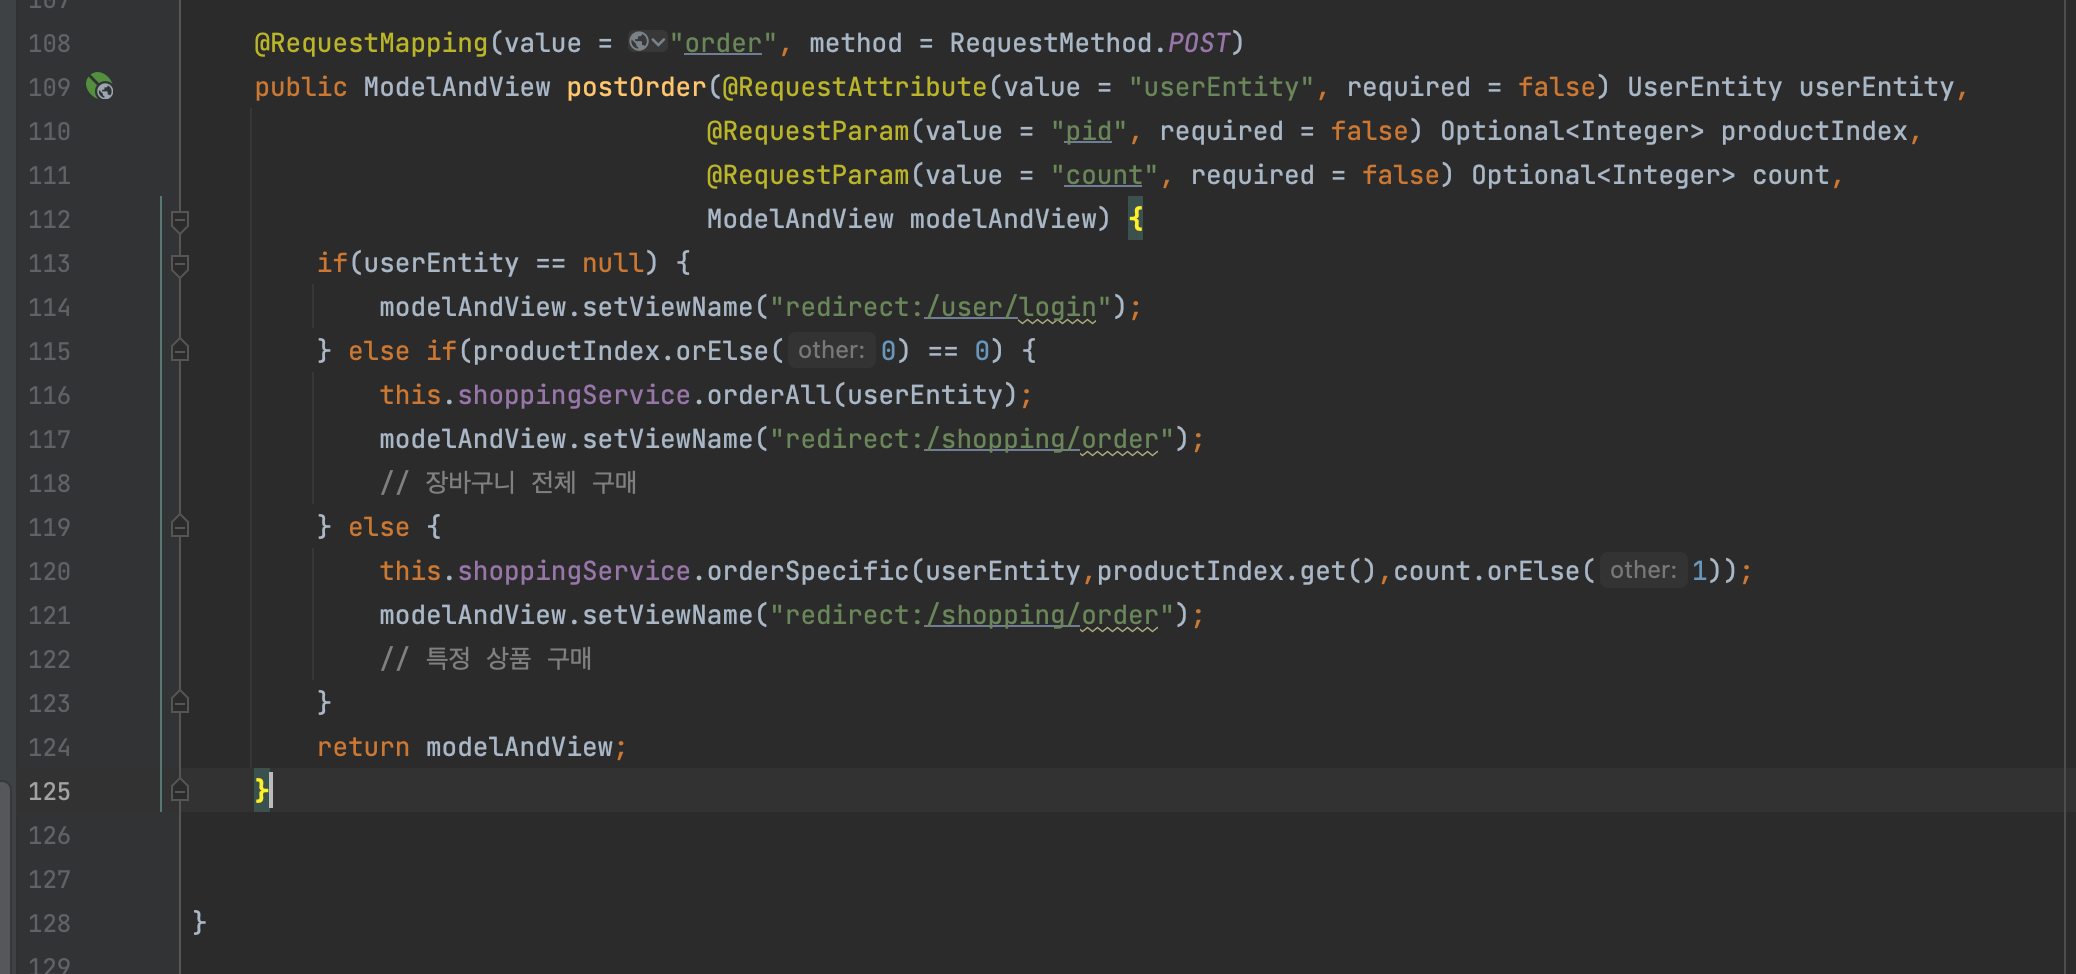
pid와 count가 붙으면 그 상품만 구매하는 것이고,
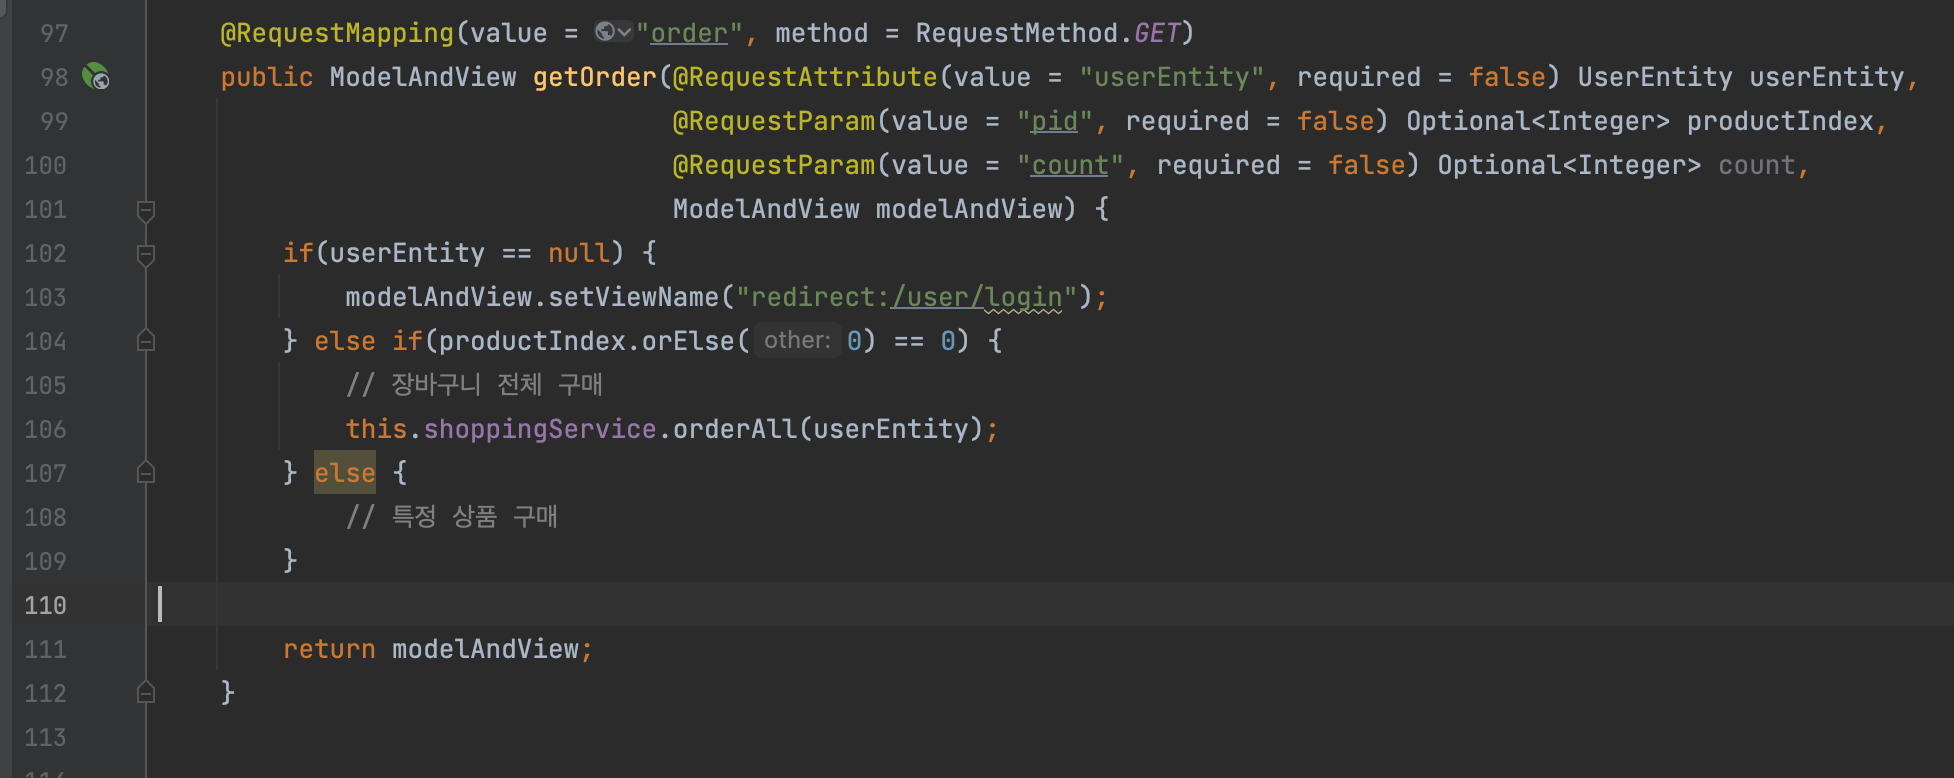
그냥 /shopping/order 이렇게 들어오면 장바구니에 있는 것을 다 구매하도록 처리를 할 것.
detail.html form으로 변경 .
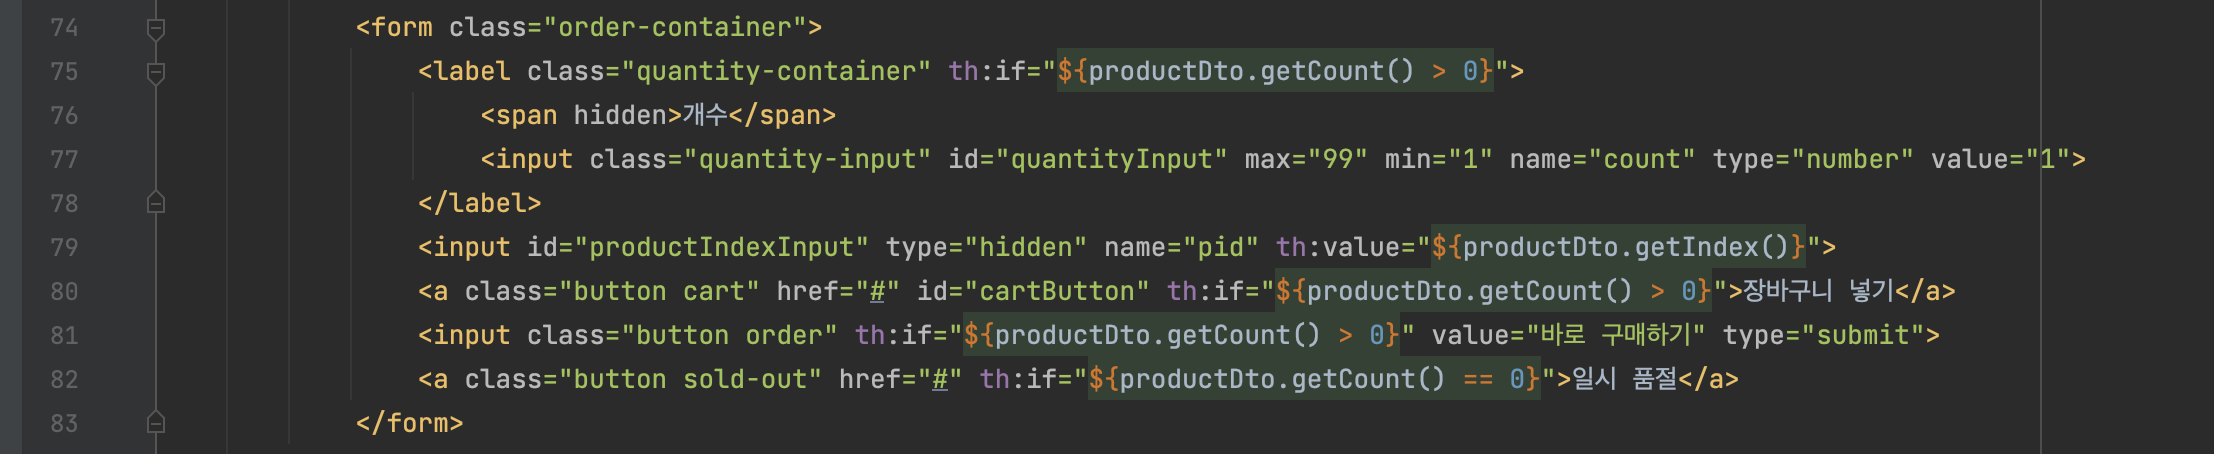
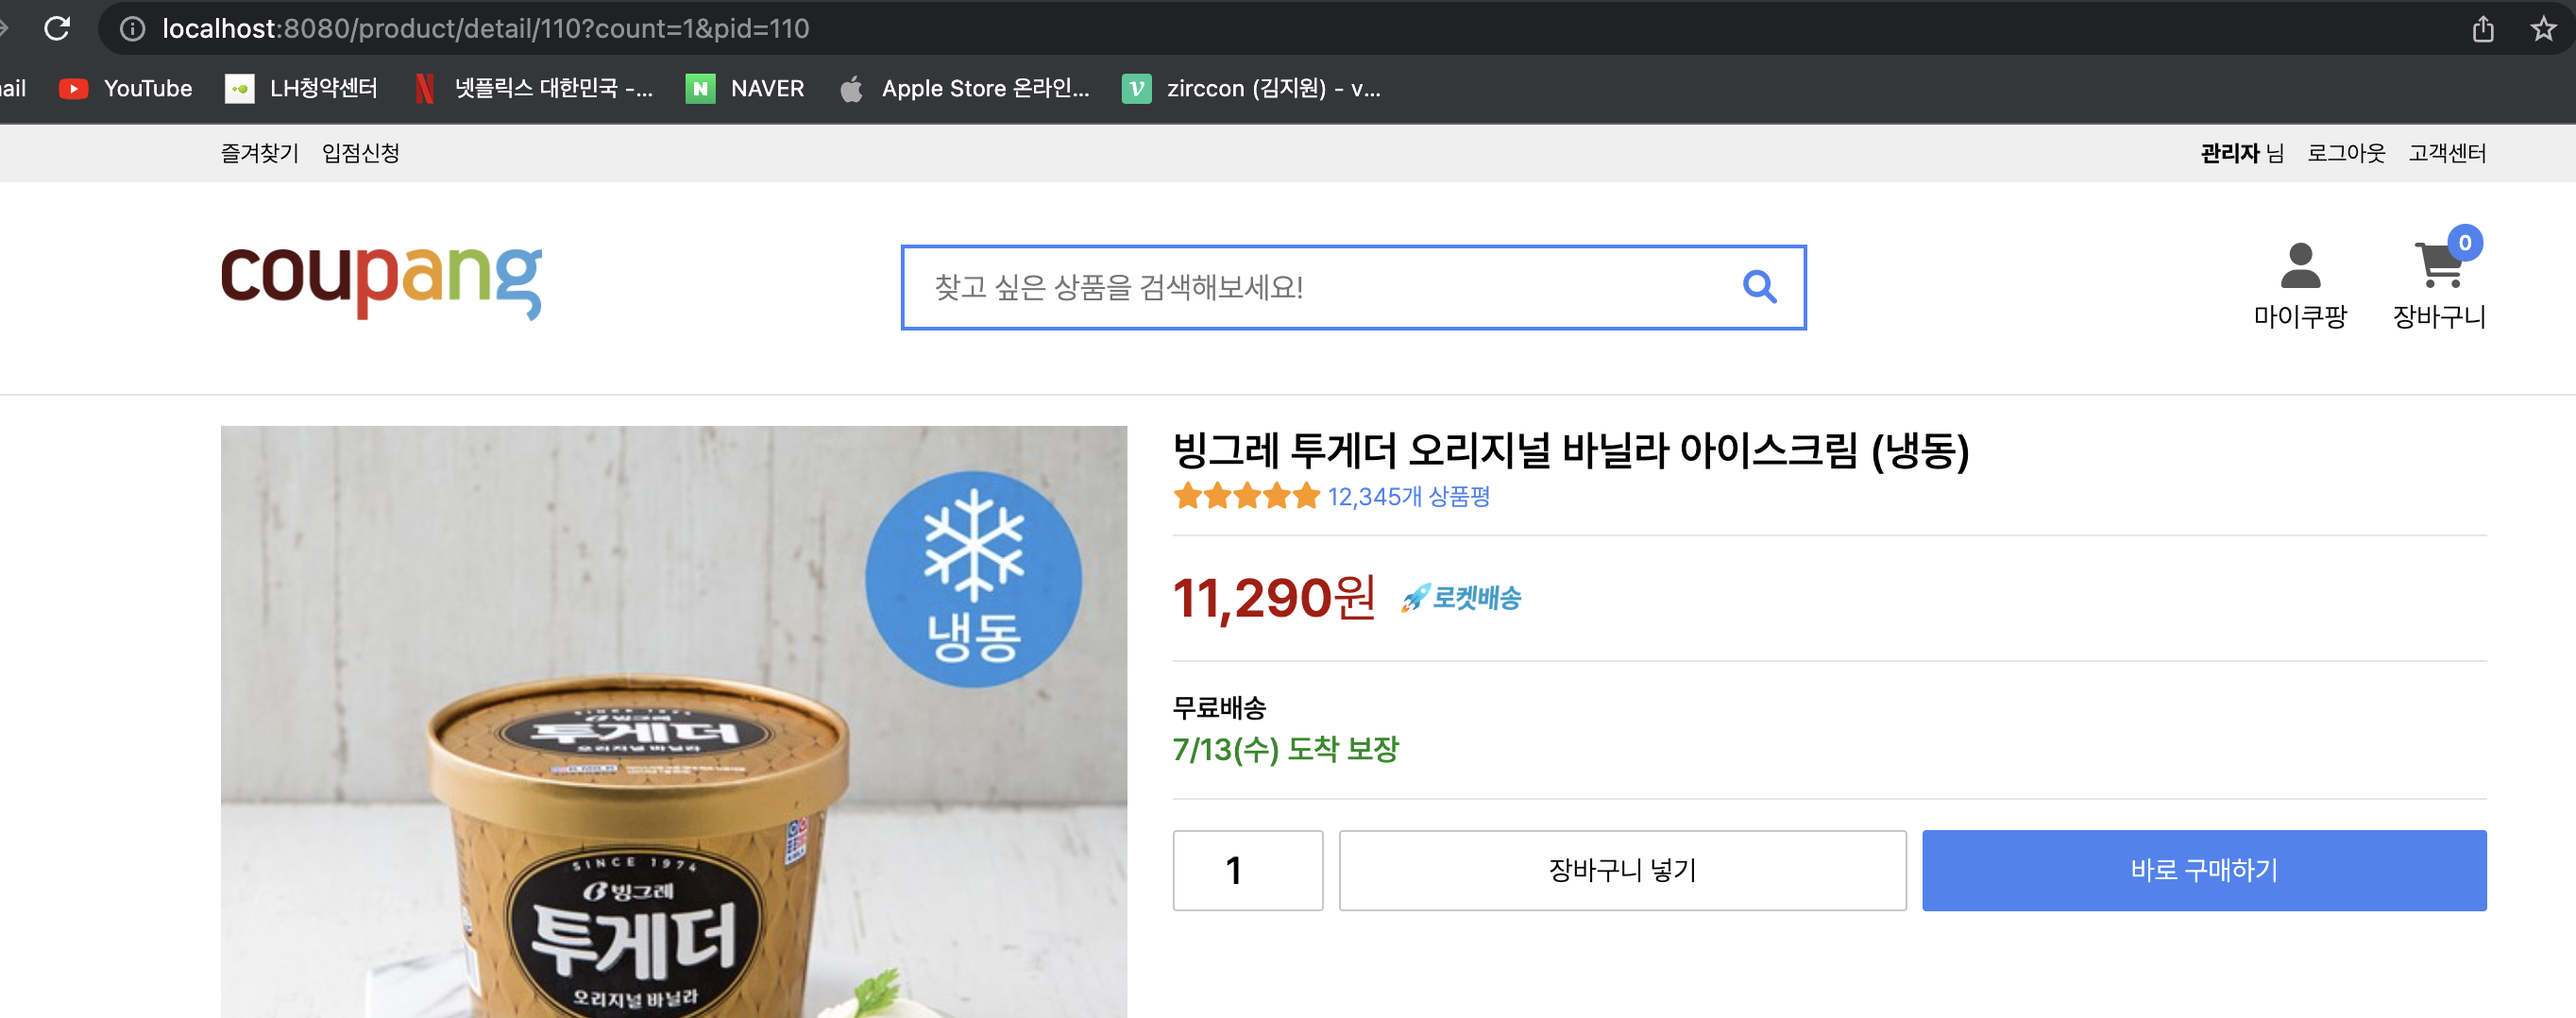
이제 바로 구매하기를 눌러보면
http://localhost:8080/product/detail/110?count=1&pid=110
이렇게 맵핑이 된다.
그리고 action 으로 order로 맵핑을 보내면
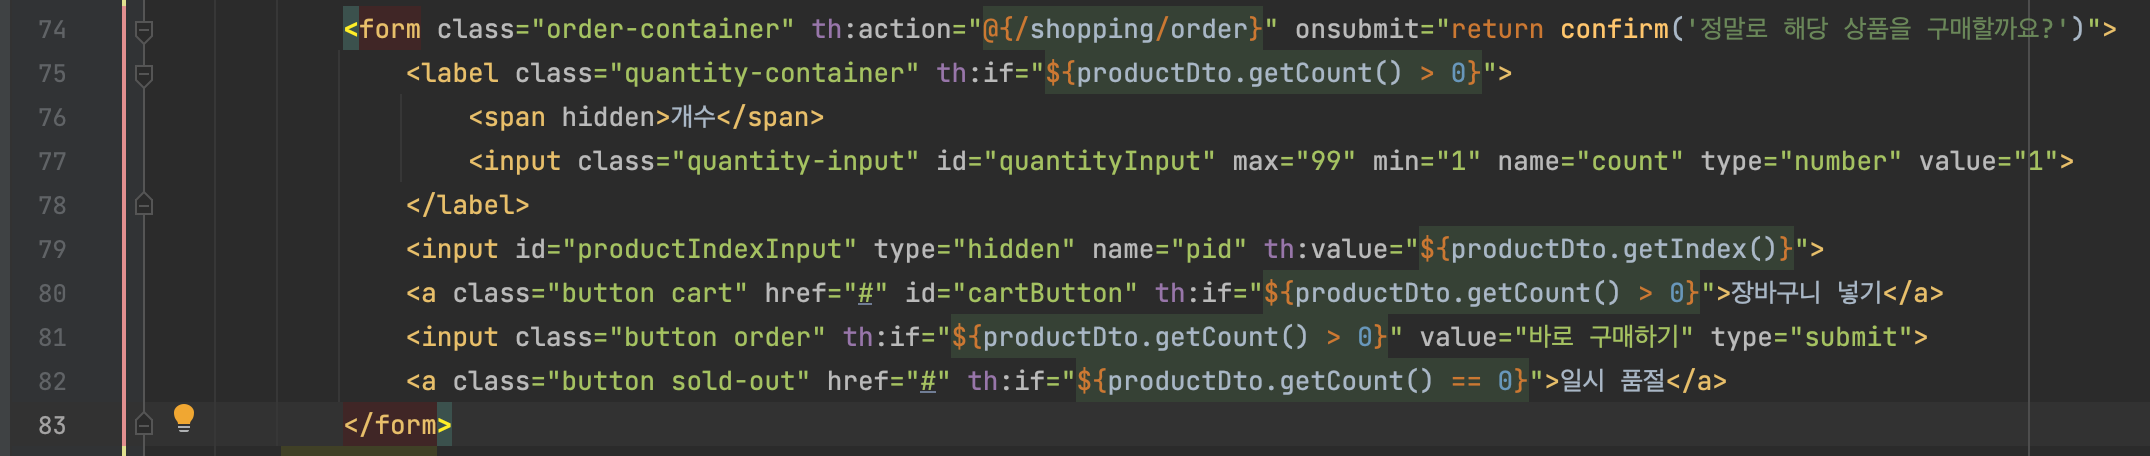
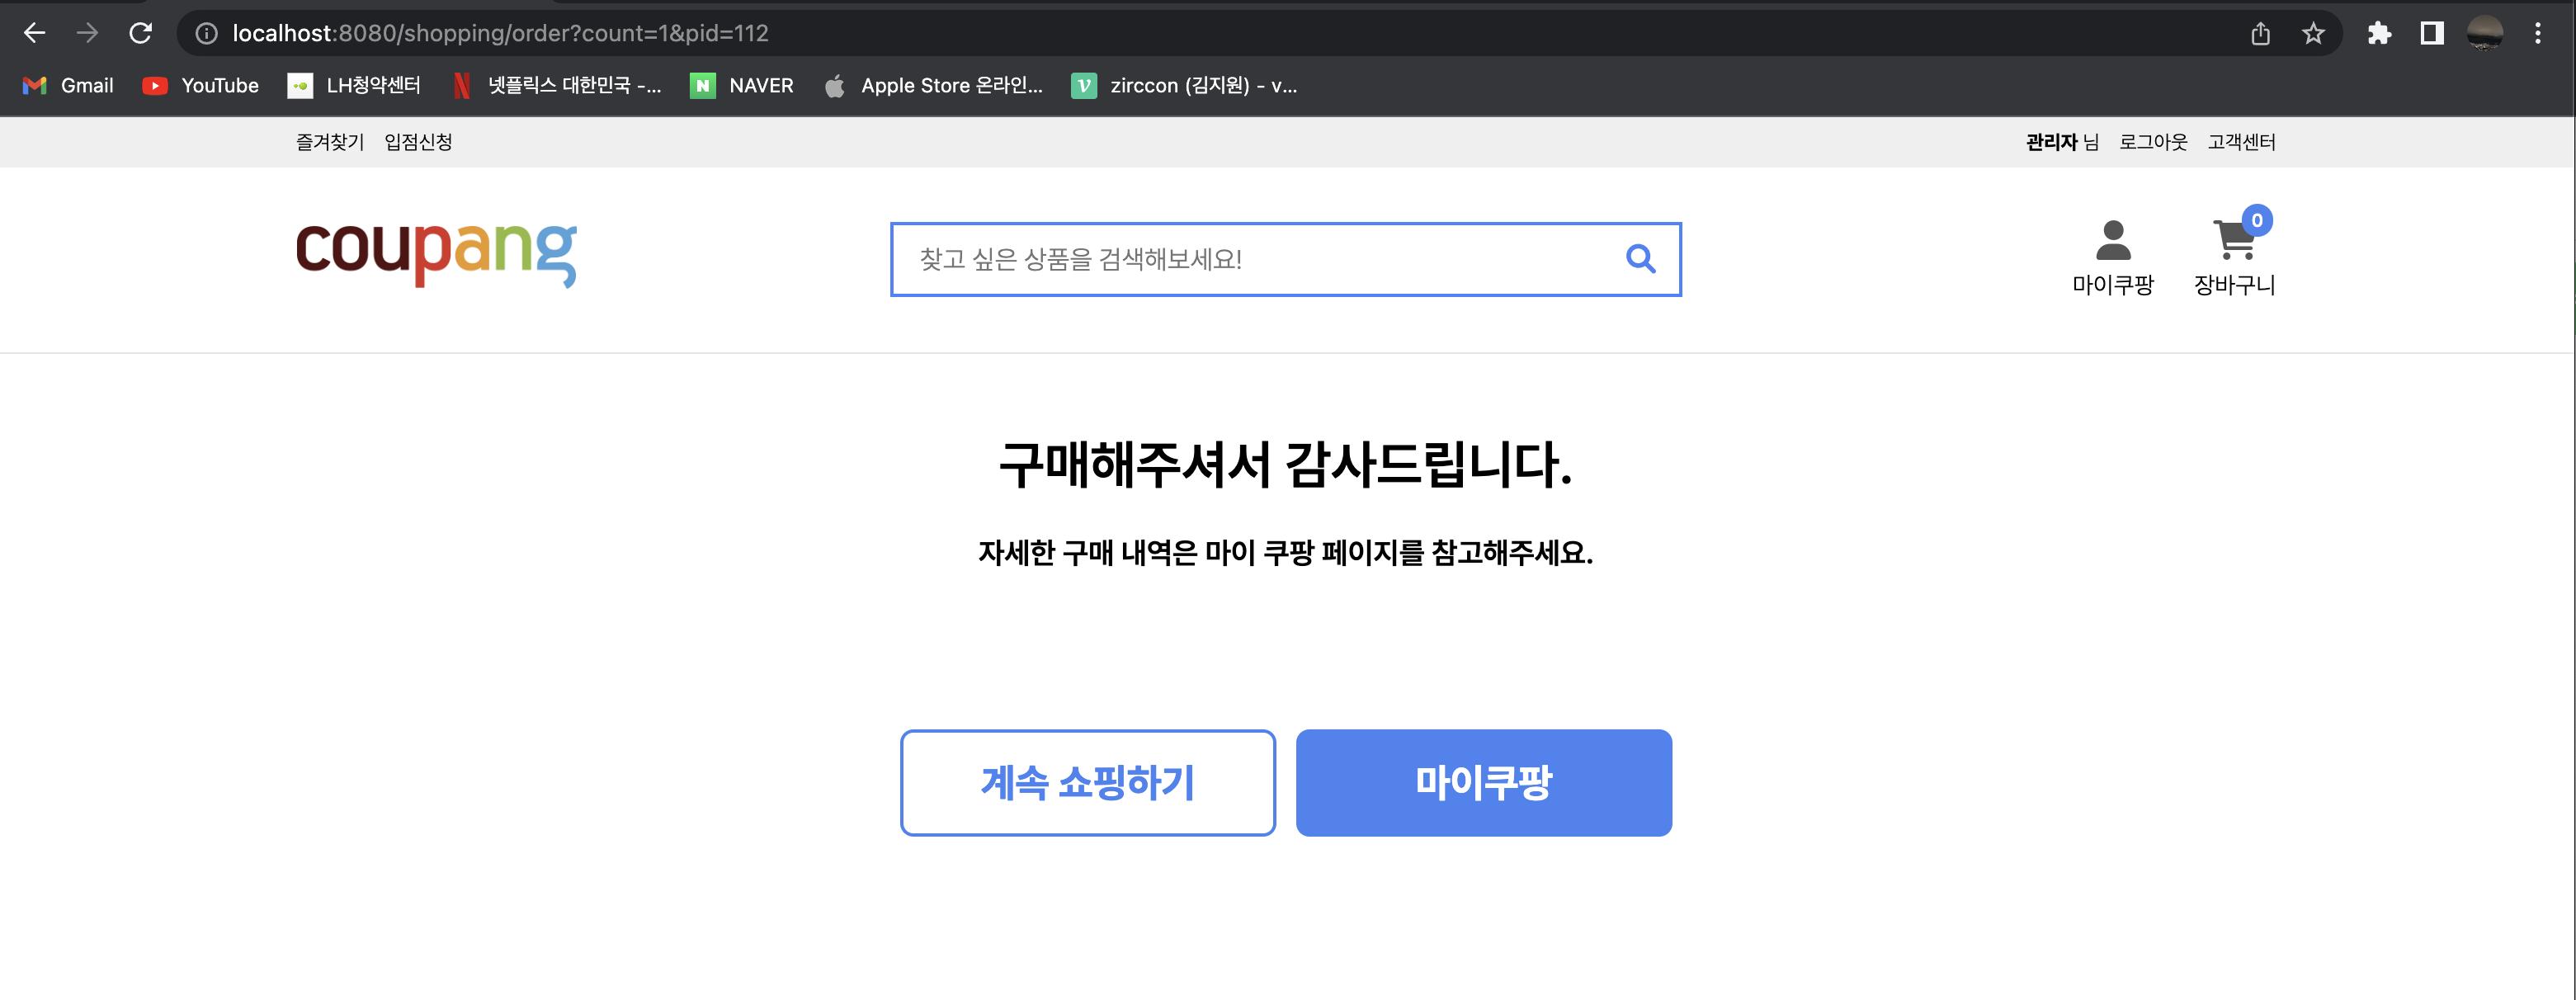
http://localhost:8080/shopping/order?count=1&pid=110
이제 detail화면에서 구매를 하면 해당 상품만 구매가 되는 식이 될 것.
cart.html 에도 onclick

이제 구현만 하면 되겠다.
참고로 html에서 onclick 이 아닌, 사실 정석은 CSP를 이용한다.
하지만 실무에서도 잘 하지 않는 편.
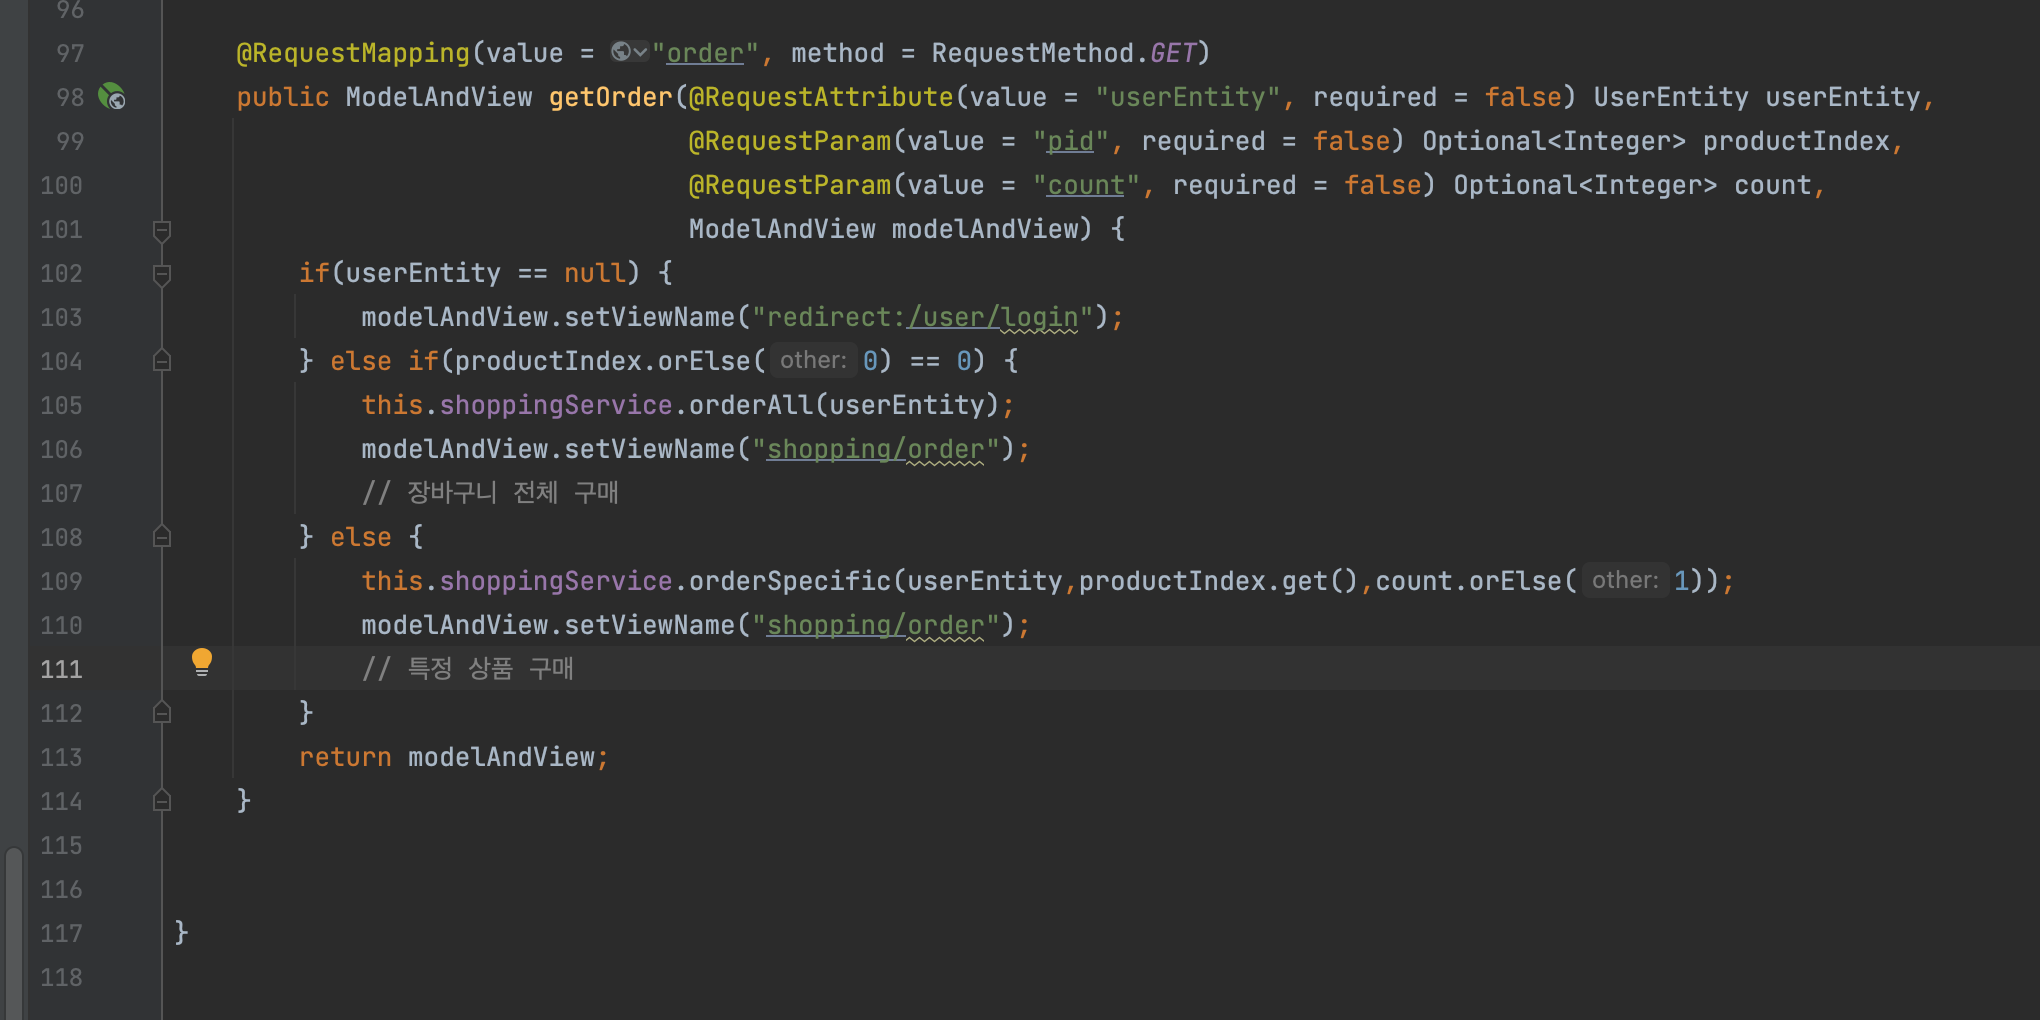
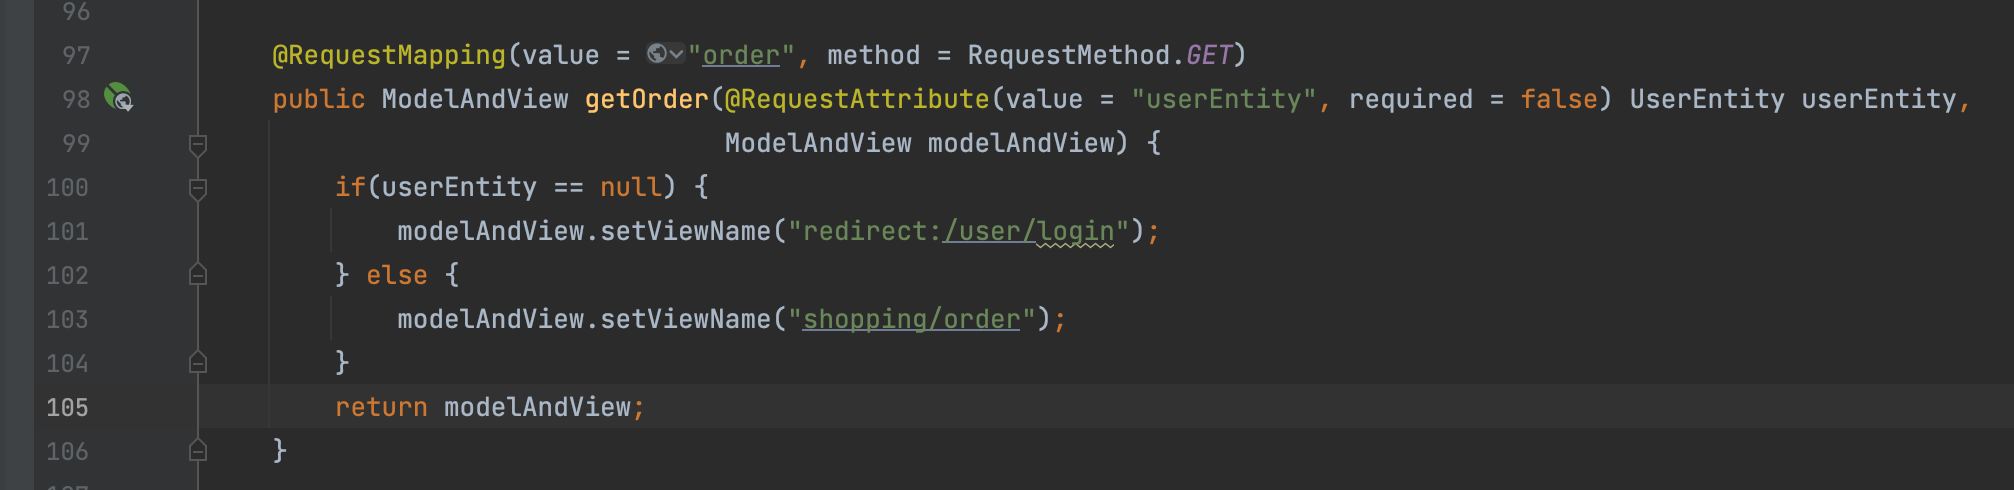
ShoppingController 에서 getOrder
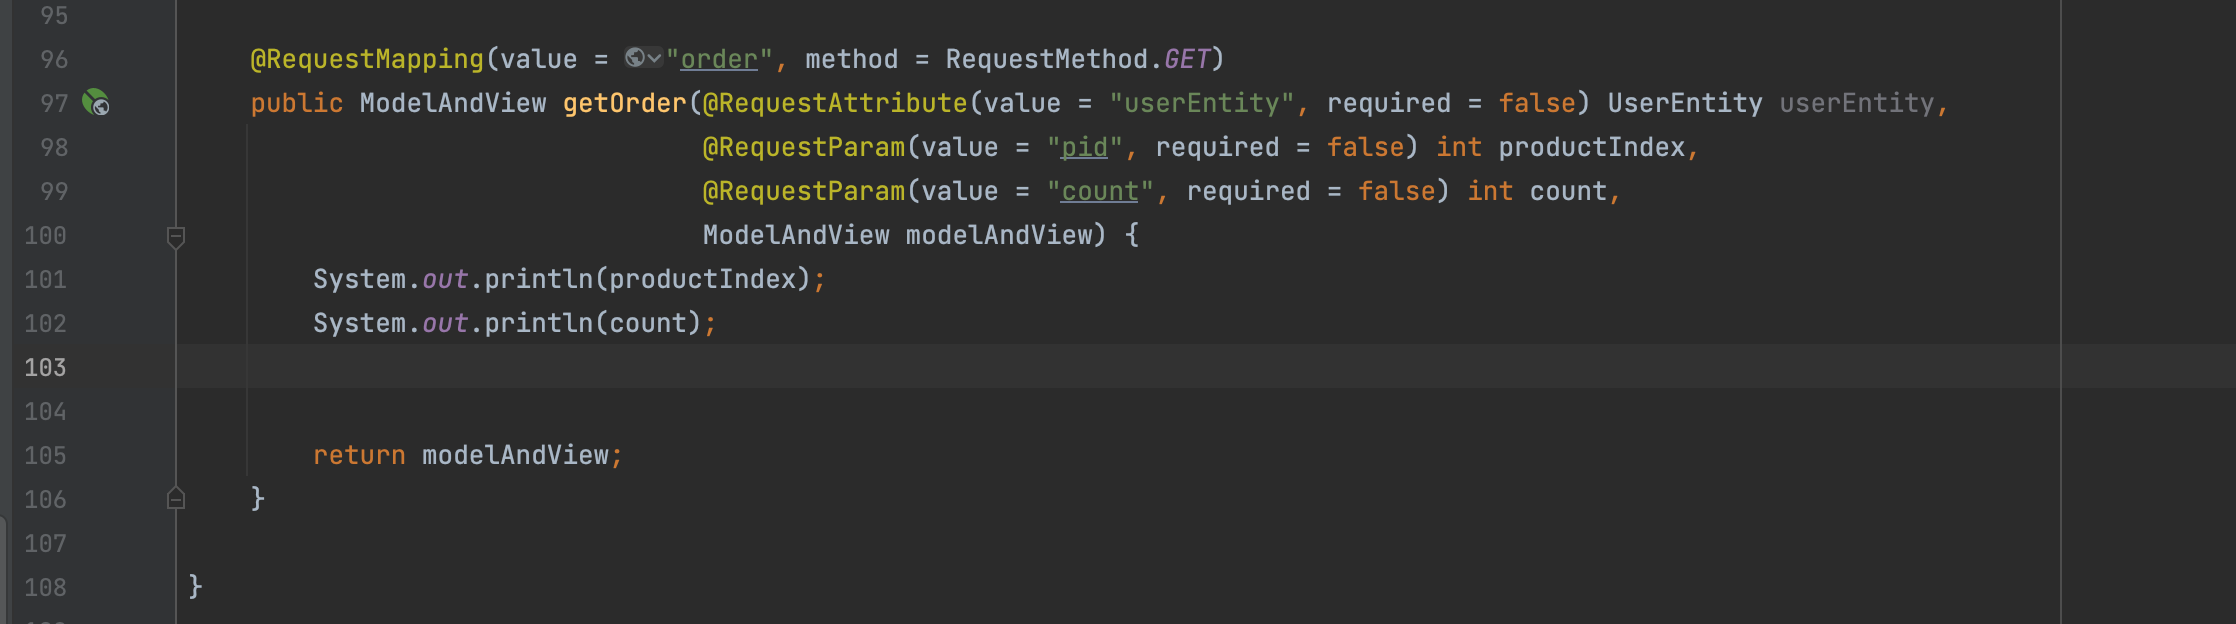
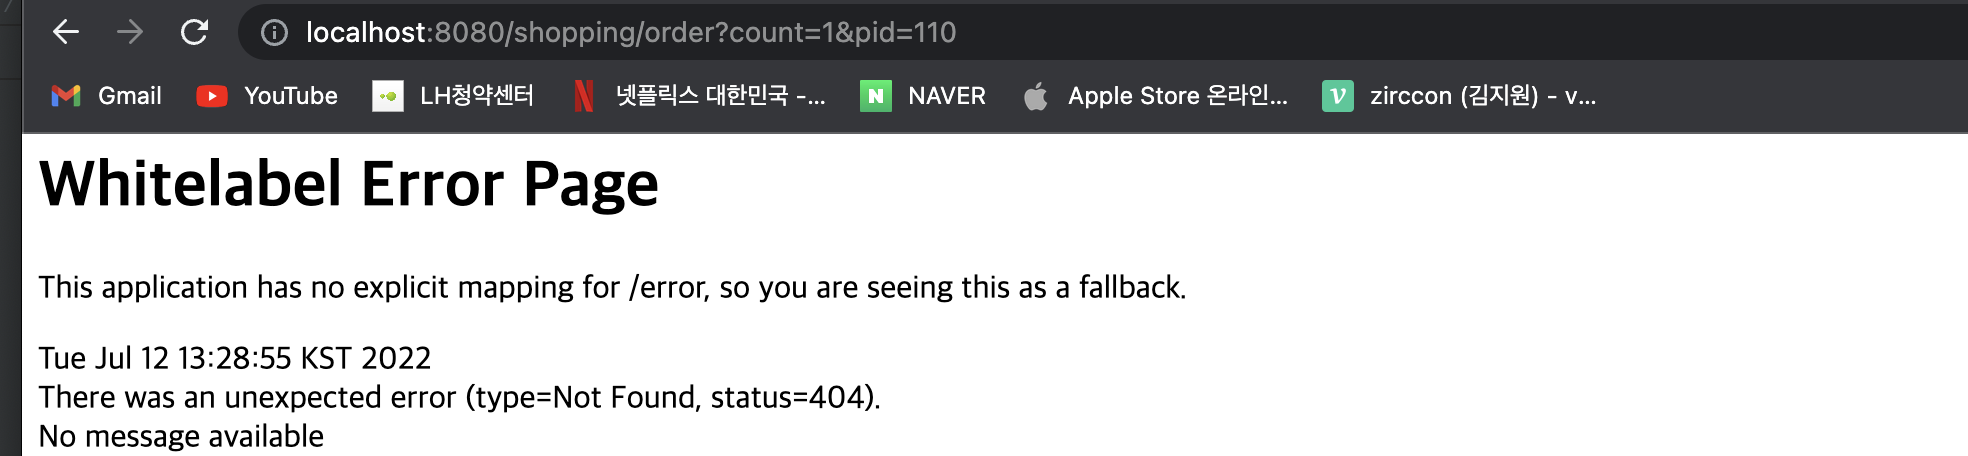
현재 구매하기 눌러보면 productIndex와 count 값은 넘어오지만 아래의 오류가 뜬다.
required = false이기 때문에 int인 productIndex와 count가 값이 없어 null이 되면 오류가 뜰 수 밖에 없는 상황.


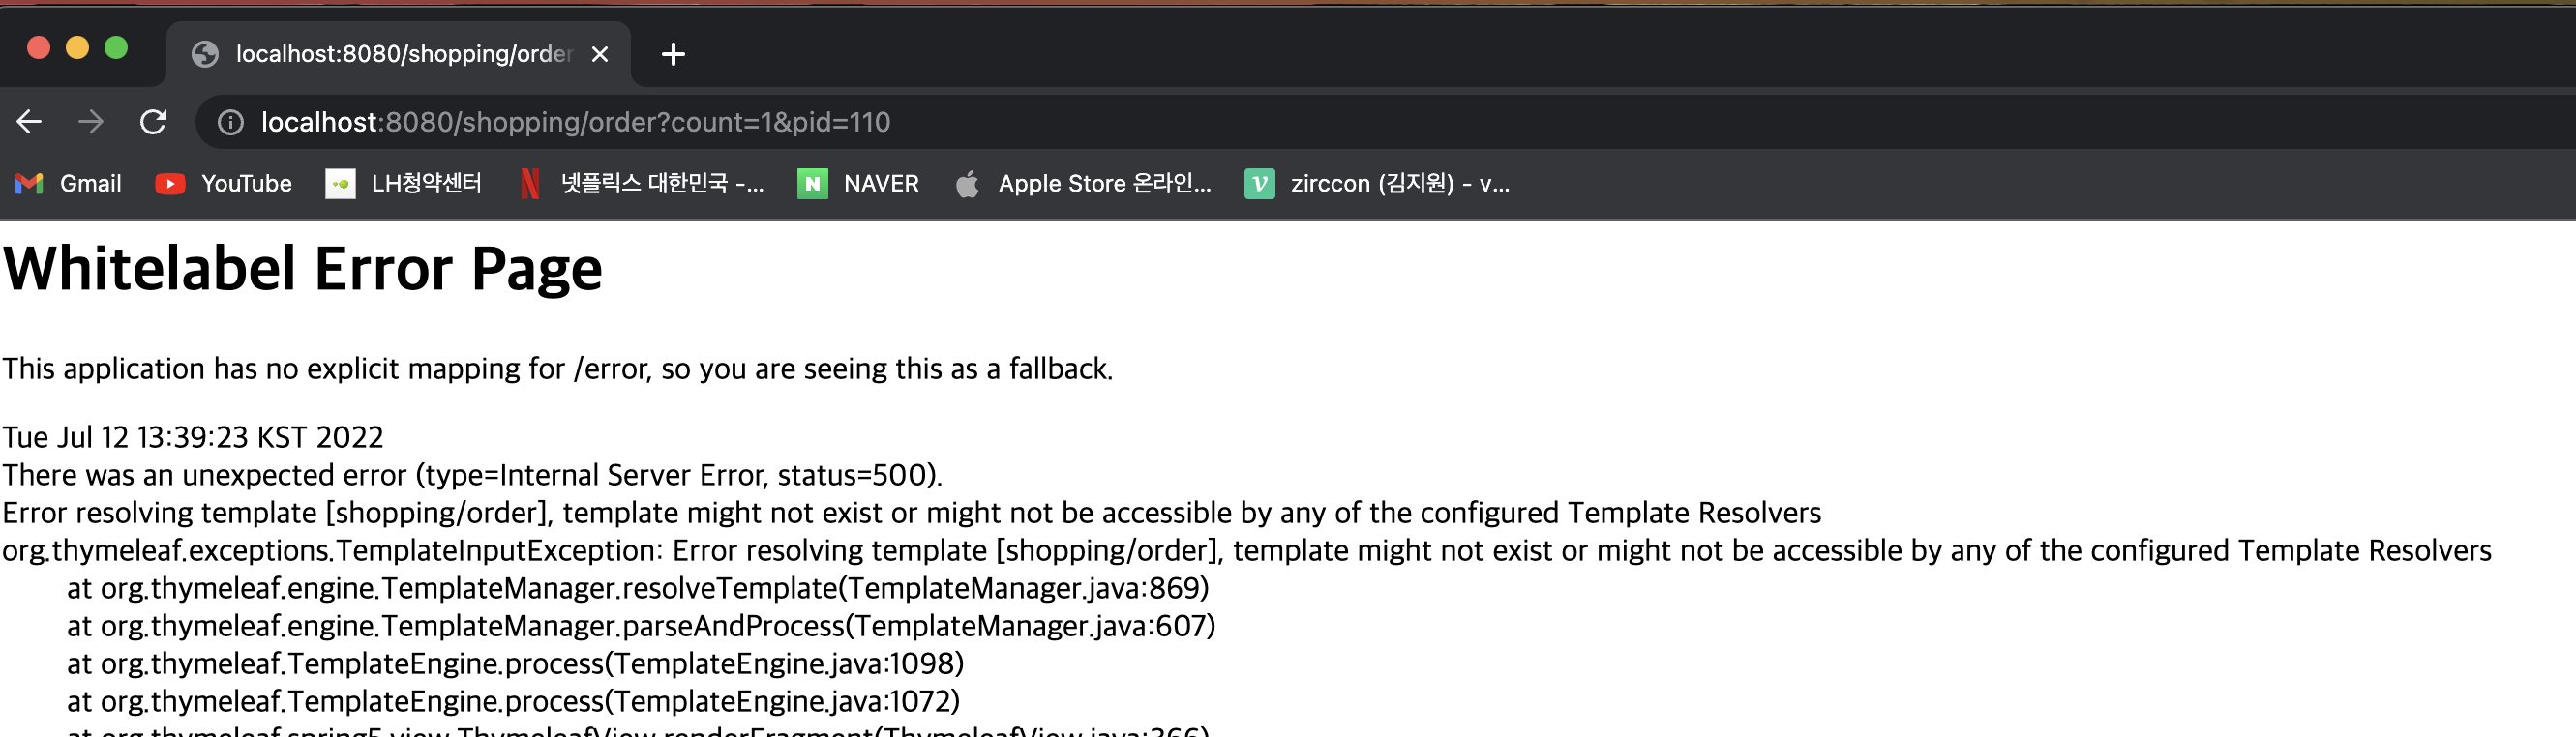
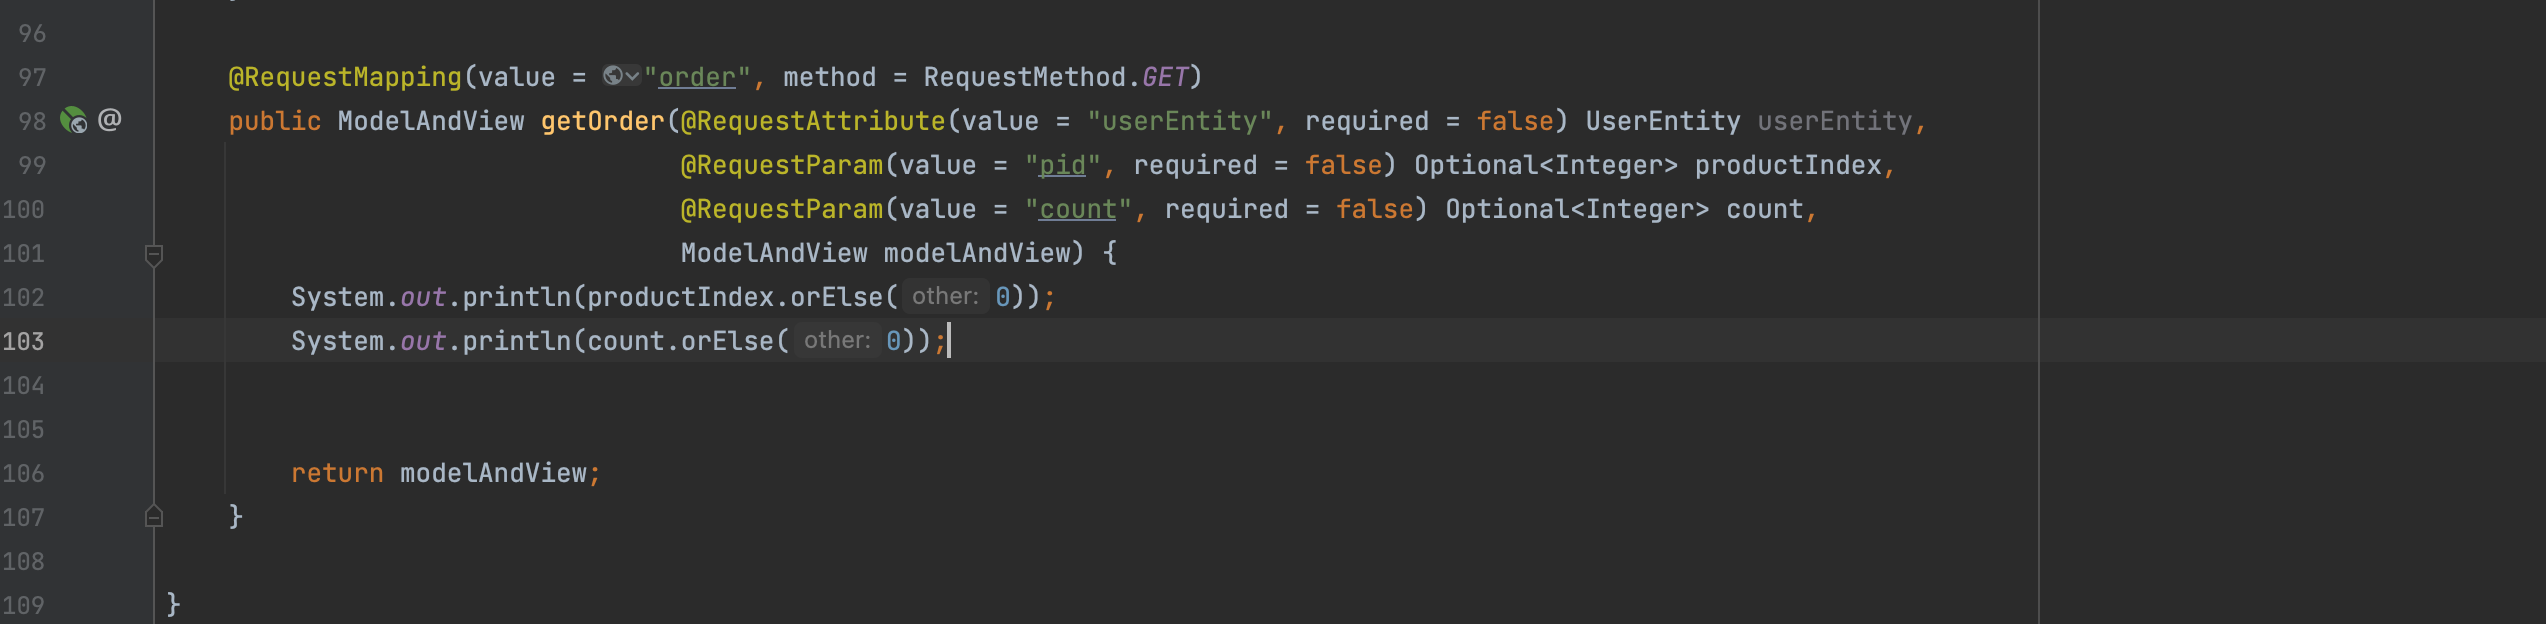
Optional<Integer>로 변경
이제 orElse를 통하여 null을 0으로 막을 수 있게 되었다.
ShoppingService

ShoppingController
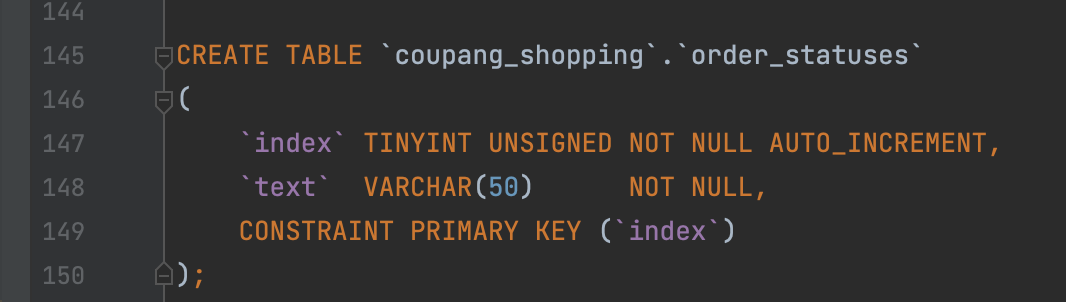
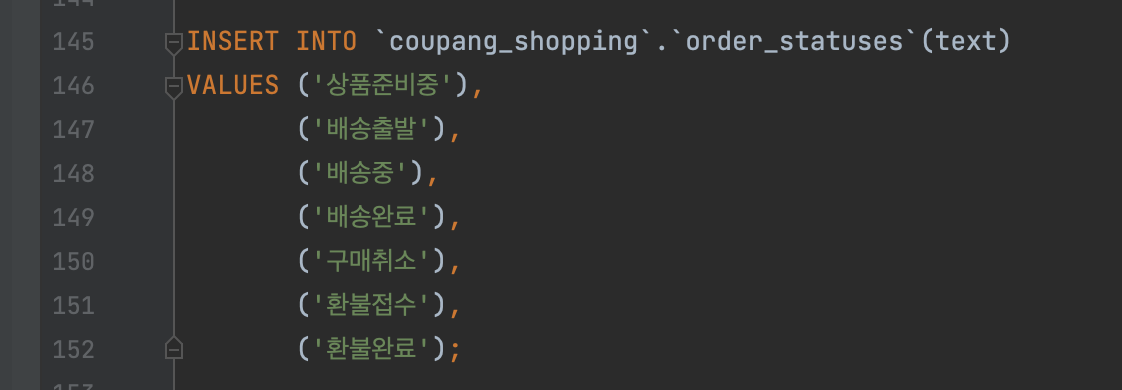
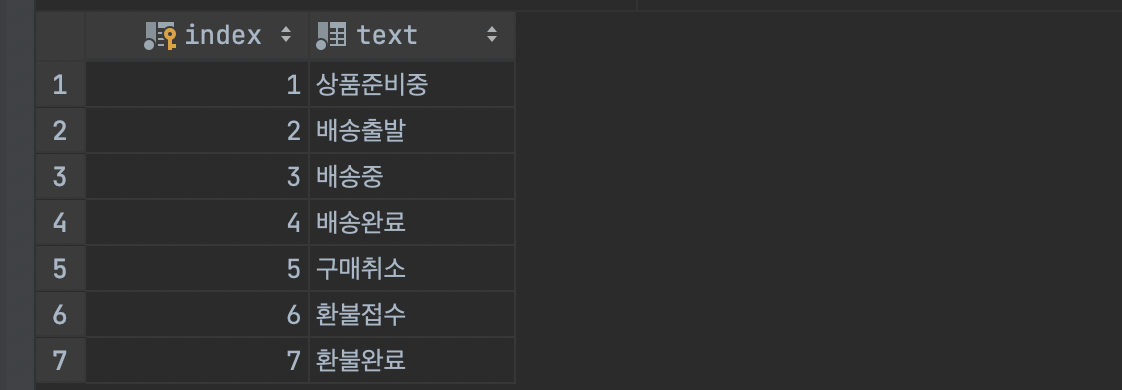
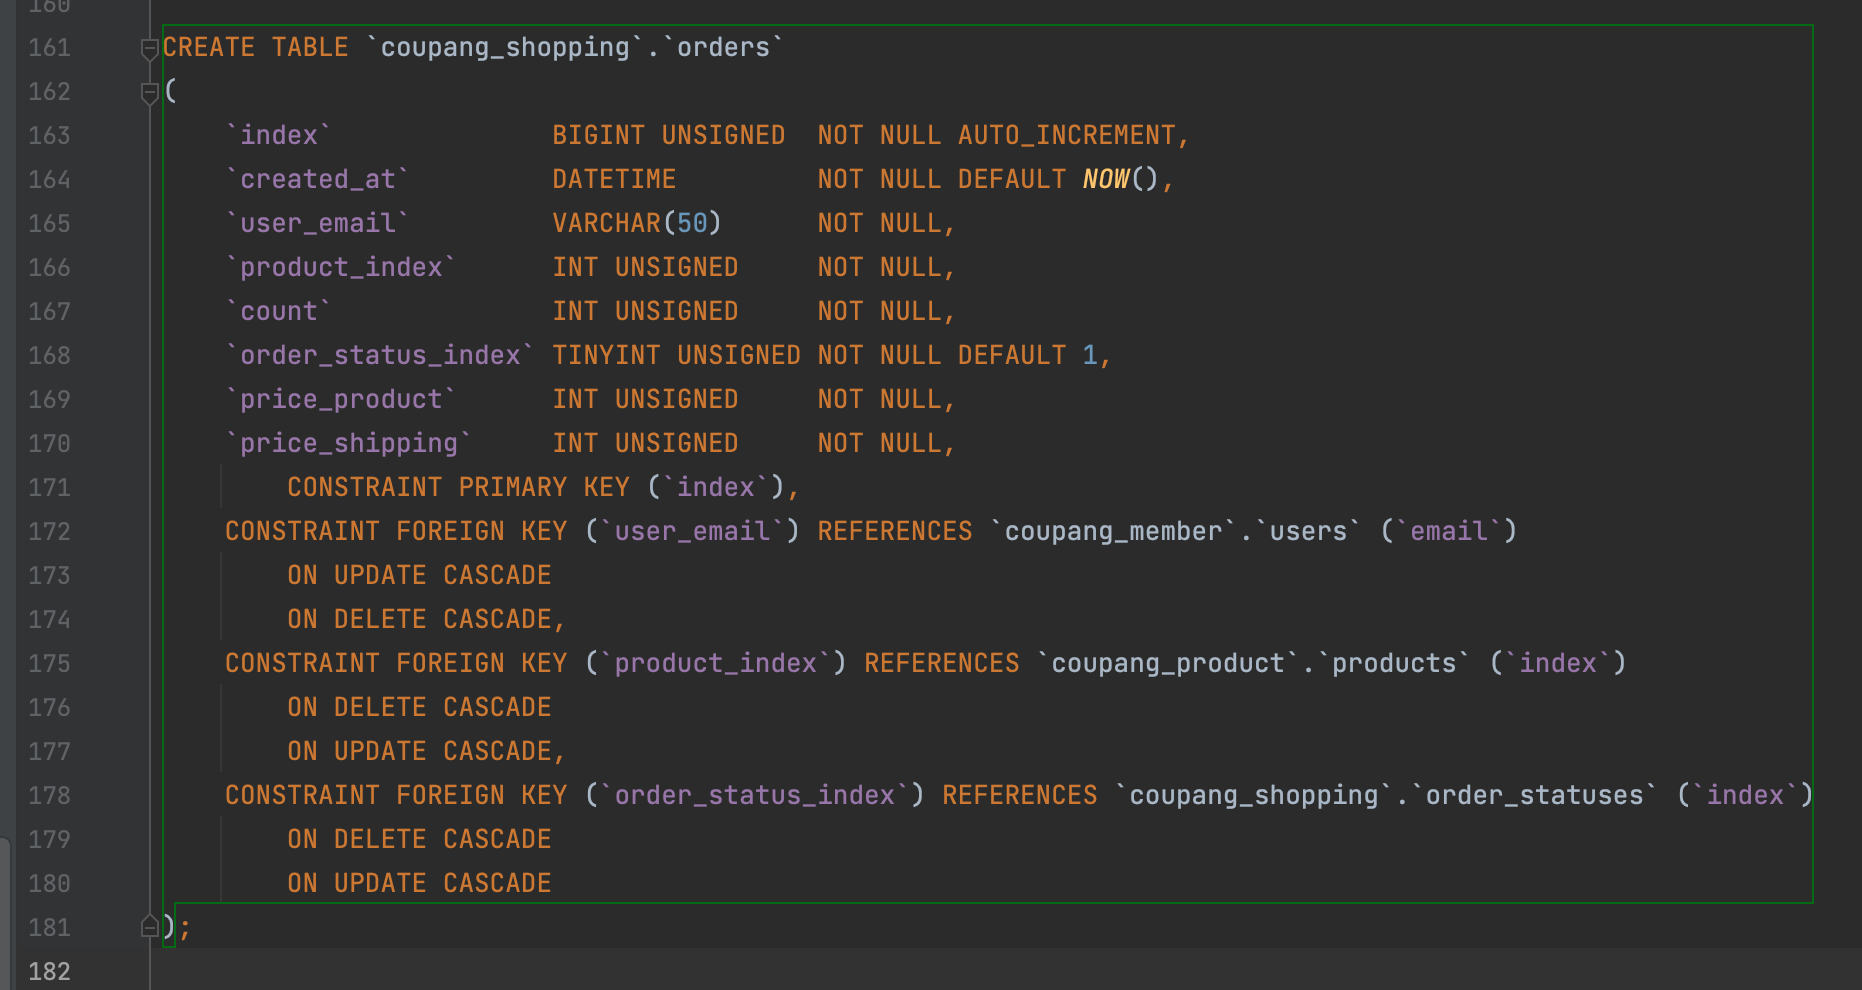
테이블 추가

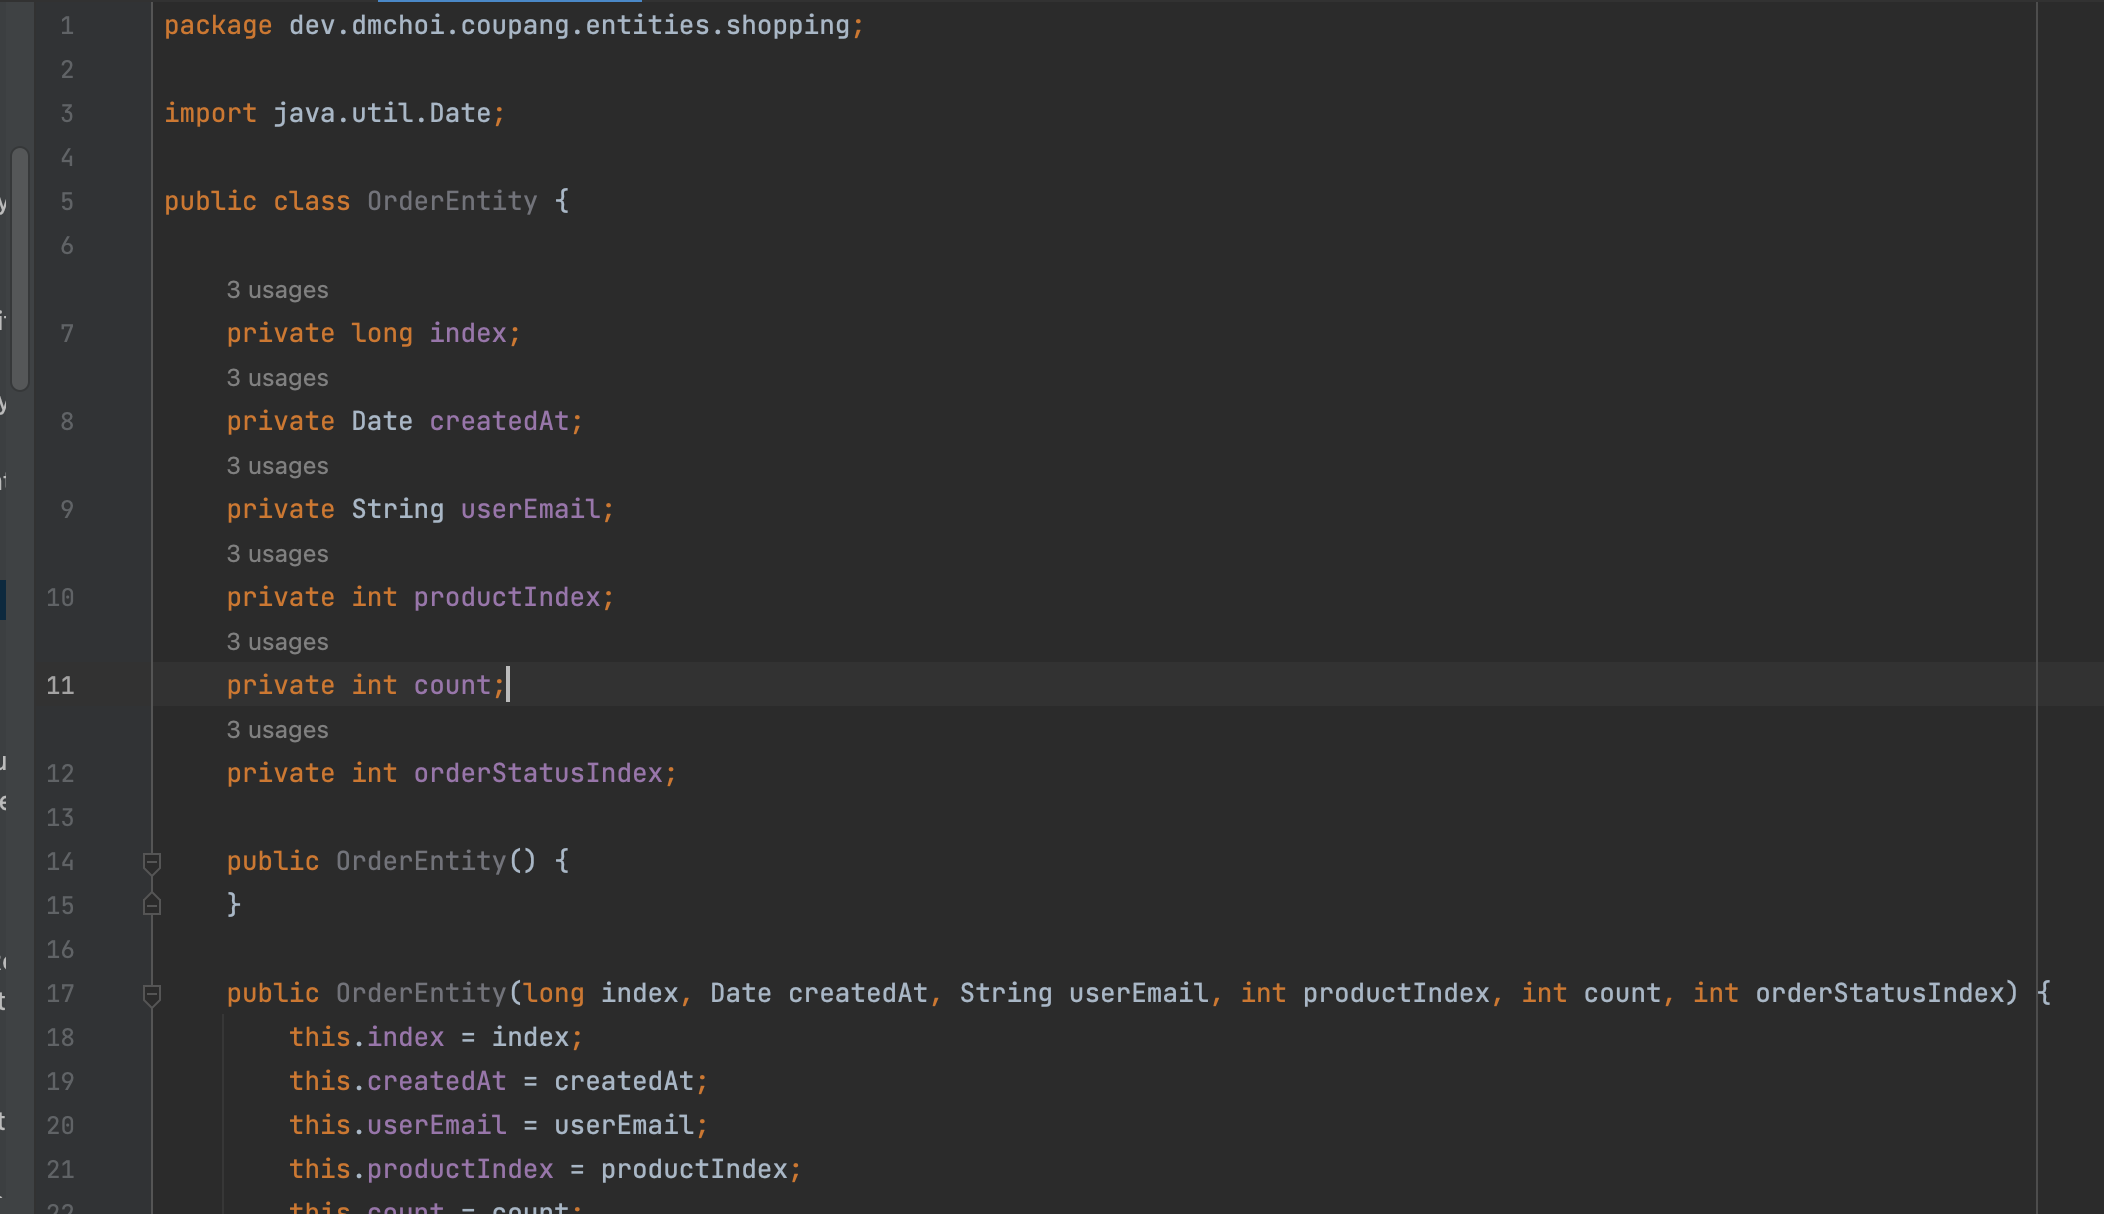
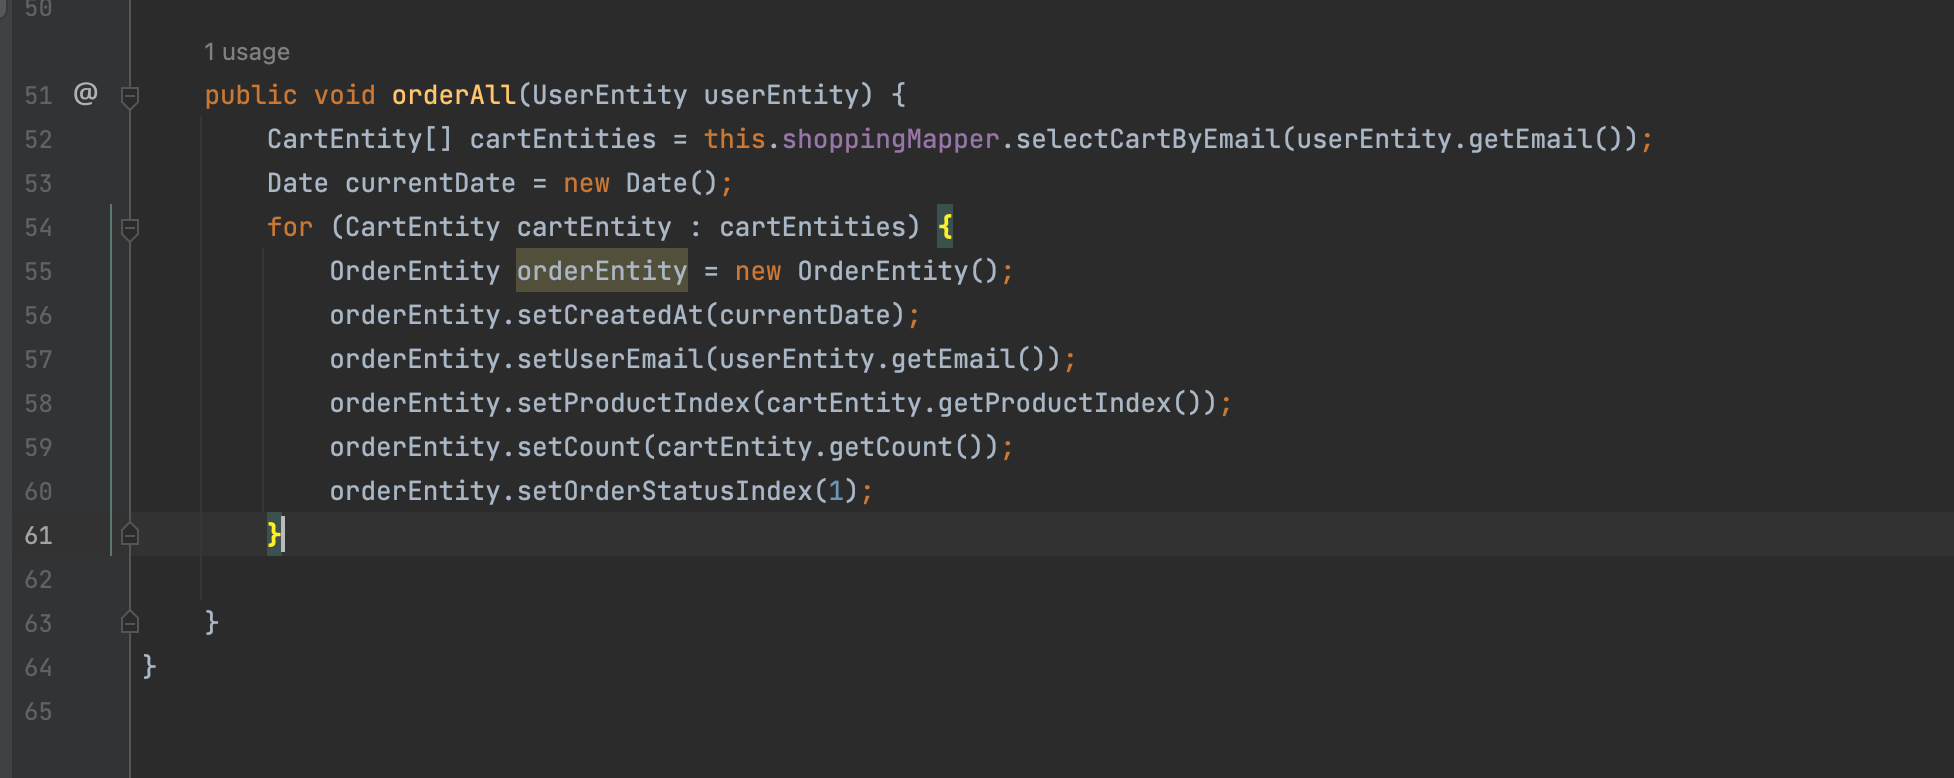
OrderEntity
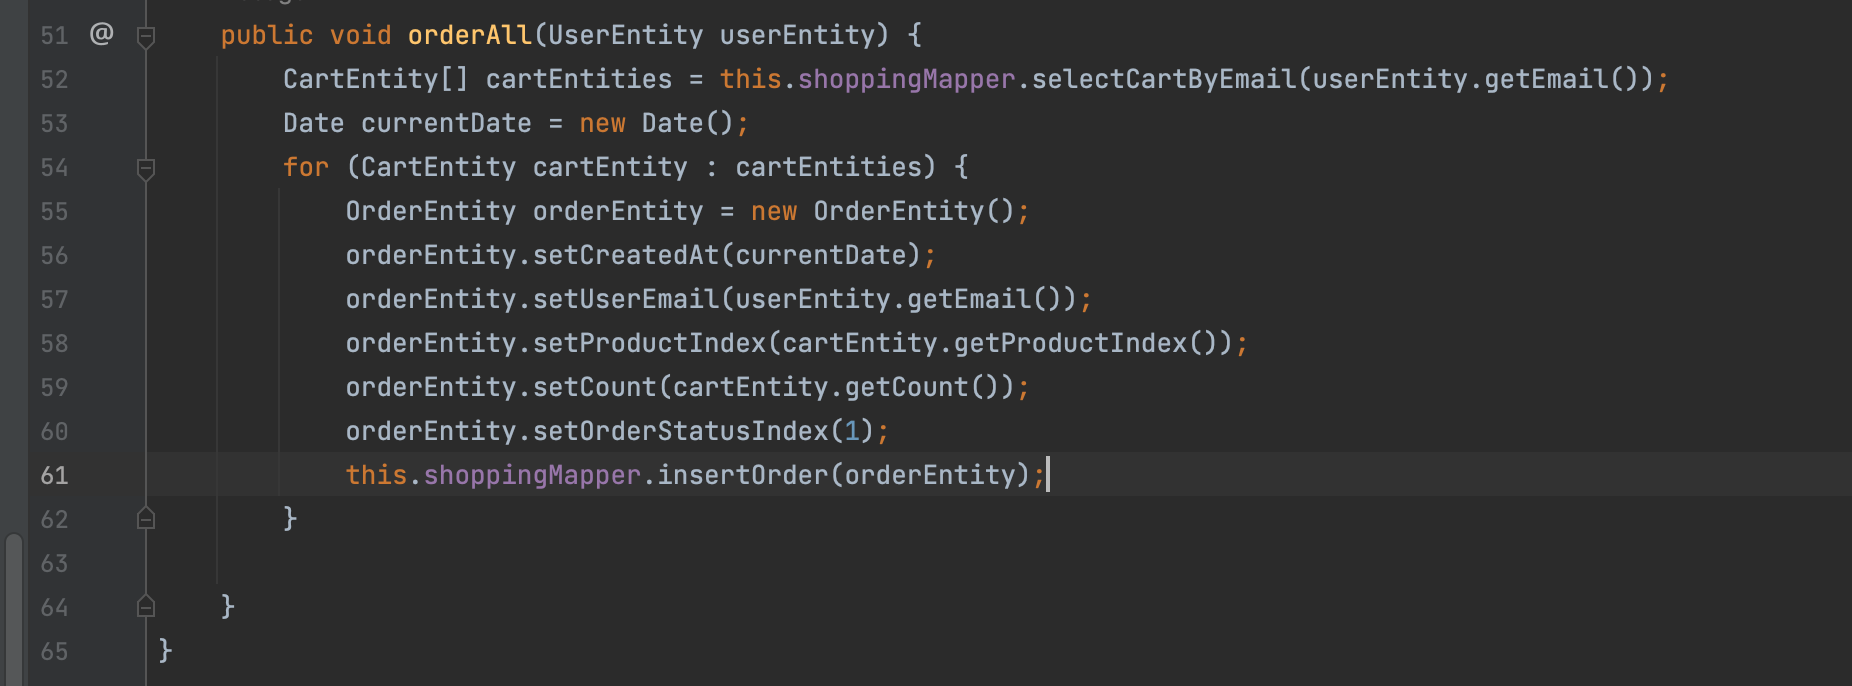
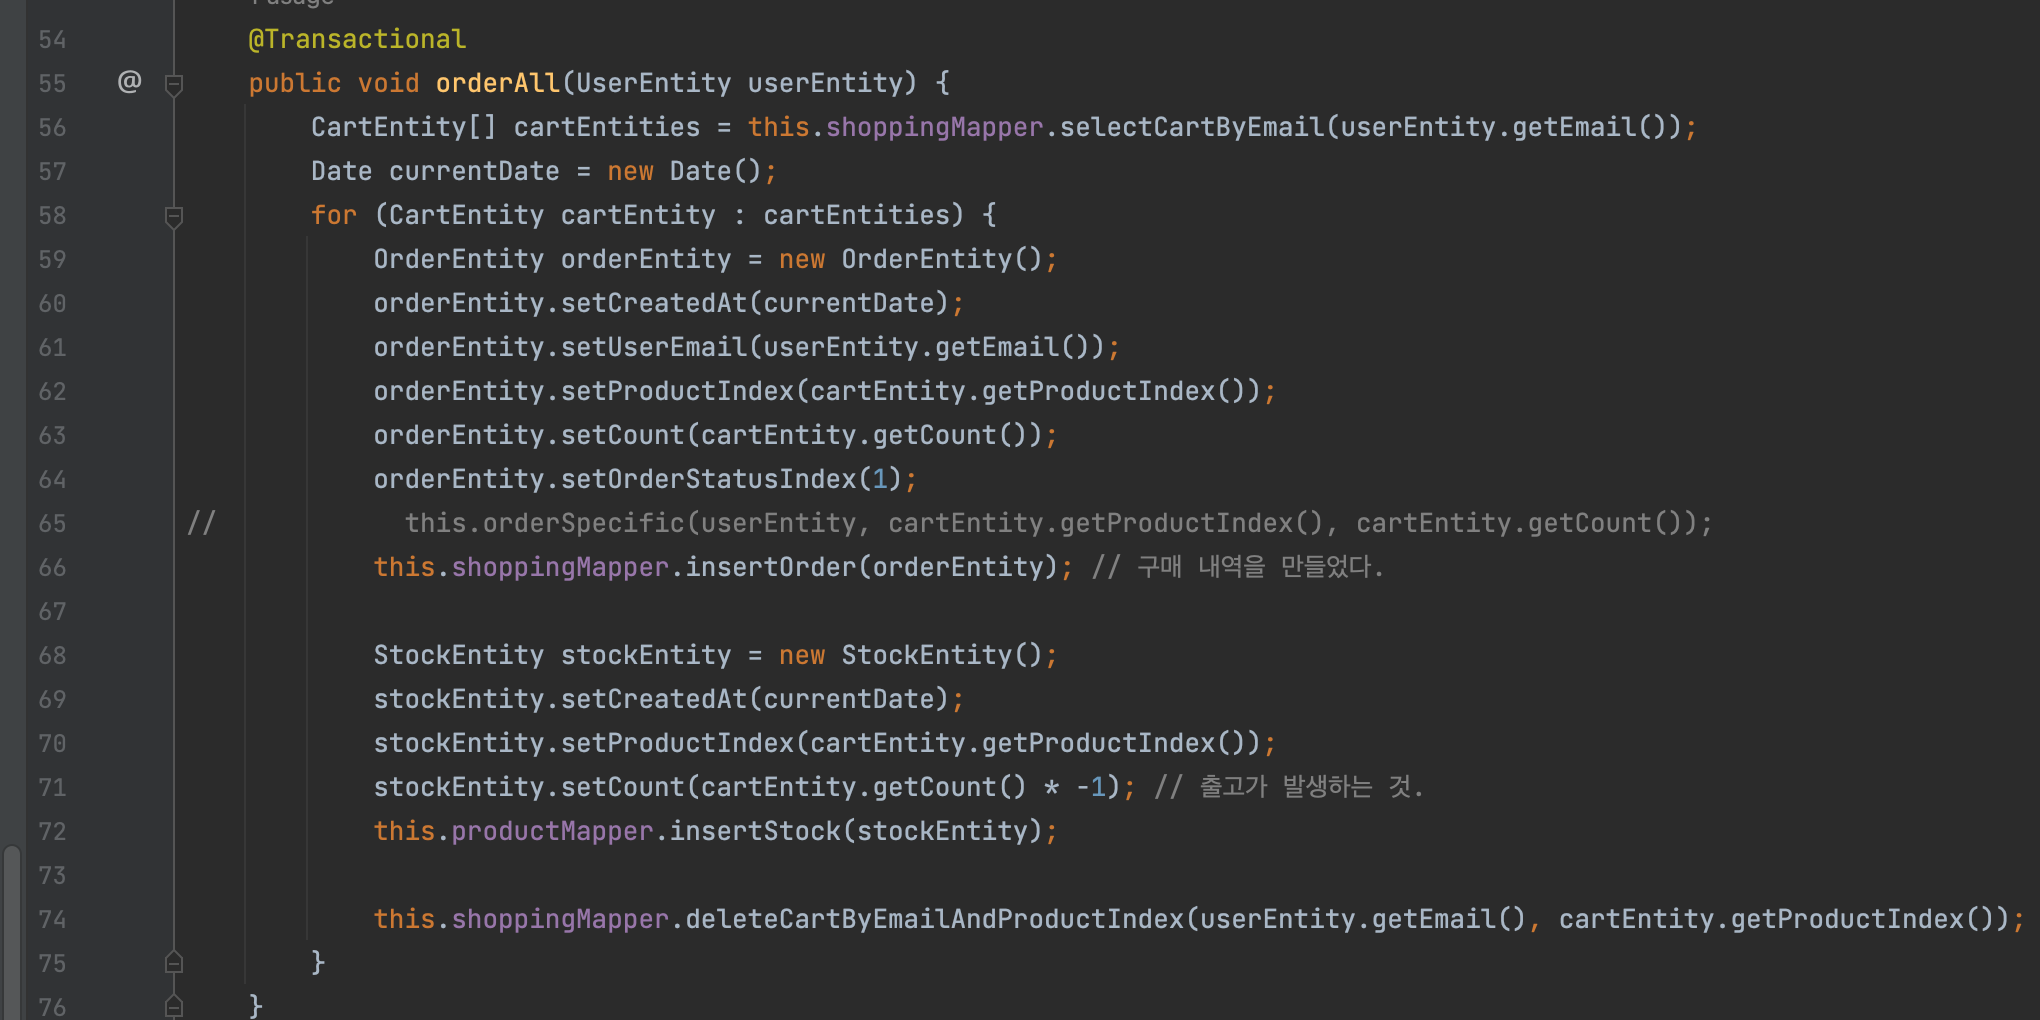
ShoppingService
IShoppingMapper

xml

ShoppingService
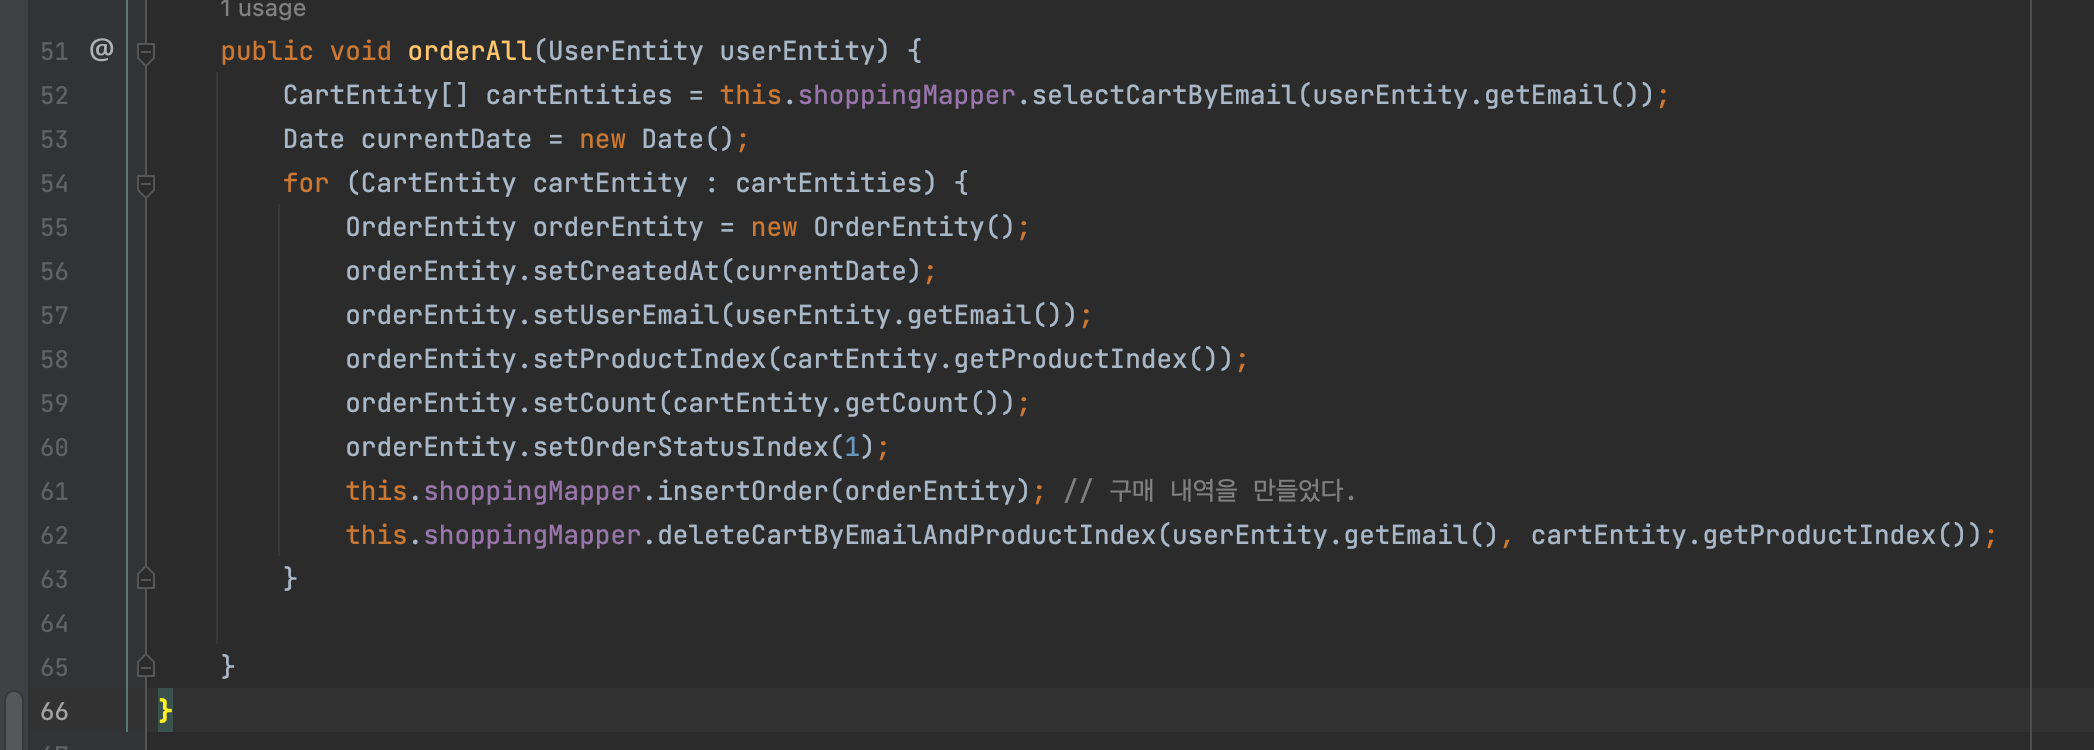
장바구니 내용을 구매하면 장바구니 내용이 비워져야 한다.
구매 후 장바구니 내역이 삭제가 될 것. (delete)
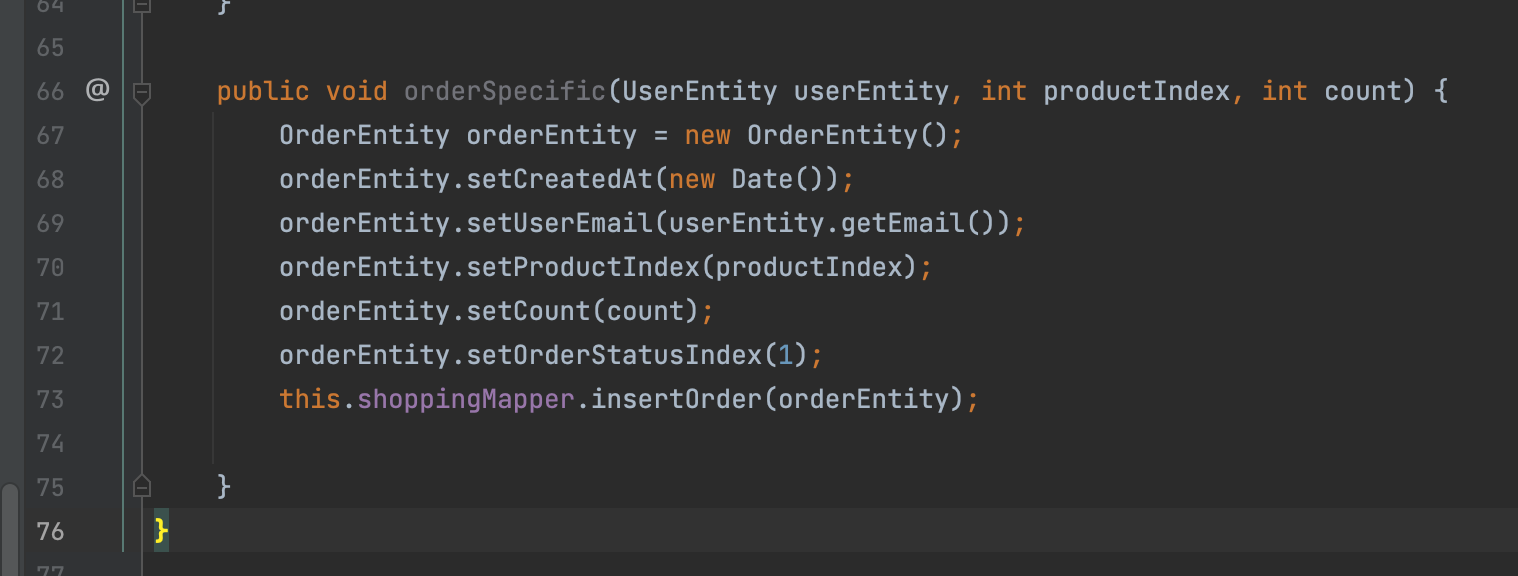
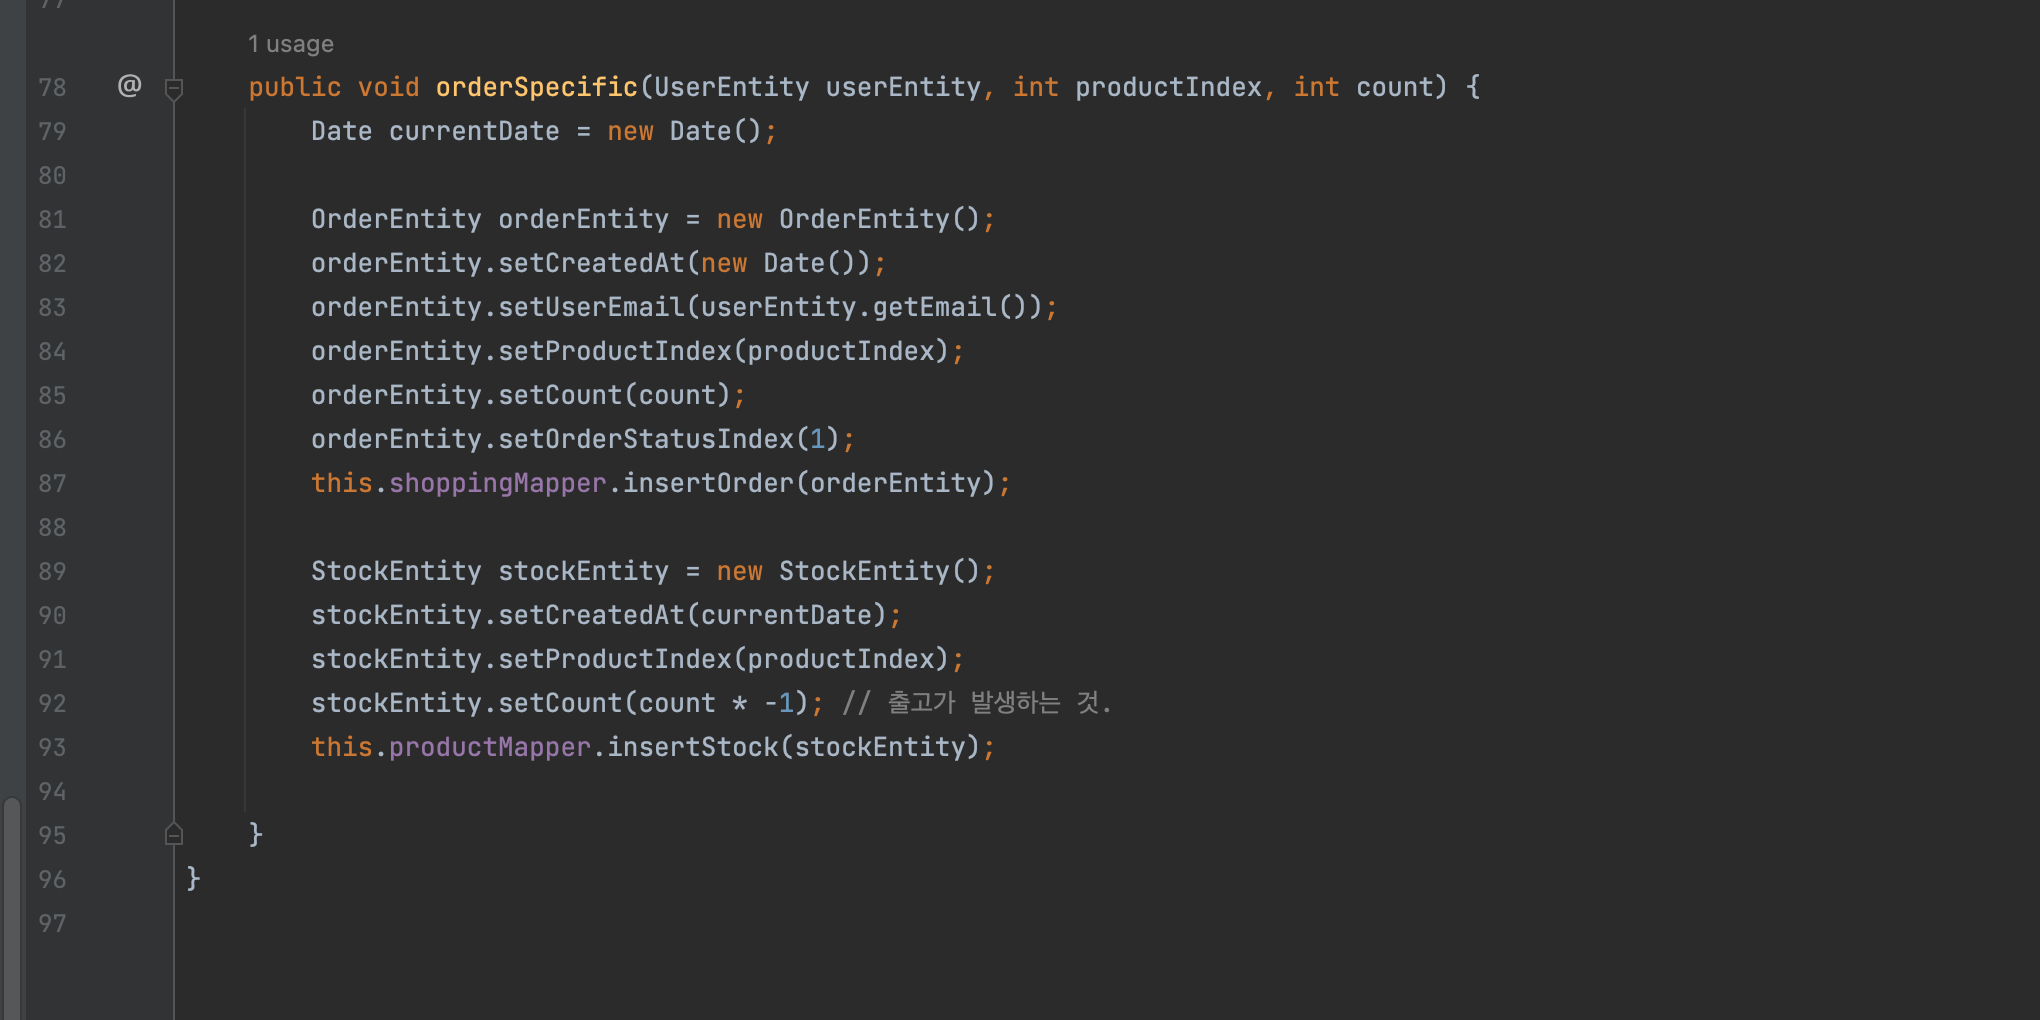
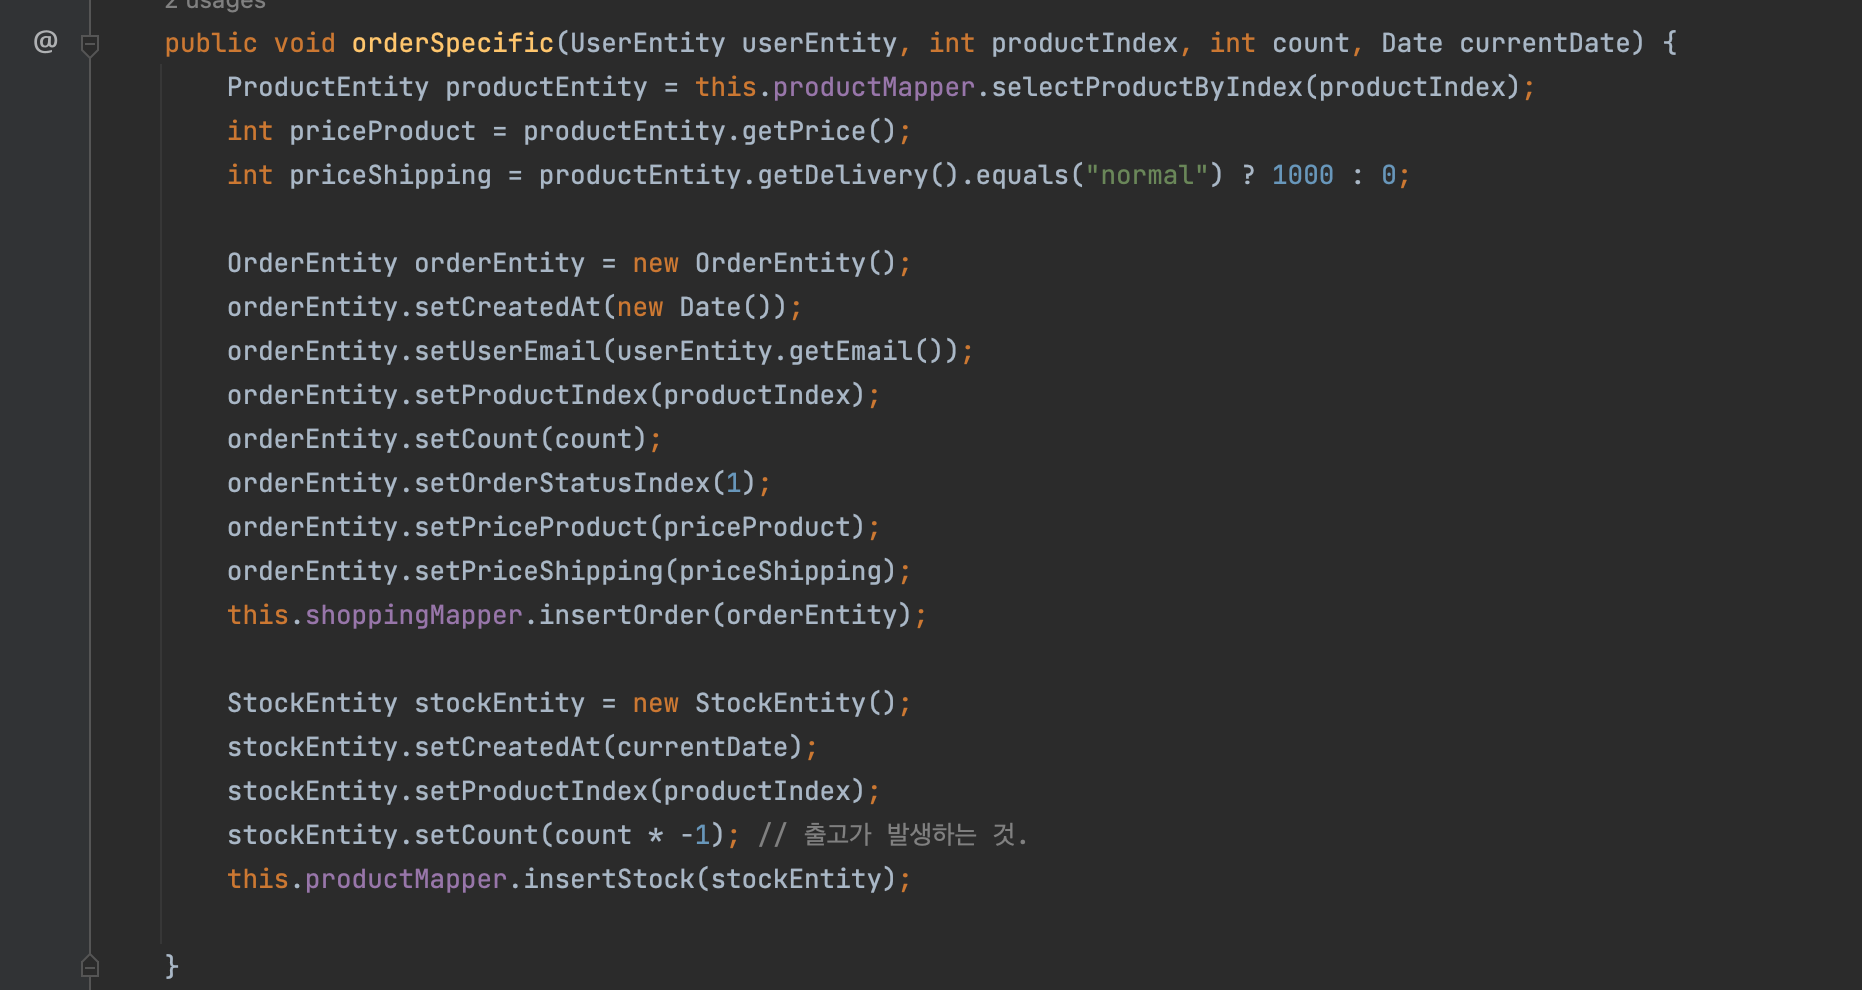
ShoppingService orderSpecific 추가
장바구니에서는 삭제할 필요는 없다.
Transactional 추가
재고에도 추가. Stock
orderSpecific 에도 재고 적용
ShoppingController
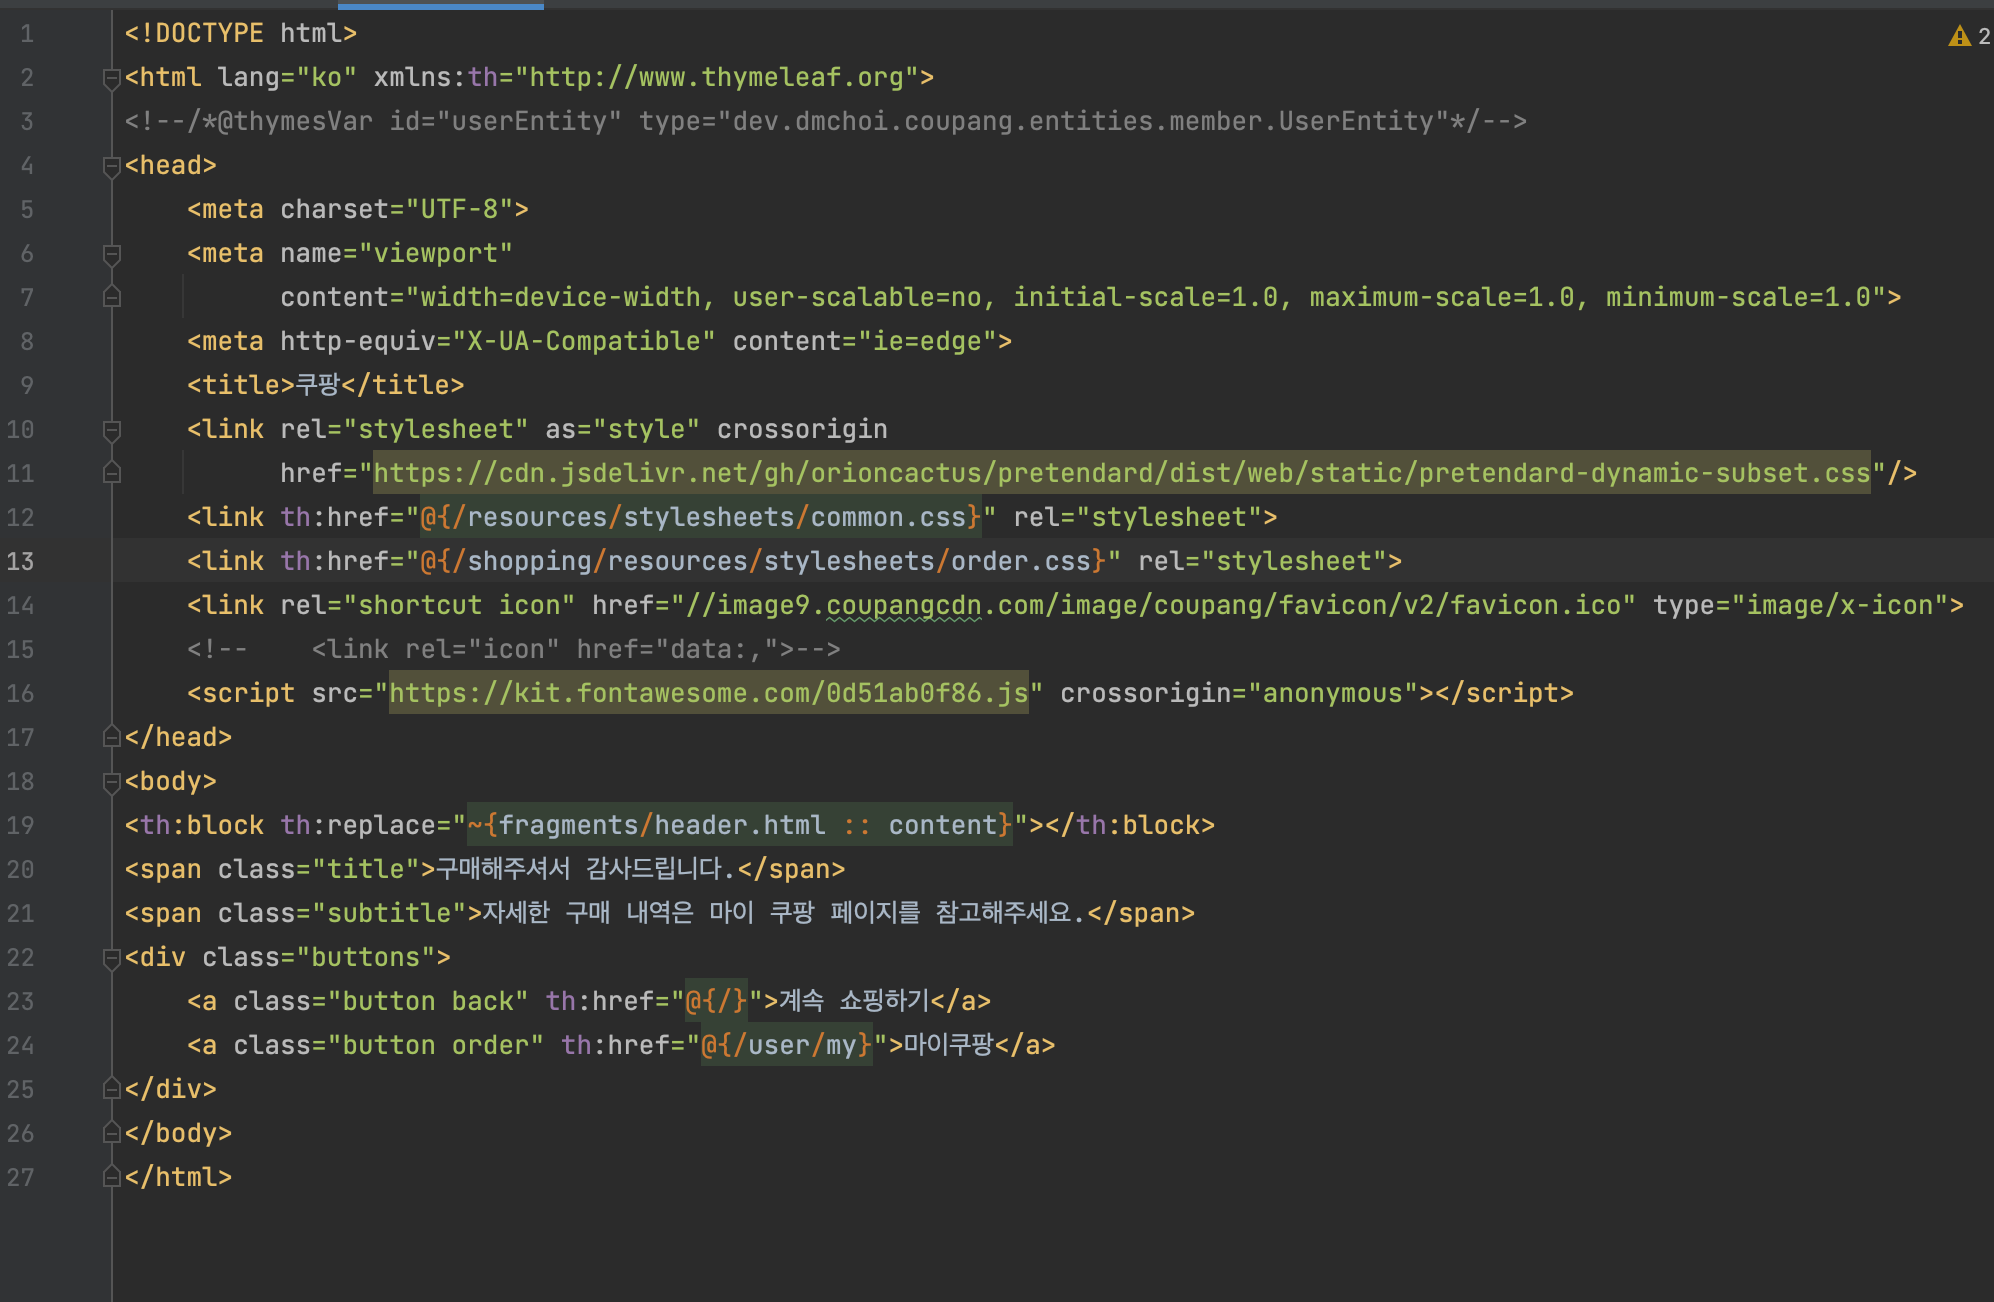
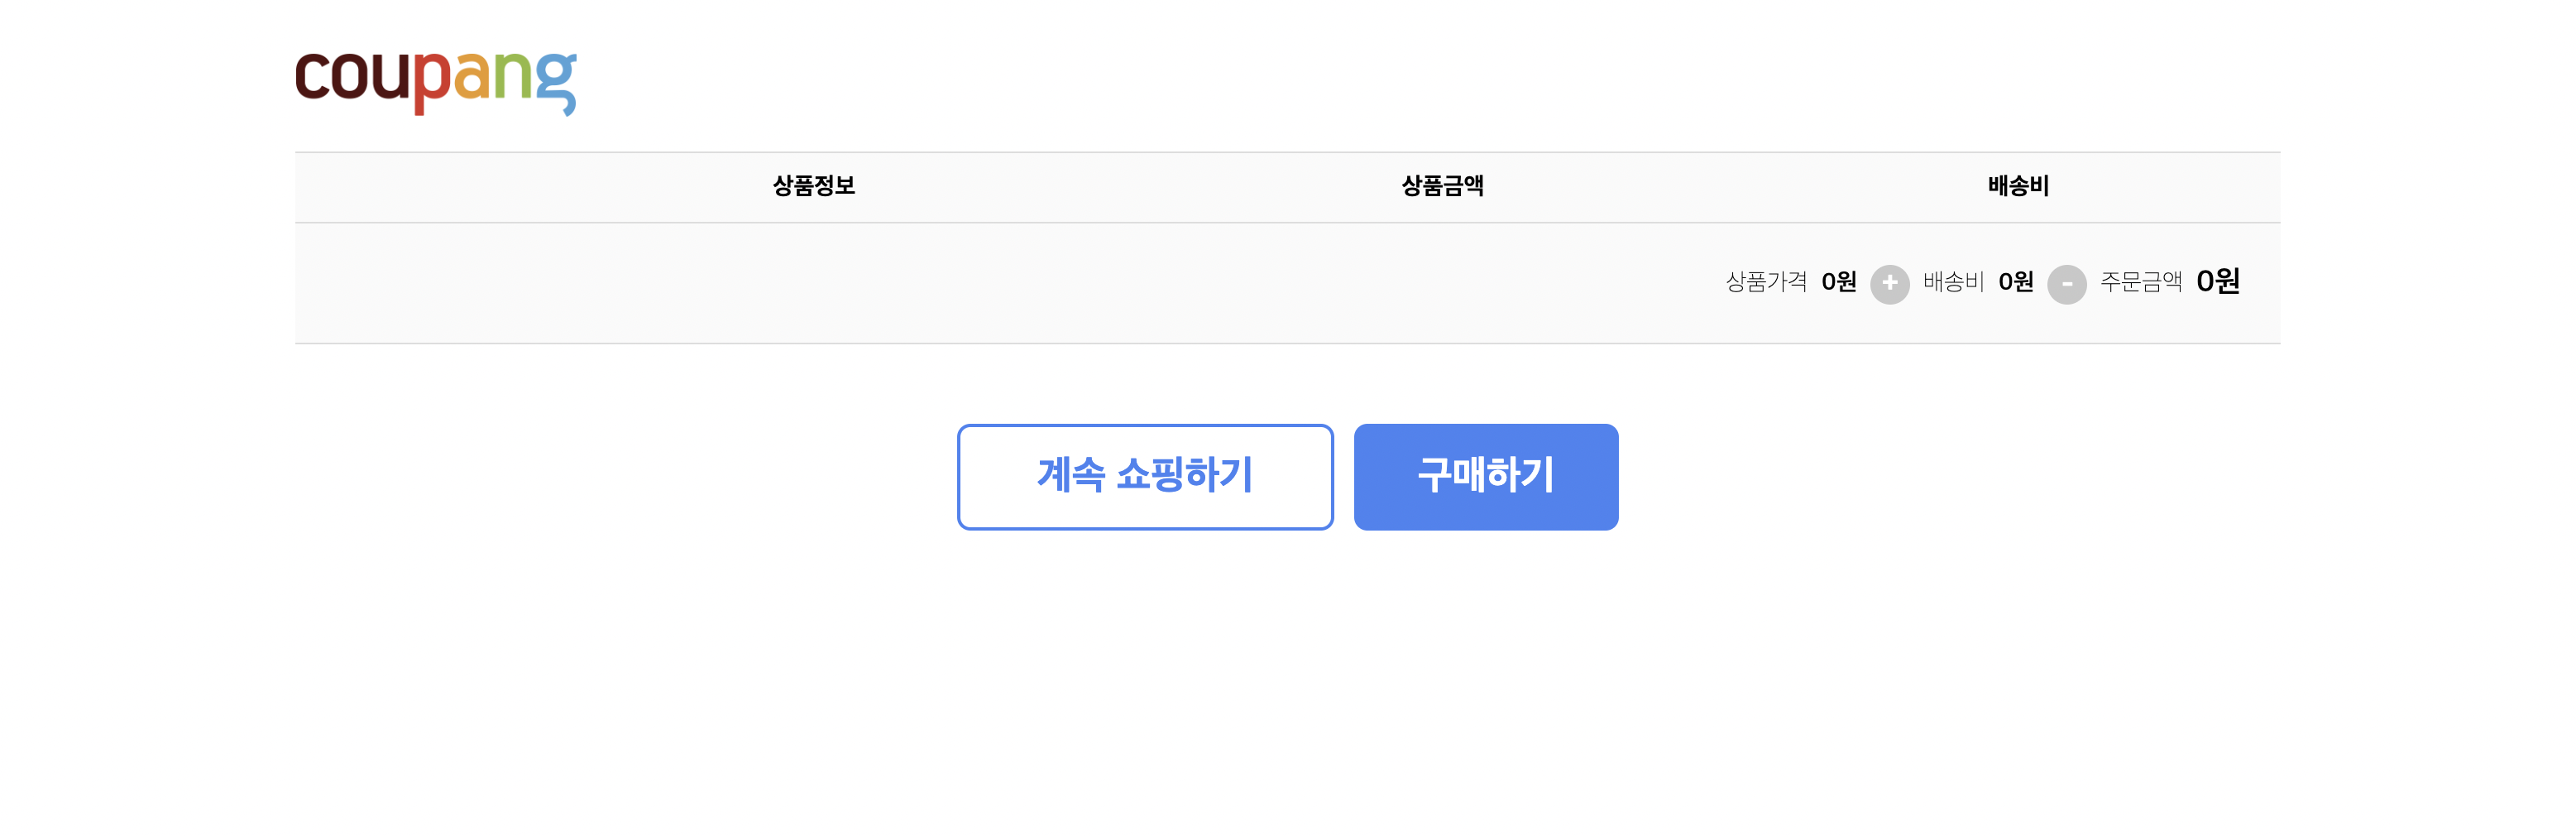
order.html
order.css
body > .title {
    font-size: 2rem;
    font-weight: 600;
    margin-top: 3rem;
    margin-bottom: 1.5rem;
}

body > .subtitle {
    font-size: 1.125rem;
    font-weight: 600;
    margin-bottom: 3rem;

}

body > .buttons {
    align-items: center;
    display: flex;
    flex-direction: row;
    justify-content: center;
    margin: 3rem 0;
}

body > .buttons > .button {
    width: 10rem;
    border-radius: 0.5rem;
    font-size: 1.5rem;
    padding: 1rem 2rem;
    text-align: center;
    font-weight: 700;
}

body > .buttons > .button + .button {
    margin-left: 0.75rem;
}

body > .buttons > .button.back {
    border: 0.125rem solid rgb(66, 132, 243);
    color: rgb(66, 132, 243);
}

body > .buttons > .button.order {
    background-color: rgb(66, 132, 243);
    border: 0.125rem solid rgb(66, 132, 243);
    color: rgb(255, 255, 255);
}
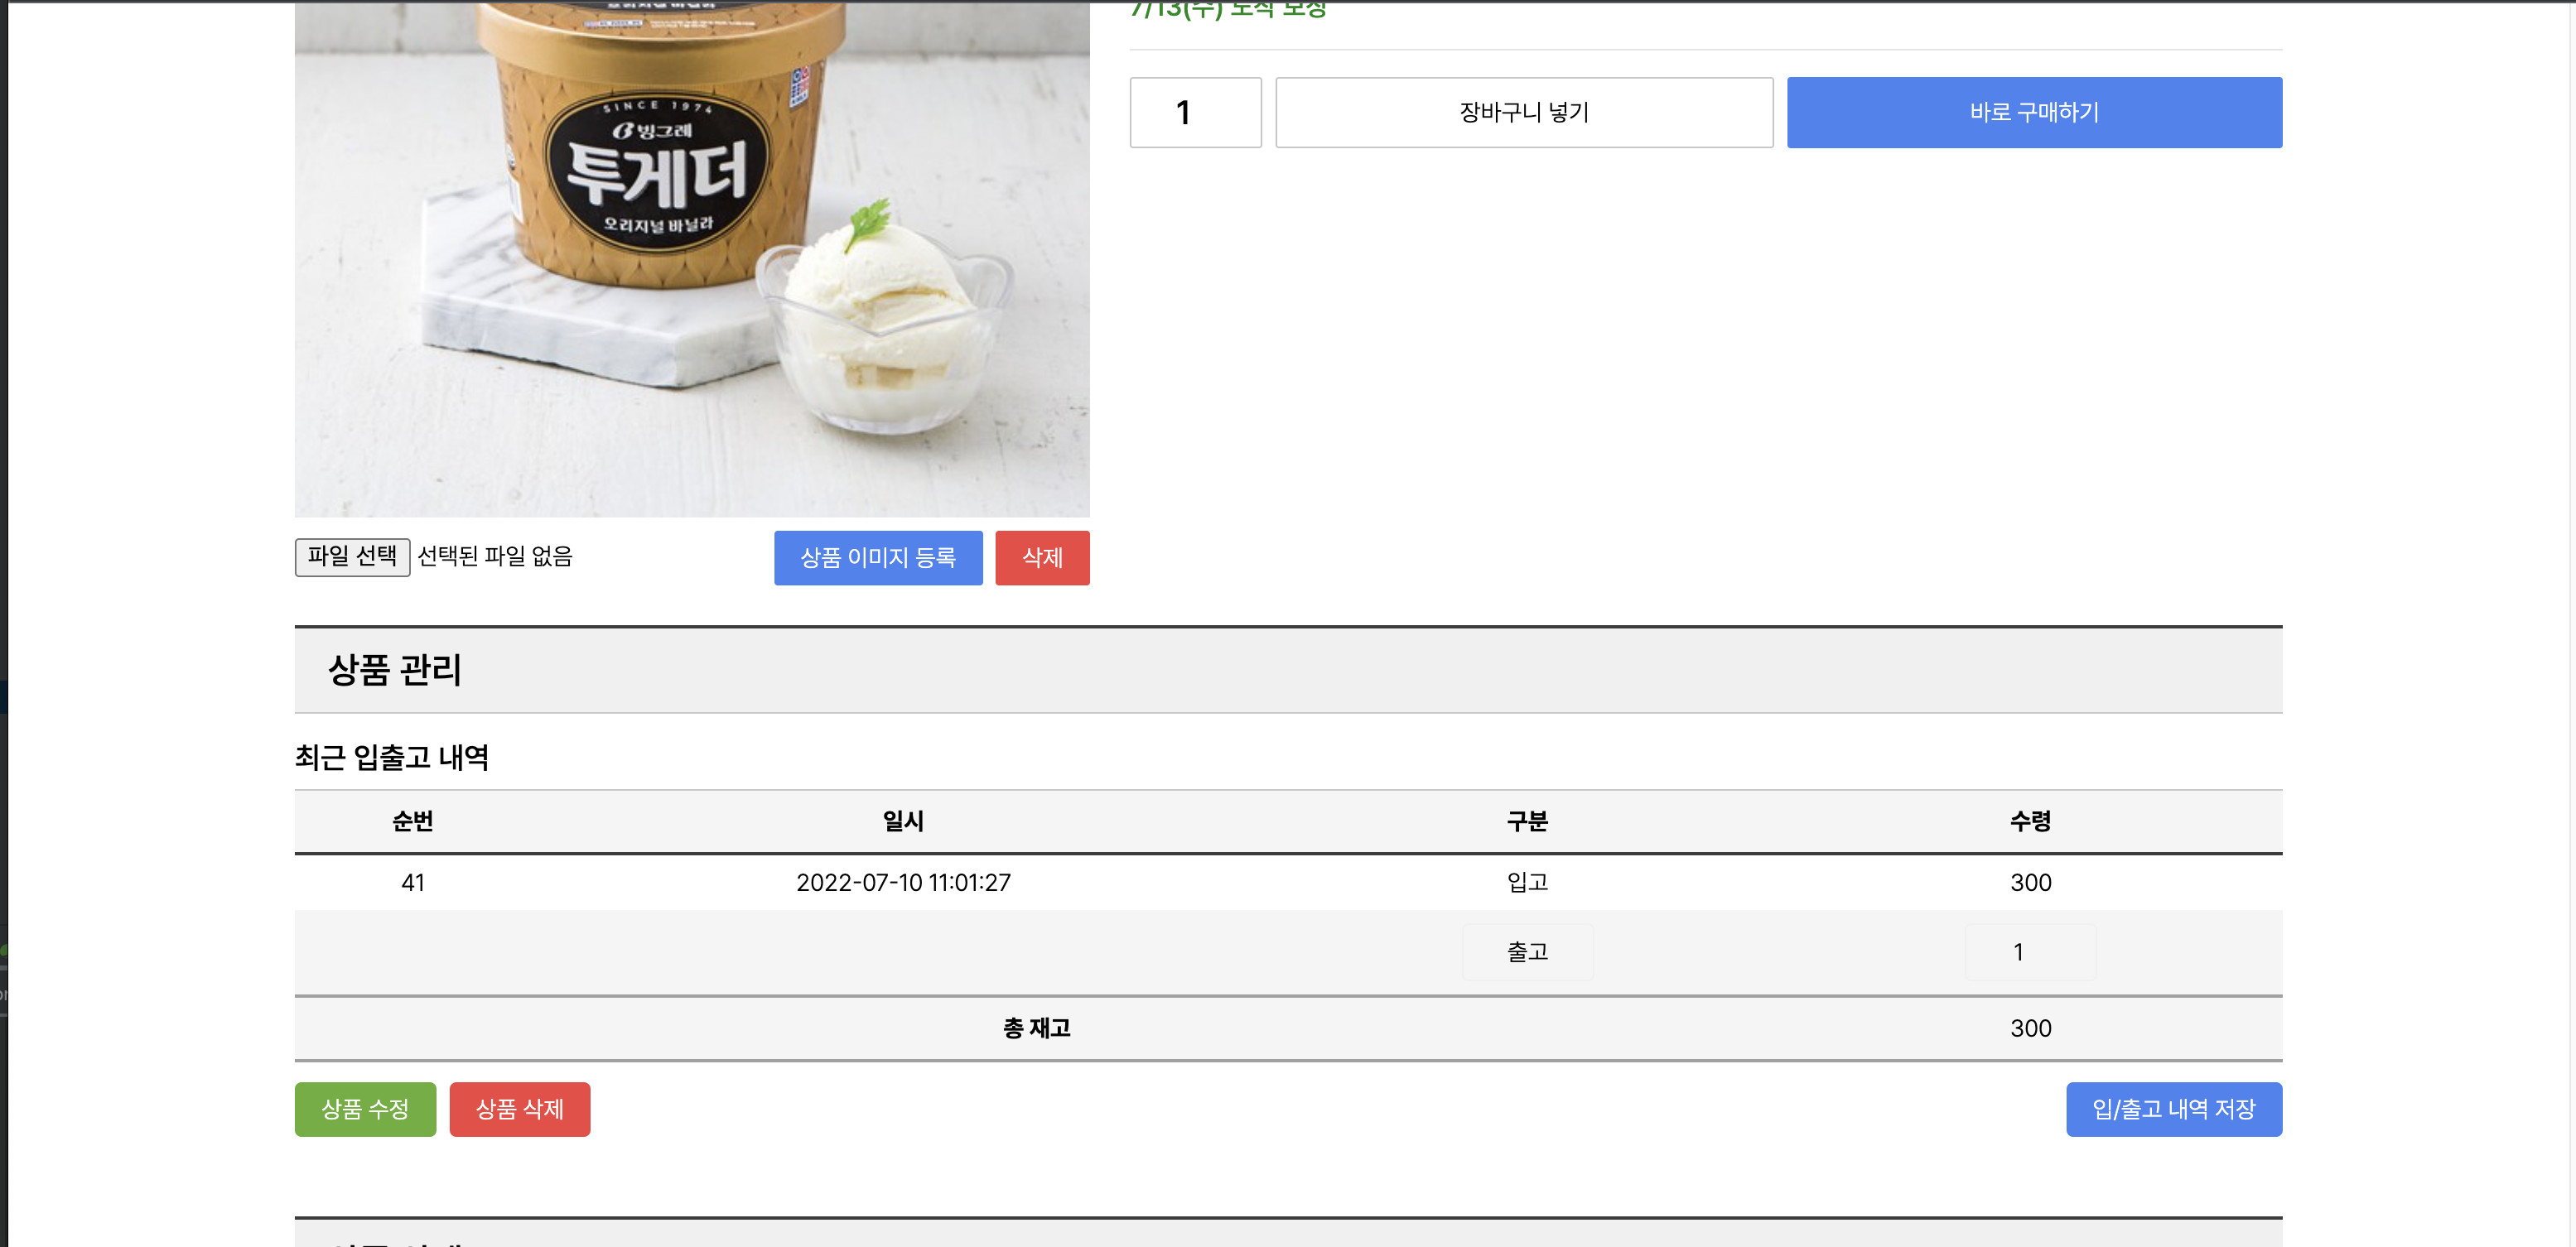
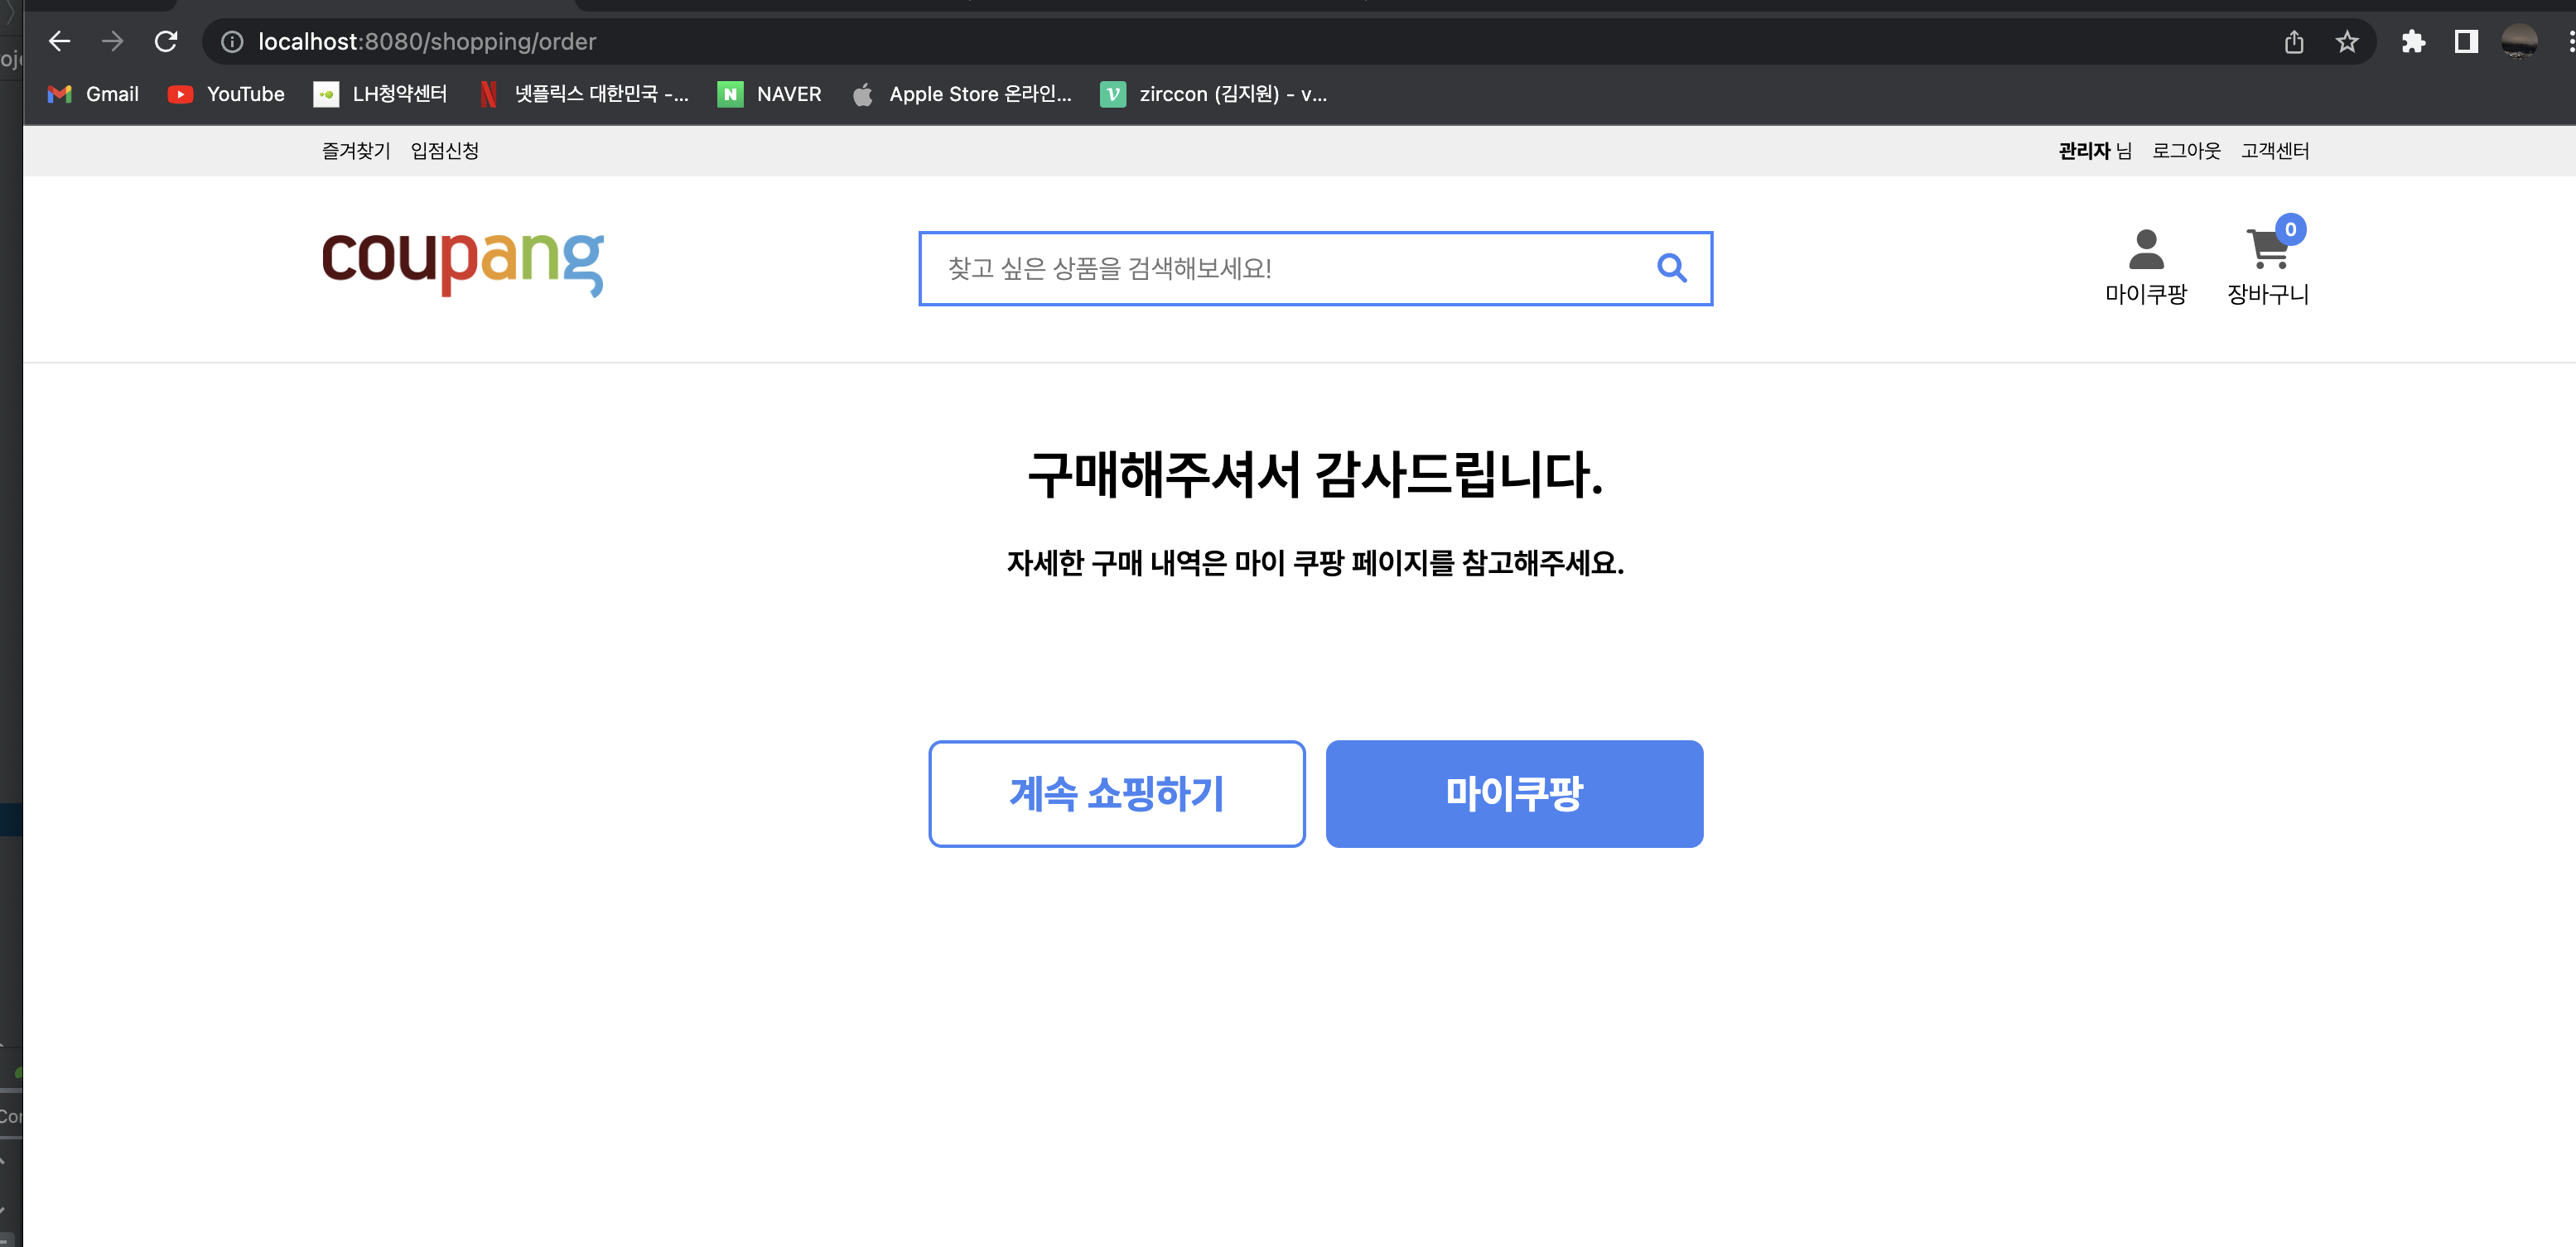
이제 상품 디테일에 들어가 바로 구매하기 버튼을 클릭하면 구매가 완료된다.
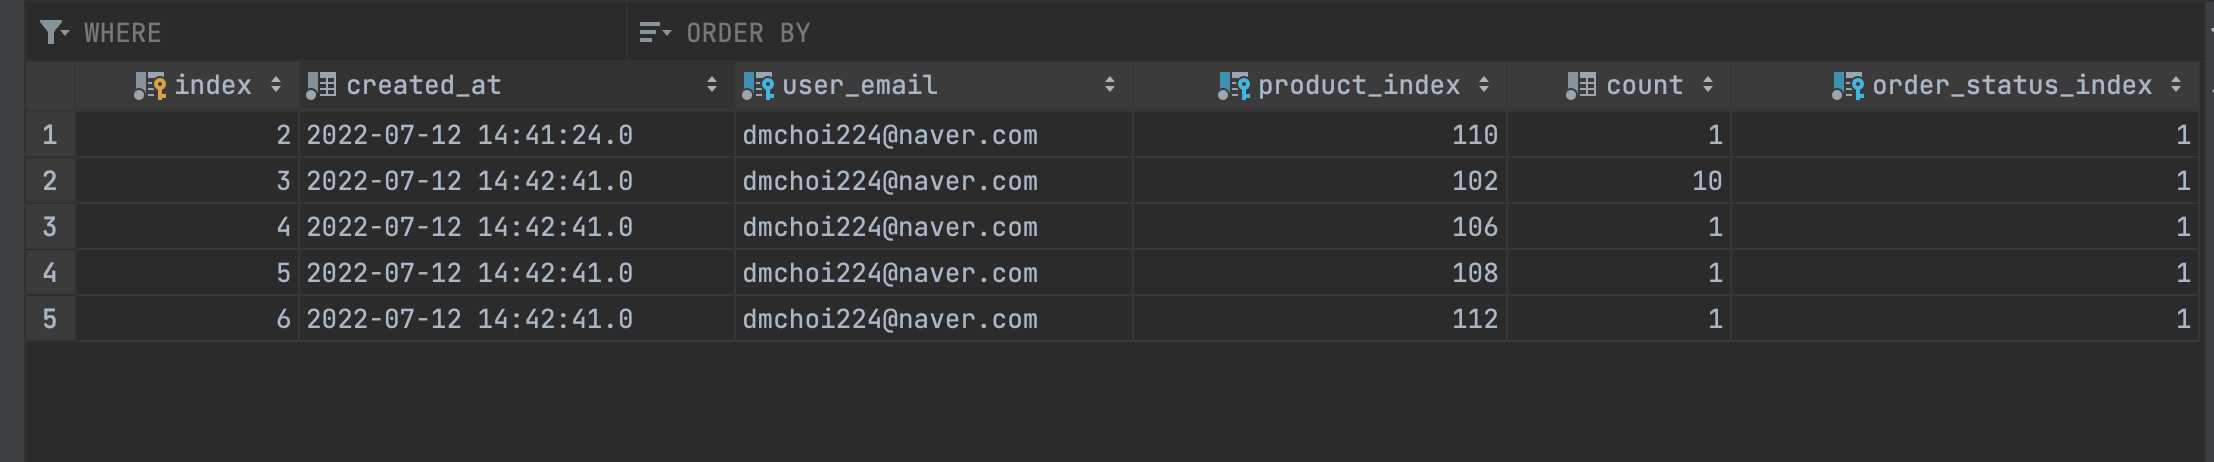
orders DB

그런데 이 화면에서 새로고침을 하면 계속 구매내역이 추가가 된다.
detail.html post로 form method 변경
cart.html

기존 getOrder를 Post로 변경. 메서드도 POST
getOrder 새로 추가
이제 구매를 하면 출고가 1 찍히고, 새로고침을 해도 DB에 더 추가되지 않는다.
장바구니 상품도 구매를 해보면
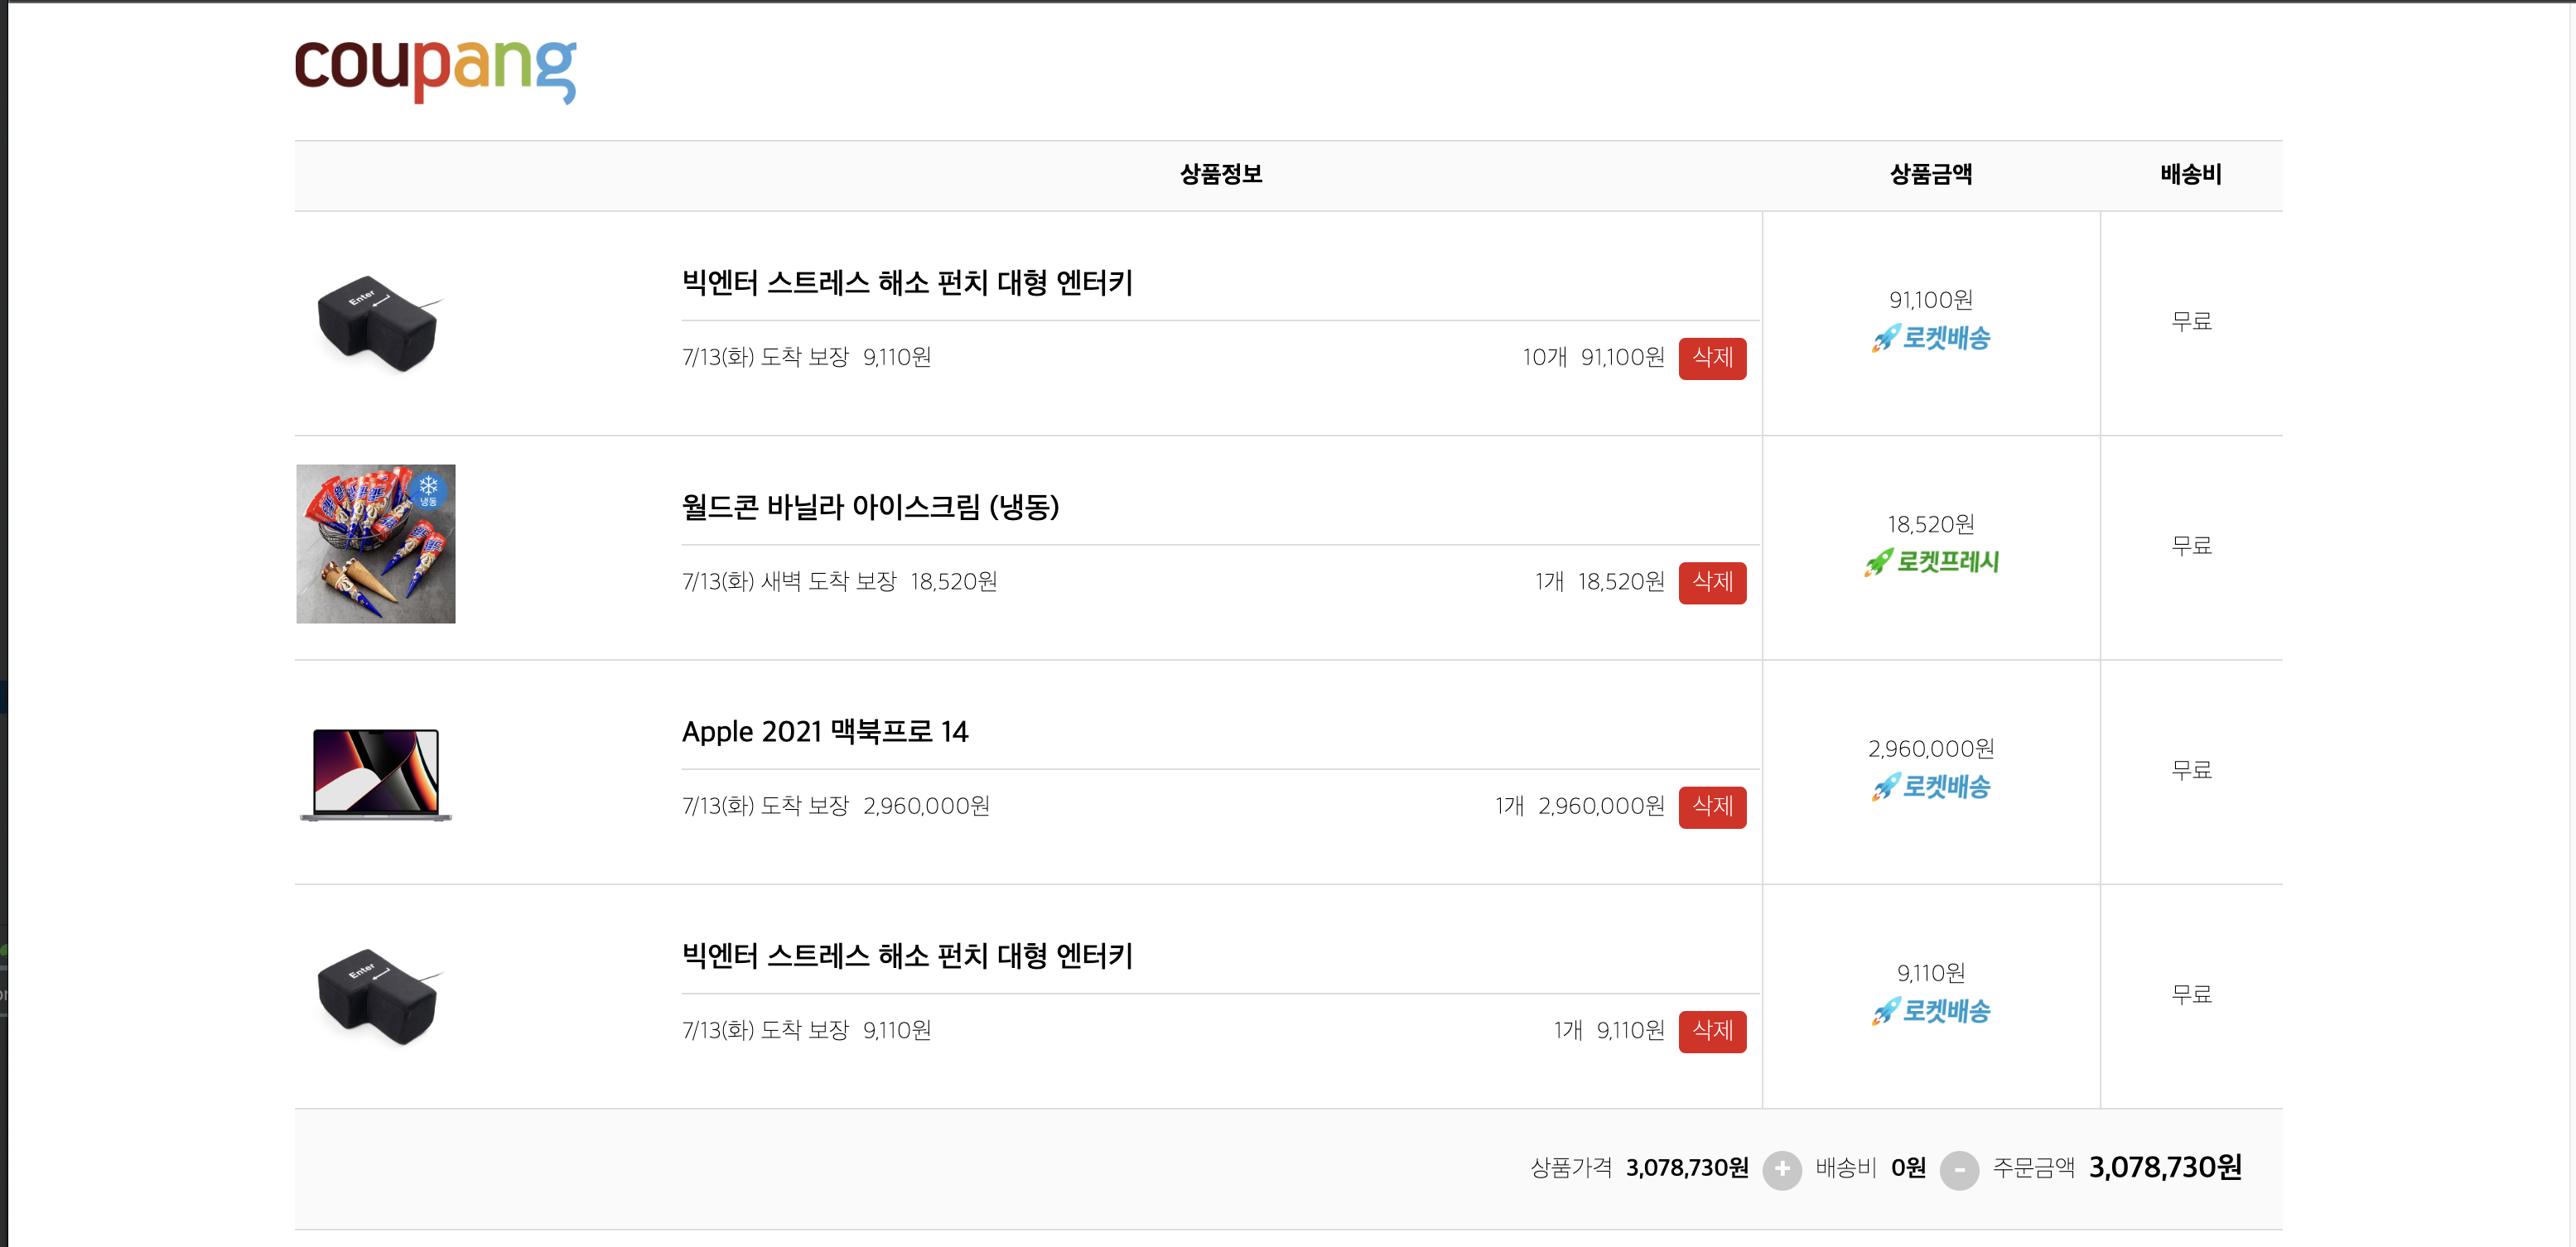
그 내역이 다 들어온다.
그리고 장바구니를 확인해보면 DB에 찍힌 구매한 상품이 전부 삭제된다.
그런데 아까 delete에서 LIMIT 1 설정을 하는 바람에 상품 중 여러 갯수가 담긴 상품을 구매하였을 때, DB에는 장바구니 전체가 들어가는데 장바구니에는 하나만 삭제가 되어지는 오류가 생겼다. 그래서 LIMIT 1 을 지웠다.
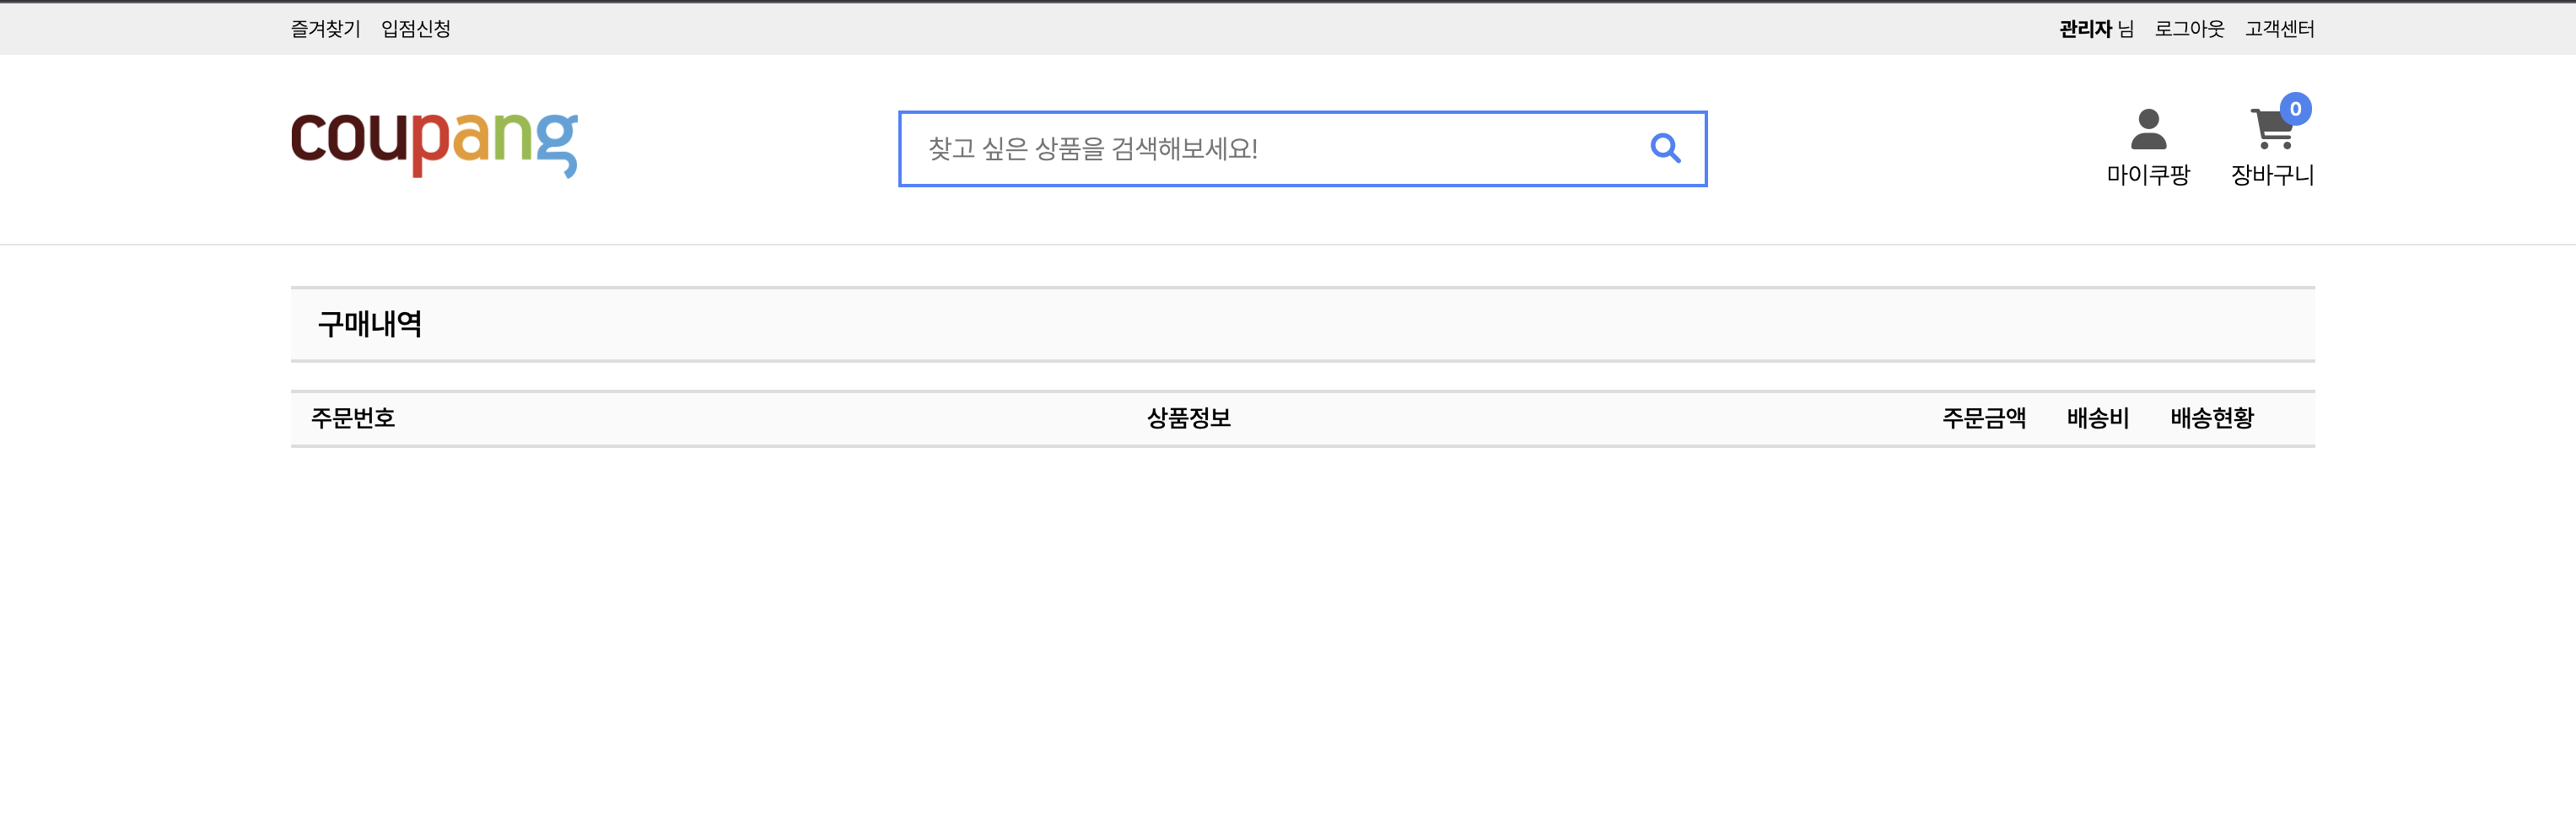
이제 마이쿠팡에 들어갔을 때 구매내역이 보이도록 해보자.

상품 가격을 따로 추가한다.
상품을 구매 당시 가격, 구매한 후의 가격이 달라질 수가 있다.
내가 오늘 산 상품의 가격이 내일엔 오를 수가 있음.
DB 수정
entity와 xml에도 추가해준다.
ShoppingService
중복 코드를 줄이기 위해 orderAll 메서드에서 orderSpecific 호출
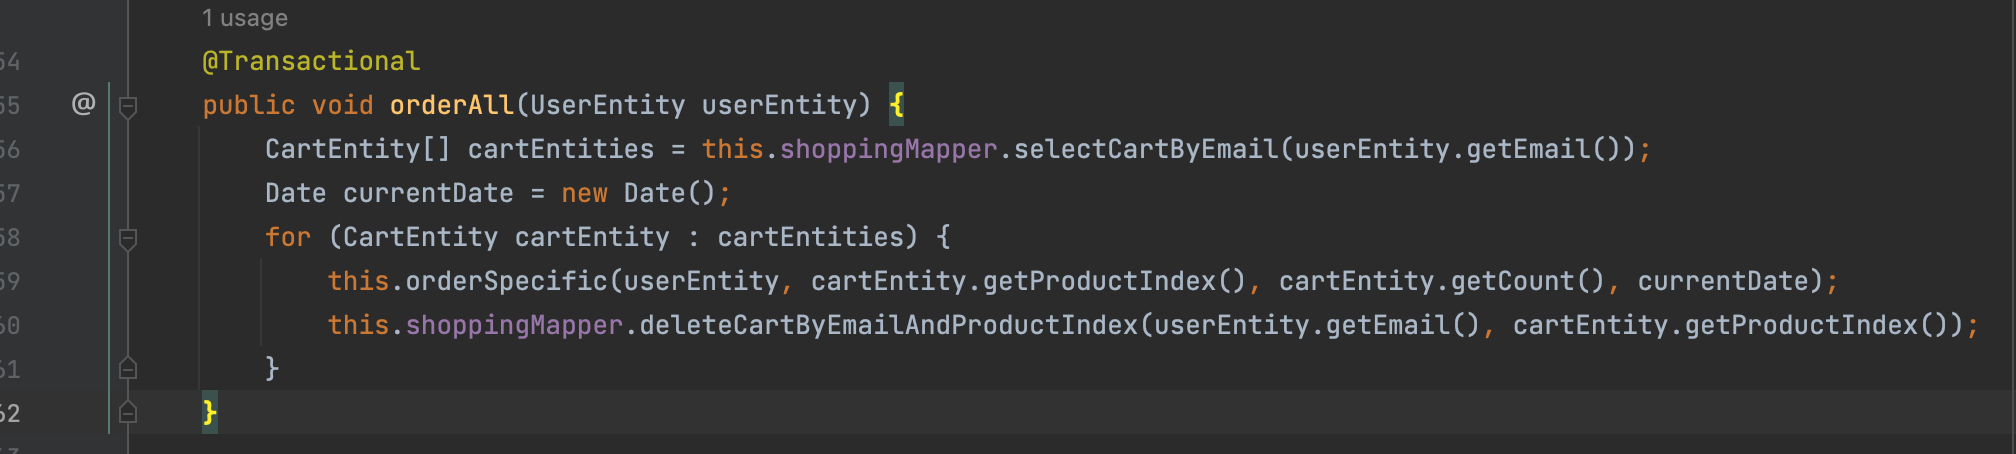
이렇게만 하면 컨트롤러에서 Date current 를 추가해주어야 하는데 메서드를 그냥 하나 더 만들어준다.

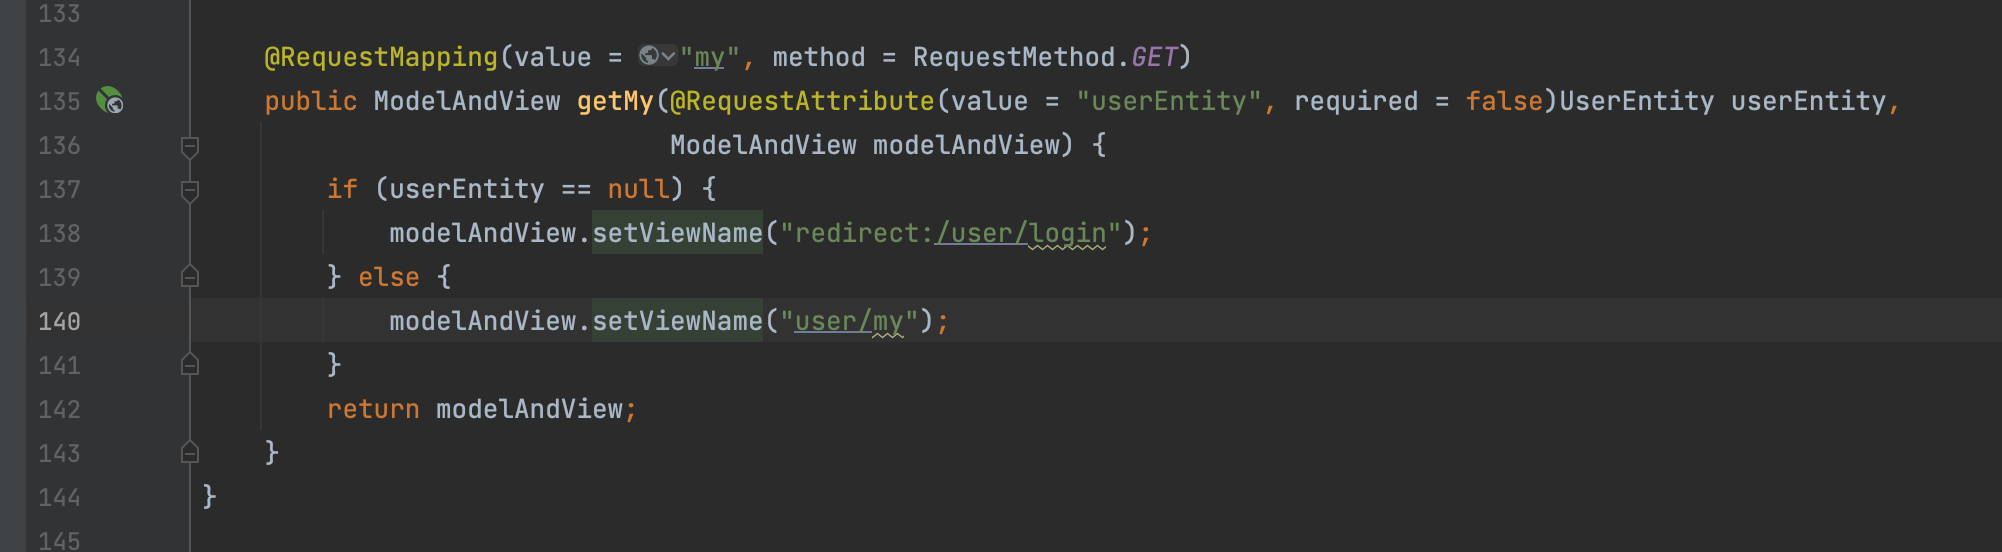
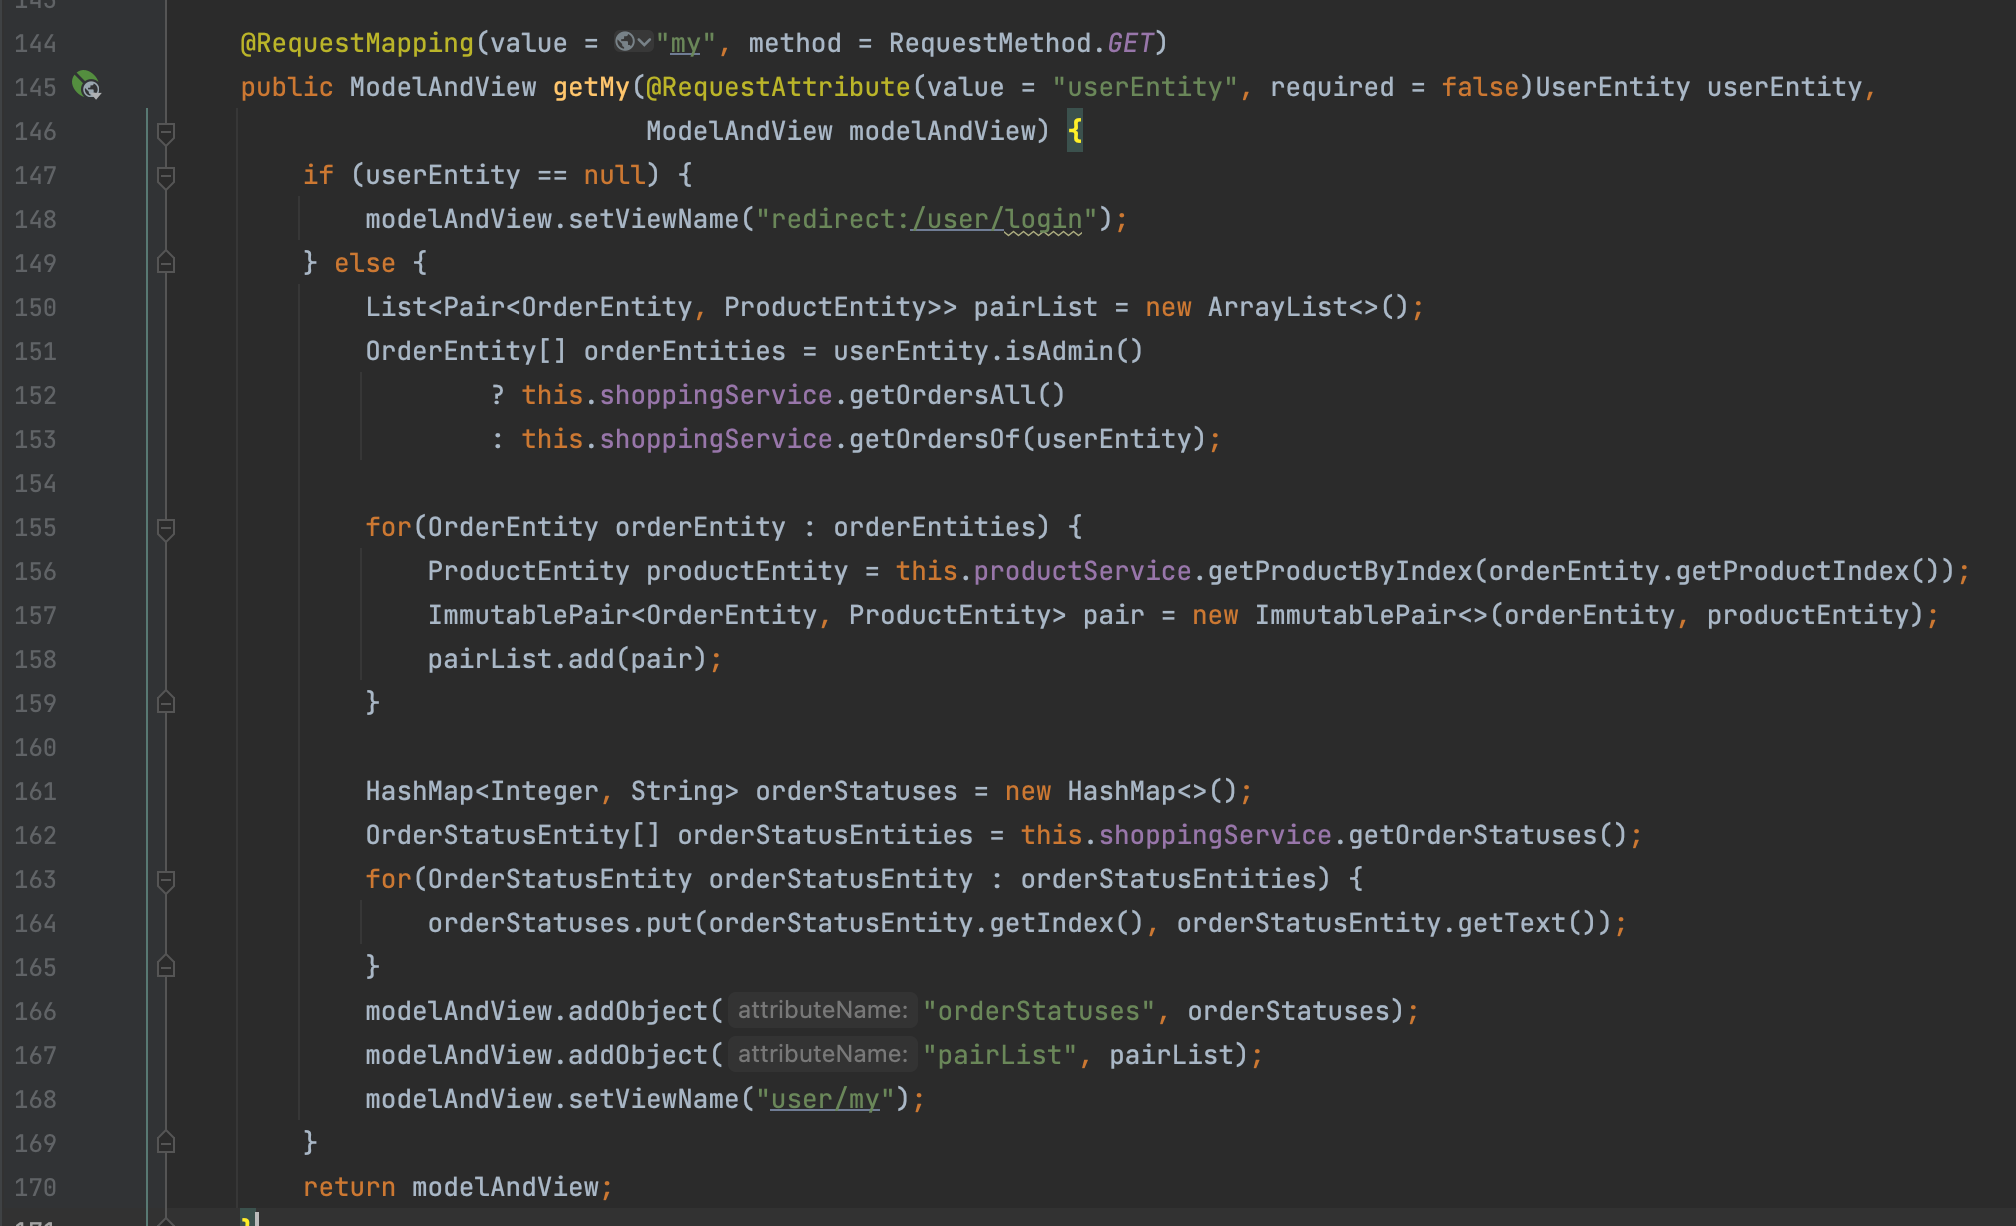
UserController 에서 getMy 만들어준다.
현재 사용자의 주문 내역에 해당하는 내용들을 orderEntity로 받아올 것이다.
IShoppingMapper

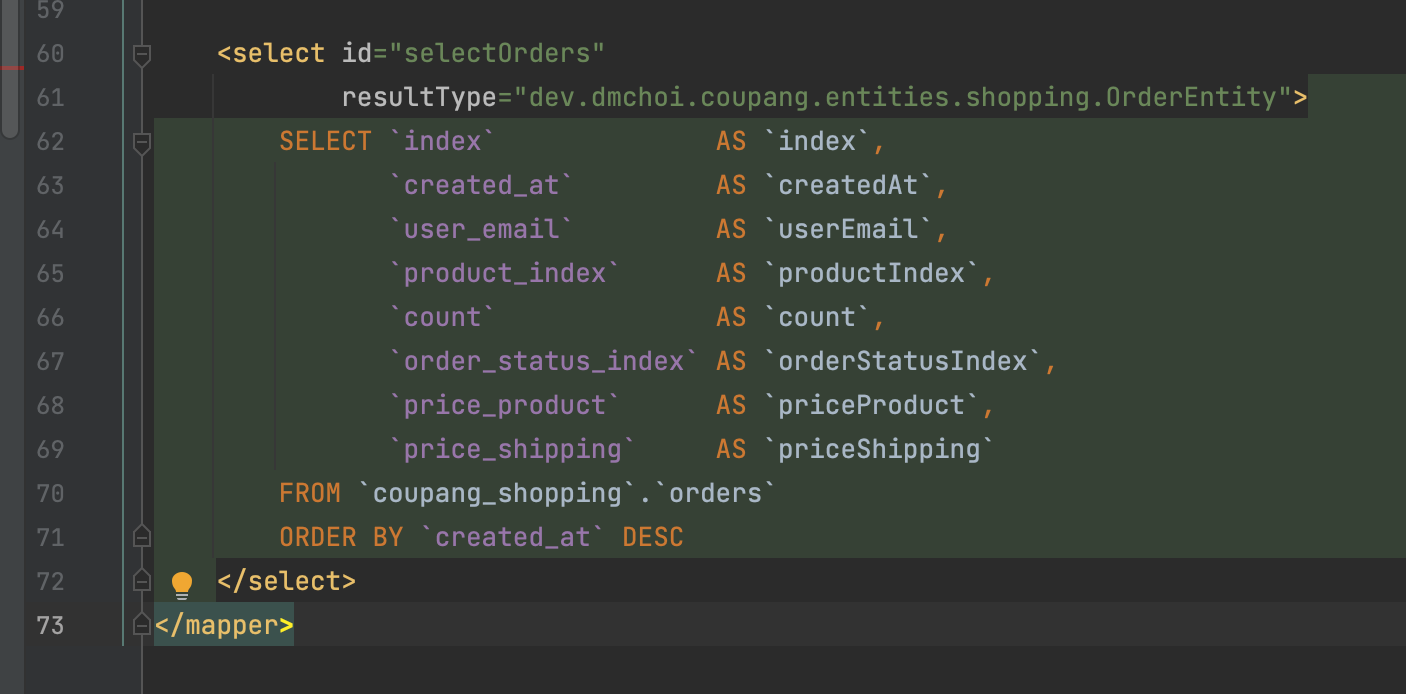
xml

ShoppingService getOrdersOf

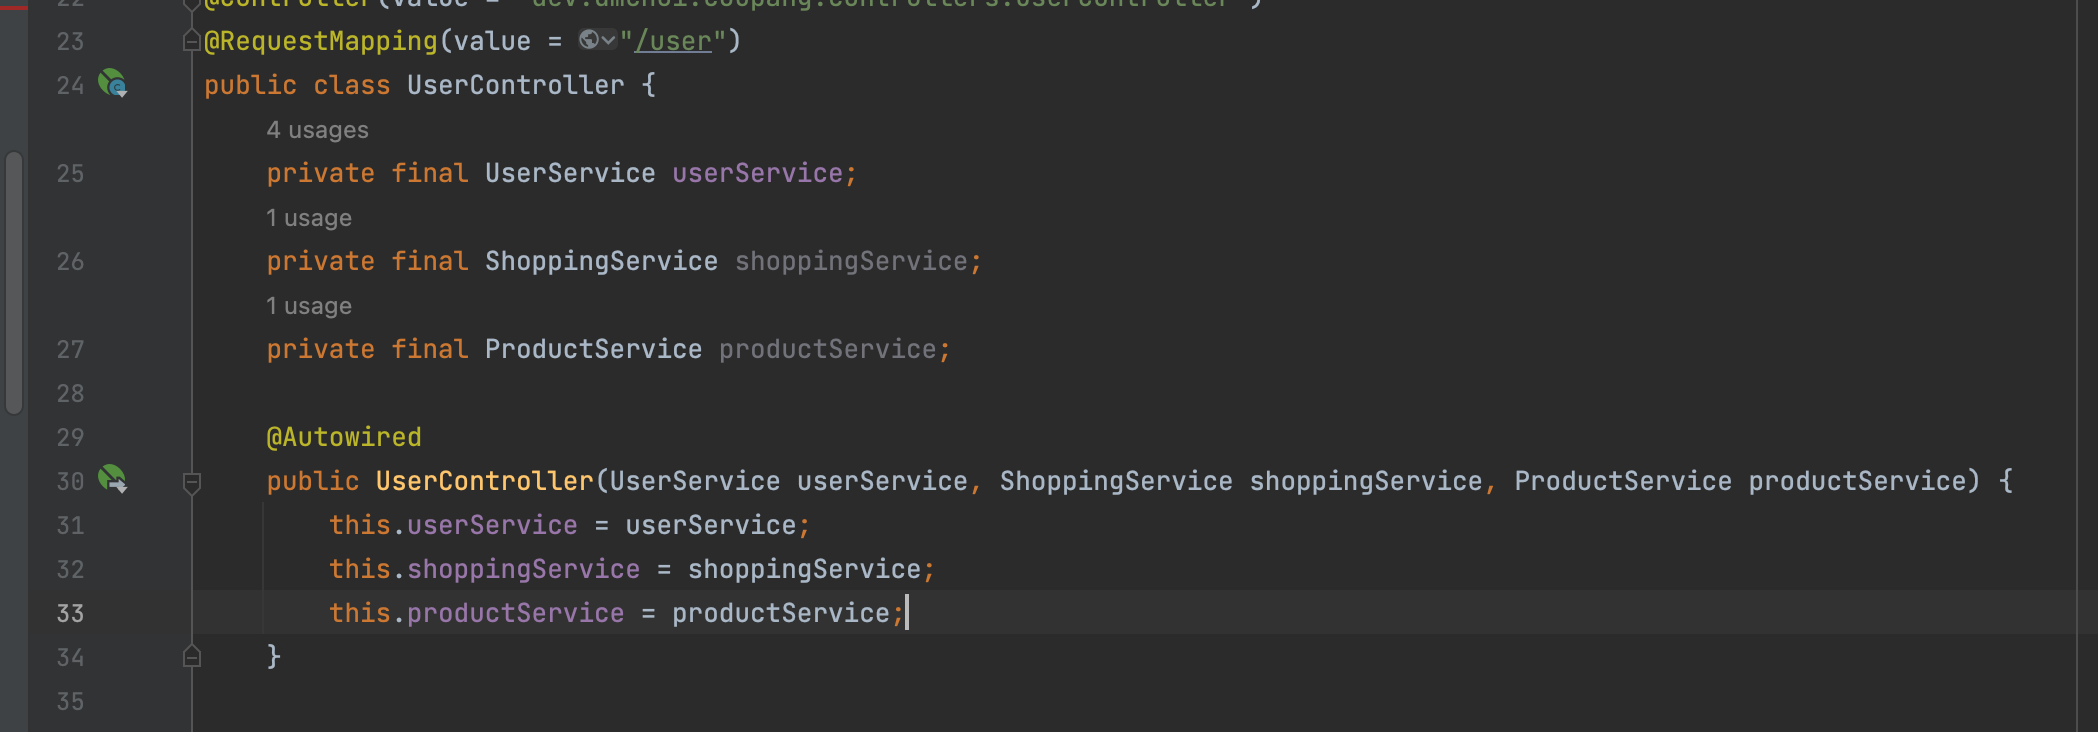
UserController
로그인한 사용자 별로 그 사용자의 주문내역을 가져오는데,
어떤 상품이 발송처리가 되었거나 하는건 관리자가 지정을 해주는데,
그렇기에 관리자가 로그인했다면, 관리자의 상품뿐만이 아닌, 모든 상품이 다보여져야 한다.
IShoppingMapper

xml
ShoppingService

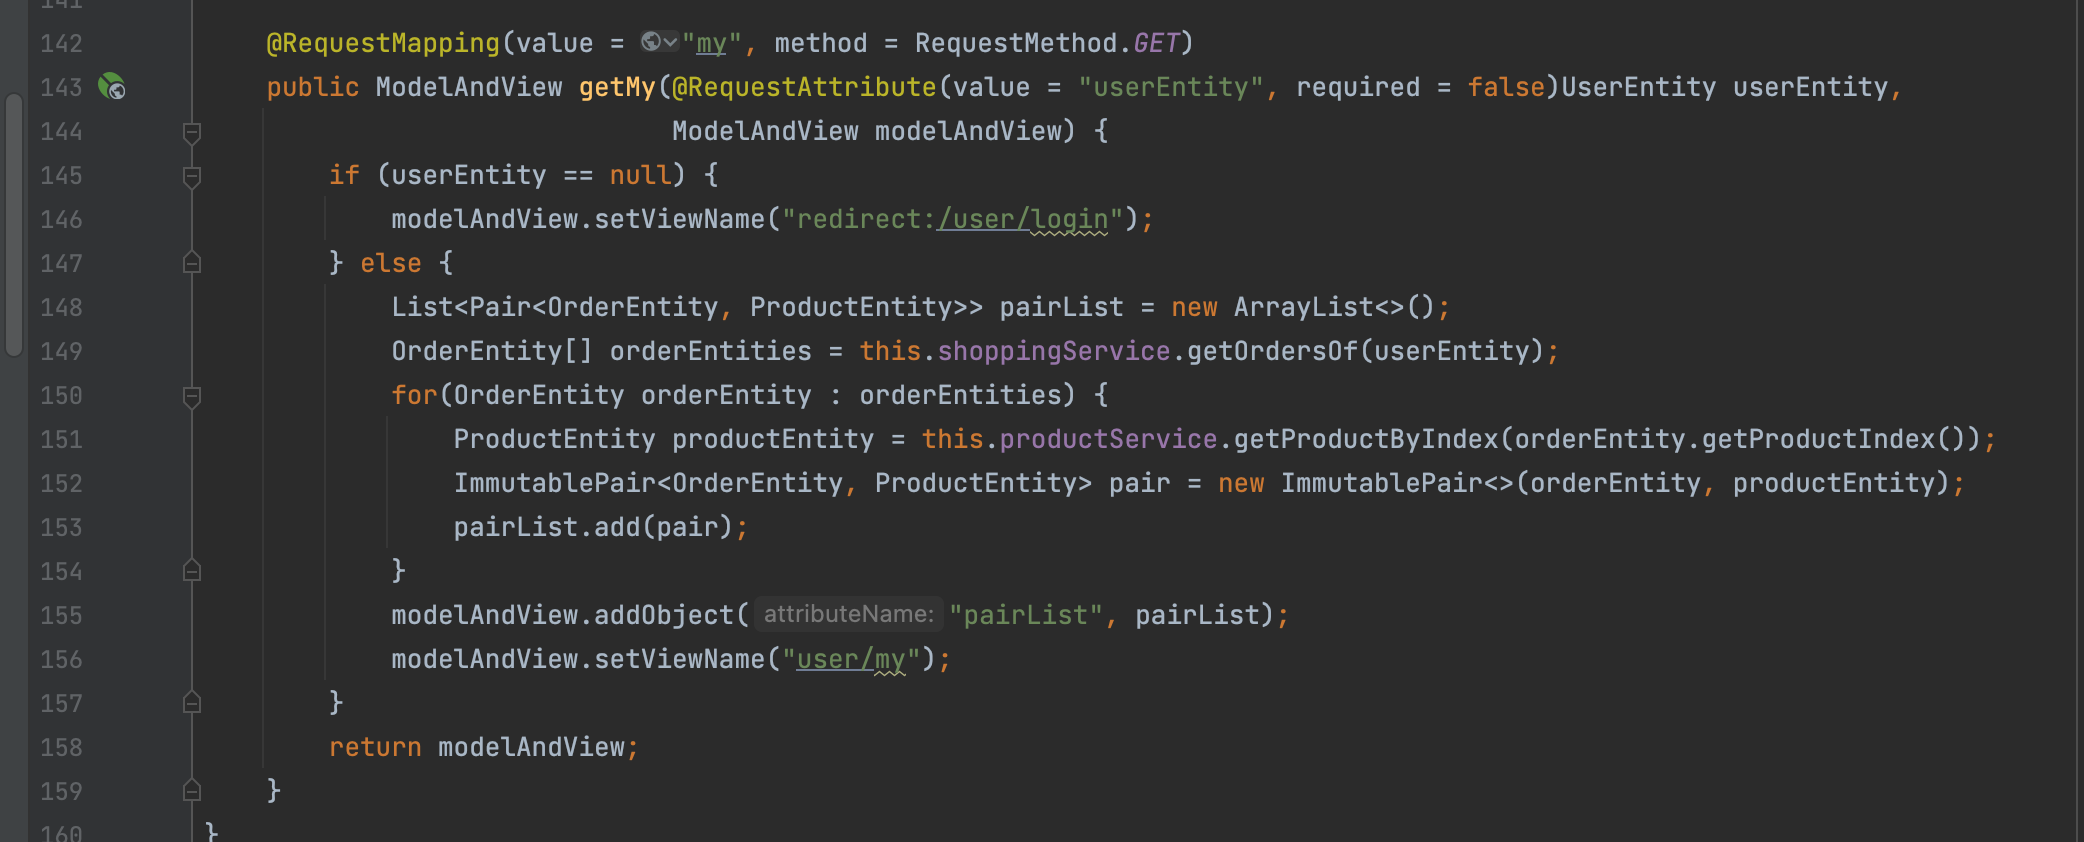
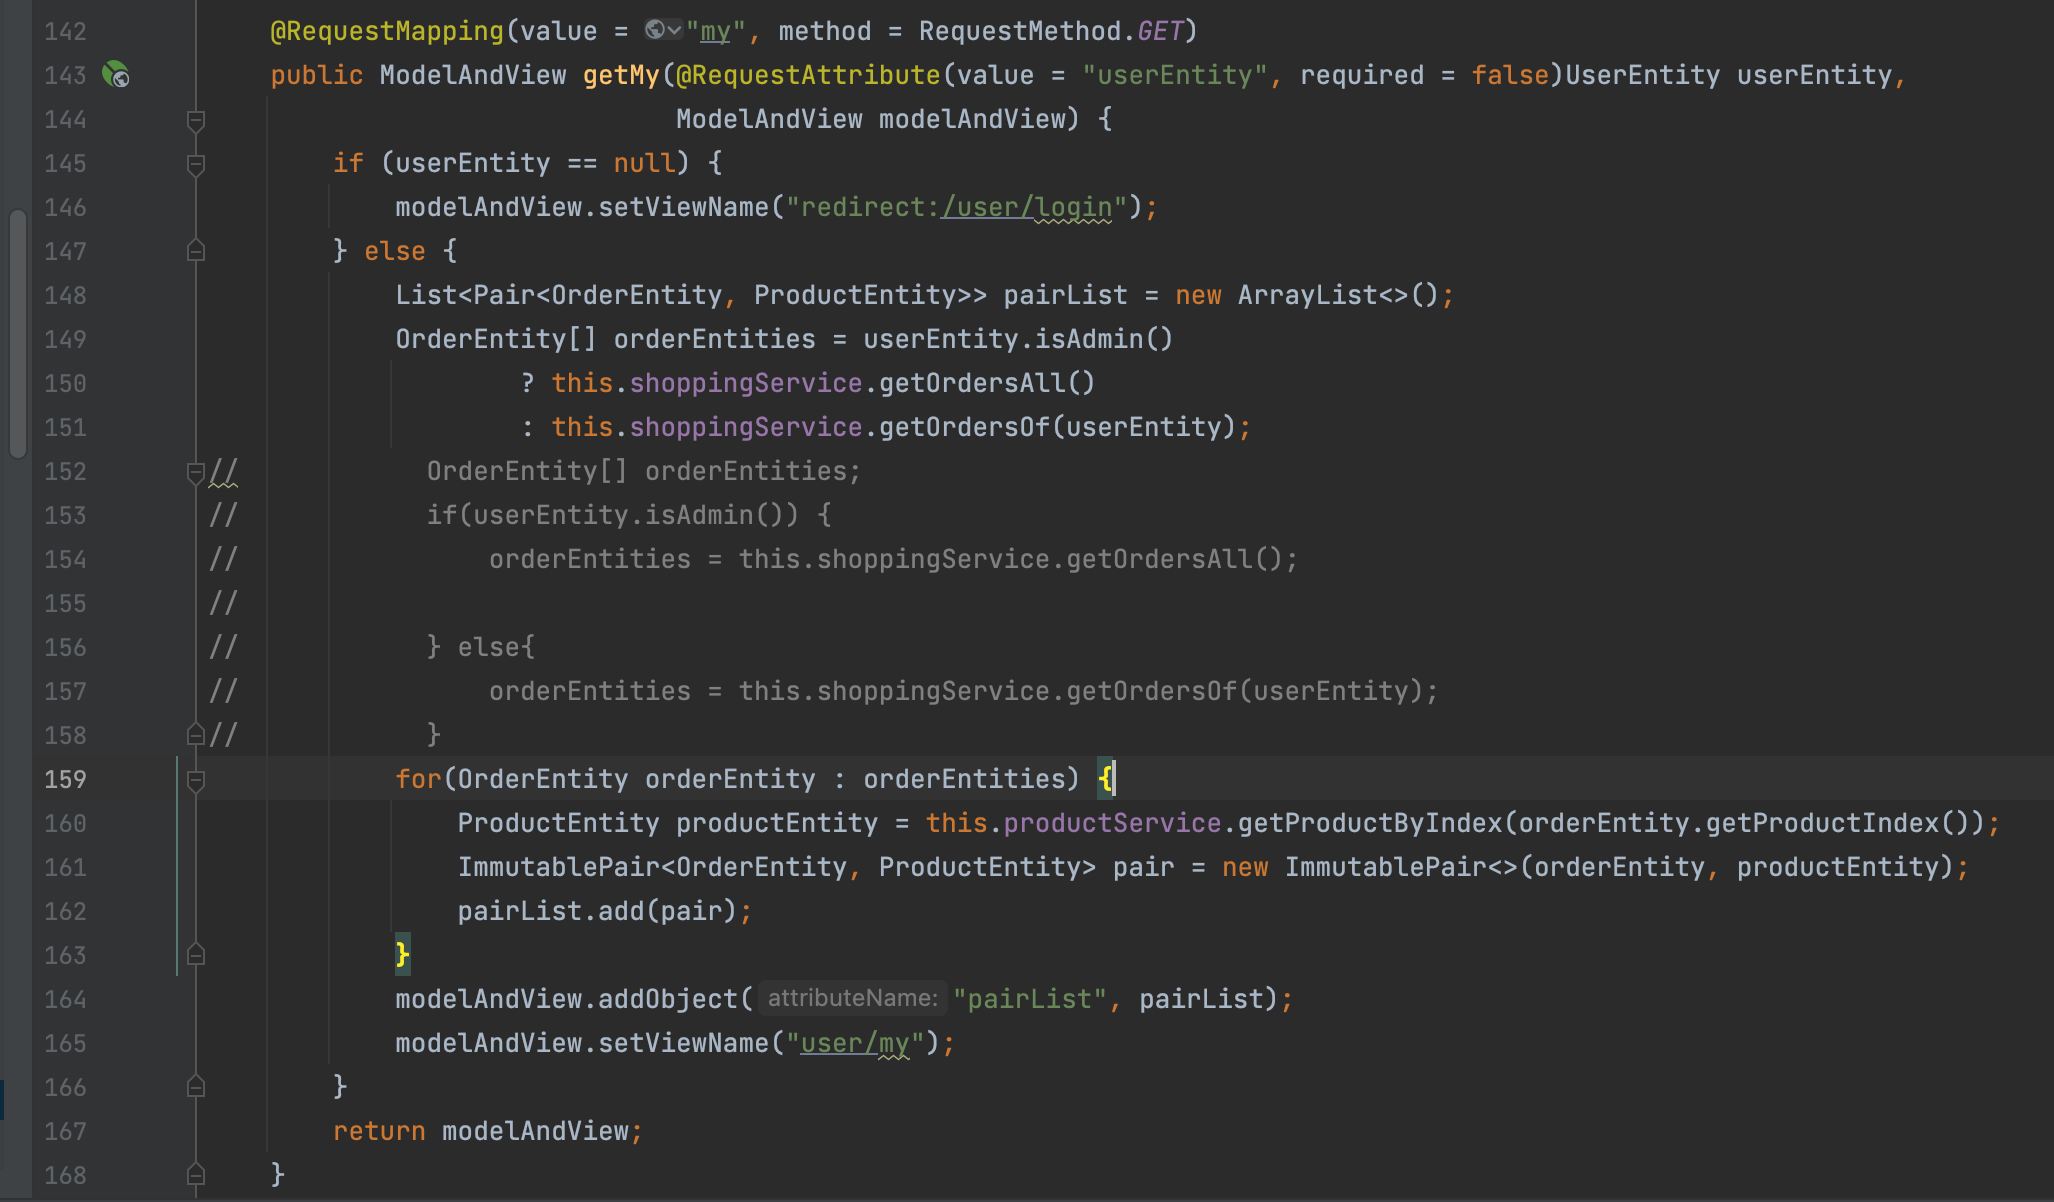
UserController
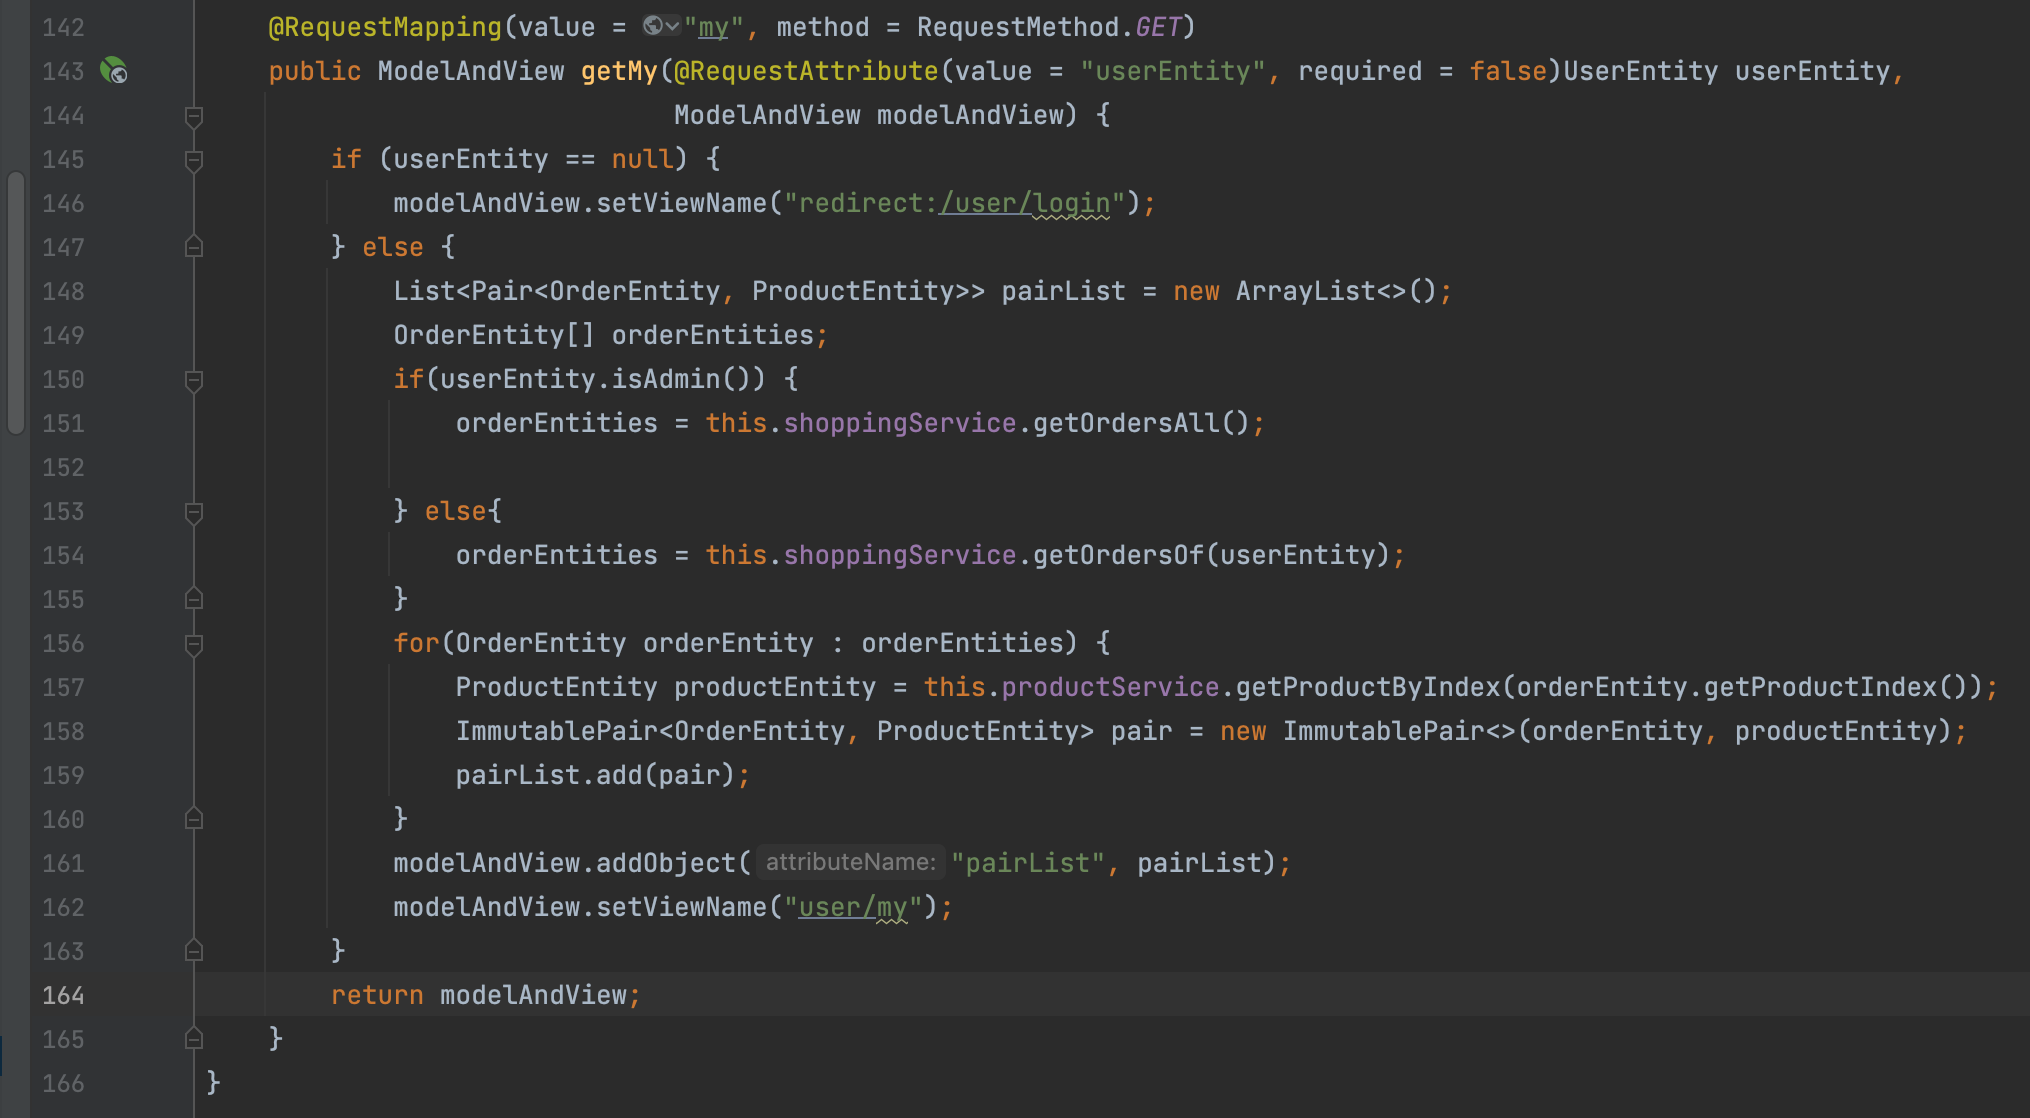
이렇게 간단히 코드를 줄여도 되겠다. (삼항식)
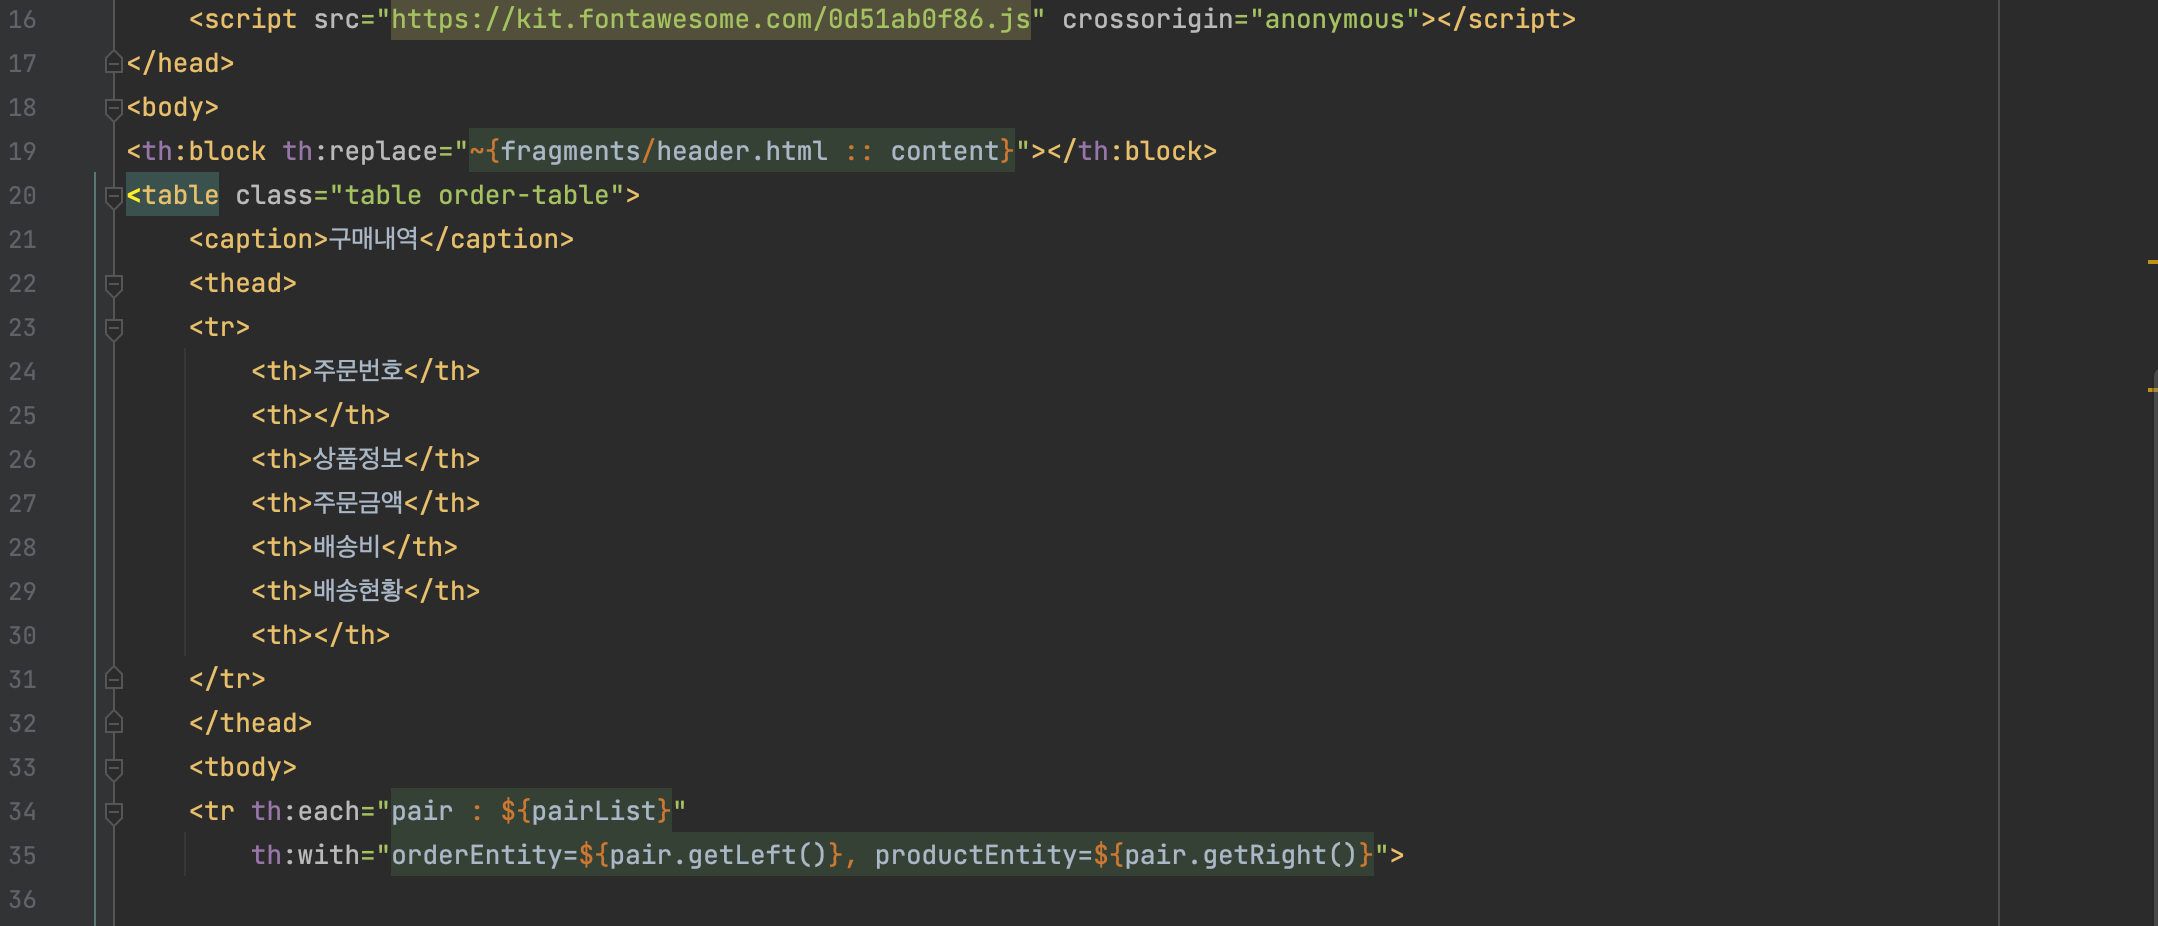
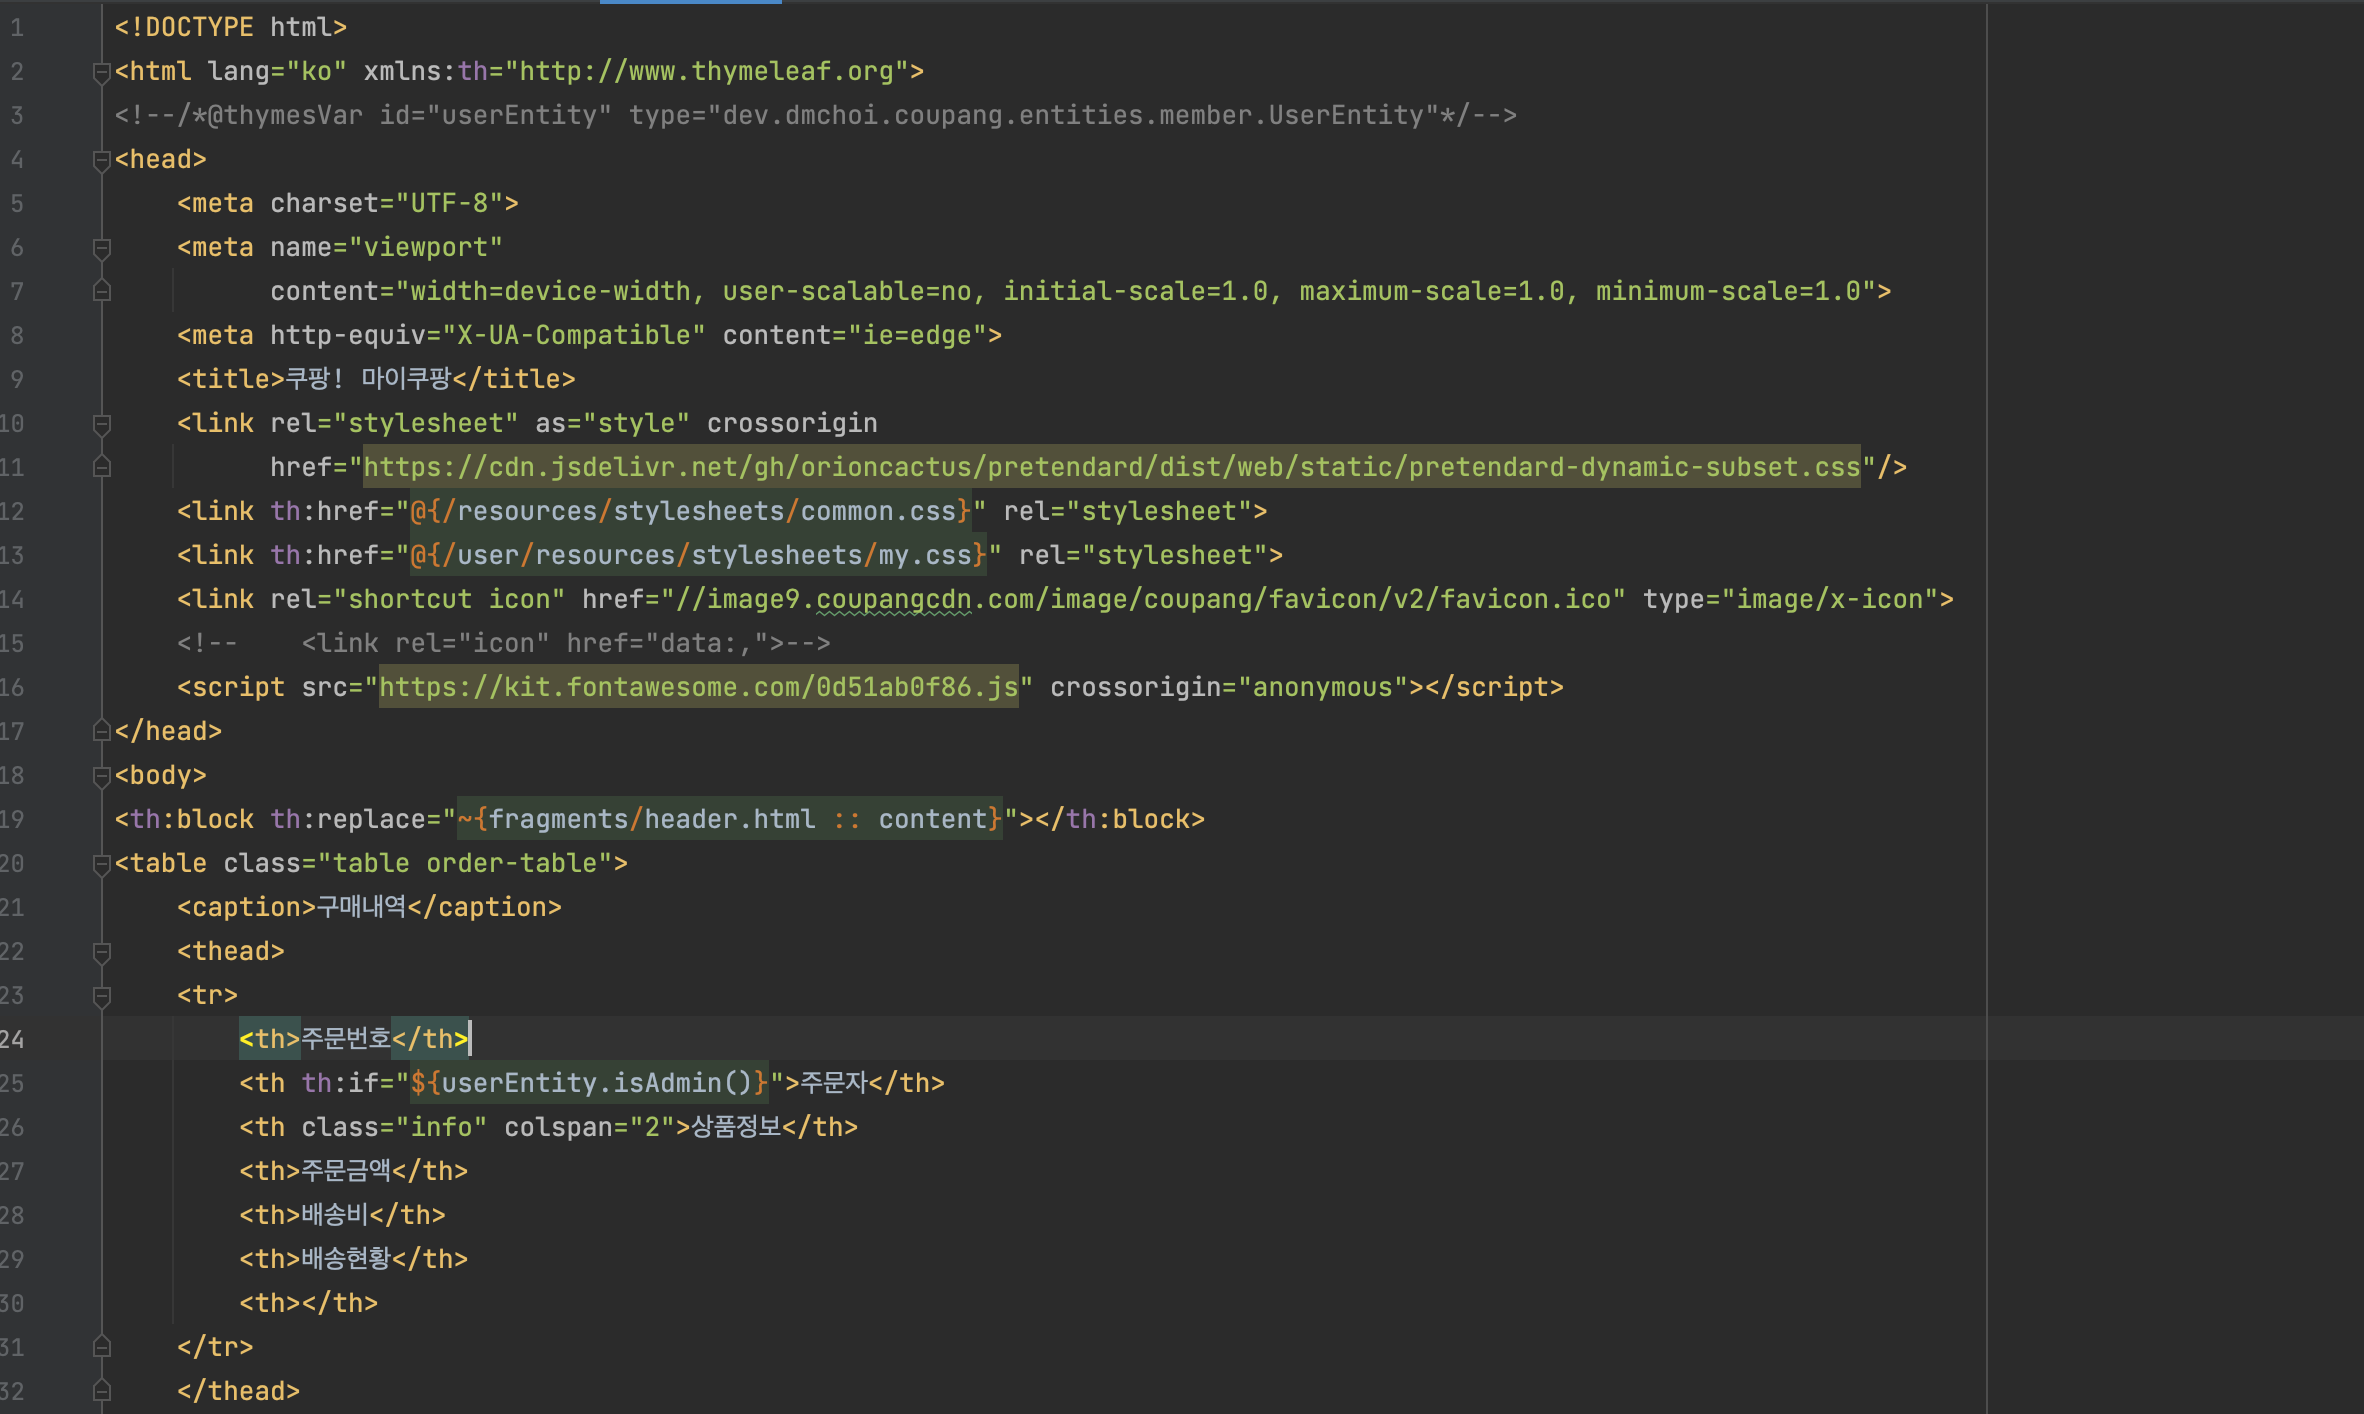
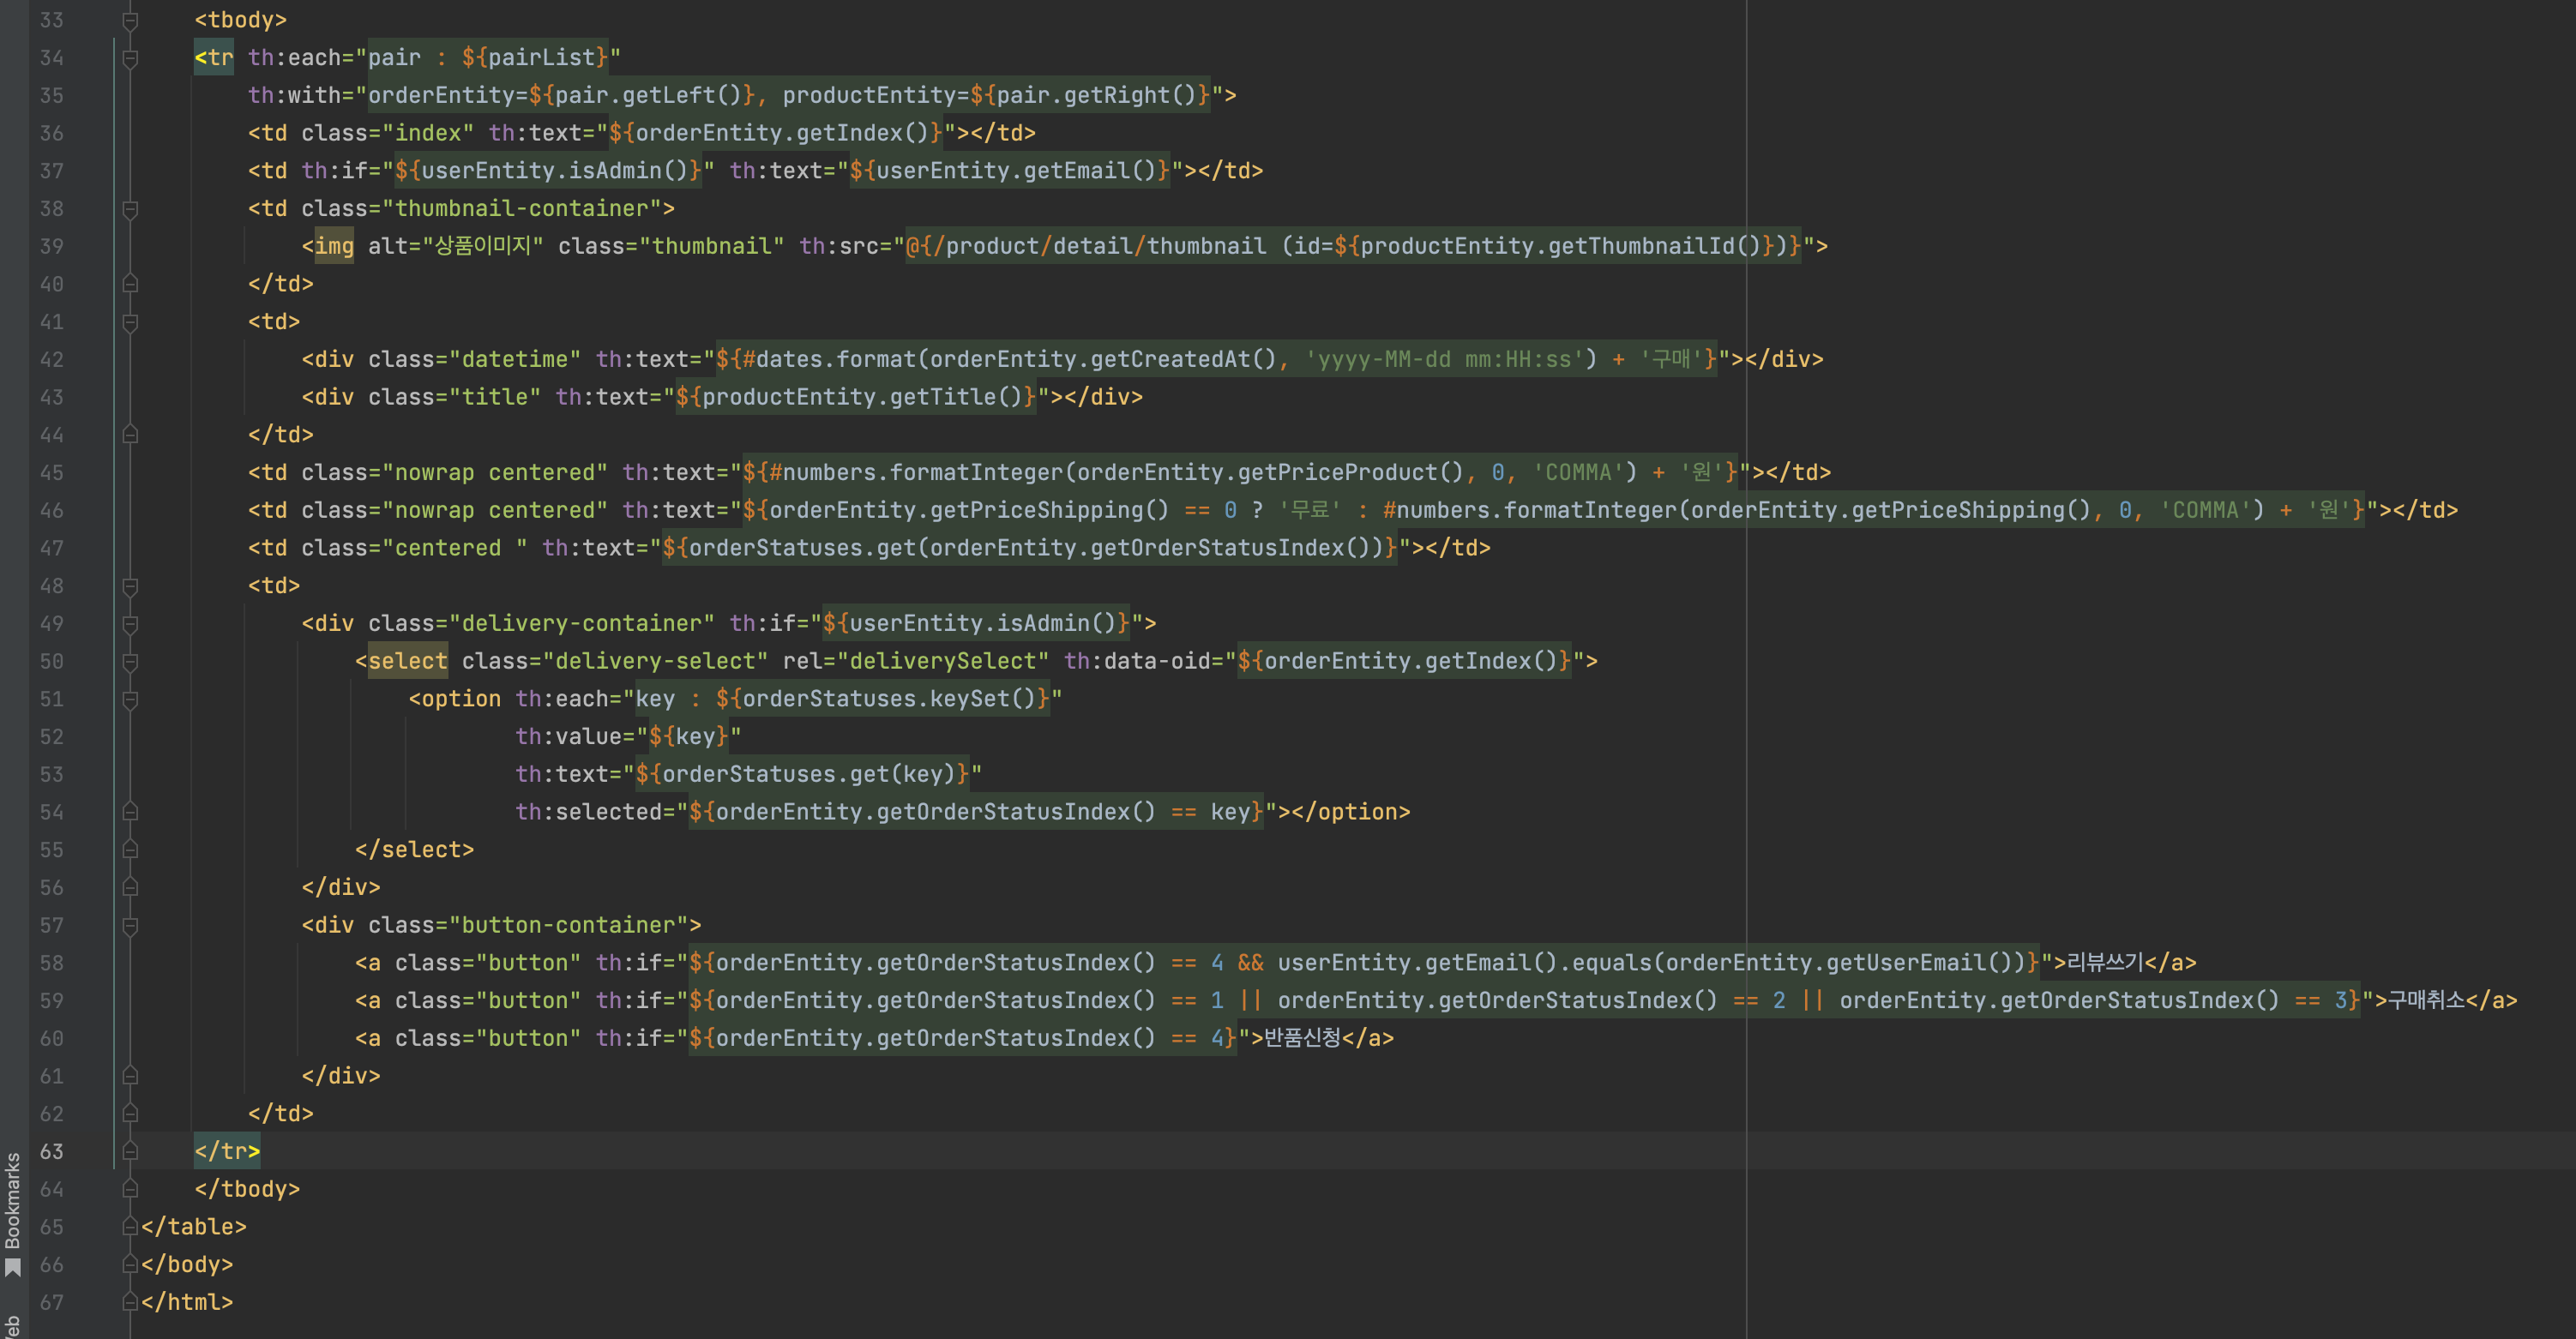
my.html
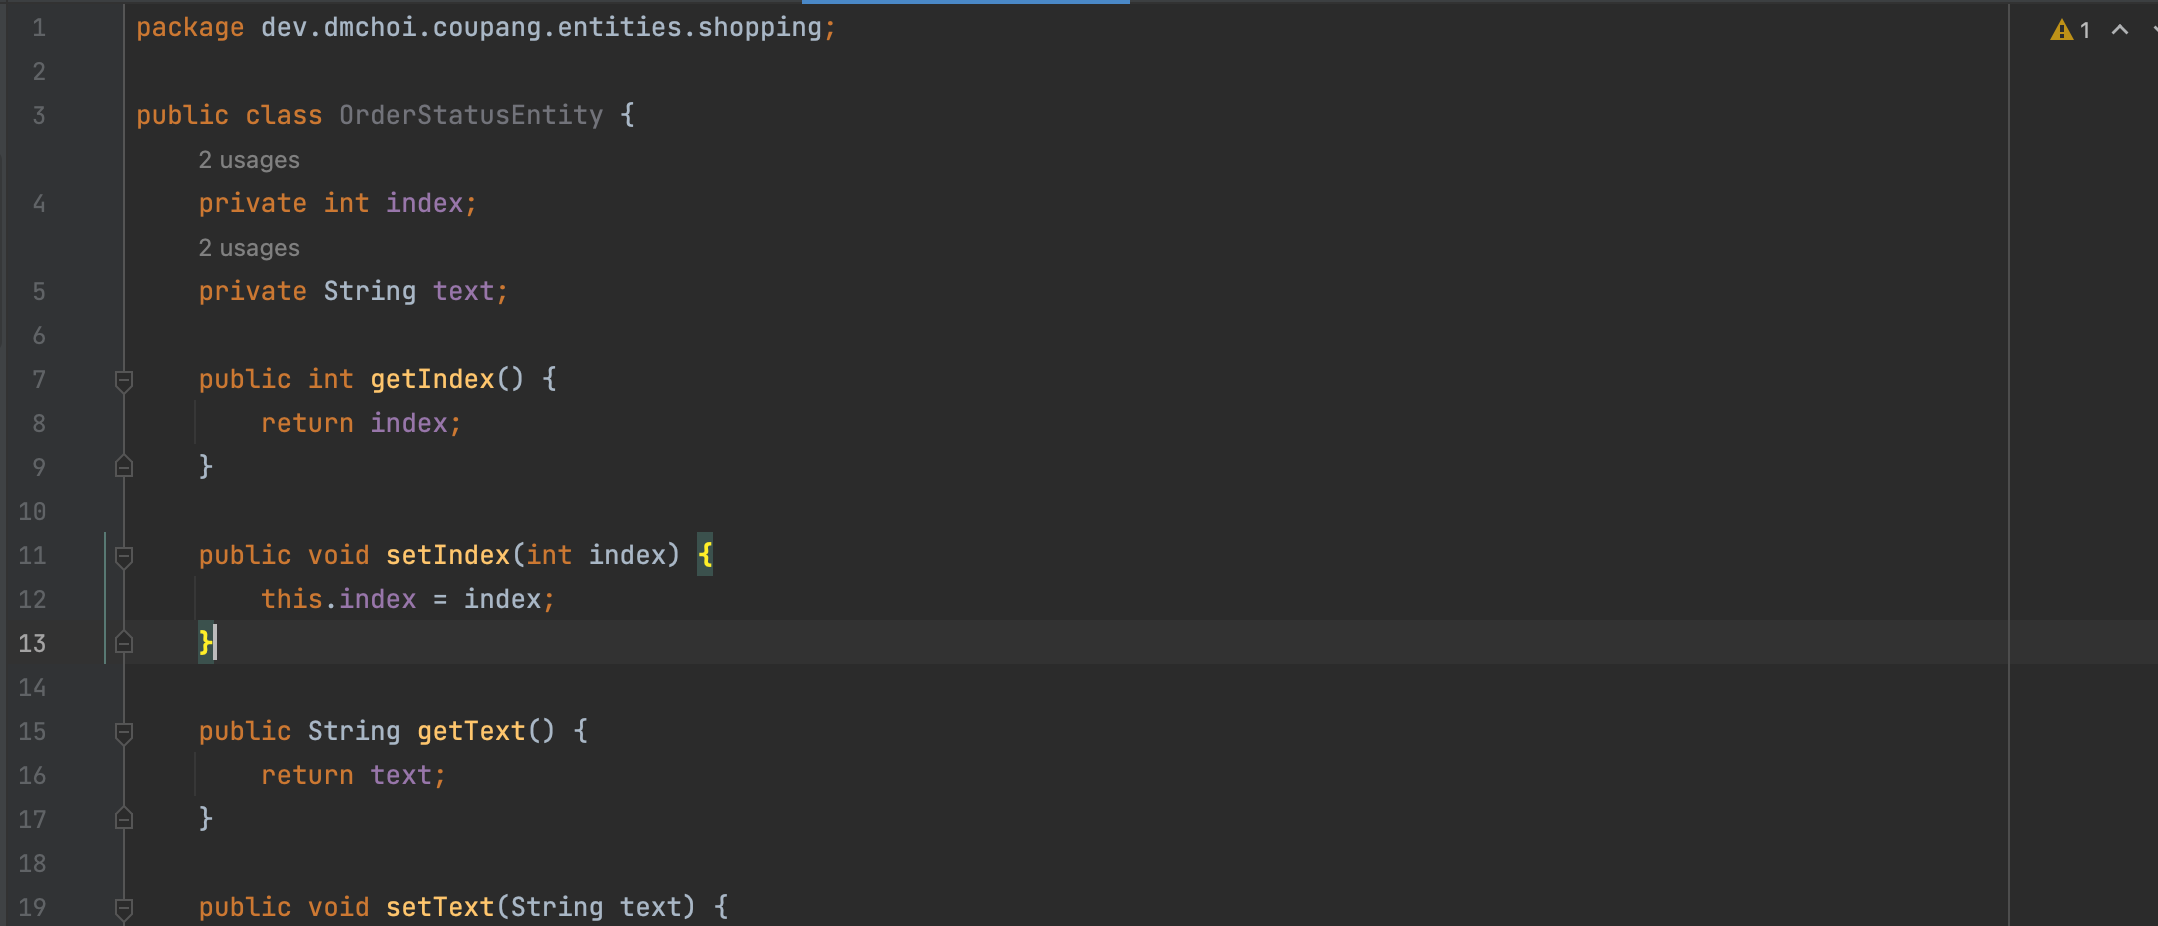
OrderStatusEntity
IShoppingMapper

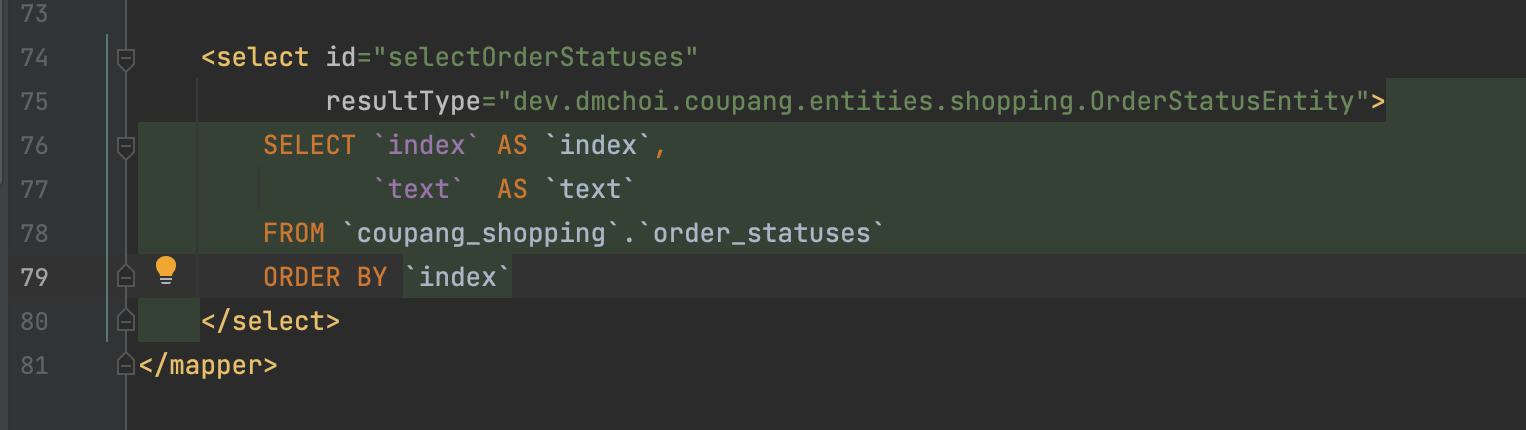
xml
ShoppingService

UserController
my.html

body > .table {
    width: var(--content-max-width);
    border-collapse: collapse;
    margin-top: 1.5rem;
}

body > .table > caption {
    background-color: rgb(250, 250, 250);
    border-top: 0.125rem solid rgb(221, 221, 221);
    border-bottom: 0.125rem solid rgb(221, 221, 221);
    font-size: 1.125rem;
    font-weight: 500;
    margin-bottom: 1rem;
    padding: 0.625rem 1rem;
    text-align: left;
}

body > .table > thead th {
    background-color: rgb(250, 250, 250);
    border-top: 0.0625rem solid rgb(221, 221, 221);
    border-bottom: 0.0625rem solid rgb(221, 221, 221);
    font-weight: 500;
    padding: 0.425rem 0.75rem;
    white-space: nowrap;
}

body > .table > thead th:not(:last-child) {
    border-right: 0.0625rem solid rgb(221, 221, 221);
}

body > .table > thead th.info {
    width: 100%;
}

body > .table > tbody td {
    border-bottom: 0.0625rem solid rgb(221, 221, 221);
    padding: 0.5rem 1rem;
}

body > .table > tbody td:not(:last-child) {
    border-right: 0.0625rem solid rgb(221, 221, 221);
}

body > .table > tbody td.index {
    text-align: center;
}

body > .table > tbody td.nowrap {
    white-space: nowrap;
}

body > .table > tbody td.centered {
    text-align: center;
    white-space: nowrap;
}

body > .table > tbody td.thumbnail-container {
    border-right: none;
    padding-right: 0;
}

body > .table > tbody .thumbnail {
    height: 5rem;
}
body > .table > tbody .datetime {
    color: rgb(160, 160, 160);
    font-size: 0.8rem;
    margin-bottom: 0.325rem;
}

body > .table > tbody .title {
    font-weight: 500;
}
body > .table > tbody .delivery-select {
    width: auto;
    border: 0.0625rem solid rgb(221, 221, 221);
    border-radius: 0.25rem;
    margin-bottom: 0.5rem;
    padding: 0.25rem 0.5rem;
}

body > .table > tbody .button-container {
    align-items: stretch;
    display: flex;
    flex-direction: column;
    justify-content: flex-end;
}

body > .table > tbody .button-container > .button {
    border: 0.0625rem solid rgb(221, 221, 221);
    border-radius: 0.25rem;
    cursor: pointer;
    padding: 0.25rem 0.5rem;
    text-align: center;
}

body > .table > tbody .button-container > .button + .button {
    margin-top: 0.375rem;
}
관리자 화면
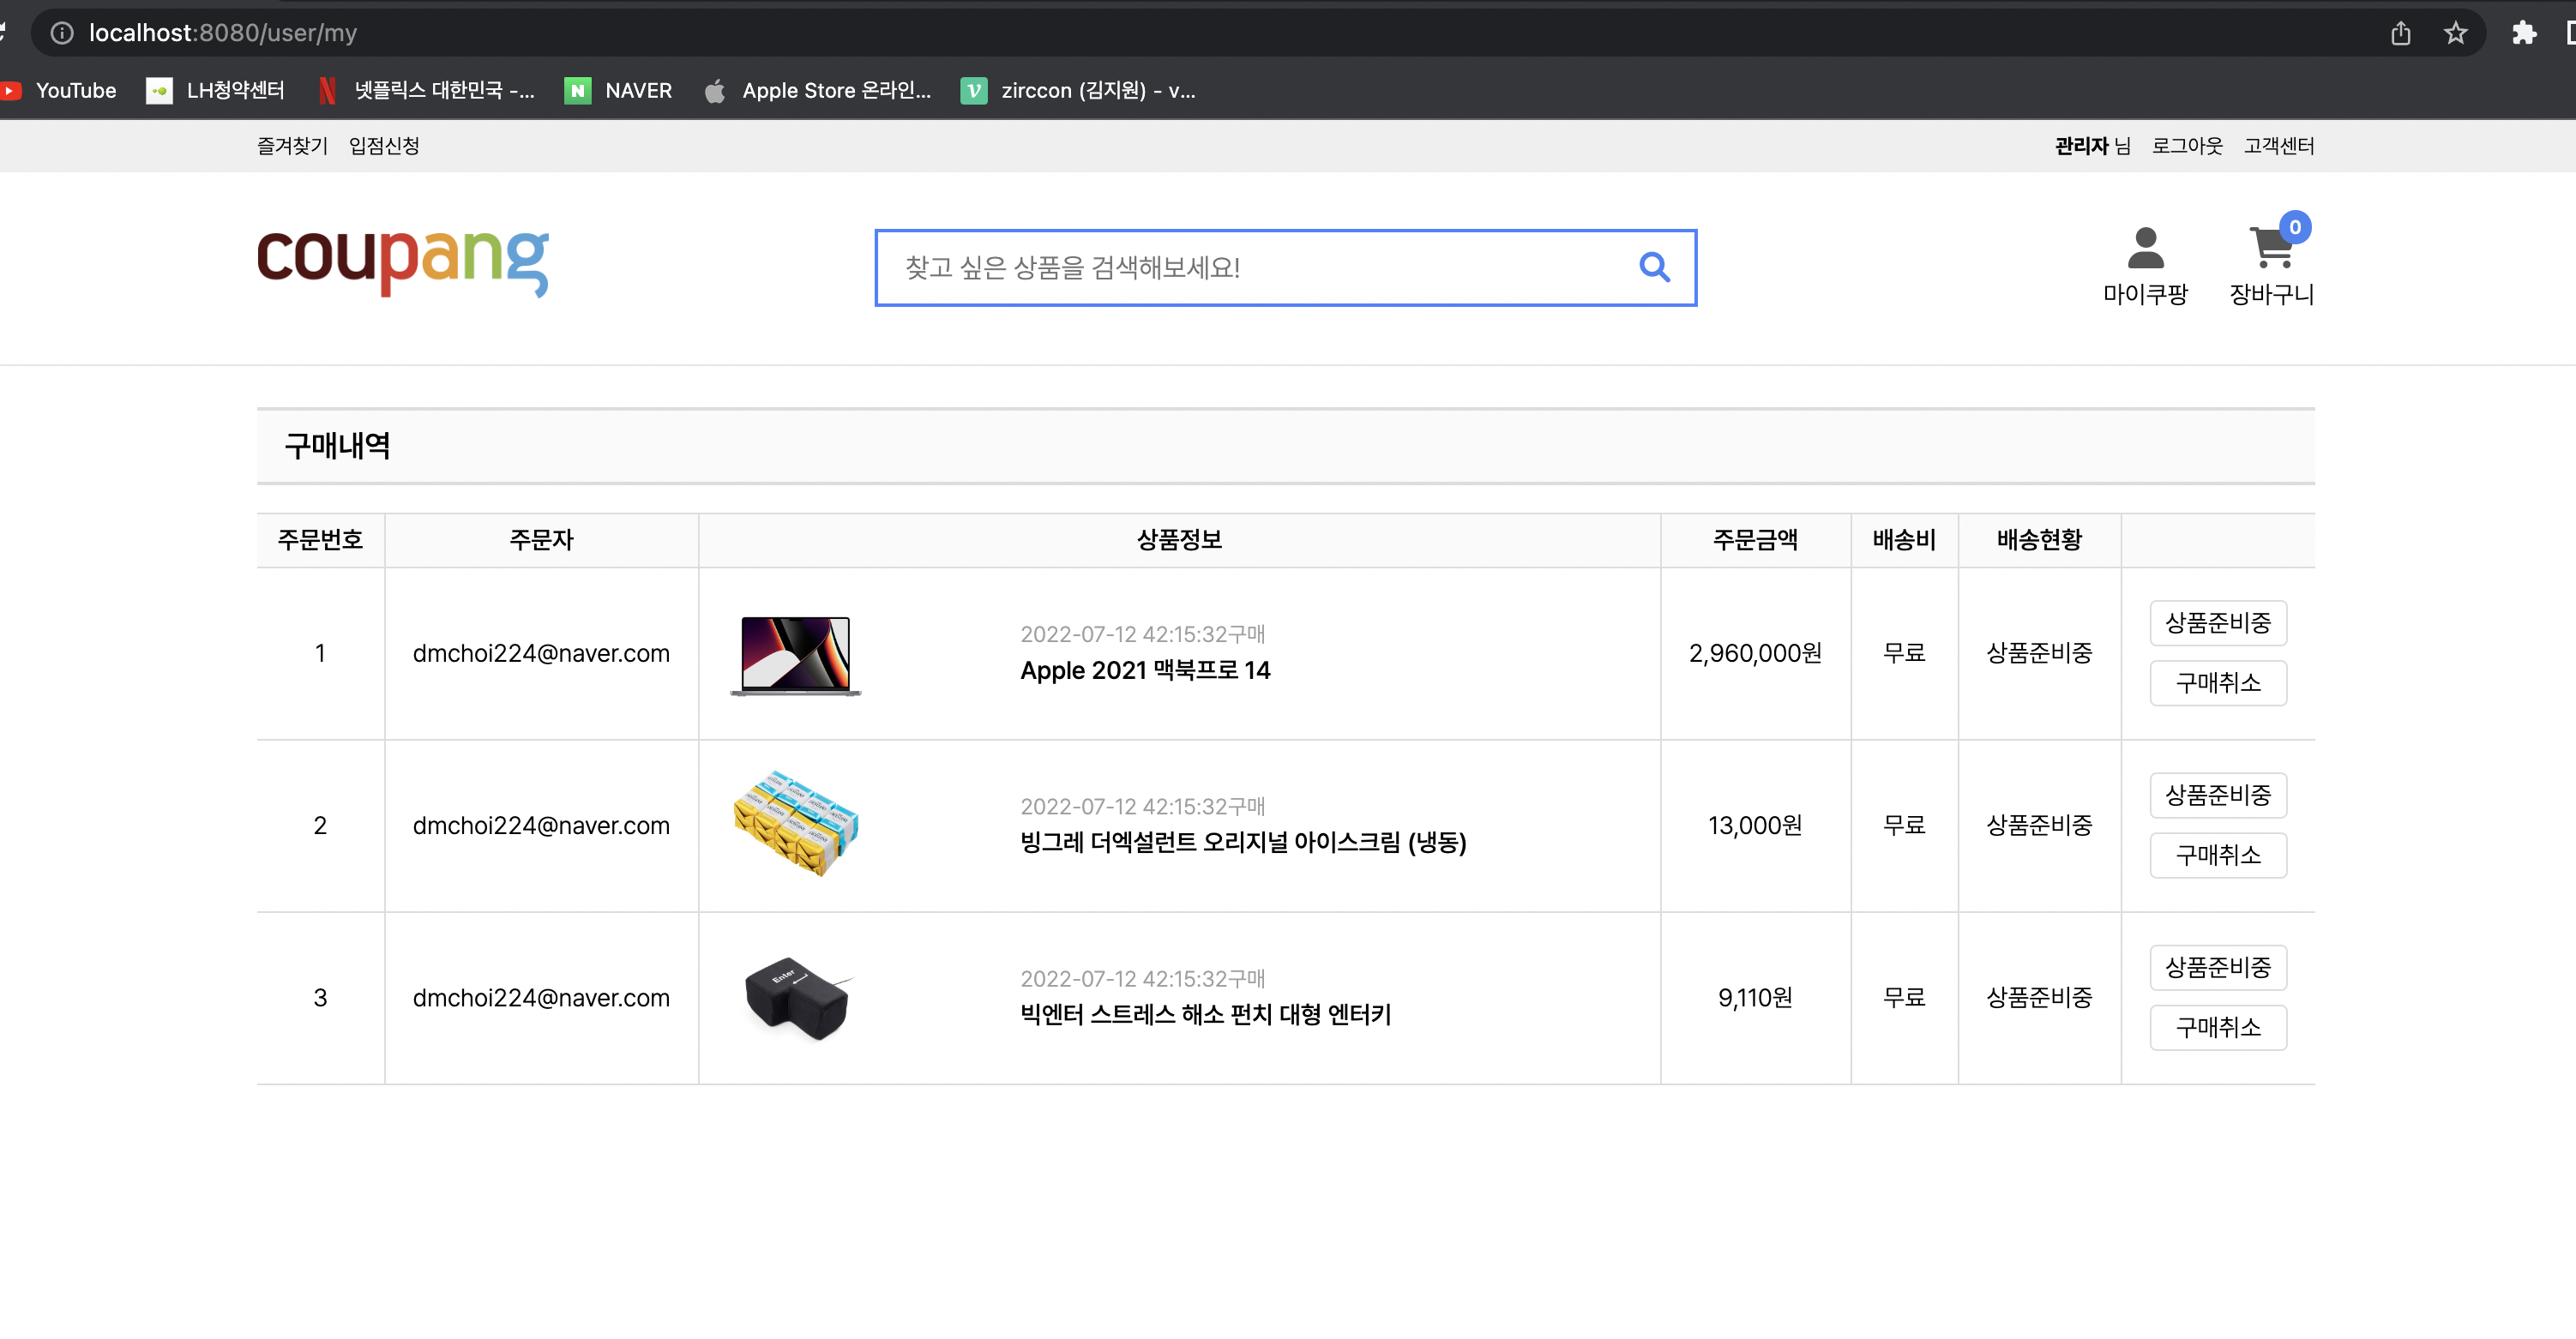
관리자가 아닌 화면