Prev | Jetpack Navigation 01
1. Navigating using menus, drawers and bottom navigation
NavigationUI and navigation-ui-ktx
The Navigation Components include a NavigationUI class and navigation-us-ktx kotlin extensions. NavigationUI has static methods that associate menu items with navigation destinations, and navigation-ui-ktx is a set of extenstion functions that do the same. If NavigationUI finds a menu item with the same ID as a destination on the current graph, it configures the menu item to navigate to that destination.
Using NavigationUI with an Options menu
One of the easiest ways to use NavigationUI is to have it simplify option menu setup. In particular, NavigationUI simplifies handling the onOptionsItemSelected callback.
-
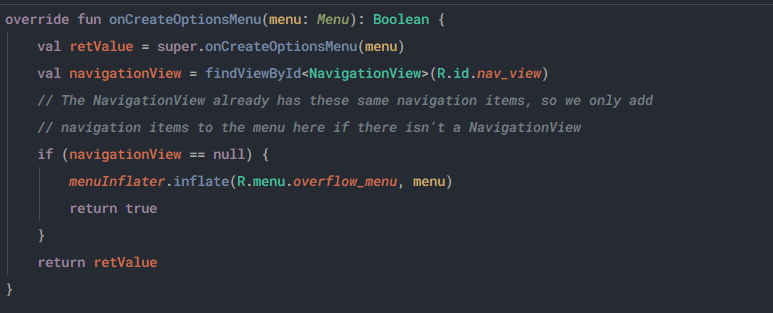
Open MainActivity.kt
Notice how you already have the code for inflating the menuoverflow_menuinonCreateOptionsMenuMainActivity.kt
-
Open
res/menu/overflow_menu.xml -
Update your overflow menu to include the
settings_destoverflow_menu.xml

-
Open
MainActivity.kt -
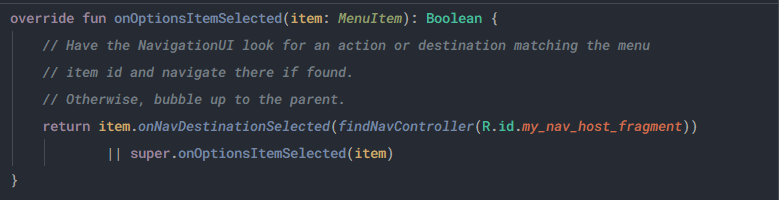
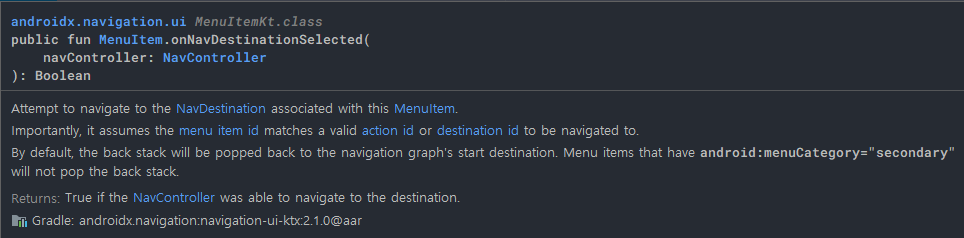
Have NavigationUI handle
onOptionsItemSelectedwith the onNavDestinationSelected helper method. If the menu item is not meant to navigate, handle withsuper.onOptionsItemSelectedMainActivity.kt
-
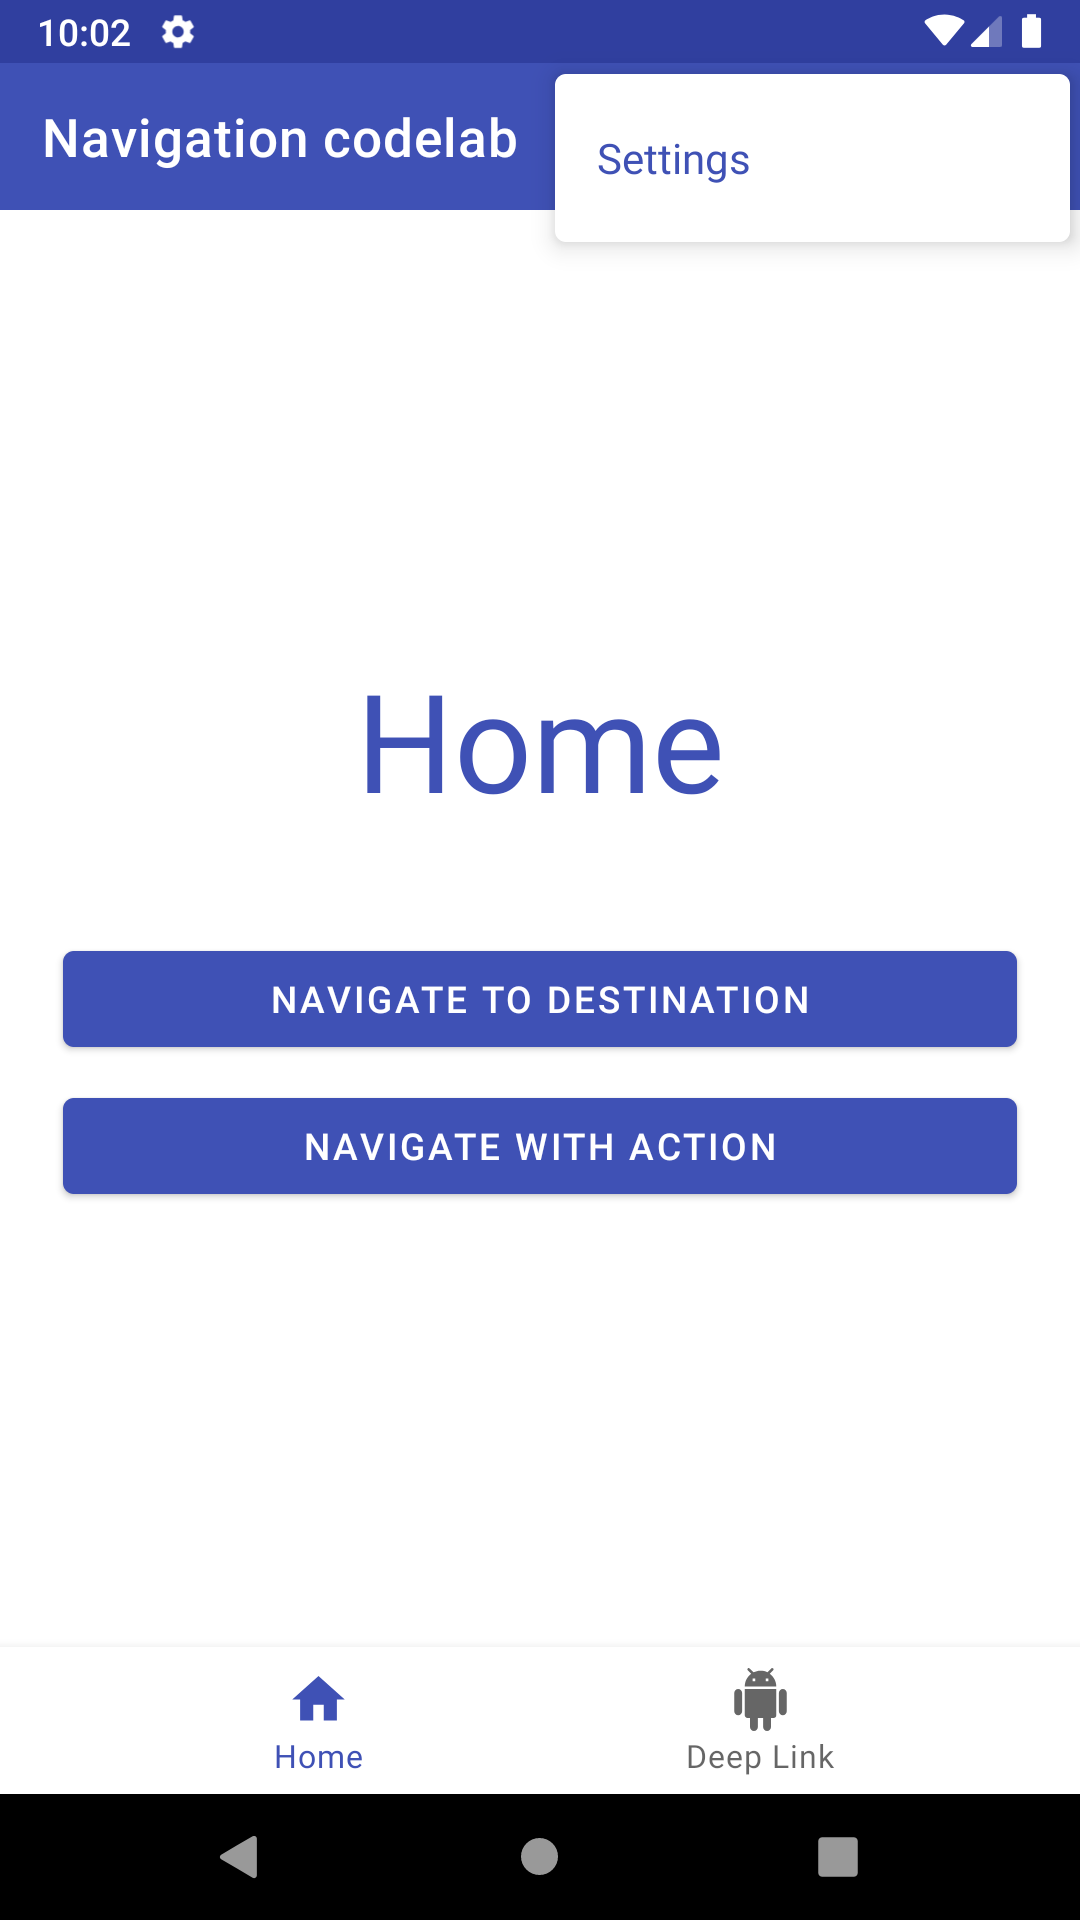
Run your app. You should have a functional ActionBar menu that navigates to the SettingsFragment.

Using NavigationUI to configure Bottom Navigation
The coded already contains the XML layout code for implementing bottom navigation, which is why you see the bottom navigation bar. But it doesn't navigate anywhere.
-
Open
res/layout/navigation_activity.xml (h470dp)and click the Text tab
Notice how the XML layout code for bottom navigation is there and refers tobottom_nav_menu.xmlnavigation_activity.xml (h470dp)

-
Open
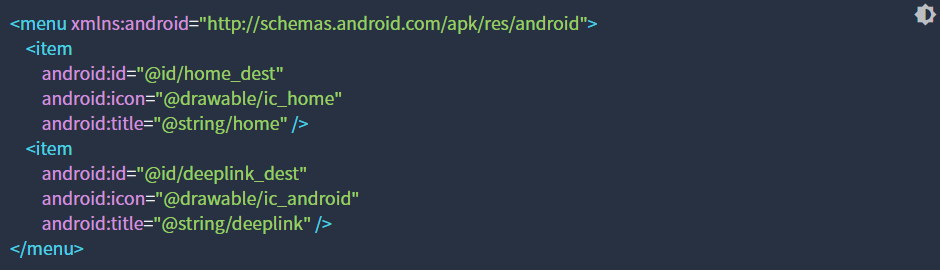
res/menu/bottom_nav_menu.xml
Notice how there are two items for bottom navigation and that their ids match the destinations of navigation graph destinations:bottom_nav_menu.xml
Let's make the bottom navigation actually do something using NavigationUI.
-
Open
MainActivity.kt -
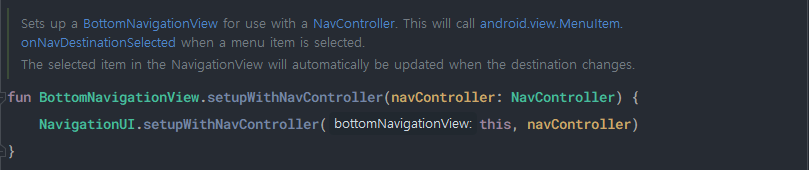
Implement the
setupBottomNavMenumethod using setupWithNavController(bottomNavigationView: BottomNavigationView, navController: NavController)MainActivity.kt

Now your bottom navigation works!
Using NavigationUI to configure a Navigation Drawer
Finally, let's use NavigationUI to configure the side navigation and navigation drawer, including handling the ActionBar and proper up navigation. You'll see this if you've got a large enough screen or if the screen's too short for bottom navigation.
First observe how the proper layout XML code is already in the app.
-
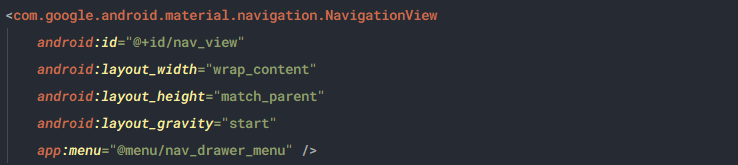
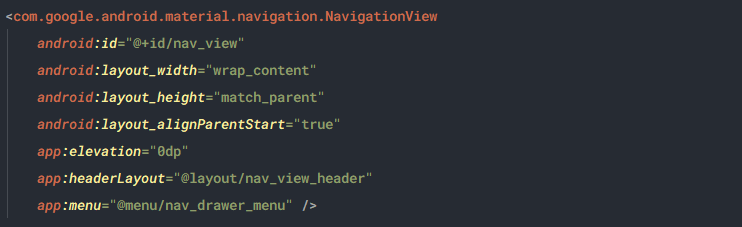
Open both
navigation_activity.xmlandnavigation_activity.xml (w960dp)Notice how both layouts contain a NavigationView connected to nav_drawer_menu. In the tablet version (w960dp) the NavigationView is always on screen. On smaller devices the NavigationView is nested within a DrawerLayout.
navigation_activity.xml
navigation_activity.xml (w960dp)
Now to start implementing the NavigationView navigation.
-
Open
MainActivity.kt -
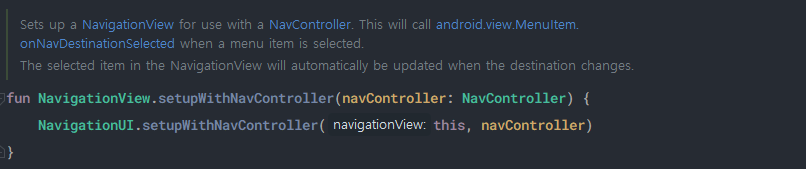
Implement the
setupNavigationMenumethod using setupWithNavController(navigationView: NavigationView, navController: NavController). Notice how this version of the method takes aNavigationViewand not aBottomNavigationView.MainActivity.kt
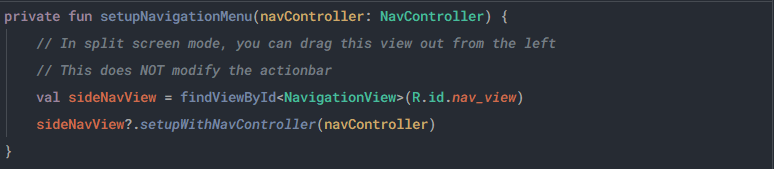
Now the navigation view menu will show on the screen, but it will not affect the ActionBar.
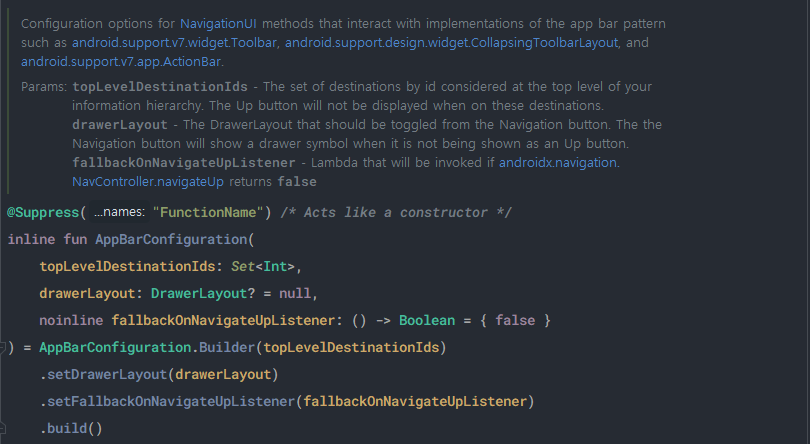
Setting up the
ActionBarrequires creating an instance of AppBarConfiguration. The purpose ofAppBarConfigurationis to specify the configuration options you want for your toolbars, collapsing toolbars, and action bars. Configuration options include whether the bar must handle a drawer layout and which destinations are considered top-level destinations.Top-level destinations are the root-level destinations of your app. These destinations do not display an "up" button in the app bar, and they display the drawer icon if the destination uses a drawer layout.
-
Create an
AppBarConfigurationby passing in a set of top-level destination IDs and the drawer layout.MainActivity.kt

How to determine top-level destinations
Destinations reachable via global navigation UI, such as bottom nav or side nav, all appear to users as on the same top level of the hierarchy. Therefore, they are top level destinations. home_dest and deeplink_dest are in the bottom nav and we want the drawer icon to show on both of these destinations, so they are top-level destinations.
Note that the start destination is always considered a top-level destination. If you don't specify a list of top-level destinations, then the only top-level destination is your start destination. You can learn more about AppBarConfiguration in the documentation.
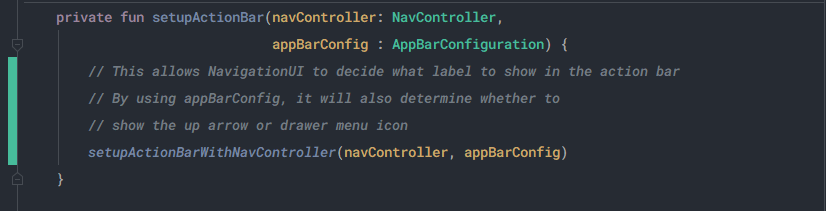
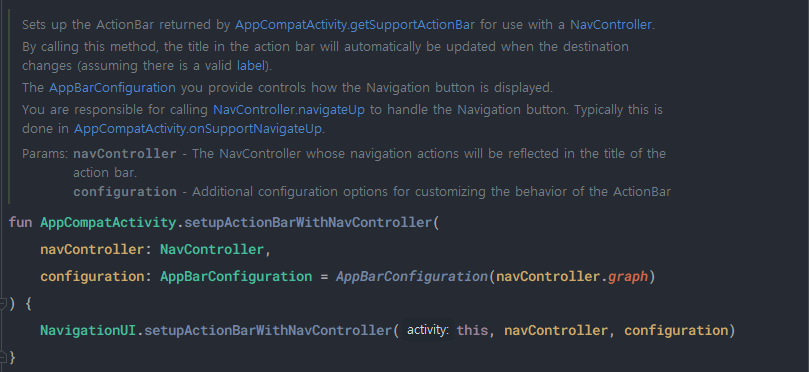
Now that you have an AppBarConfiguration, you can call NavigationUI.setupActionBarWithNavController. This will do the following:
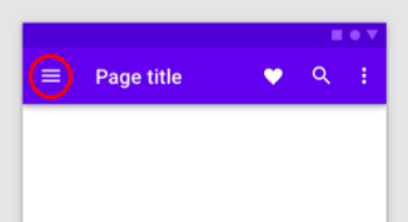
- Show a title in the ActionBar based off of the destination's label
- Display the Up button whenever you're not on a top-level destination
- Display a drawer icon (hamburger icon) when you're on a top-level destination
-
Implement
setupActionBarWithNavControllerMainActivity.kt
You should also have NavigationUI handle what happens when the Up button is pressed.
- Override
onSupportNavigateUpand call NavigationUI.navigateUp, using the sameAppBarConfiguration.MainActivity.kt


-
Run your code. If you open the app in split screen, you should have a working navigation drawer. The up icon and the drawer icon should display at the appropriate times and work correctly.
Notice
The layout navigation_activity.xml (h470dp) will be used on phones in portrait mode. This layout does not include the navigation drawer and instead includes the bottom navigation, which is why you should open the app in split screen to see the navigation drawer. The reason there is not a layout with both a navigation drawer and bottom navigation is because Material Design guidelines cautions against this.
Adding new destinations to a
NavigationViewis easy. Once you have the navigation drawer working with up and back navigation, you just need to add the new menu item.
-
Open
menu/nav_drawer_menu.xml -
Add a new menu item for
setting_destnav_drawer_menu.xml
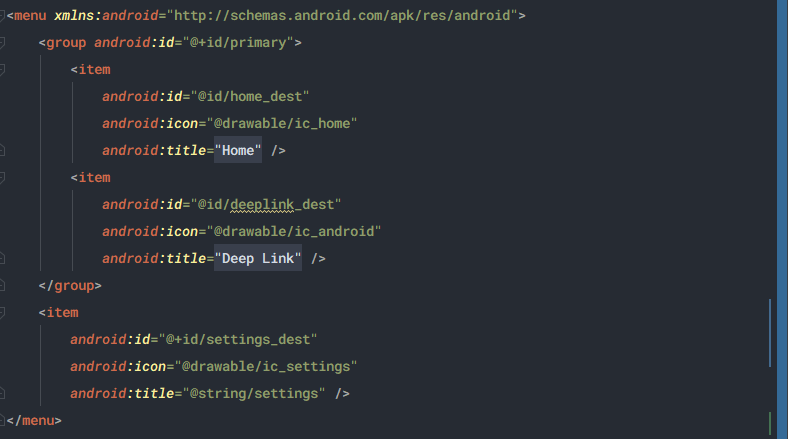
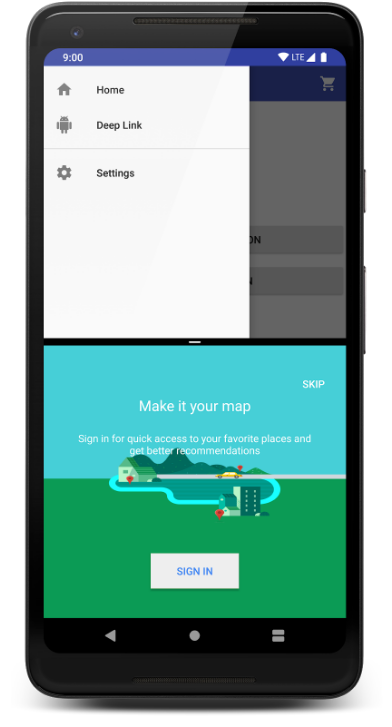
Now your navigation drawers shows the Settings screen as a destination.
2. Deep Linking to a destination
Deep Links and Navigation
Navigation components also include deep link support. Deep links are a way to jump into the middle of your app's navigation, whether that's from an actual URL link or a pending intent from a notification.
One benefit of using the navigation library to handle deep links is that it ensures users start on the right destination with the appropriate back stack from other entry points such as app widgets, notifications, or web links (covered in the next step).
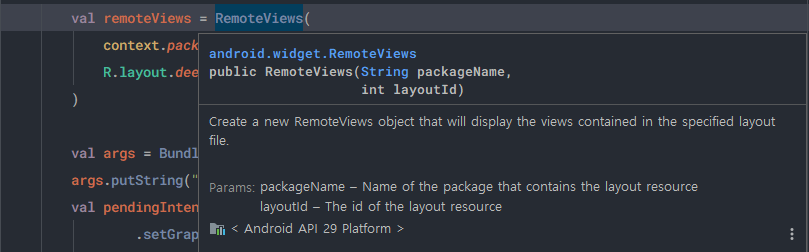
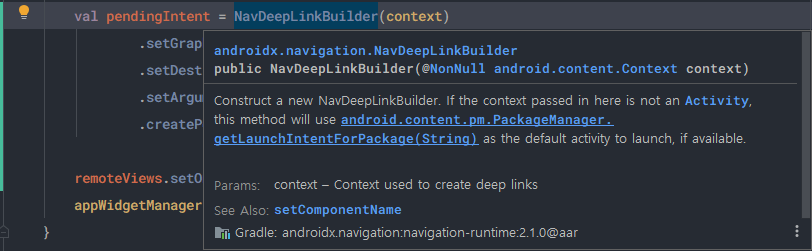
Navigation provides a NavDeepLinkBuilder class to construct a PendingIntent that will take the user to a specific destination.
Add a Deep Link
We'll use the NavDeepLinkBuilder to hook up an app widget to a destination.
-
Add a
PendingIntentconstructed withNavDeepLinkBuilder:DeepLinkAppWidgetProvider.kt
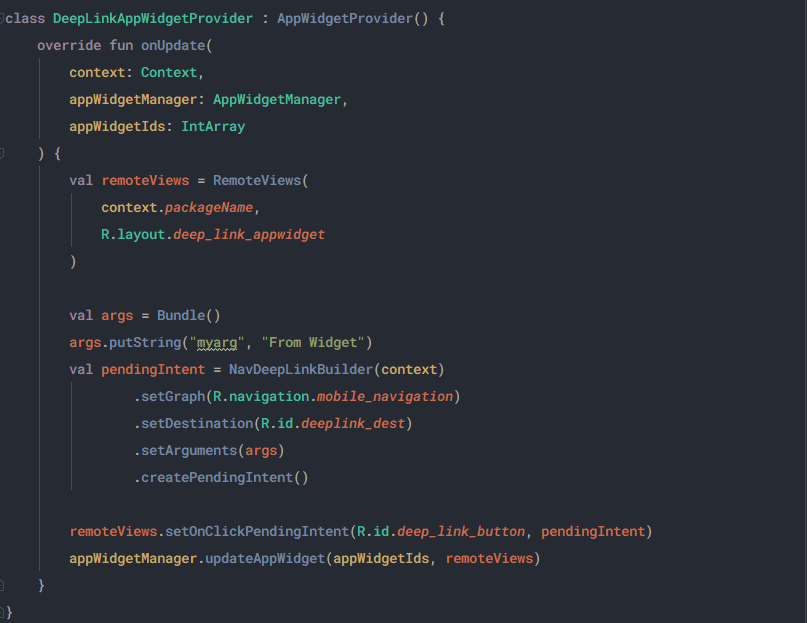

Notice:
setGraphincludes the navigation graph.
-
setDestinationspecifies where the link goes to. -
setArgumentsincludes any arguments you want to pass into your deep link.By default NavDeepLinkBuilder will start your launcher Activity. You can override this behavior by passing in an activity as the context or set an explicit activity class via setComponentName().
-
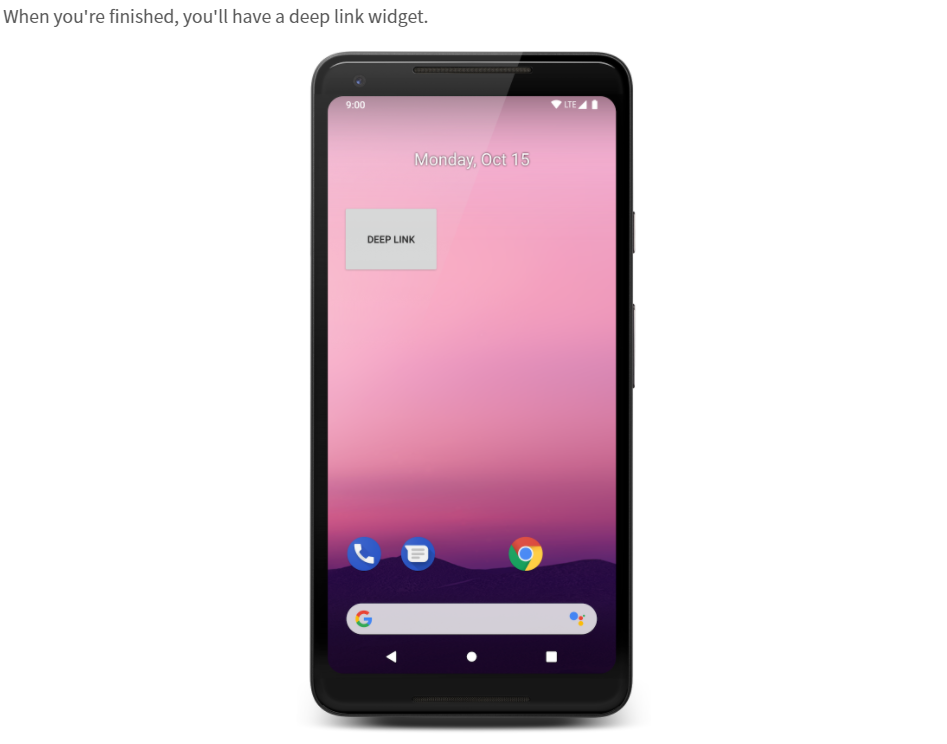
Add the Deep Link widget to your home screen.
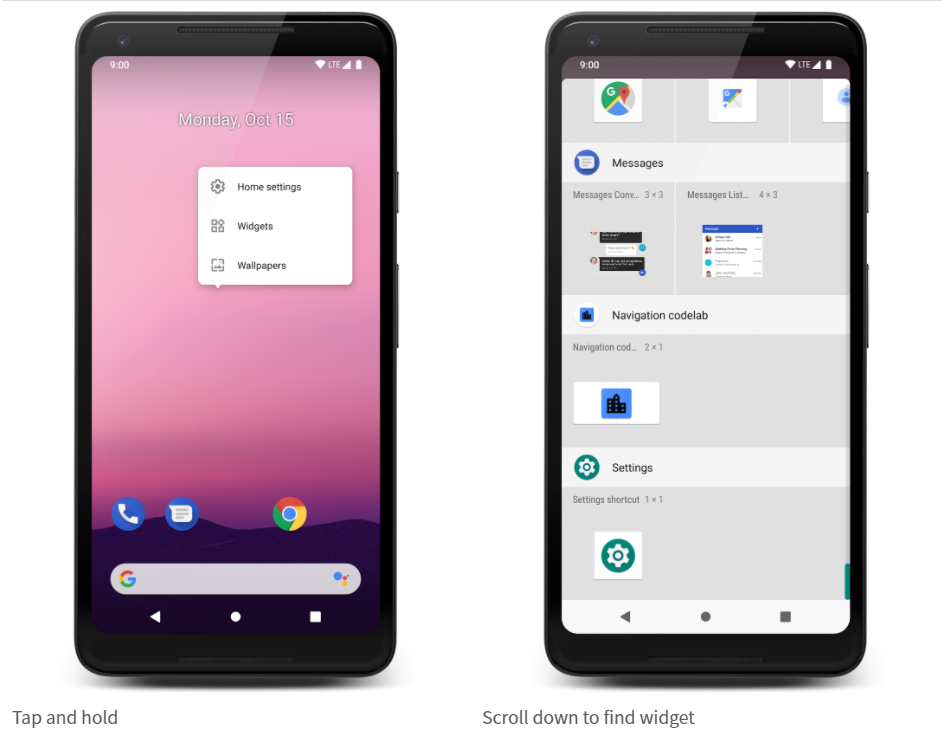
- Tap the widget, and verify that the Android destination opens with the correct argument. It should say "From Widget" at the top since that is the argument you passed in DeepLinkAppWidgetProvider.
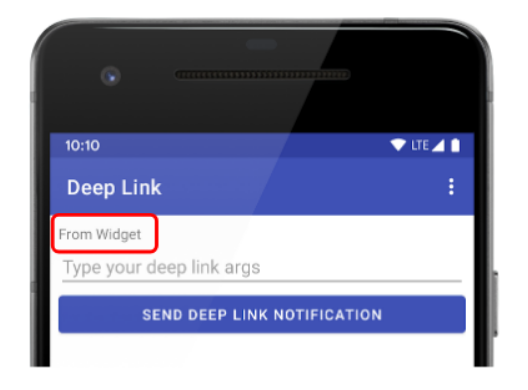
- Verify that hitting the back button takes you to the
home_destdestination.
As a convenience, you can also call NavController's createDeepLink() method to use the Context and current navigation graph from the NavController.
DeepLink Backstack
The backstack for a deep link is determined using the navigation graph you pass in. If the explicit Activity you've chosen has a parent activity, those parent Activities are also included.
The backstack is generated using the destinations specified with app:startDestination. In this app we only have one activity and one level of navigation, so the backstack will take you to the home_dest destination.
More complicated navigation can include nested navigation graphs. The app:startDestination at each level of the nested graphs determines the backstack. For more information on deep links and nested graphs, check out the Principles of Navigation.
3. Associating a web link with a destination
The <deepLink> element
One of the most common uses of a deep link is to allow a web link to open an activity in your app. Traditionally you would use an intent-filter and associate a URL with the activity you want to open.
The navigation library makes this extremely simple and allows you to map URLs directly to destinations in your navigation graph.
<deepLink> is an element you can add to a destination in your graph. Each <deepLink> element has a single required attribute: app:uri.
In addition to a direct URI match, the following features are supported:
-
URIs without a scheme are assumed to be http and https. For example,
www.example.comwill matchhttp://www.example.comandhttps://www.example.com. -
You can use placeholders in the form of
{placeholder_name}to match one or more characters. The String value of the placeholder is available in the arguments Bundle which has a key of the same name. For example,http://www.example.com/users/{id}will matchhttp://www.example.com/users/4. -
You can use the
.*wildcard to match zero or more characters. -
NavController will automatically handle ACTION_VIEW intents and look for matching deep links.
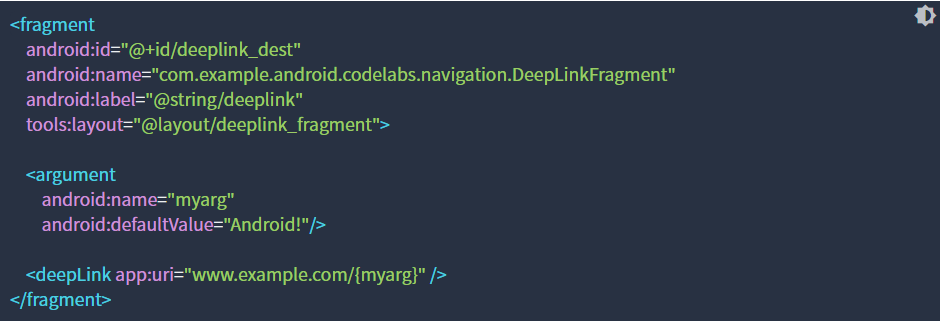
Add a URIbased Deep Link using <deepLink>
In this step, you'll add a deep link to www.example.com
-
Open
mobile_navigation.xml -
Add a
<deepLink>element to thedeeplink_destdestination.mobile_navigation.xml
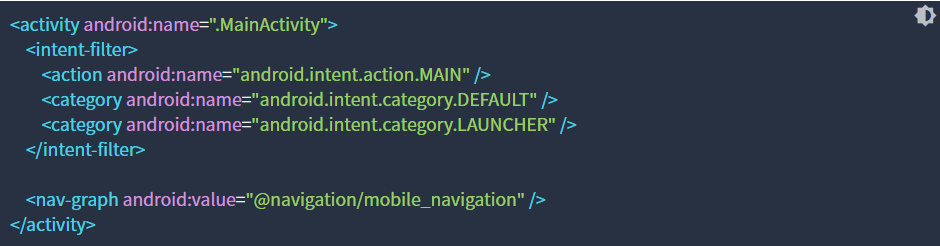
-
Open
AndroidManifest.xml -
Add the
nav-graphtag. This will ensure the appropriate intent filter is generatedAndroidManifest.xml
-
Launch your app using a deep link. There are two ways to do this:
-
Use
adb:

-
Navigate via the Google app. You should be able to put www.example.com/urlTest in the search bar and the disambiguation window will appear. Select Navigation codelab

Either way, you should see the message "urlTest" on screen. This was passed through to the fragment, from the URL.

-
Learn more | Google Codelabs