
Reference
Android Navigation | Android developers
Jetpack Navigation | Google Codelabs
1. Overview of Navigation
The Navigation Component consists of three key parts, working together. They are:
-
Navigation Graph (New XML resource) - This is a resource that contains all navigation-related information in one centralized location. This includes all the places in your app, known as destinations, and possible paths a user could take through your app.
-
NavHostFragment (Layout XML view) - This is a special widget you add to your layout. It displays different destinations from your Navigation Graph.
-
NavController (Kotlin/Java object) - Ths is an object that keeps track of the current position within the navigation graph. It orchestrates swapping destination content in the
NavHostFragmentas you move through a navigation graph.
When you navigate, you'll use the NavController object, telling it where you want to go or what path you want to take in your Navigation Graph. The NavController will then show the appropriate destination in the NavHostFragment.
2. Introducing the Navigation Graph
Destinations
The Navigation Component introduces the concept of a destination. A destination is any place you can navigate to in your app, usually a fragment or an activity. These are supported out of the box, but you can also make your own custom destination types if needed.
Navigation Graph
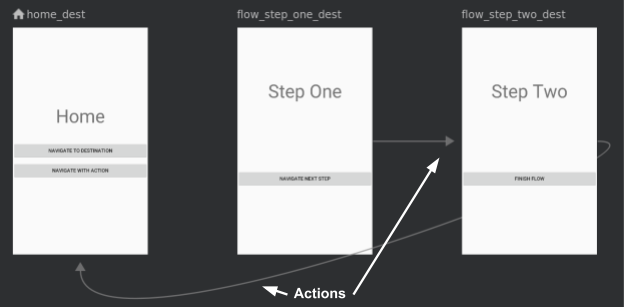
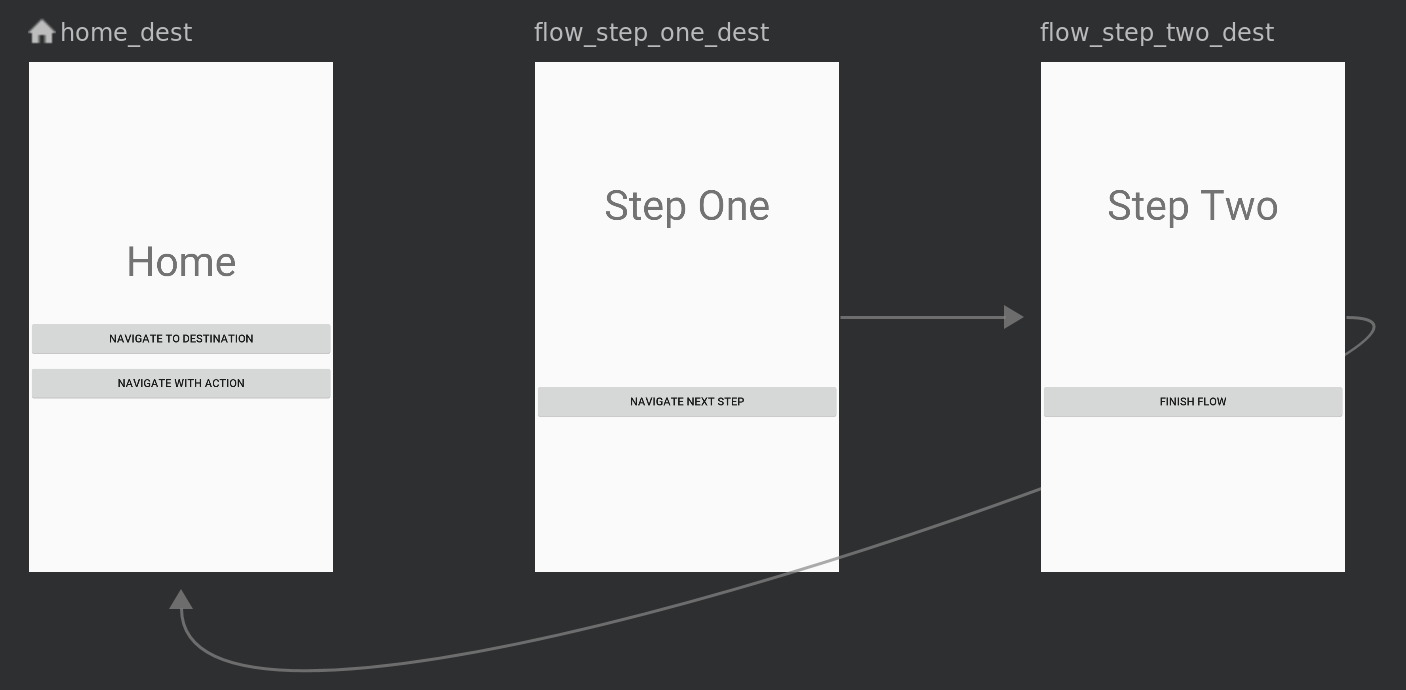
A navigation graph is a new resource type that defines all the possible paths a user can take through an app. It shows visually all the destinations that can be reached from a given destination. Android Studio displays the graph in its Navigation Editor. Here's part of the starting navigation graph you'll create for your app:

Exploring the Navigation Editor
-
Click Design to go into Design mode
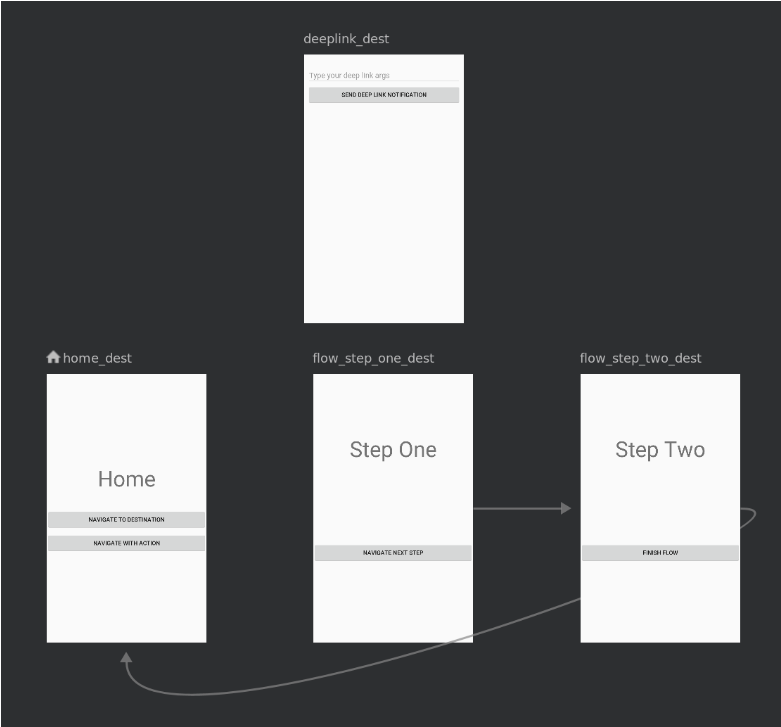 The navigation graph shows the available destinations. The arrows between the destinations are called actions. You'll learn more about actions later.
 -
Click on a destination to see its attributes.
-
Click on any action, represented by an arrow, to see its attributes.
Anatomy of a navigation XML file
All of the changes you make in the graphical Navigation Editor change the underlying XML file, similar to the way the Layout Editor modifies the layout XML.
Click the Text tab and you'll see some XML like this:

Notice:
-
<navigation>is the root node of every navigation graph. -
<navigation>contains one or more destinations, represented by<activity>or<fragment>elements. -
app:startDestinationis an attribute that specifies the destination that is launched by default when the user first opens the app.
Let's take a look at fragment destination:
Notice:
android:iddefines an ID for the fragment that you can use to reference the destination elsewhere in this XML and your code.
-
android:namedeclares the fully qualified class name of the fragment to instantiate when you navigate to that destination. -
tools:layoutspecifies what layout should be shown in the graphical editor.
Some <fragment> tags also contain <action>, <argument> and <deepLink>, all of which we'll cover later.
3. Add a Destination to the Navigation Graph
You must add a destination to the navigation graph before you can navigate to it.
-
Open
res/navigation/mobile_navigation.xml, and click the Design tab. -
Click the New Destination icon, and select
settings_fragment
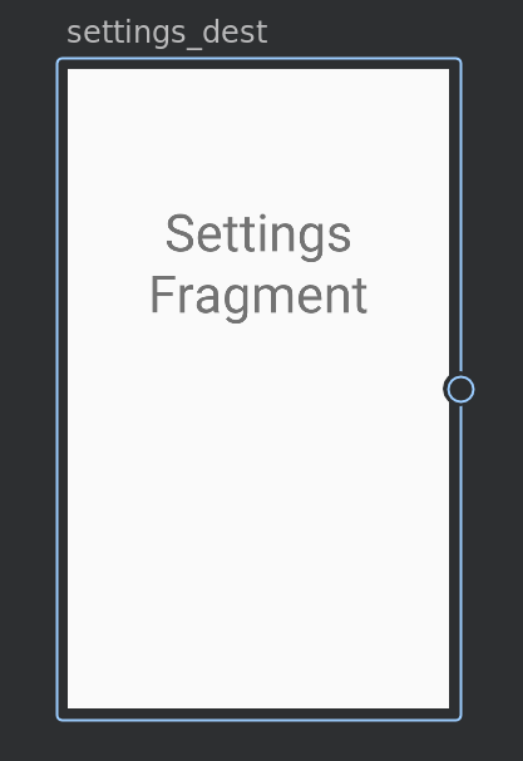
 The result is a new destination, which renders a preview of the fragment's layout in the design view.
Note : You can also edit the XML file directly to add destinations:
To follow our naming convention, change the id to settings_dest from the default settingsFragment.
4. Using the Navigation Graph to Navigate
Activities and Navigation
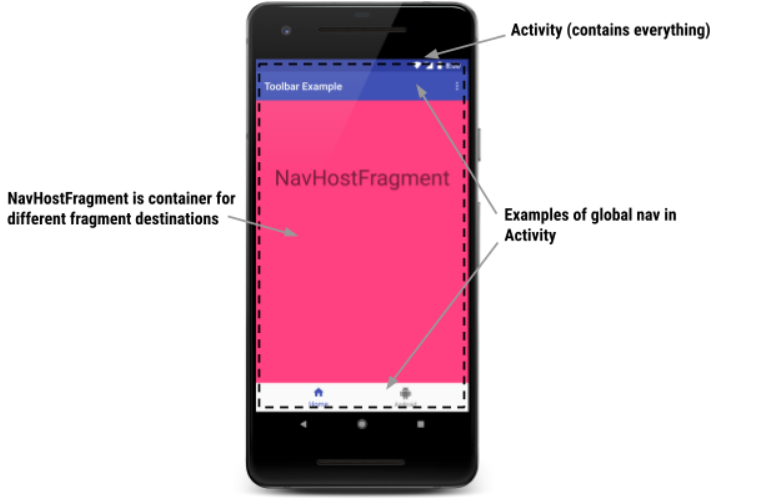
The Navigation component follows the guidance outlined in the Principles of Navigation. The Principles of Navigation recommend you use activities as entry points for your app. Activities will also contain global navigation, such as the bottom nav,
In comparison, fragments will be the actual destination-specific layouts.
To get this all to work, you need to modify your activity layouts to contain a special widget called a NavHostFragment. A NavHostFragment swaps different fragment destinations in and out as you navigate through the navigation graph.
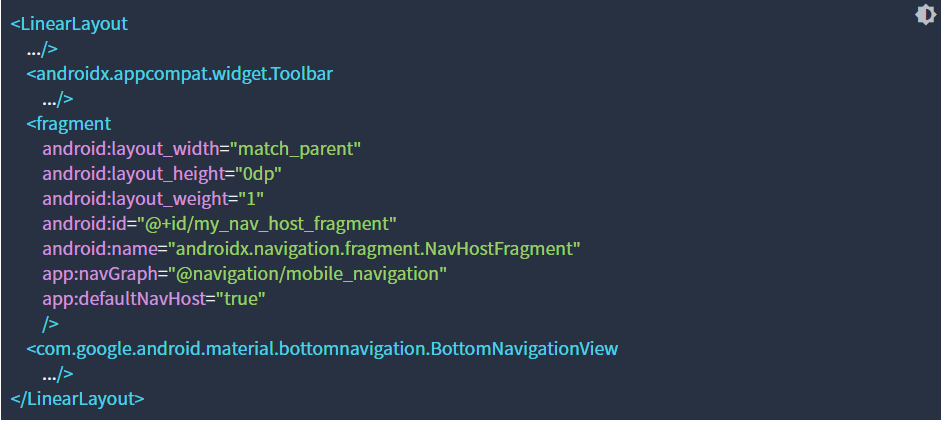
A simple layout supporting navigation similar to the picture above looks like this. An example of this code can be found in res/layout-470dp/navigation_activity.xml:
Notice:
-
This is a layout for an activity. It contains the global navigation, including a bottom nav and a toolbar.
-
android:name="androidx.navigation.fragment.NavHostFragmnet"andapp:defaultNavHost="true"connect the system back button to theNavHostFragment -
app:navGraph="@navigation/mobile_navigation"associates theNavHostFragmentwith a navigation graph. This navigation graph specifies all the destinations the user can navigate to, in thisNavHostFragment.
NavController
Finally, when a user does something like clicking a button, you need to trigger a navigate command. A special class called the NavController is what triggers the fragment swaps in the NavHostFragment.

Note that you pass in either a destination or action ID to navigate. These are the IDs defined in the navigation graph XML. This is an example of passing in a destination ID.
NavController is powerful because when you call methods like navigate() or popBackStack(), it translates these commands into the appropriate framework operations based on the type of destination you are navigating to or from. For example, when you call navigate() with an activity destination, the NavController calls startActivity() on your behalf.
There are a few ways to get a NavController object associated with your NavHostFragment. In Kotlin, it's recommended you use one of the following extension functions, depending on whether you're calling the navigation command from within a fragment, activity or view:
Your NavController is associated with a NavHostFragment. Thus whichever method you use, you must be sure that the fragment, view, or view ID is either a NavHostFragment itself, or has a NavHostFragment as a parent. Otherwise you will get an IllegalStateException.
Navigate to a Destination with NavController
It's your turn to navigate using NavController. You'll hook up the Navigate To Destination button to the flow_step_one_dest destination (which is a destination that is a FlowStepFragment:
-
Open HomeFragment.kt
-
Hook up the
navigate_destination_buttoninonViewCreated() -
Run the app and click the Navigate To Destination button. Note that the button navigates to the
flow_step_one_destdestination.

You can also use the convenience method Navigation.createNavigateOnClickListener(@IdRes destId: Int, bundle: Bundle). This method will build an OnClickListener to navigate to the given destination with a bundle of arguments to be passed to the destination.
The click listener code would look like this:

5. Changing the Navigation Transition
Each navigate() call has a not very exciting default transition associated with it, as seen below:
The default transition, as well as other attributes associated with the call, can be overridden by including a set of NavOptions. NavOptions uses a Builder pattern which allows you to override and set only the options you need. There's also a ktx DSL for NavOptions, which is what you'll be using.
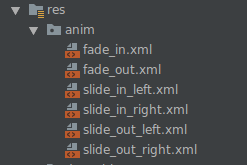
For animated transitions, you can define XML animation resources in the anim resource folder and then use those animations for transitions. Some examples are included in the app code:
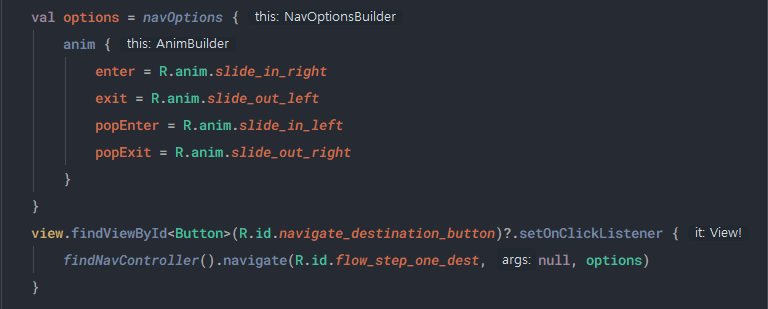
Add a Custom Transition
Update the code so that pressing the Navigate To Destination button shows a custom transition animation.
-
Open HomeFragment.kt
-
Define a
NavOptionsand pass it into thenavigate()call tonavigate_destination_button -
Remove the code added in step 5, if it's still there
-
Verify that tapping the Navigate To Destination button causes the fragment to slide onto the screen and back causes it to slide off the screen

6. Navigate using actions
Actions
The navigation system also allows you to navigate via actions. As previously mentioned, the lines shown in the navigation graph are visual representations of actions.
Navigation by actions has the following benefits over navigation by destination:
-
You can visualize the navigation paths through your app
-
Actions can contain additional associated attributes you can set, such as a transition animation, arguments values, and backstack behavior
-
You can use the plugin safe args to navigate, which you'll see shortly
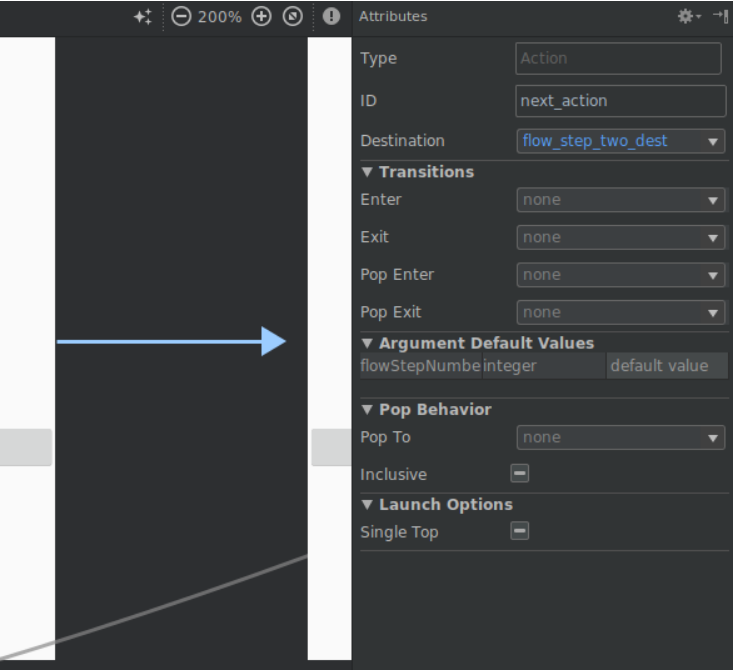
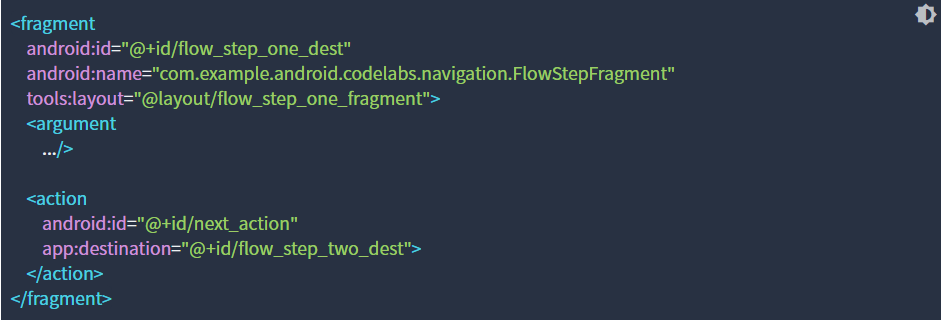
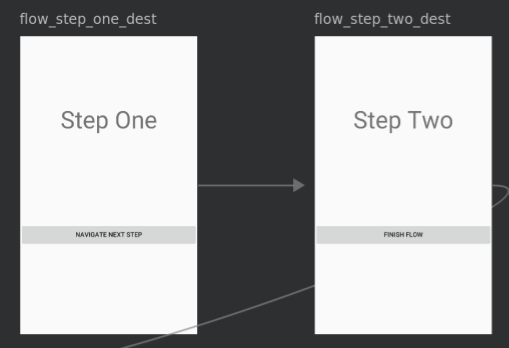
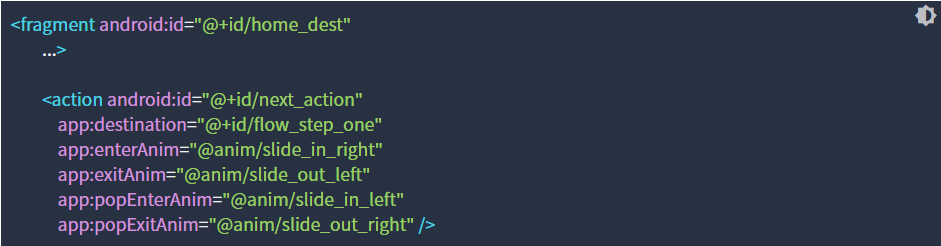
Here's the visual and XML for the action that connects flow_step_one_dest and flow_step_two_dest:

Notice:
-
The actions are nested within the destination - this is the destination you will navigate from
-
The action includes a destination argument referring to
flow_step_two_dest; this is the ID of where you will navigate to -
The ID for the action is
next_action
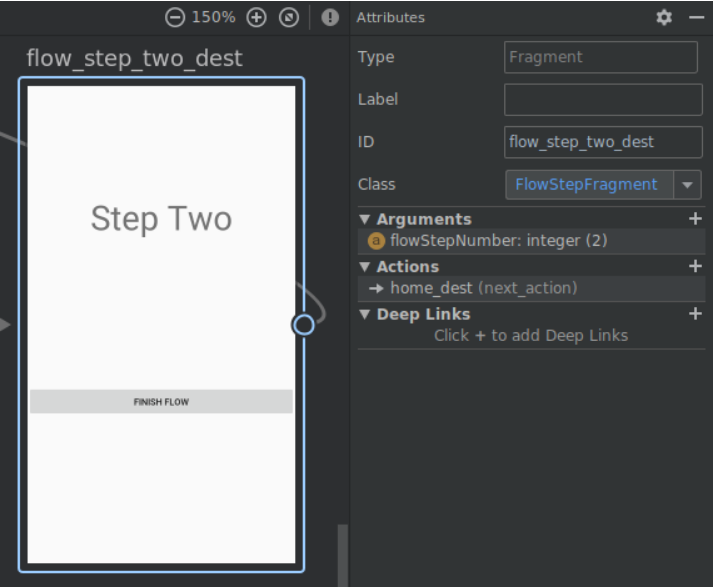
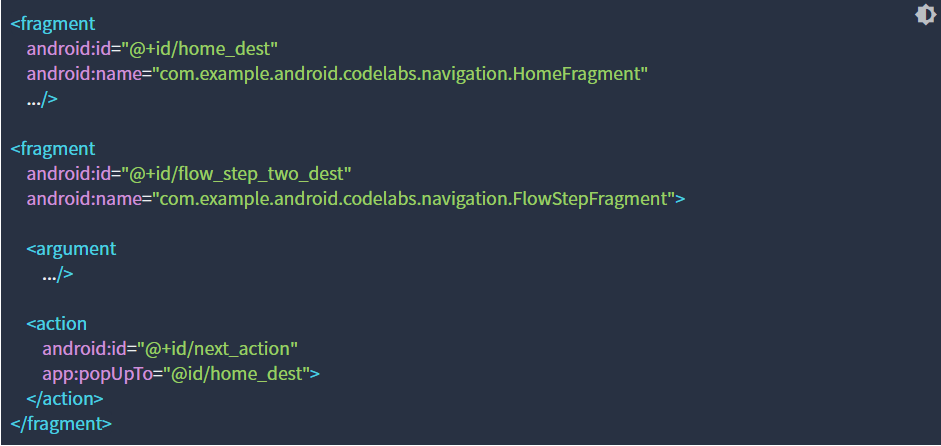
Here is another example of the action connecting flow_step_two_dest to home_dest
Notice:
-
The same ID
next_actionis used for the action connectingflow_step_two_desttohome_dest. You can navigate using thenext_actionid from eitherflow_step_one_destorflow_step_two_dest. This is an example of how actions can provide a level of abstraction and can navigate your somewhere different depending on context. -
The
popUpToattribute is used - this action will pop fragments off of the back-stack until you reachhome_dest
Navigate with an Action
Time to hook up the Navigate with Action button so that it lives up to its name!
-
Open the mobile_navigation.xml file in Design mode
-
Drag an arrow from
home_desttoflow_step_two_dedst: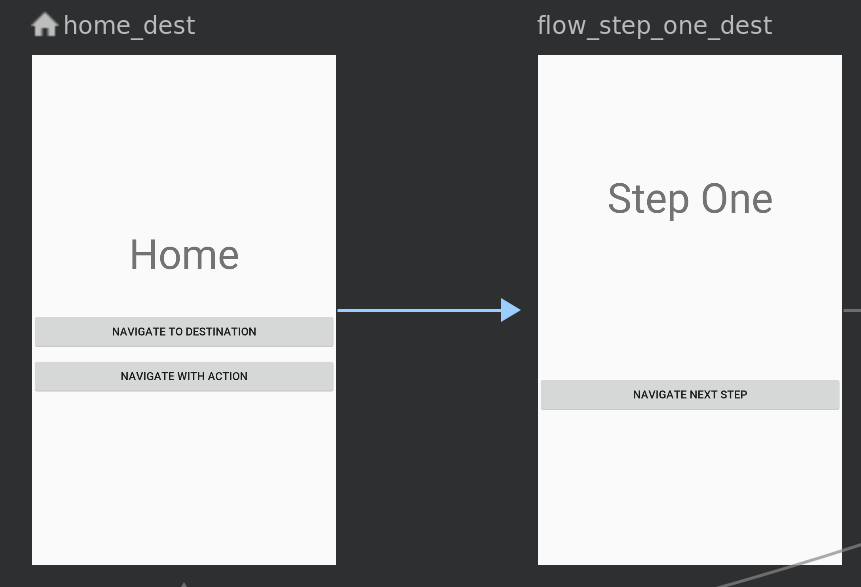
-
With the action arrow selected change the properties of the action so that:
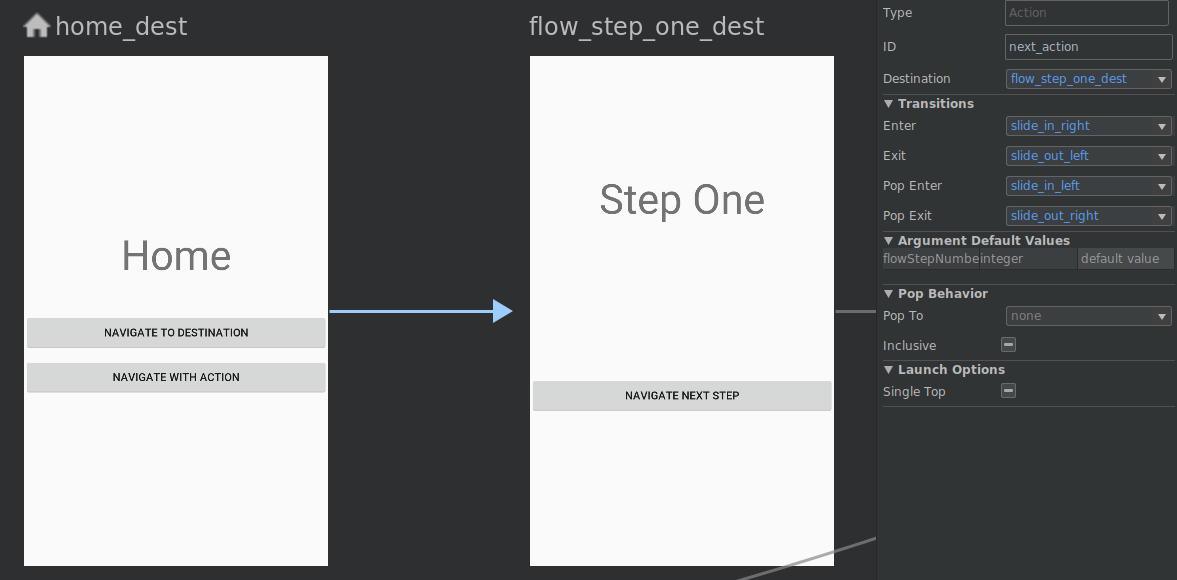
-
Click the Text tab
 Note the newly added
 next_actionaction under thehome_destdestination. -
Open HomeFragment.kt
-
Add a click listener to the
navigate_action_button

Actions allow you to attach NavOptions in the navigation XML file, rather than specifying them programmatically.
-
Verify that tapping the Navigate To Action now navigates to the next screen.
7. Using safe args for navigation
Safe Args
The navigation component has a Gradle plugin, called safe args, that generates simple object and builder classes for type-safe access to arguments specified for destinations and actions.
Safe args allows you to get rid of code like this when passing values between destinations:

And, instead, replace it with code that has generated setters and getters.

Because of its type safety, navigation using safe args generated classes is the preferred way to navigate by action and pass arguments during navigation.
Pass a value using safe args
-
Open the project
build.gradlefile and notice the safe args plugin:build.gradle

-
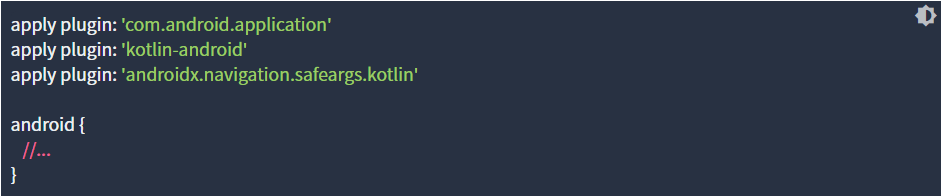
Open the
app/build.gradlefile and notice the applied plugin:app/build.gradle
-
Open
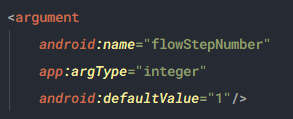
mobile_navigation.xmland notice how arguments are defined in theflow_step_one_destdestination.mobile_navigation.xml
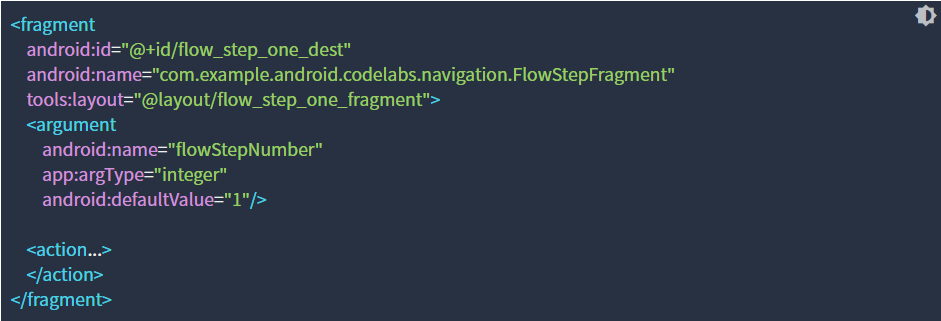
Using the
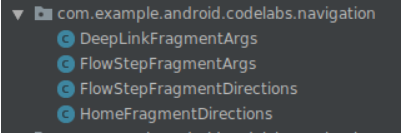
<argument>tag, safeargs generates a class calledFlowStepFragmentArgs.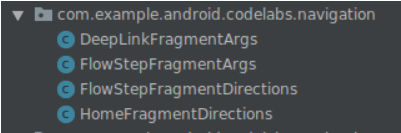
Since the XML includes
argumentcalledflowStepNumber, specified byandroid:name="flowStepNumber", the generated classFlowStepFragmentArgswill include variableflowStepNumberwith getters and setters.
-
Open
FlowStepFragment.kt -
Comment out the line of code shown below:
FlowStepFragment.kt
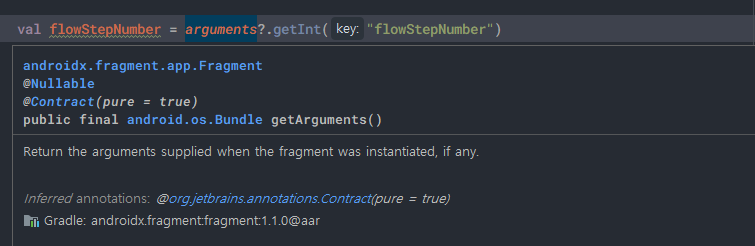
This old-style code is not type-safe. It's better to use safe args.
-
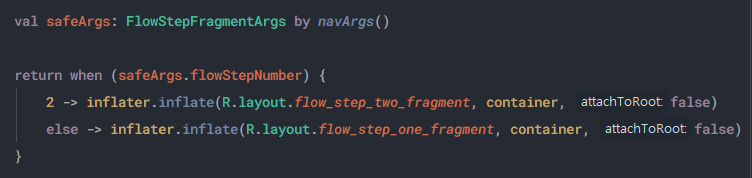
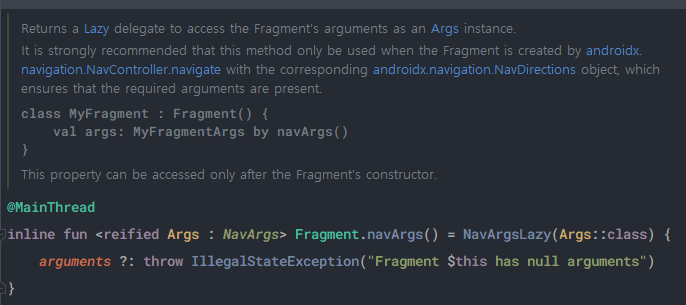
Update
FlowStepFragmentto use the code generated classFlowStepFragmentArgs. This will get theFlowStepFragmentarguments in a type-safe manner:FlowStepFragment.kt
Safe Args Direction classes
You can also use safe args to navigate in a type safe way, with or without adding arguments. You do this using the generated Directions classes.
Directions classes are generated for every distinct destination with actions. The Directions class includes methods for every action a destination has.
For example, the navigate_action_button click listener in HomeFragment.kt could be changed to:
HomeFragment.kt
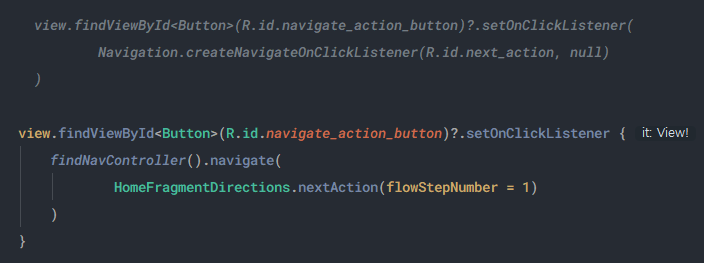
Note that in your navigation graph XML you can provide a defaultValue for each argument. If you do not then you must pass the argument into the action, as shown:
HomeFragmentDirections.nextAction(flowStepNumberArg)
Next | Jetpack Navigation 02