%20(1).png)
block vs inline
- block요소: 대부분의 html요소 (
<header>,<footer>,<p>,<li>,<table>,<div>,<h1>) - inline요소: 딱 크기만큼만 차지 (
<span>,<a>,<img>)
block -> inline 요소로 바꾸기
- display: inline-block; 블록요소를 인라인 요소로 바꿔준다.
- float: 방향설정; 원하는 방향으로 인라인요소로 바꾼 후 정렬 시켜준다.
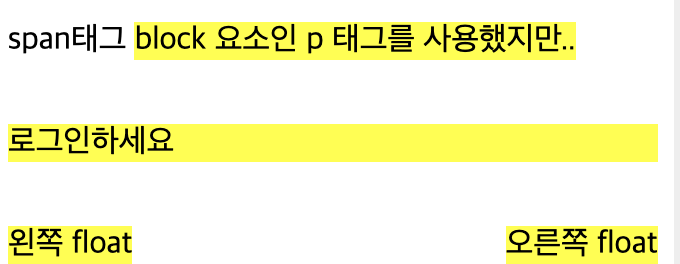
inline -> block 요소로 바꾸기
- display: block; 인라인요소를 블록요소로 바꿔준다.

리스트 중 짝수 or 홀수만 변경하고 싶을 때
li:nth-child(odd) {
  background: red;
}


li:nth-child(even) {
  background: blue;
}
이러한 코드를 입력하면

이렇게 변경할 수 있다!!
table
- table은 표를 html css 에서 표를 만들 때 사용된다.
- 테이블은 항상
<table>태그로 감싸져 있고<table>태그 내에서 행도 만들고 열도 만든다. <tr>: table row의 줄임말로 행을 의미한다.<td>: table data의 줄임말이다.<th>: table heading의 줄임말로 사용하면 가운데 정렬이 되고 글씨 두께가 두꺼워진다.
 <table>
    <tr>
      <td>Row 1, column 1</td>
      <td>Row 1, column 2</td>
    </tr>
    <tr>
      <td>Row 2, column 1</td>
      <td>Row 2, column 2</td>
    </tr>
</table> 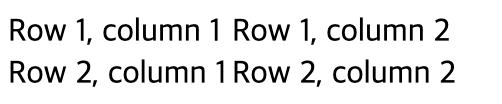
아직 css를 추가하지 않아서 선은 보이지 않는다.
-
rowspan : 행병합
-
colspan : 열병합
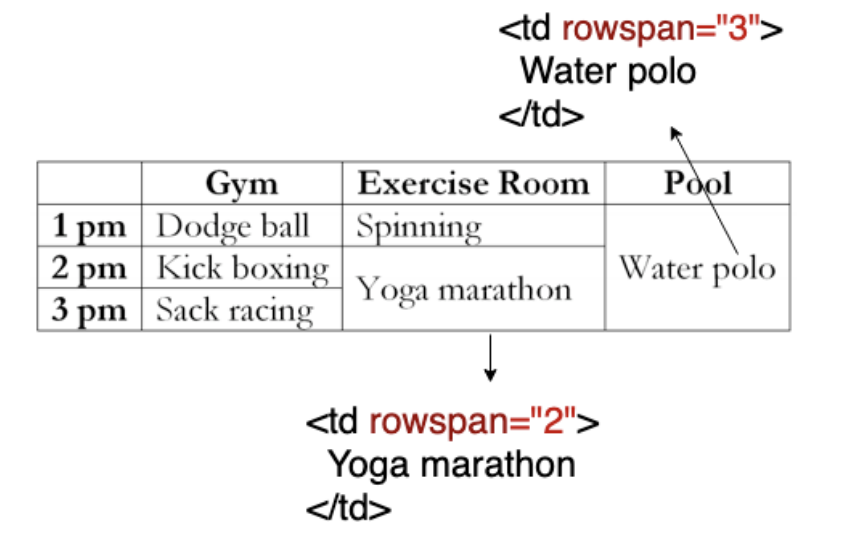
위처럼 테이블 데이터에 씌워서 활용하면 된다!!
input
-
<input>태그에는 마침태그가 없다.
<input>태그 뒤에는 많은 속성들이 따라오는데<input type="text" placeholder="ID"> <input type="password" placeholder="비밀번호"> <input type="number" placeholder="학번">
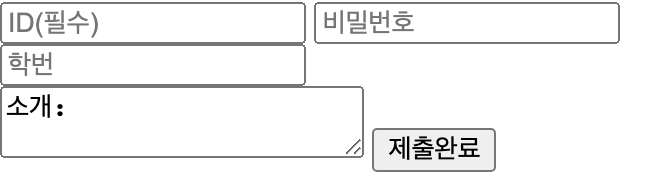
- type = "text" : 주로 이름, 아이디, 닉네임 등을 입력받을 때 사용한다.
- type = "password" : 뭔가를 입력하면 까만 원으로 나온다.
- type = "number" : 숫자만 입력할 수 있다.
- placeholder : 도움말을 넣어주는 부분이다.
textarea
<input> 태그보다는 조금 더 긴 텍스트를 입력받고 싶을 때 사용된다.
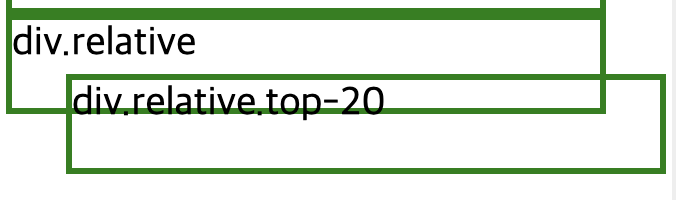
Position: relative;
- position: relative만 써서는 어느 위치로 이동하지 않는다.
- top, right, bottom, left를 같이 써야 위치를 이동 시킬 수 있다.
.relative {
  position: relative;
}
.top-20 {
  top: -20px;
  left: 30px;
}
이렇게 코드를 작성하면
위로 20px 이동, 왼쪽에서 30px만큼 떨어지게 된 것 이다.
마이너스 값을 주면 아래로 떨어지지 않고 위로 올라가게 된다.
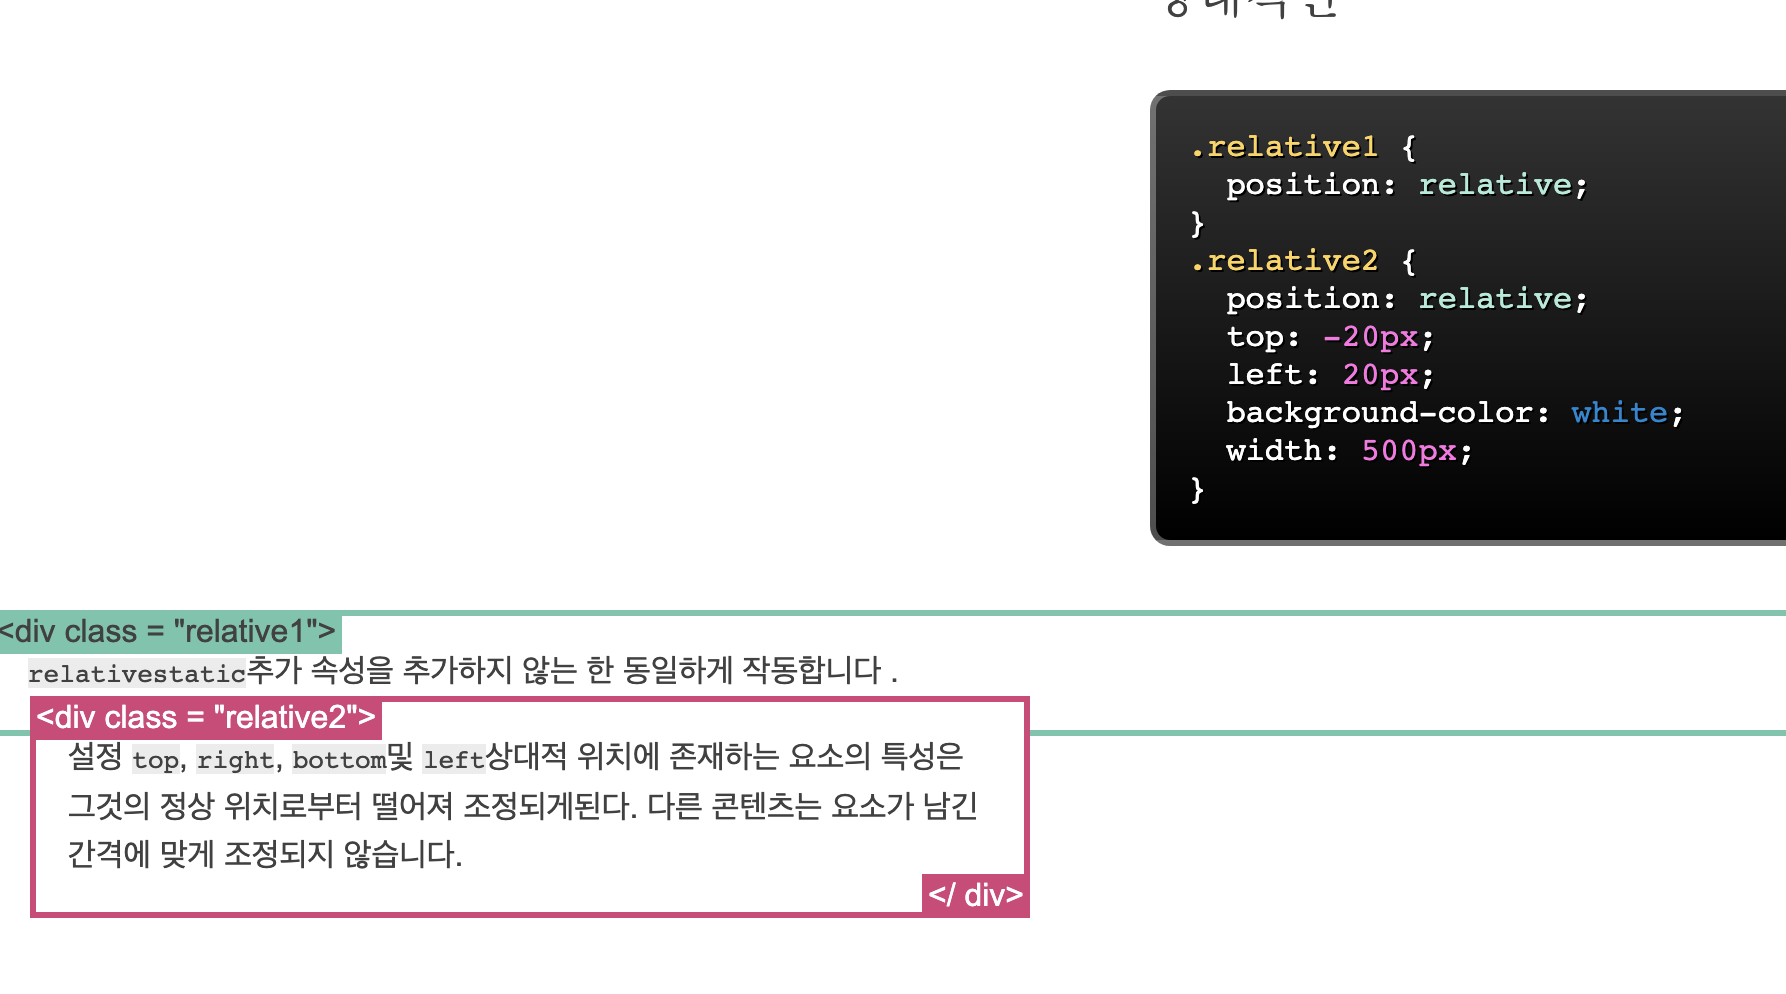
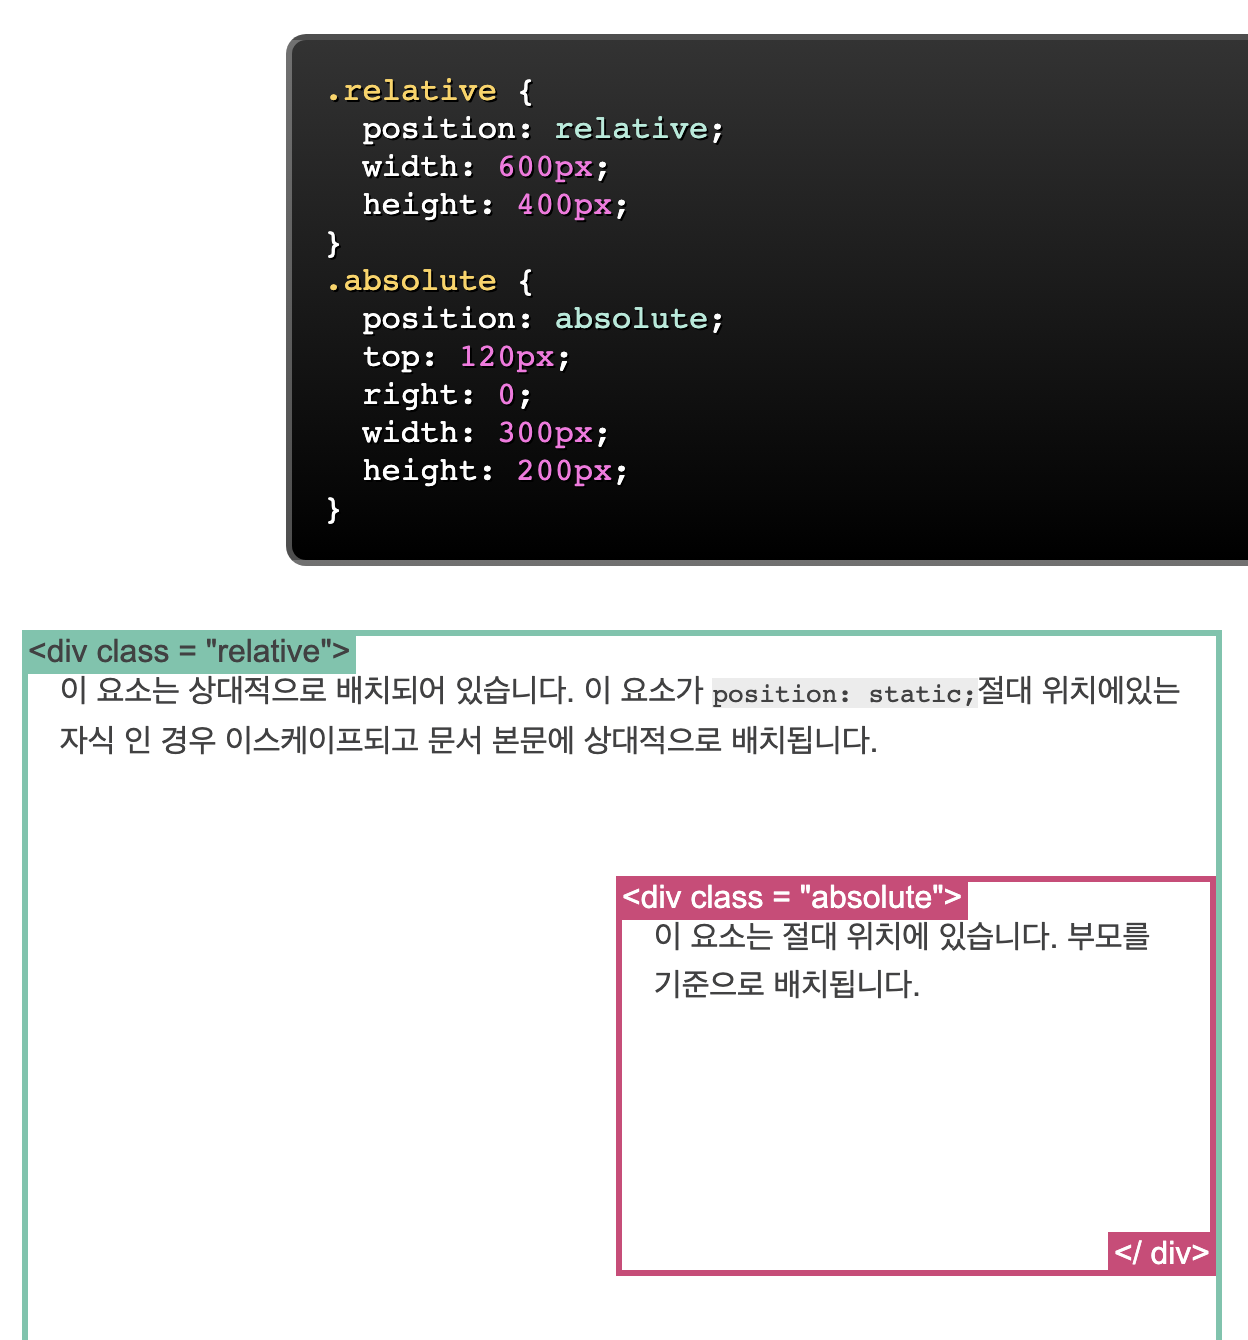
Position: absolute;
- 이름과 같이 특정 부모에 대해 절대적인 위치에 둘 수 있다.
- 부모 중에 position이 relative,fixed,absolute 하나라도 있으면 그 부모에 대해 절대적으로 움직인다.
- right: 0; 의 의미는 오른쪽으로부터 0만큼 떨어졌다는 의미이다.
Position: fixed;
- absolute, relative와는 다르게 부모가 필요없다.
- 스크롤을 내려도 계속 그자리에 유지!
float
- 현재는 flex가 나와서 잘 사용하지 않는다.
- 예전코드를 읽을 때는 필요하다.
- float속성은 보통 이미지에 사용을 많이 한다.
float: left / right / top / bottom ; 한 방향에 치우치게 이미지를 위치시킨다.

생각하는 개발자 되기