
개요
생성형 AI 서버를 구축하여 AI 기능을 활용하는 방법 설명
1. Langchain 개요
2. Langchain과 연동 가능한 AI 모델 종류 알아보기
- OpenAI : ChatGPT
- Anthropic : Claude
- Google (VertexAI) : Gemini
- Meta : Llama 3.1
3. Llama 3.1 모델 소개
4. 생성형 AI를 직접 서버에 설치하기
5. 설치된 Ollama 서버에 REST API로 생성형 AI 기능을 사용해 본다
6. 웹 소켓을 활용한 대화형 UI를 만들어본다
Langchain
Langchain은 AI 모델과 연동하여 다양한 작업을 수행할 수 있는 강력한 도구이다. Langchain을 사용하면 여러 AI 모델을 통합하고, 데이터 파이프라인을 관리하며, 자연어 처리 작업을 쉽게 수행할 수 있다. Node 환경에서 npm으로 설치하여 사용할 수 있다.
npm install @langchain/community설치 후, 다음과 같이 Ollama와 연동할 수 있다:
import { ChatOllama } from "@langchain/community/chat_models/ollama";

const ollamaLlm = new ChatOllama({
  baseUrl: "http://localhost:11434", // Default value
  model: "llama3.1", // Default value
});
자세한 내용은 Langchain JS 문서를 참고할 수 있다. 추가적인 Langchain 패키지 및 사용 방법은 Langchain JS 튜토리얼에서 확인할 수 있다.
Ollama 설치
Ollama에서 Llama 3.1을 사용할 수 있는 Docker 이미지를 제공하여 쉽게 서버에 설치할 수 있다. Ollama 공식 문서 참고
아래 명령어를 사용하여 Ollama 서버를 Docker container로 설치한다:
docker run -d --device /dev/kfd --device /dev/dri -v ollama:/root/.ollama -p 11434:11434 --name ollama ollama/ollama:rocm
docker exec -itd ollama ollama run llama3.1
Llama 3.1의 AI 모델 유형은 다음과 같다:
- 8B: 초소형 모델로 서버 최소 권장 스펙이 비교적 낮지만 너무 낮은 스펙의 서버를 사용하면 응답속도가 매우 느리다. 그리고 ChatGPT 4o와 같은 수준의 답변은 당연히 기대하기 어렵고 토이 프로젝트용으로는 활용할만 한 수준으로 보인다
- 대략적인 권장 사양: 4코어 CPU, 16GB RAM, GPU 메모리 8GB
- 70B: 중형 모델로, 더 많은 데이터 처리와 복잡한 작업에 적합하며, 더 높은 서버 스펙이 필요하다.
- 대략적인 권장 사양: 8코어 CPU, 64GB RAM, GPU 메모리 24GB
- 405B: 대형 모델로, 고도의 복잡한 작업과 대량의 데이터를 처리할 수 있으며, 매우 높은 서버 스펙이 요구된다.
- 대략적인 권장 사양: 16코어 CPU, 128GB RAM, GPU 메모리 48GB
Llama 3.1 Requirements 참고
- 대략적인 권장 사양: 16코어 CPU, 128GB RAM, GPU 메모리 48GB
이 글에서 실습할 서버 PC의 스펙은 다음과 같다:
- CPU (내장그래픽) : AMD Ryzen 3 2200G with Radeon Vega Graphics (4Core, 3.5GHz)
- Memory: 8GB
따라서 가장 초소형 모델인 8B 모델로 진행했다.
- Ollama 컨테이너 구동 결과

App UI 연동하기
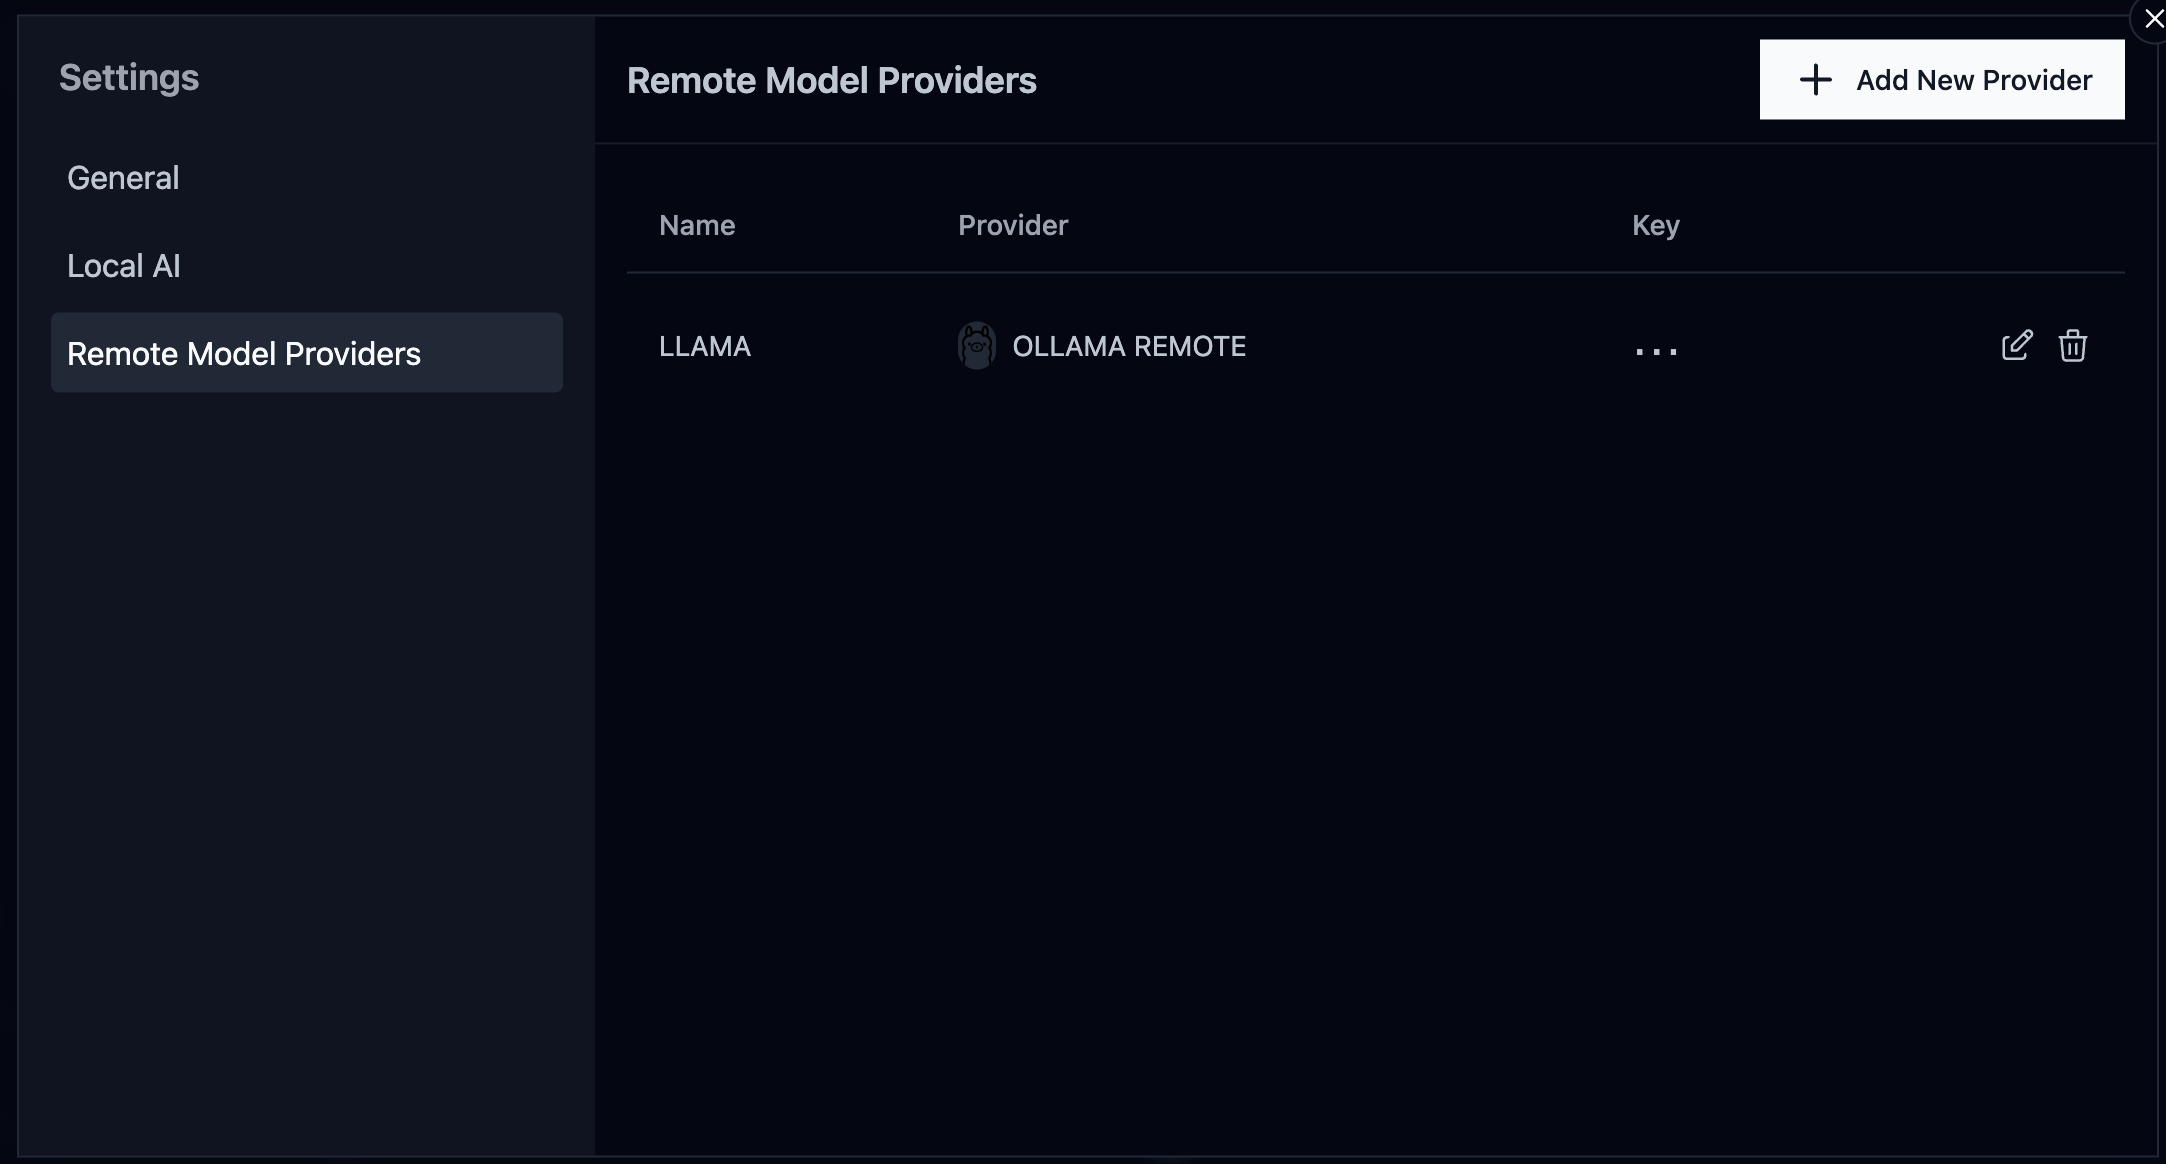
Msty에서 생성형 AI 모델에 대한 UI를 지원해준다. 설치 후 구축한 서버로 endpoint를 설정해주면 Msty앱에서 생성형 AI를 사용할 수 있다.
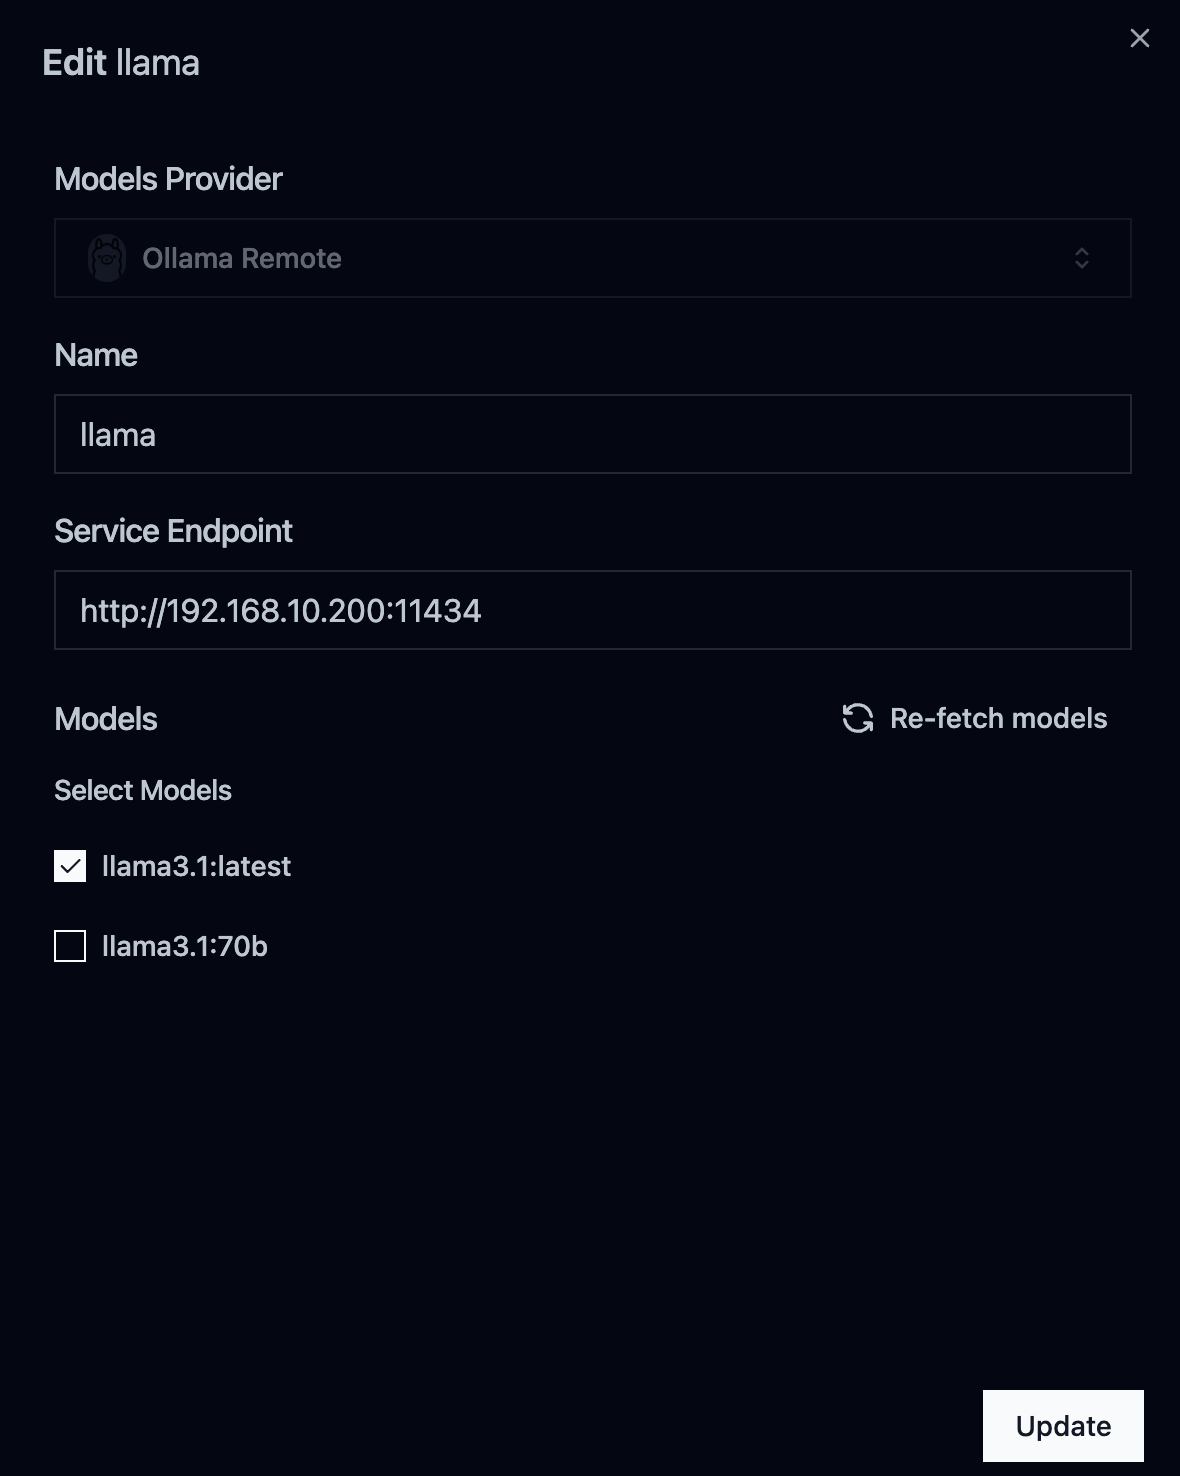
아래와 같이 Setting 진입 후, Add New Provider를 선택하여 서버의 endpoint 정보를 입력해준다
- provider 추가하기
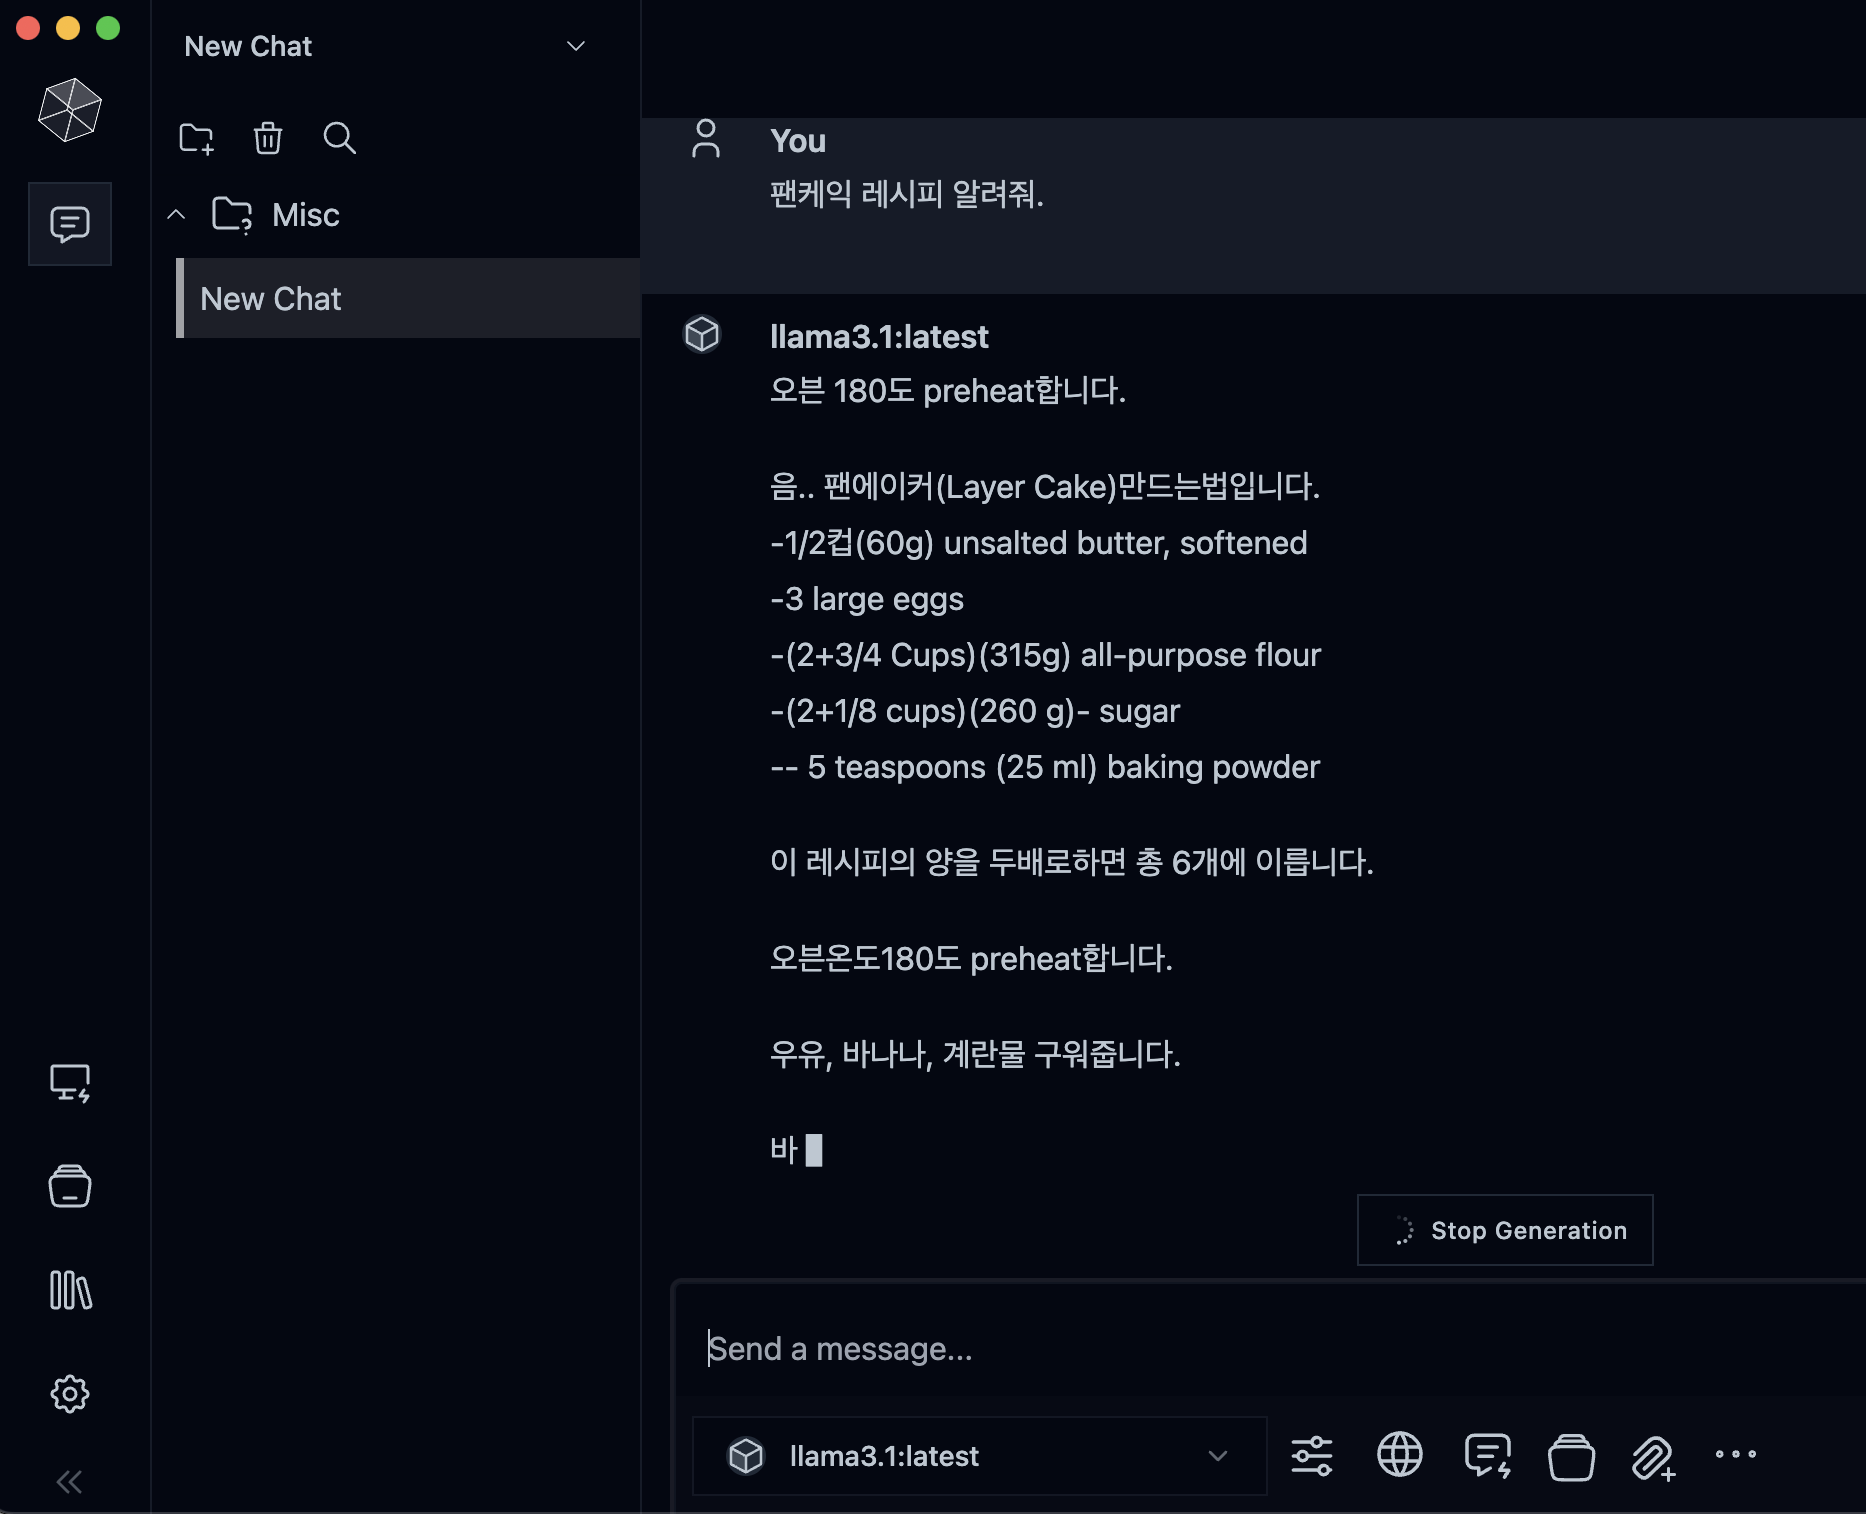
- App UI를 활용한 Llama 3.1 서버의 AI 모델과 대화
REST API 사용하기
Ollama 서버는 REST API를 통해 생성형 AI 기능을 제공한다. 주요 엔드포인트는 다음과 같다:
/api/generate: 텍스트 생성 요청/api/chat: 대화 요청
/api/generate는 단발성 질문에 적합하지만, 질의응답이 이어지지 않는 한계가 있다. 따라서 대화형 기능을 위해 /api/chat 기능을 활용한다. 자세한 세부 설정은 Ollama API 문서를 참고할 수 있다.
/api/chat의 stream 파라미터를 false로 설정하여 생성형 AI의 응답 결과를 서버에서 한번에 얻어온 후, 이를 가공하여 처리할 수 있다.
이 방법은 단순히 브라우저에서 질문/답변하는 것과는 다르게, 서버에서 응답 결과에 대한 값을 제어할 수 있다.
서버 코드
NestJS를 사용하여 웹 소켓 서버를 구현한다. 서버는 클라이언트의 요청을 받아 Ollama 서버로 전달하고, 결과를 다시 클라이언트에 전송한다. 여기서는 Langchain 패키지를 사용하지 않고, 직접 구축한 서버의 endpoint를 통해 REST API 요청으로 처리하였다.
import {
  WebSocketGateway,
  WebSocketServer,
  SubscribeMessage,
  MessageBody,
} from '@nestjs/websockets';
import { Server } from 'socket.io';
import { Injectable } from '@nestjs/common';
import { ConfigService } from '@nestjs/config';
import { request } from 'http';

@Injectable()
@WebSocketGateway({ cors: true })
export class EventsGateway {
  @WebSocketServer()
  server: Server;

  constructor(private readonly config: ConfigService) {}

  @SubscribeMessage('message')
  handleMessage(@MessageBody() data: { prompt: string }): void {
    console.log(`Received message: ${data.prompt}`);

    const options = {
      hostname: this.config.get('OLLAMA_HOST'),
      port: this.config.get('OLLAMA_PORT'),
      path: '/api/chat',
      method: 'POST',
      headers: {
        'Content-Type': 'application/json',
      },
    };

    const requestData = JSON.stringify({
      model: this.config.get('OLLAMA_MODEL'),
      prompt: data.prompt,
      stream: false,
    });

    const apiReq = request(options, (apiRes) => {
      apiRes.setEncoding('utf8');

      apiRes.on('data', (chunk) => {
        this.server.emit('response', { data: chunk.toString() });
      });

      apiRes.on('end', () => {
        this.server.emit('response', { data: 'Stream ended' });
      });
    });

    apiReq.on('error', (e) => {
      console.error(`Problem with request: ${e.message}`);
      this.server.emit('error', { message: `Problem with request: ${e.message}` });
    });

    apiReq.write(requestData);
    apiReq.end();
  }
}
프론트엔드 코드
Next.js와 Socket.io를 사용하여 대화형 UI를 구현한다. 클라이언트는 서버에 메시지를 보내고, 서버로부터 응답을 실시간으로 받아 화면에 표시한다.
'use client';
import React, { useEffect, useState } from 'react';
import { io } from 'socket.io-client';

export default function RequestAi() {
  const [text, setText] = useState('');
  const [prompt, setPrompt] = useState('');
  const socket = io(process.env.NEXT_PUBLIC_WEBSOCKET_SERVER || 'http://localhost:4000');

  useEffect(() => {
    socket.on('connect', () => {
      console.log('Connected to server');
    });

    socket.on('response', (data) => {
      const parsedData = JSON.parse(data.data);
      setText((prevText) => prevText + parsedData.response);

      if (data.done) {
        socket.disconnect();
        console.log('Connection closed');
      }
    });

    socket.on('error', (error) => {
      console.error('WebSocket error:', error);
    });

    return () => {
      socket.disconnect();
    };
  }, [socket]);

  const handleSubmit = (event) => {
    event.preventDefault();
    socket.emit('message', { prompt });
    setPrompt('');
  };

  return (
    <div className="flex flex-col items-center gap-4 p-4">
      <div className="w-[438px] rounded-xl bg-white p-6 shadow-md">
        <div>{text}</div>
      </div>
      <form onSubmit={handleSubmit} className="flex gap-2 mt-4">
        <input
          type="text"
          value={prompt}
          onChange={(e) => setPrompt(e.target.value)}
          placeholder="Ask a question..."
          className="flex-grow p-2 border rounded-md"
        />
        <button type="submit" className="px-4 py-2 bg-blue-500 text-white rounded-md hover:bg-blue-600">
          Send
        </button>
      </form>
    </div>
  );
}
결과
- 서버 리소스가 충분하지 않았기 때문에 응답 속도가 느린 편이었다
- 가장 기본 등급의 8B를 사용했기 때문에 ChatGPT와 같은 성능을 기대하긴 어렵지만 기본적인 질문을 처리하는데는 문제가 없었다
결론
Llama 3.1 기본 모델로 AI 서버를 구축하여 사용해 본 소감은, 8B 모델만으로도 실무에 적용하여 업무 자동화나 업무 효율을 높여주는 도구로써도 활용할 수 있을 것 같다는 생각이 들었다.
또한 405B 모델로 구축된 서버의 성능은 얼마나 좋을지, 그리고 고스펙 모델은 구축 비용이 많이 든다는 점을 제외한다면 개인이나 소규모 조직에서도 어렵지 않게 AI 서버를 직접 구축하여 활용할 수 있게 되었다.
이러한 생성형 AI를 잘 활용한다는 것은 일반적인 기대를 뛰어 넘어 기존 프로세스 개선을 극대화하고 다양한 분야에 응용하여 혁신이 될 수 있는 강력한 도구가 될 것이라고 생각한다.
