이번 우리 회사에서 설 기념 이벤트 페이지를 만들었다.
이벤트 페이지는 얼굴사진을 넣고 ai로 관상을 봐주는 기능을 제공하고,
핵심 액션은 얼굴사진을 넣고, 결과 데이터를 서버에서 받아오는 조금은 간단한 기능!
오늘 블로그 내용은 얼굴사진을 넣는 뷰를 핸들링 하는 후기 및 공유 글을 적어보려 한다.
3일만에 프로젝트 세팅부터 뷰, 서버와의 연결, dynamic link, 로그 이벤트 심기 등
정말 알차게 진행한 프로젝트.. 언제까지 살아있을지 모를 도디가 개발한 이벤트 페이지 구경하기
해결해야 할 과제

UI는 이러하다. '사진 넣고 관상보기' 버튼은 이미지로 되어있다.
저 버튼을 누르면 file을 집어넣는 액션이 진행되어야 한다.
해결
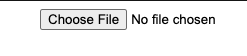
 <input
	type="file"
	accept="image/jpg, image/png, image/jpeg"
	onChange={(e) => console.log(e.target.files[0])}
/>
위처럼 기본 코드를 작성하면 아래처럼 보인다.
위의 회색 빛 가득한 UI에서, 버튼을 이미지로 수정하고 싶으면 아래의 코드를 참고하자.
import styled from "styled-components";
import btnStart from "./img/btnStart.png";

export default function App() {
  return (
    <AppStyle>
      <label htmlFor="ex_file">
        <div className="btnStart">
          <img src={btnStart} alt="btnStart" />
        </div>
      </label>
      <input
        type="file"
        id="ex_file"
        accept="image/jpg, image/png, image/jpeg"
        onChange={(e) => console.log(e.target.files[0])}
      />
    </AppStyle>
  );
}

const AppStyle = styled.div`
  margin: 0 8px 0 8px;
  img {
    max-width: 325px;
  }
  label {
    display: inline-block;
    font-size: inherit;
    line-height: normal;
    vertical-align: middle;
    cursor: pointer;
  }
  input[type="file"] {
    position: absolute;
    width: 0;
    height: 0;
    padding: 0;
    margin: -1px;
    overflow: hidden;
    clip: rect(0, 0, 0, 0);
    border: 0;
  }
`;

충전중..🤔