
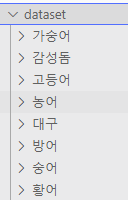
1. 크롤링
구글에서 8개의 어종을 검색해서 이미지를 한 클래스 당 400장 이상 수집
필요 라이브러리 import
BeautifulSoup
BeautifulSoup은 HTML과 XML 파일을 파싱(분석)하여, 데이터를 쉽게 추출할 수 있도록 도와주는 Python 라이브러리
selenium
웹 브라우저를 자동화하여, 동적 웹 페이지에서 데이터 추출과 테스트를 가능하게 하는 도구
dask
Dask는 병렬 처리 및 분산 컴퓨팅을 지원하는 Python 라이브러리로, 데이터 처리와 계산을 효율적으로 수행하도록 설계
import os
import time
import requests
from bs4 import BeautifulSoup
from selenium import webdriver
from selenium.webdriver.common.by import By
from selenium.webdriver.common.keys import Keys
import dask
from dask import delayed, compute
고등어 감성돔 방어 농어 황어 가숭어 대구 숭어 독립적인 클래스로 설정
fish_list = ["고등어", "감성돔", "방어", "농어", "황어", "가숭어", "대구", "숭어"]headless로 미리 설정
def setup_driver():
    options = webdriver.ChromeOptions()
    options.add_argument("--headless")
    options.add_argument("--disable-gpu")
    options.add_argument("--no-sandbox")
    options.add_argument("--disable-dev-shm-usage")
    return webdriver.Chrome(options=options)
이미지 크롤링 함수 작성
def download_images(query, num_images):
    driver = setup_driver()
    save_dir = f"./dataset/{query}"
    os.makedirs(save_dir, exist_ok=True)

    driver.get(f"https://www.google.com/search?q={query}&tbm=isch")
    print(f"Searching images for: {query}")

    count = 0
    while count < num_images:
        soup = BeautifulSoup(driver.page_source, 'html.parser')
        images = soup.select("#rso > div > div > div.wH6SXe.u32vCb > div > div img")

        for img in images:
            if count >= num_images:
                break
            img_url = img.get('src')
            if img_url and img_url.startswith('http'):
                try:
                    img_data = requests.get(img_url).content
                    file_name = os.path.join(save_dir, f"{query}_{count}.jpg")
                    with open(file_name, 'wb') as f:
                        f.write(img_data)
                    print(f"Saved: {file_name}")
                    count += 1
                except Exception as e:
                    print(f"Failed to download {img_url}: {e}")

        print("Scrolling to load more images...")
        driver.find_element(By.TAG_NAME, "body").send_keys(Keys.END)
        time.sleep(1)

    driver.quit()
    print(f"Finished downloading {count} images for query: {query}")
Dask 이용하여 병렬적으로 수행
def parallel_image_crawl(num_images, object_list):
    tasks = [delayed(download_images)(obj, num_images) for obj in object_list]
    compute(*tasks)
실행 결과
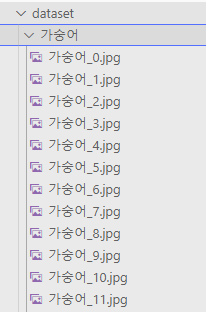
parallel_image_crawl(600, fish_list)
2m 36s 만에 8개의 어종 각 클래스 당 600장 이미지 수집 완료 (총 4,800장)
2. EDA
수집된 데이터셋 확인
import os
import matplotlib.pyplot as plt
from matplotlib import rc
rc('font', family='Malgun Gothic') # Windows 환경
# rc('font', family='Nanum Gothic') # Linux 환경 (예: Ubuntu)
def visualize_class_distribution(base_dir):
class_counts = {}
for class_name in os.listdir(base_dir):
class_dir = os.path.join(base_dir, class_name)
if os.path.isdir(class_dir):
class_counts[class_name] = len(os.listdir(class_dir))
plt.bar(class_counts.keys(), class_counts.values())
plt.xlabel("클래스")
plt.ylabel("이미지 개수")
plt.title("클래스 분포")
plt.xticks(rotation=45)
plt.show()
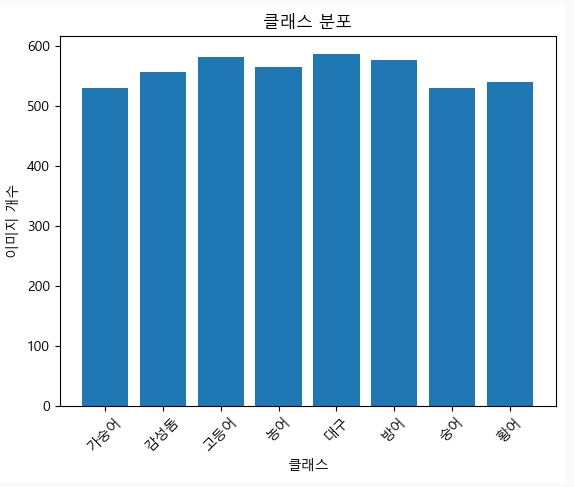
visualize_class_distribution("./dataset")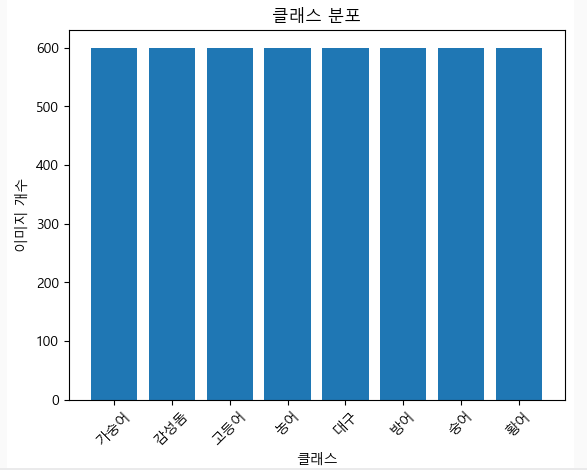
누락 없이 잘 수집된 것을 알 수 있음
유효 이미지 선별
이미지가 열리지 않거나, 100*100 이하의 해상도를 가진 이미지 삭제
from PIL import Image
def remove_invalid_images(base_dir):
invalid_images = []
for class_name in os.listdir(base_dir):
class_dir = os.path.join(base_dir, class_name)
for img_name in os.listdir(class_dir):
img_path = os.path.join(class_dir, img_name)
try:
with Image.open(img_path) as img:
img.verify()
if img.size[0] < 100 or img.size[1] < 100:
invalid_images.append(img_path)
except Exception as e:
invalid_images.append(img_path)
for img_path in invalid_images:
print(f"Removing invalid image: {img_path}")
os.remove(img_path)
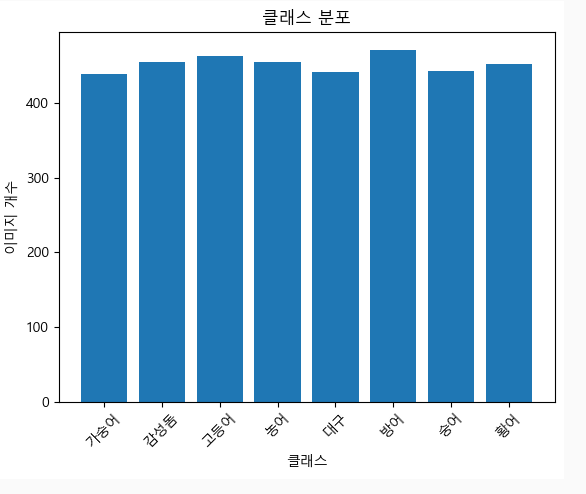
remove_invalid_images("./dataset")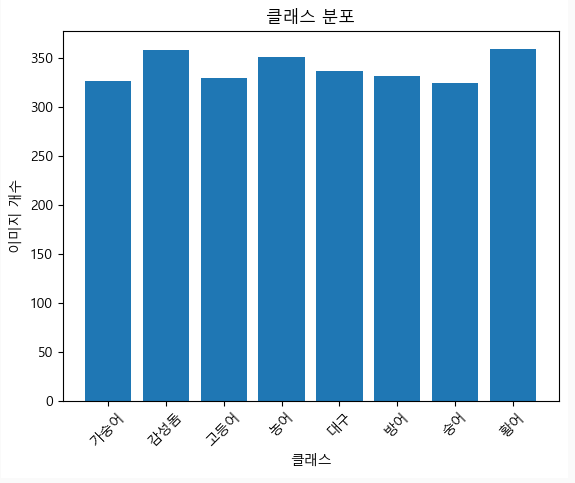
반 이상이 날라간 걸 알 수 있음
중복된 이미지(해시)인 경우 제거
중복된 이미지인 경우 제거
이미지 해시로 판단
import hashlib

def remove_duplicates(base_dir):
    hashes = set()
    duplicates = []

    for class_name in os.listdir(base_dir):
        class_dir = os.path.join(base_dir, class_name)
        for img_name in os.listdir(class_dir):
            img_path = os.path.join(class_dir, img_name)
            with open(img_path, 'rb') as img_file:
                img_hash = hashlib.md5(img_file.read()).hexdigest()  # 이미지 해시 계산
                if img_hash in hashes:
                    duplicates.append(img_path)
                else:
                    hashes.add(img_hash)

    # 중복 이미지 제거
    for img_path in duplicates:
        print(f"Removing duplicate image: {img_path}")
        os.remove(img_path)

remove_duplicates("./dataset")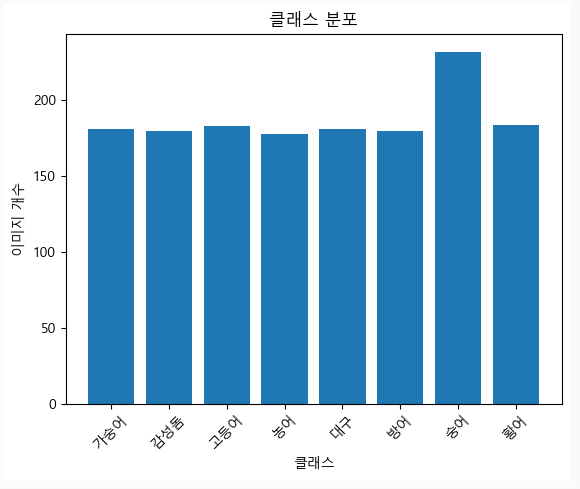
데이터가 매우 적어진 것을 확인 😅
데이터 수집 단계로 돌아가서 2000장 수집 후 데이터 정제 재시도
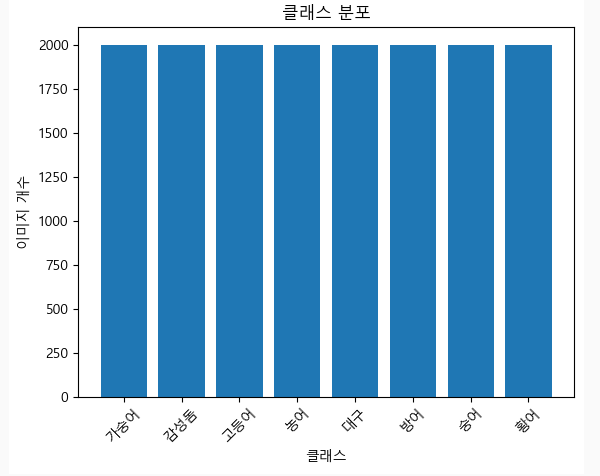
재시도 중...(1차)
1. 각 클래스 당 2000개 수집 직후
2. 중복 이미지 제거 후
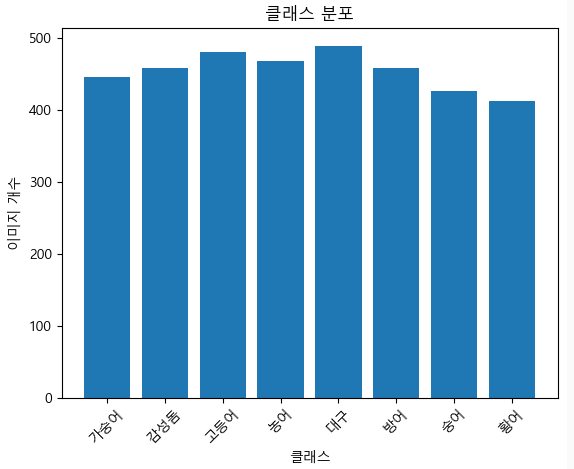
3. 유효 이미지 선별 후
아직 조금 모자른듯... ? 3000장... 가자..
왜이렇게 중복된 이미지가 많은지... 😣
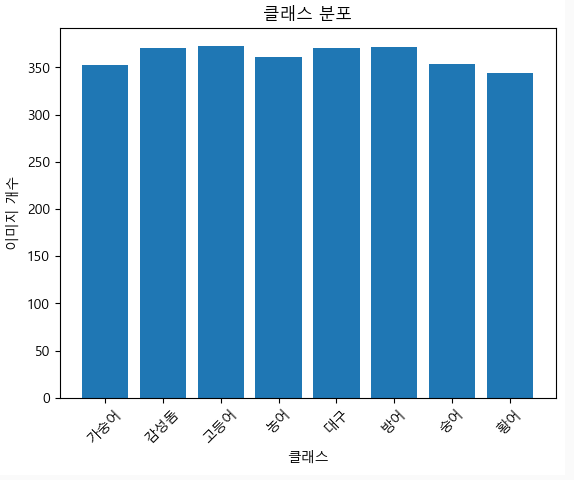
재시도 중...(2차)
1. 각 클래스 당 3000개 수집 직후

-
중복 이미지 제거 후
-
유효 이미지 선별 후
400장 이상 데이터가 나왔기 때문에, 이렇게 진행하기로 함 😎
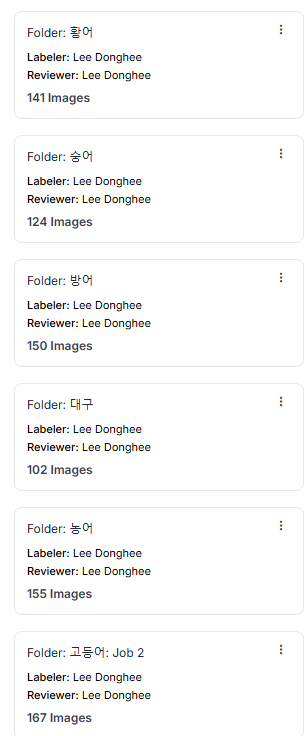
3. 라벨링 (EDA 포함)
-
라벨링 단계에서 이미지 한 장씩 보면서 전 단계 EDA에서 파악하지 못한 결함 이미지를 삭제
-
단순하게 객체만 있는 이미지에 수족관 배경을 얹어서 복잡한 이미지로 편집
-
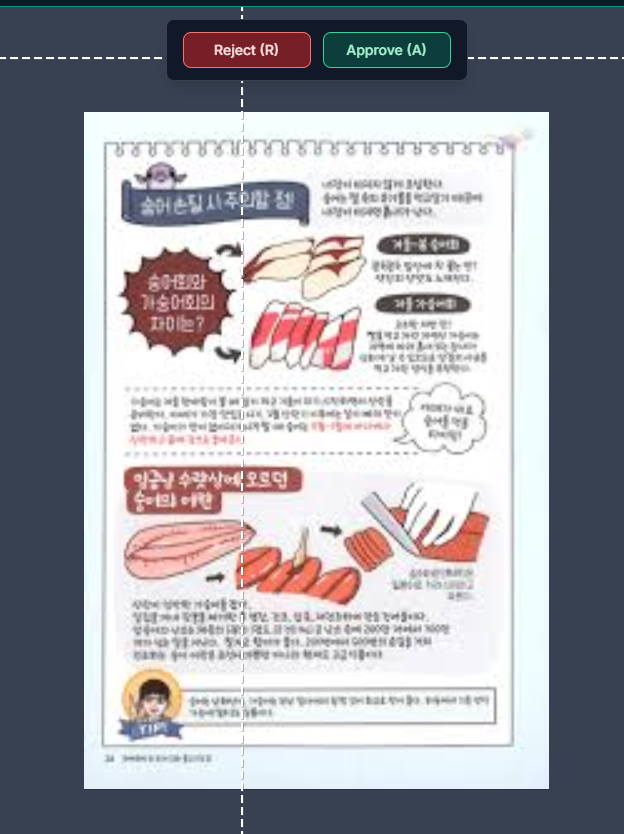
roboflow를 이용해서 라벨링 및 EDA 과정 진행
-
유효하지 않은 데이터 삭제
-
object bounding box

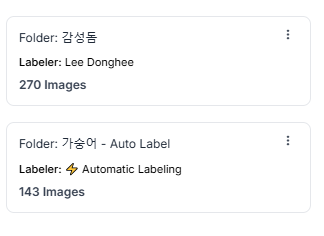
약 400장 이미지에서 라벨링 후 남은 데이터는 140장 ...
가숭어는 이래저래 했지만, 다음 타자 감성돔 ..
감성돔....

이런 젠장...
'감성돔 물고기' 이런 식으로 다시 가져오기로 결심함...
라벨링 하다 보니 또 감성돔만 엄청 많이 했다.
앞으로 클래스들은 우선 100개 ~ 150개 정도만 해보기로 !
우선 욕심부리지 말고..! 😐 (라벨링 작업 엄청 지루하다. 왜 알바가 있는지 알겠다..)
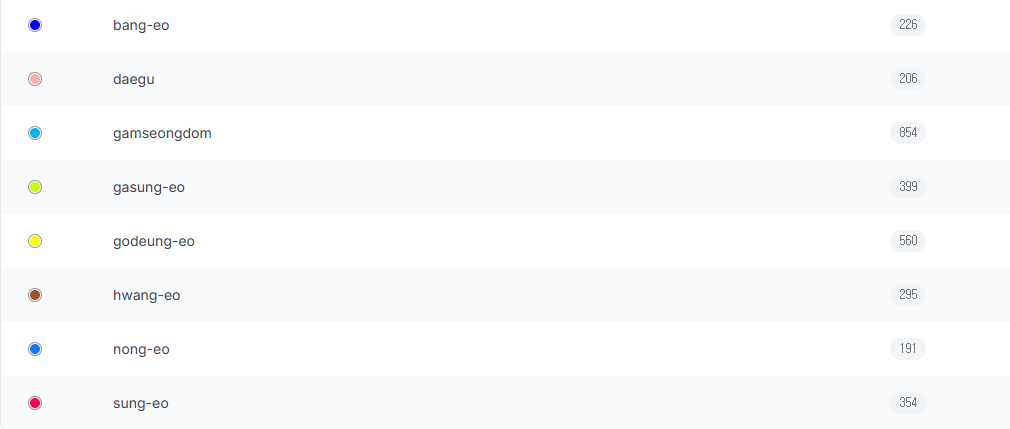
8개 구글에서 수집한 이미지 라벨링 완료
편하게 클래스를 한글로 표기했다가 영어로 바꿈
이젠, colab으로 넘어가서
라벨링 다 된 데이터를 가져왔다.
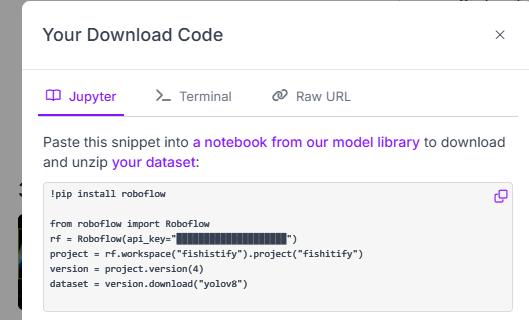
API 이용은 그냥 복붙하면 돼서 너무 편했다!
roboflow 여러모로 잘 만든 사이트 같다.
이제 라벨링이 잘된 사진들을 가져왔는지 확인 하기 위한 코드를 작성하고
나눔고딕을 colab에 설치해준 다음에 사진들을 살펴봤다.
import os
import random
import matplotlib.pyplot as plt
from matplotlib import font_manager as fm

# 나눔고딕 폰트 경로 설정
font_path = "/usr/share/fonts/truetype/nanum/NanumGothic.ttf"
fontprop = fm.FontProperties(fname=font_path)

# matplotlib에 한글 폰트 설정
plt.rc('font', family=fontprop.get_name())

# 이미지 및 라벨 폴더 경로
image_folder = 'fishitify/train/images'
label_folder = 'fishitify/train/labels'

# YOLO data.yaml 파일의 names와 한글 이름 매핑
class_names = {
    'bang-eo': '방어',
    'daegu': '대구',
    'gamseongdom': '감성돔',
    'gasung-eo': '가숭어',
    'godeung-eo': '고등어',
    'hwang-eo': '황어',
    'nong-eo': '농어',
    'sung-eo': '숭어',
}

# 클래스별 색상 지정
class_colors = {
    'bang-eo': 'blue',
    'daegu': 'red',
    'gamseongdom': 'green',
    'gasung-eo': 'orange',
    'godeung-eo': 'purple',
    'hwang-eo': 'cyan',
    'nong-eo': 'yellow',
    'sung-eo': 'pink',
}

# 폴더 내의 모든 .jpg 파일 리스트 가져오기
image_files = [f for f in os.listdir(image_folder) if f.endswith('.jpg')]

# 랜덤으로 9개의 이미지 선택
random_images = random.sample(image_files, min(9, len(image_files)))

# 3x3 그리드로 이미지 표시
fig, axes = plt.subplots(3, 3, figsize=(15, 15))

for ax, img_file in zip(axes.flat, random_images):
    img_path = os.path.join(image_folder, img_file)
    img = plt.imread(img_path)

    # 이미지 출력
    ax.imshow(img)
    ax.axis('off')

    # 라벨 파일 처리
    label_file = os.path.join(label_folder, img_file.replace('.jpg', '.txt'))
    if os.path.exists(label_file):
        with open(label_file, 'r') as f:
            for line in f:
                parts = line.strip().split()
                if len(parts) >= 5:
                    class_id, x_center, y_center, width, height = map(float, parts[:5])
                    class_name_en = list(class_names.keys())[int(class_id)]
                    class_name_kr = class_names[class_name_en]
                    box_color = class_colors.get(class_name_en, 'white')

                    img_h, img_w = img.shape[:2]
                    x_center *= img_w
                    y_center *= img_h
                    width *= img_w
                    height *= img_h

                    x1 = int(x_center - width / 2)
                    y1 = int(y_center - height / 2)
                    x2 = int(x_center + width / 2)
                    y2 = int(y_center + height / 2)

                    ax.add_patch(plt.Rectangle((x1, y1), width, height, edgecolor=box_color, facecolor='none', linewidth=2))
                    ax.text(x1, y1 - 10, class_name_kr, color=box_color, fontsize=10, backgroundcolor='white')

plt.tight_layout()
plt.show()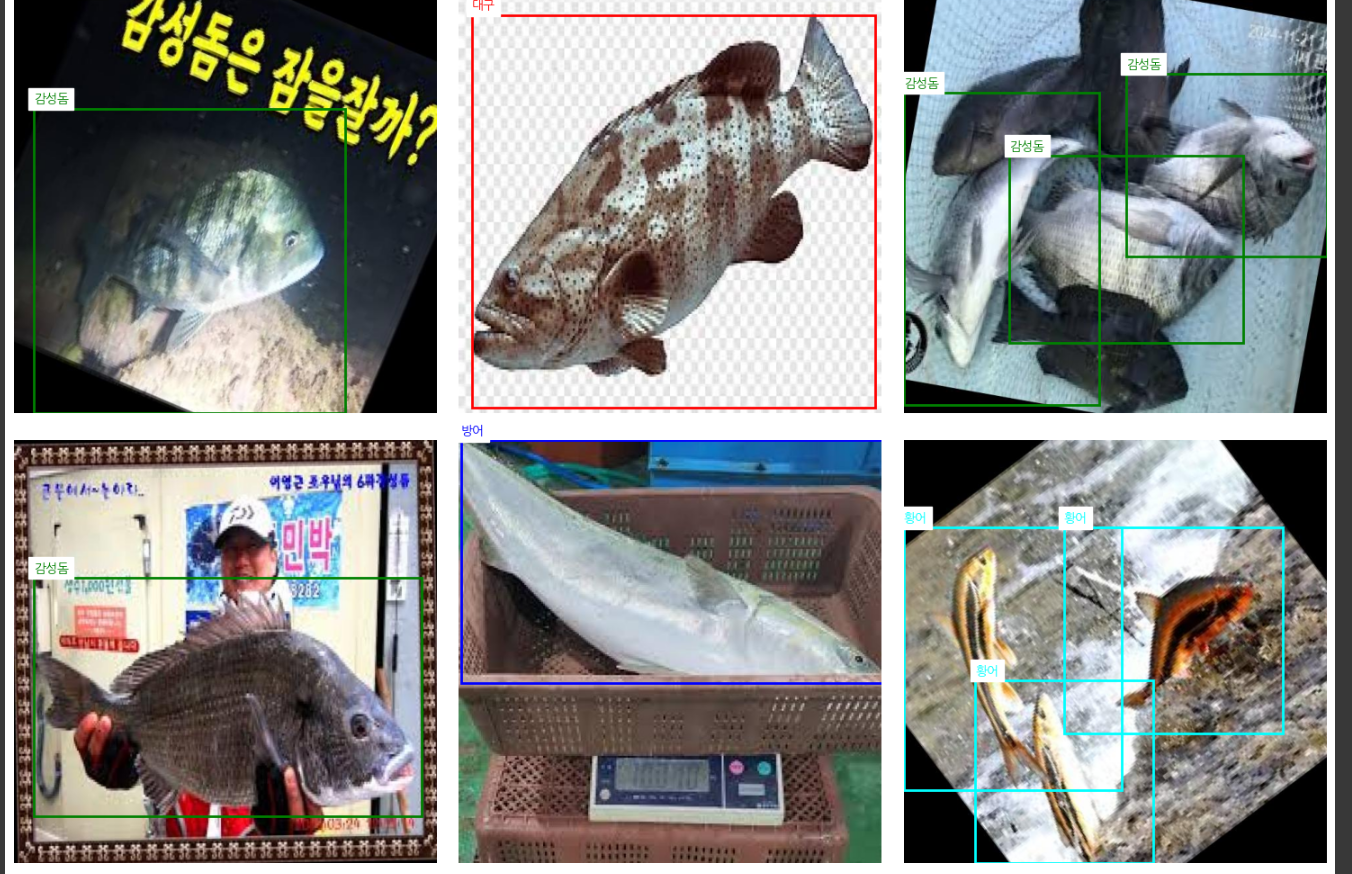
이로써 준비 끝!