Helm
쿠버네티스 리소스 패키지를 관리하기 위한 도구이다.
쿠버네티스는 서비스나 디플로이먼트, 인그레스와 같은 리소스를 생성하고 매니페스트파일을 적용하는 방식으로 애플리케이션을 배포하는데, 이 매니페스트 파일들을 하나의 템플릿으로 패키징한 것이 차트 이다.
helm chart 허브 사이트에 접속하면 다른 사람들이 만들어 놓은 chart를 무료로 다운받아 사용할 수 있다.
Helm을 사용하는 이유
- yaml 은 정적 파일이기 때문에 리소스별로 yaml파일을 만들어야 한다.
- 서비스가 많아지면서 많은 리소스를 관리하게 될 때 yaml파일에 대한 유지보수가 힘들게 된다.
- 환경별로 업무별로 App 을 쪼개거나 추가하면서 기존 yaml 에서 특수한 값들만 수정하면 되는 사항이 발생할 것이다. 하나의 Template을 통해 yaml파일을 동적으로 생성하게 해주는 Tool을 통해 템플릿관리를 통한 배포관리를 편리하게 할 수 있다.
차트 파일 구조
wordpress/
  Chart.yaml          # 차트에 대한 정보를 가진 YAML 파일
  LICENSE             # 옵션: 차트의 라이센스 정보를 가진 텍스트 파일
  README.md           # 옵션: README 파일
  values.yaml         # 차트에 대한 기본 환경설정 값들
  values.schema.json  # 옵션: values.yaml 파일의 구조를 제약하는 JSON 파일
  charts/             # 이 차트에 종속된 차트들을 포함하는 디렉터리
  crds/               # 커스텀 자원에 대한 정의
  templates/          # 쿠버네티스 manifest 파일들이 생성될 템플릿들의 디렉터리
  templates/NOTES.txt # 옵션: 간단한 사용법을 포함하는 텍스트 파일
Helm 설치
# helm 바이너리 설치
$ wget https://get.helm.sh/helm-v3.14.4-linux-amd64.tar.gz
$ tar -xvf helm-v3.14.4-linux-amd64.tar.gz
$ install linux-amd64/helm /usr/local/sbin

# helm 설치 확인
$ helm version
Helm Release
위 링크에서 helm 릴리즈 정보를 확인할 수 있으며, 작성자는 3.14.4 버전을 바이너리 설치를 하였다.
Helm을 사용한 Nginx 배포
# helm 업데이트
$ helm repo update

# Chart Repository 구성, Chart 리포지토리는 APT 또는 YUM Repo와 유사하다.  아래에서는 Stable Repository를 다운로드 한다.
$ helm repo add stable https://charts.helm.sh/stable       # stable repo
$ helm repo add bitnami https://charts.bitnami.com/bitnami # bitnami repo

# nginx와 관련된 repository를 검색
$ helm search repo nginx
NAME                                    CHART VERSION   APP VERSION     DESCRIPTION
bitnami/nginx                           16.0.6          1.25.5          NGINX Open Source is a web server that can be a...
bitnami/nginx-ingress-controller        11.1.1          1.10.1          NGINX Ingress Controller is an Ingress controll...
bitnami/nginx-intel                     2.1.15          0.4.9           DEPRECATED NGINX Open Source for Intel is a lig...
stable/nginx-ingress                    1.41.3          v0.34.1         DEPRECATED! An nginx Ingress controller that us...
stable/nginx-ldapauth-proxy             0.1.6           1.13.5          DEPRECATED - nginx proxy with ldapauth
stable/nginx-lego                       0.3.1                           Chart for nginx-ingress-controller and kube-lego
stable/gcloud-endpoints                 0.1.2           1               DEPRECATED Develop, deploy, protect and monitor...

# nginx 설치
$ helm install nginx bitnami/nginx
NAME: nginx
LAST DEPLOYED: Tue May  7 14:53:10 2024
NAMESPACE: default
STATUS: deployed
REVISION: 1
TEST SUITE: None
NOTES:
CHART NAME: nginx
CHART VERSION: 16.0.6
APP VERSION: 1.25.5

** Please be patient while the chart is being deployed **
NGINX can be accessed through the following DNS name from within your cluster:
    nginx.default.svc.cluster.local (port 80)
To access NGINX from outside the cluster, follow the steps below:

1. Get the NGINX URL by running these commands:

  NOTE: It may take a few minutes for the LoadBalancer IP to be available.
        Watch the status with: 'kubectl get svc --namespace default -w nginx'

    export SERVICE_PORT=$(kubectl get --namespace default -o jsonpath="{.spec.ports[0].port}" services nginx)
    export SERVICE_IP=$(kubectl get svc --namespace default nginx -o jsonpath='{.status.loadBalancer.ingress[0].ip}')
    echo "http://${SERVICE_IP}:${SERVICE_PORT}"

WARNING: There are "resources" sections in the chart not set. Using "resourcesPreset" is not recommended for production. For production installations, please set the following values according to your workload needs:
  - cloneStaticSiteFromGit.gitSync.resources
  - resources
+info https://kubernetes.io/docs/concepts/configuration/manage-resources-containers/

# pod, service, deployment 확인
kubectl get all
NAME                         READY   STATUS    RESTARTS   AGE
pod/nginx-76d6874c57-m7mmr   1/1     Running   0          32s

NAME                 TYPE           CLUSTER-IP       EXTERNAL-IP   PORT(S)                      AGE
service/kubernetes   ClusterIP      10.96.0.1        <none>        443/TCP                      44m
service/nginx        LoadBalancer   10.103.183.216   <pending>     80:30542/TCP,443:30058/TCP   32s

NAME                    READY   UP-TO-DATE   AVAILABLE   AGE
deployment.apps/nginx   1/1     1            1           32s

NAME                               DESIRED   CURRENT   READY   AGE
replicaset.apps/nginx-76d6874c57   1         1         1       32s

# 접속 확인
$ curl 10.103.183.216:80
<!DOCTYPE html>
<html>
<head>
<title>Welcome to nginx!</title>
<style>
html { color-scheme: light dark; }
body { width: 35em; margin: 0 auto;
font-family: Tahoma, Verdana, Arial, sans-serif; }
</style>
</head>
<body>
<h1>Welcome to nginx!</h1>
<p>If you see this page, the nginx web server is successfully installed and
working. Further configuration is required.</p>

<p>For online documentation and support please refer to
<a href="http://nginx.org/">nginx.org</a>.<br/>
Commercial support is available at
<a href="http://nginx.com/">nginx.com</a>.</p>

<p><em>Thank you for using nginx.</em></p>
</body>
</html>

# 삭제
$ helm uninstall nginx
release "nginx" uninstalled
Helm을 사용한 커스텀 서비스 배포
$ mkdir demo
$ cd demo
$ helm create custom
$ tree custom
custom
|-- charts
|-- Chart.yaml
|-- templates
|   |-- deployment.yaml
|   |-- _helpers.tpl
|   |-- hpa.yaml
|   |-- ingress.yaml
|   |-- NOTES.txt
|   |-- serviceaccount.yaml
|   |-- service.yaml
|   `-- tests
|       `-- test-connection.yaml
`-- values.yaml
helm create [chart명] 명령어를 통해 차트를 생성한다. 본 포스팅에서는 Chart.yaml, values.yaml, templates/deployment.yaml, templates/service.yaml 만 사용하기에 다른 부분들은 삭제를 진행한다.
# Chart.yaml
apiVersion: v2
description: A Helm chart for Custom Nginx
name: custom-nginx
version: 0.0.1
---

# values.yaml
iamge: sysnet4admin/echo-hname
port: 80
nodePort: 30000
protocol: TCP
---

# templates/deployment.yaml
apiVersion: apps/v1
kind: Deployment
metadata:
  name: "np-deployment-{{ .Release.Name }}"
spec:
  replicas: 2
  selector:
    matchLabels:
      app: np-pods
  template:
    metadata:
      labels:
        app: np-pods
    spec:
      containers:
      - name: {{ .Chart.Name }}
        image: {{ .Values.image }}
        ports:
        - containerPort: {{ .Values.port }}
---

# templates/service.yaml
apiVersion: v1
kind: Service
metadata:
  name: np-svc
spec:
  selector:
      app: np-pods
  ports:
      - name: http
        protocol: {{ .Values.protocol }}
        port: {{ .Values.port }}
        targetPort: {{ .Values.port }}
        nodePort: {{ .Values.nodePort }}
  type: NodePort
위 templates/deployment.yaml, templates/service.yaml 을 확인한다면 특이한 부분이 있을 것이다.
{{ .Release.Name }} 의 경우 "helm install custom-nginx ." 명령어로 릴리즈를 시작할 때 사용하는 릴리즈명이다.
또한, {{ .Chart.Name }} 에서는 Chart.yaml 에 정의된 name 의 값을 가져 오는 것이며, {{ .Values.변수 }} 로 정의가 되어 있는 값들은 values.yaml 에서 가져온 값들이며, 위 예시와 같이 템플릿처럼 수정이 필요한 부분만 변수로 받아 사용할 수 있다.
# 커스텀 Nginx 설치
$ helm install custom-nginx .
NAME: custom-nginx
LAST DEPLOYED: Tue May  7 15:53:05 2024
NAMESPACE: default
STATUS: deployed
REVISION: 1
TEST SUITE: None

# helm list 확인
$ helm list
NAME            NAMESPACE       REVISION        UPDATED                                 STATUS          CHART           APP VERSION
custom-nginx    default         1               2024-05-07 15:53:05.381389914 +0900 KST deployed        nginx-0.0.1

# pod, service, deployment 확인
$ kubectl get all
NAME                                              READY   STATUS    RESTARTS   AGE
pod/np-deployment-custom-nginx-697cbdc4b4-frgkv   1/1     Running   0          5m54s
pod/np-deployment-custom-nginx-697cbdc4b4-grc6z   1/1     Running   0          5m54s

NAME                 TYPE        CLUSTER-IP     EXTERNAL-IP   PORT(S)        AGE
service/kubernetes   ClusterIP   10.96.0.1      <none>        443/TCP        6h51m
service/np-svc       NodePort    10.106.9.163   <none>        80:30000/TCP   5m54s

NAME                                         READY   UP-TO-DATE   AVAILABLE   AGE
deployment.apps/np-deployment-custom-nginx   2/2     2            2           5m54s

NAME                                                    DESIRED   CURRENT   READY   AGE
replicaset.apps/np-deployment-custom-nginx-697cbdc4b4   2         2         2       5m54s

# 접속 확인
$ curl 10.106.9.163:80
np-deployment-6b96849c57-6gzn9
$ curl 10.106.9.163:80
np-deployment-6b96849c57-nlnqs

# 삭제
$ helm uninstall custom-nginx
release "custom-nginx" uninstalled
(추가) --set 플래그를 통한 커스텀 설정
# template/deployment.yaml
apiVersion: apps/v1
kind: Deployment
metadata:
  name: "np-deployment-{{ .Release.Name }}"
spec:
  replicas: 2
  selector:
    matchLabels:
      app: np-pods
  template:
    metadata:
      labels:
        app: np-pods
    spec:
      containers:
      - name: "{{ .Values.env }}-{{ .Chart.Name }}"
        image: {{ .Values.image }}
        ports:
        - containerPort: {{ .Values.port }}
--set 플래그를 사용하여 deployment.yaml파일에서 {{ .Values.env }}값을 커스텀하게 설정할 수 있다.
아래 명령어는 env 값을 dev로 설정하여 차트를 설치한다. 이렇게 함으로써 deployment.yaml 템플릿에서 {{ .Values.env }}를 통해 해당 값을 사용할 수 있다.
# 커스텀 Nginx 설치
$ helm install custom2-nginx . --set env=dev
NAME: custom2-nginx
LAST DEPLOYED: Tue May 7 21:14:57 2024
NAMESPACE: default
STATUS: deployed
REVISION: 1
TEST SUITE: None
# 확인
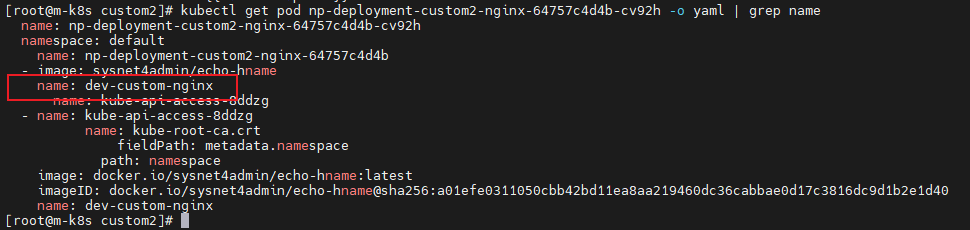
$ kubectl get pod np-deployment-custom2-nginx-64757c4d4b-cv92h -o yaml | grep name
name: np-deployment-custom2-nginx-64757c4d4b-cv92h
namespace: default
name: np-deployment-custom2-nginx-64757c4d4b
- image: sysnet4admin/echo-hname
name: dev-custom-nginx
name: kube-api-access-8ddzg
- name: kube-api-access-8ddzg
name: kube-root-ca.crt
fieldPath: metadata.namespace
path: namespace
image: docker.io/sysnet4admin/echo-hname:latest
imageID: docker.io/sysnet4admin/echo-hname@sha256:a01efe0311050cbb42bd11ea8aa219460dc36cabbae0d17c3816dc9d1b2e1d40
name: dev-custom-nginx결과