
useReducer 이란?
useReducer라는 것은 useState나, useEffect와 같이 React 내장 훅들중에 하나입니다.
상태관리에 관해 사용되는데 그래서 useState 훅과 비슷한 면이 있지만 더욱 복잡한 상태관리에 대해서 사용됩니다.
더욱 강력한 상태관리가 필요한 경우 useReducer는 useState의 대체 훅이 될 수 있습니다.
useState 로 상태관리를 하기에 너무 복잡해지거나 많아지게 될 경우입니다. 하지만 상태관리의 메인 툴로서 복잡하지 않다면 useState 사용이 훨씬 간단합니다. 보통 useState로 관리하는 상태가 객체인 경우 해당 객체의 프로퍼티들을 관리 할때의 useState는 코드길이도 길어지고 성가시기 때문에 useReducer를 사용합니다.
구체적인 예를 들어 봅시다.
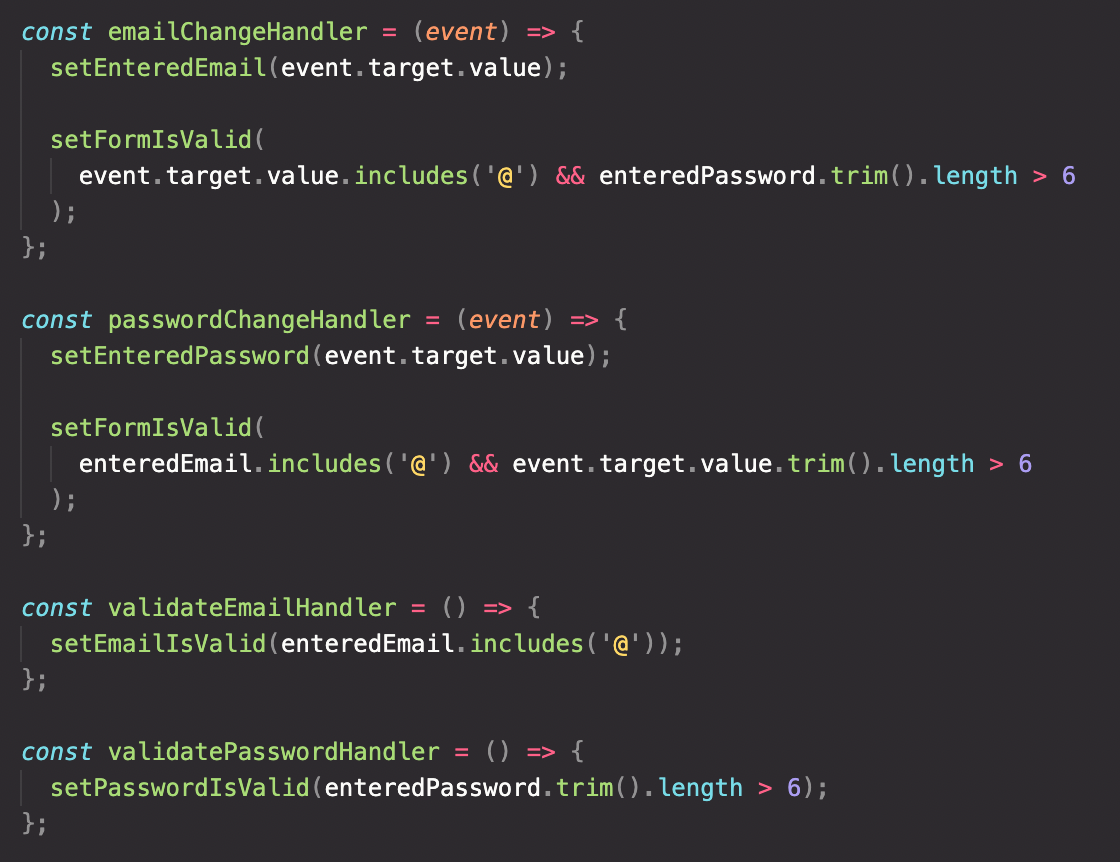
이런식의 상태관리에서 setEmailIsValid(enteredEmail.includes('@')); 이코드에서 enteredEmail은 사용자가 가장최근에 입력한 내용이 아닐수 있습니다. 다른 모든 setState 함수들안에서도 마찬가지인 상황인데 이를 위해서 useReducer없이 useState로 저 변수들을 객체로 모은다음 하나로 관리해서 이전 값을 참조하는 useState 사용을 할수 있으나 상태관리가 지저분해 집니다.
이때 useReducer가 해결책이 될 수 있습니다.
useReducer 사용법
const [state, dispatchFn] = useReducer(reducerFn, intialState, initFn);useState와 마찬가지로 항상 정확히 두개의 값이 있는 배열을 반환합니다. 배열구조분해 형태로 state, dispatchFn 을 얻을 수 있습니다.
state는 컴포넌트가 렌더링될때 최신 state에 해당하는 스냅샷 데이터를 가지고 있습니다.dispatchFn은 상태를 업데이트 하기위한 트리거를 제공하는 dispatch action 함수를 반환합니다.reducerFn은 이전 상태의 state를 참조해서 dispatchFn 에 의해 전달된 action을 받으면 새로운 newState를 반환하는 함수 입니다. 실질적인 state를 가공하는 로직함수입니다.
(prevState, action) => newState;initialState: 초기 상태가 들어갑니다.initFn: 초기상태를 세팅하는 함수 입니다. 초기상태가 좀 복잡한 경우에 사용됩니다.
먼저 위에서 보았던 코드에 email과 관련된 상태들을 action에 따라 관리해봅시다.
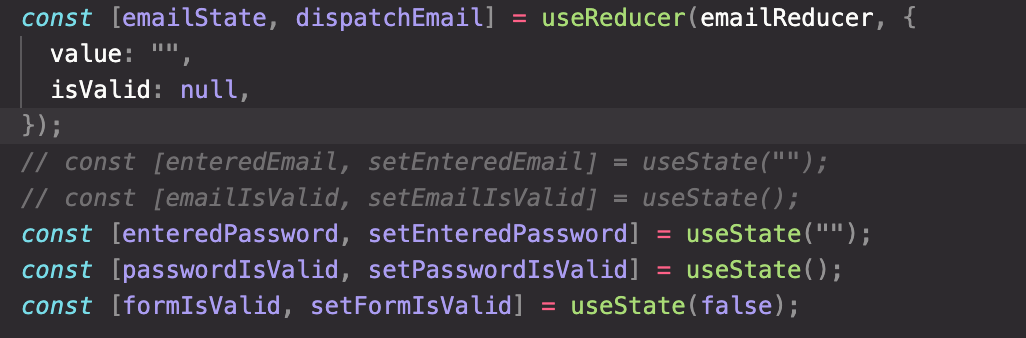
주석 처리한 부분을useReducer를 이용해서 하나의 state로 묶어 관리합니다. 초기 state의 상태도 넣어줍니다.
enteredEmail → emailState.value
emailIsValid → emailState.isValid
로 대체되어 관련 코드들을 모두 대체해줍니다.
이후 setEnteredEmail을 대체해봅니다.
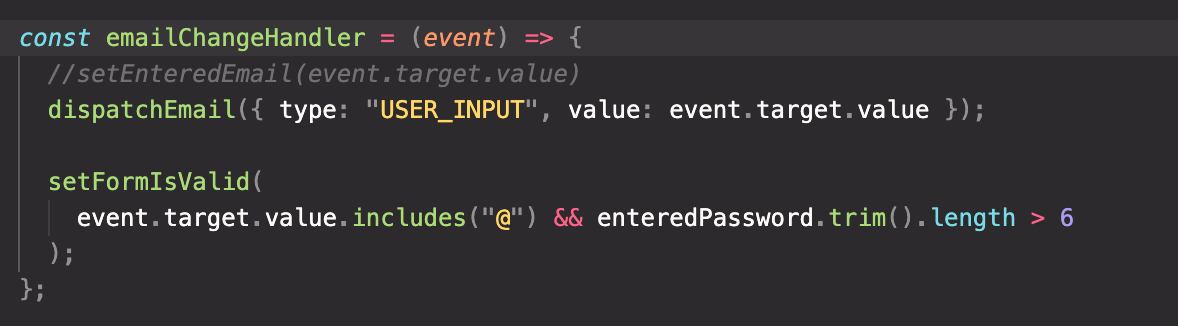
dispatchEmail 함수의 인수로 들어가는 것은 emailReducer 함수의 action이라는 두번째 인수로 들어가게 됩니다.
따라서 action의 형태는 {type: "", value: }가 되는데 두번째 인수는 필요할때 늘려서 사용하면 됩니다. (페이로드 라고 표현합니다.)
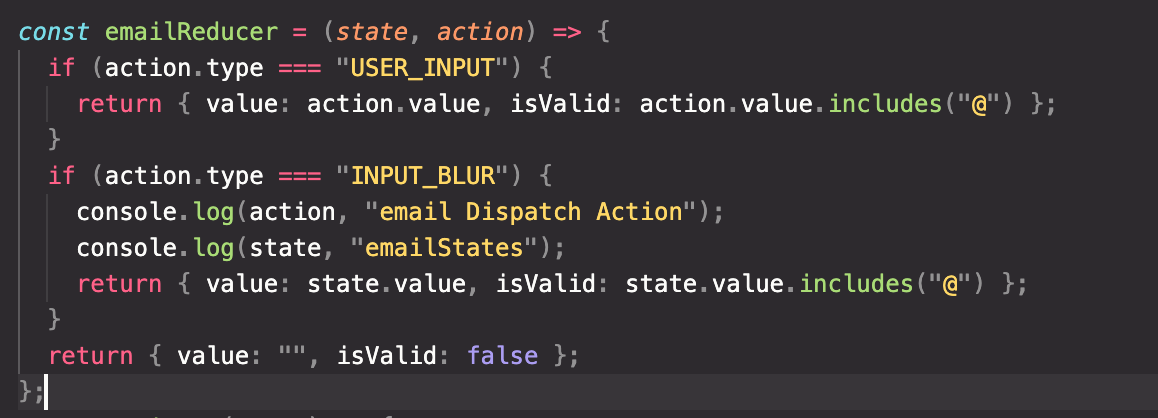
따라서 emailReducer에서 해당 타입의 액션이 들어오면 state를 어떻게 변경할 것인지 데이터를 설정합니다. emailState.value값을 바꿔야하므로
state는 {value: action.value, isValid: action.value.includes("@")} 이렇게 한번에 state를 변경할수 있습니다. 이렇게 한번의 함수로
state를 관리 할수 있는점이 useReducer의 장점입니다. 코드가 간결해지니까요.
이어서 setEmailIsValid함수도 대체해봅니다.
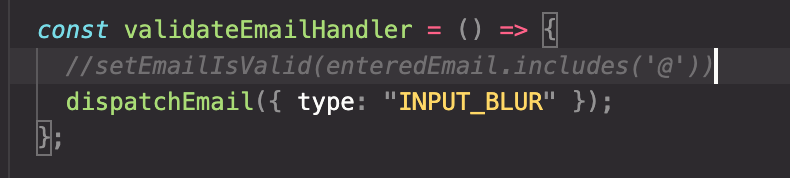
validateEmailHandler 함수에서 dispatchEmail 함수를 호출할때는 email 유효성 검사만 진행하므로 emailState.value 값을 바꾸지 않아도 됩니다. 따라서 type 값만 지정하고 이에따른 state값만 지정합니다.
emailReducer 함수에서 액션 타입에 따른 state 가공을 추가해줍시다.
이때의 이메일 유효성은 emailState.value값의 includes("@") 결과로 반영되므로 타입이 지정된 액션일시 value값은 이전값인 state.value 로 지정하고 이메일 유효성은 state.value.includes("@")로 지정해줍니다.
이제 password에 대해서도 동일하게 적용하면 됩니다.
코드를 수정한 전체 코드
import React, { useState, useEffect, useReducer } from "react";

import Card from "../UI/Card/Card";
import classes from "./Login.module.css";
import Button from "../UI/Button/Button";

const emailReducer = (state, action) => {
  if (action.type === "USER_INPUT") {
    return { value: action.value, isValid: action.value.includes("@") };
  }
  if (action.type === "INPUT_BLUR") {
    return { value: state.value, isValid: state.value.includes("@") };
  }
  return { value: "", isValid: false };
};

const passwordReducer = (state, action) => {
  if (action.type === "USER_INPUT") {
    return { value: action.value, isValid: action.value.trim().length > 6 };
  }
  if (action.type === "INPUT_BLUR") {
    return { value: state.value, isValid: state.value.trim().length > 6 };
  }
  return { value: "", isValid: false };
};

const Login = (props) => {
  const [emailState, dispatchEmail] = useReducer(emailReducer, {
    value: "",
    isValid: null,
  });

  const [passwordState, dispatchPassword] = useReducer(passwordReducer, {
    value: "",
    isValid: null,
  });
  const [formIsValid, setFormIsValid] = useState(false);

  useEffect(() => {
    console.log("sksl");
    const timerId = setTimeout(() => {
      setFormIsValid(emailState.isValid && passwordState.isValid);
    }, 500);

    return () => {
      console.log("CLEANUP");
      clearTimeout(timerId);
    };
  }, [passwordState.isValid, emailState.isValid]);


  const emailChangeHandler = (event) => {
    //setEnteredEmail(event.target.value)
    dispatchEmail({ type: "USER_INPUT", value: event.target.value });

    setFormIsValid(
      event.target.value.includes("@") && passwordState.value.trim().length > 6
    );
  };

  const passwordChangeHandler = (event) => {
    dispatchPassword({ type: "USER_INPUT", value: event.target.value });
    setFormIsValid(emailState.isValid && event.target.value.trim().length > 6);
  };

  const validateEmailHandler = () => {
    //setEmailIsValid(enteredEmail.includes('@'))
    dispatchEmail({ type: "INPUT_BLUR" });
  };

  const validatePasswordHandler = () => {
    dispatchPassword({ type: "INPUT_BLUR" });
  };

  const submitHandler = (event) => {
    event.preventDefault();
    props.onLogin(emailState.value, passwordState.value);
  };

  return (
    <Card className={classes.login}>
      <form onSubmit={submitHandler}>
        <div
          className={`${classes.control} ${
            emailState.isValid === false ? classes.invalid : ""
          }`}
        >
          <label htmlFor="email">E-Mail</label>
          <input
            type="email"
            id="email"
            value={emailState.value}
            onChange={emailChangeHandler}
            onBlur={validateEmailHandler}
          />
        </div>
        <div
          className={`${classes.control} ${
            passwordState.isValid === false ? classes.invalid : ""
          }`}
        >
          <label htmlFor="password">Password</label>
          <input
            type="password"
            id="password"
            value={passwordState.value}
            onChange={passwordChangeHandler}
            onBlur={validatePasswordHandler}
          />
        </div>
        <div className={classes.actions}>
          <Button type="submit" className={classes.btn} disabled={!formIsValid}>
            Login
          </Button>
        </div>
      </form>
    </Card>
  );
};

export default Login;