
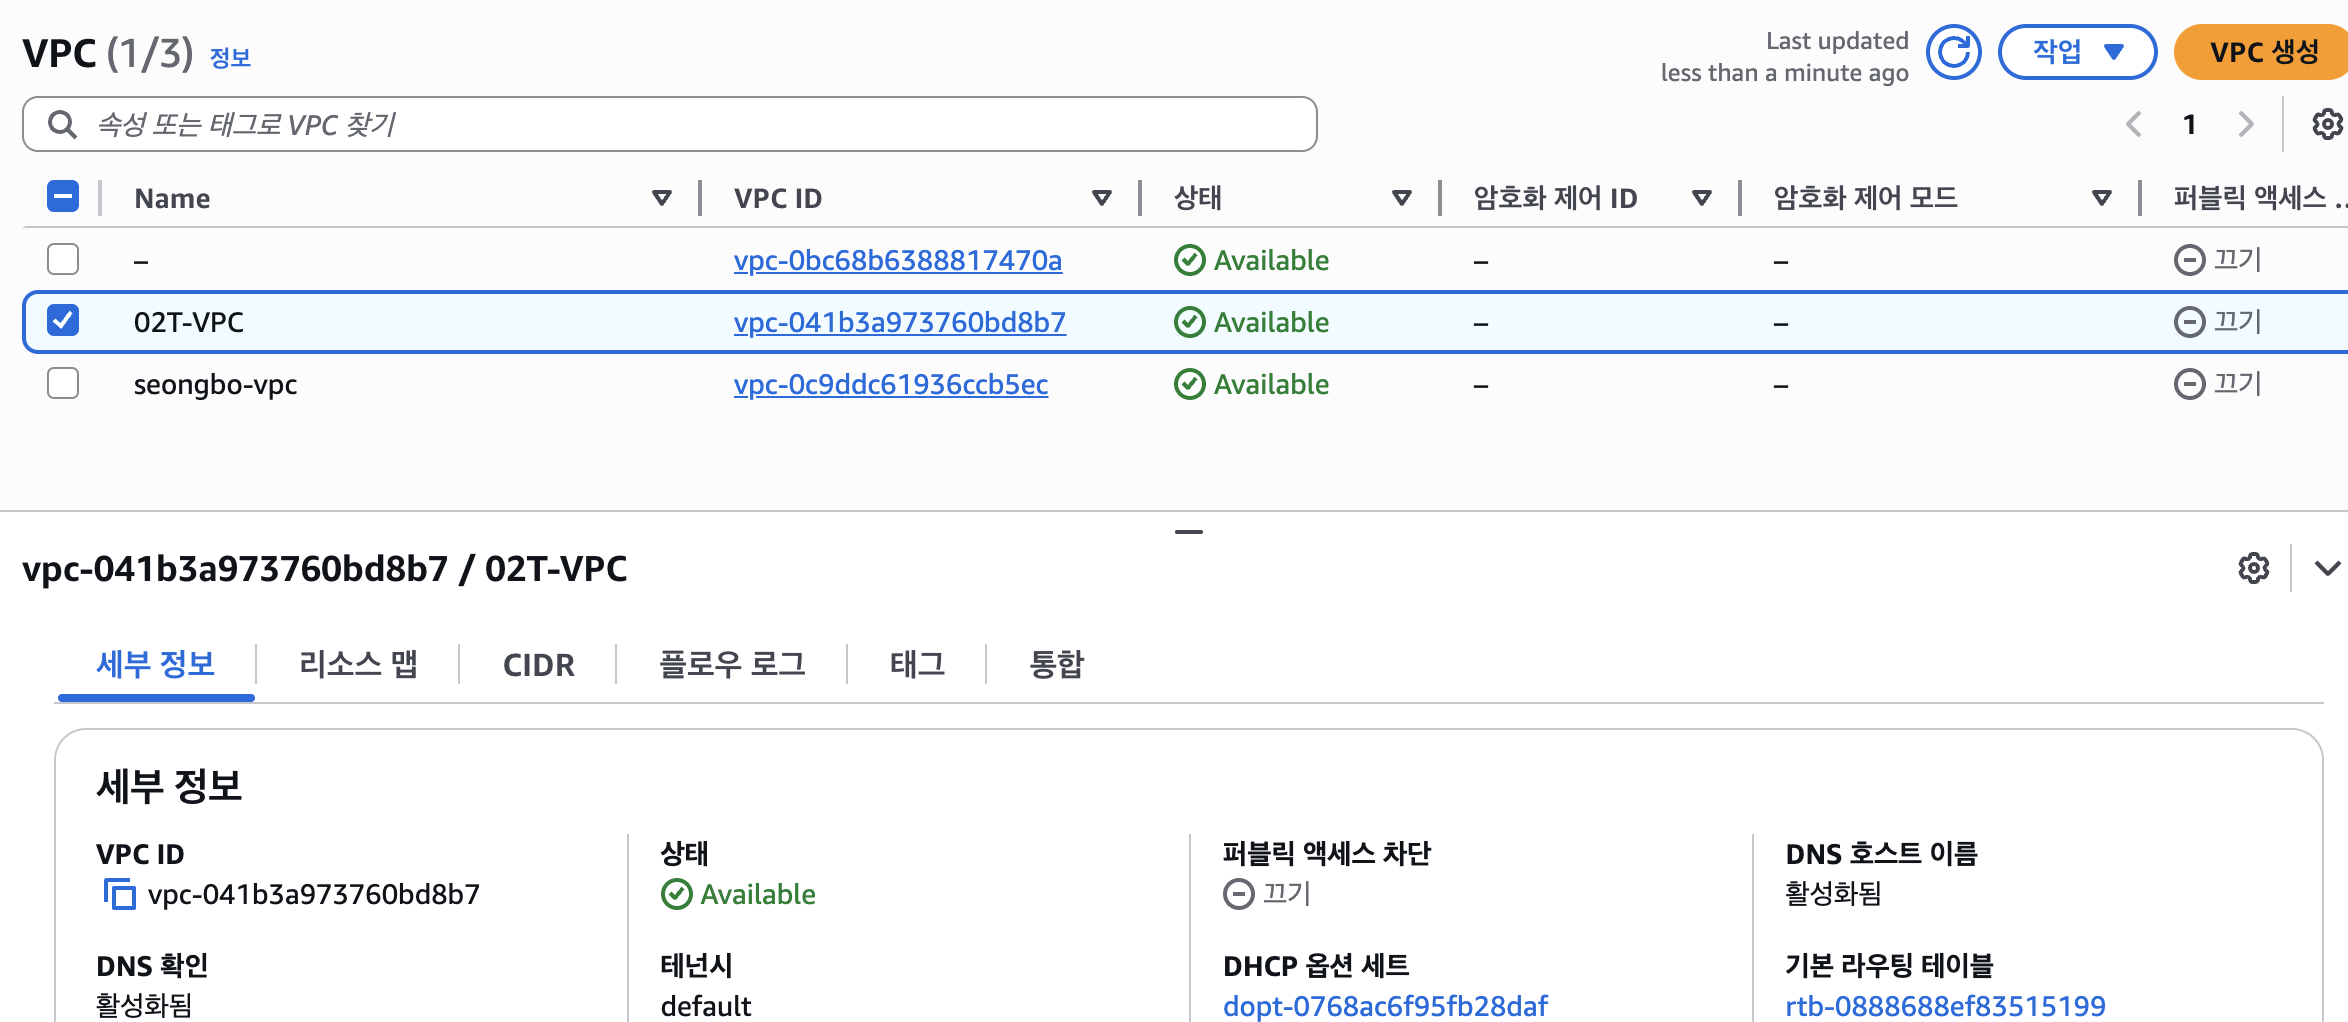
1.VPC 생성
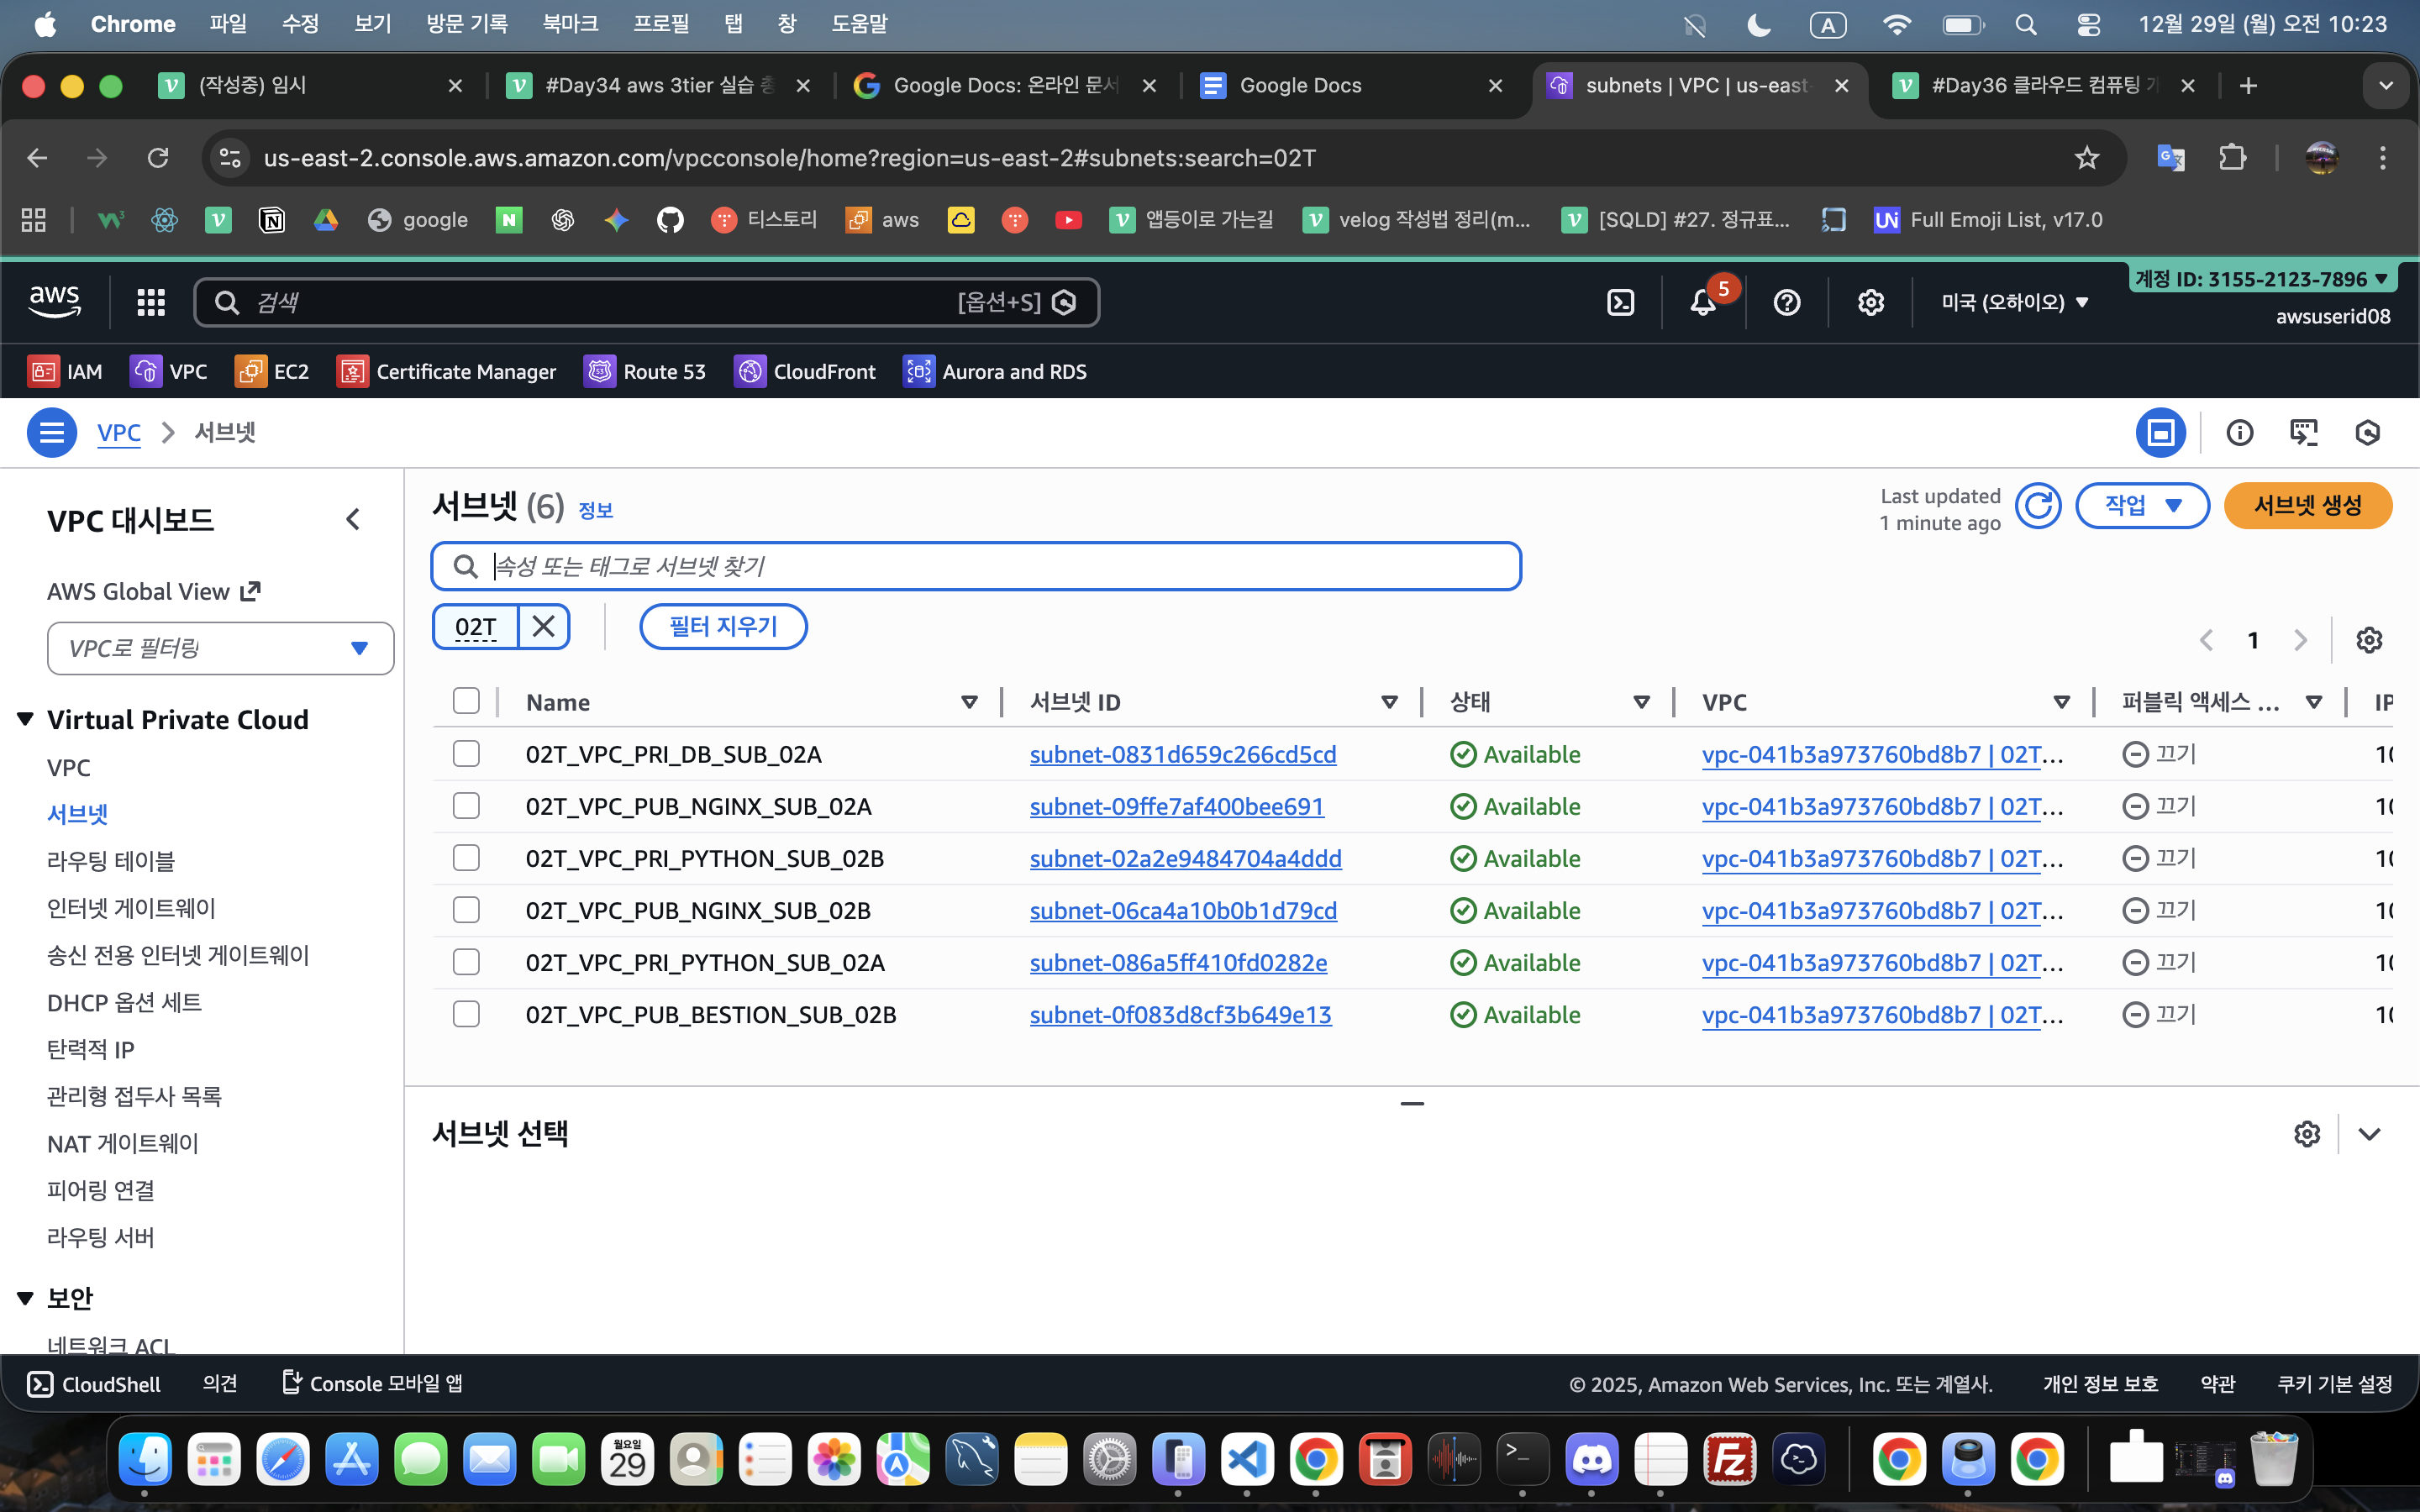
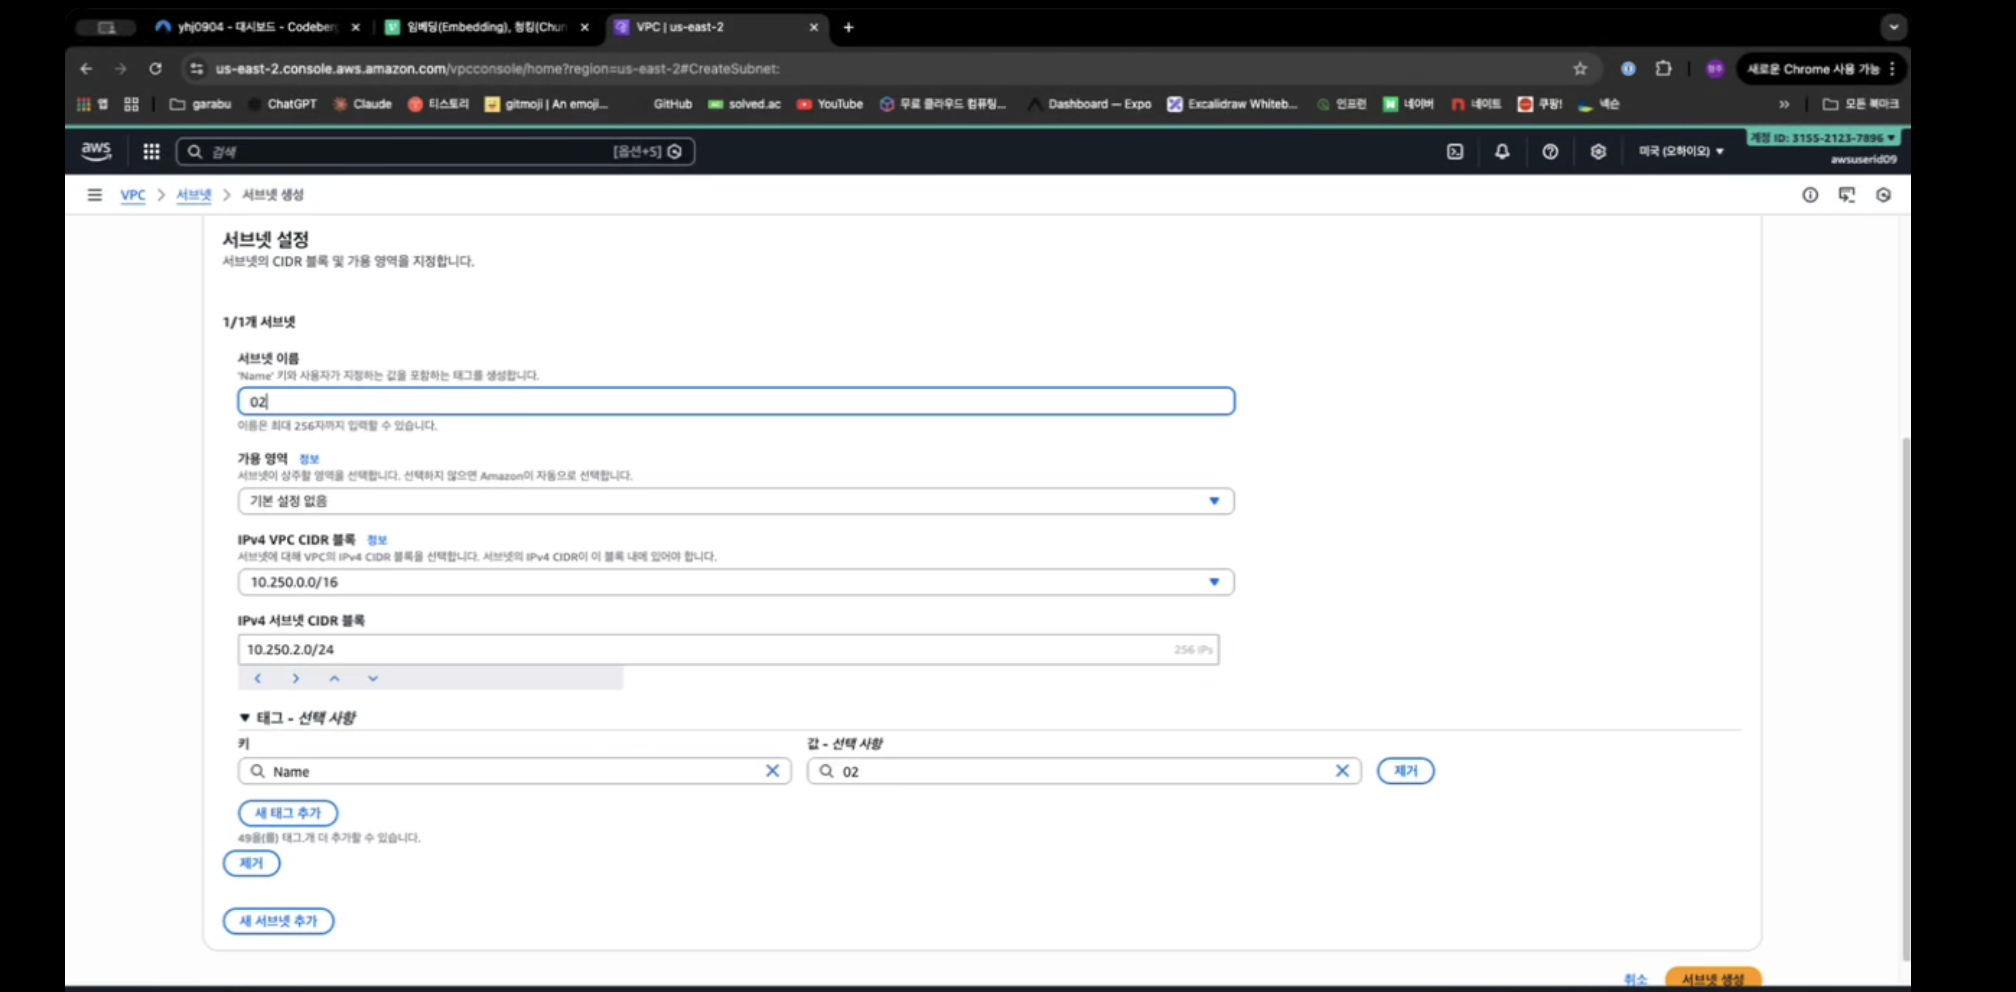
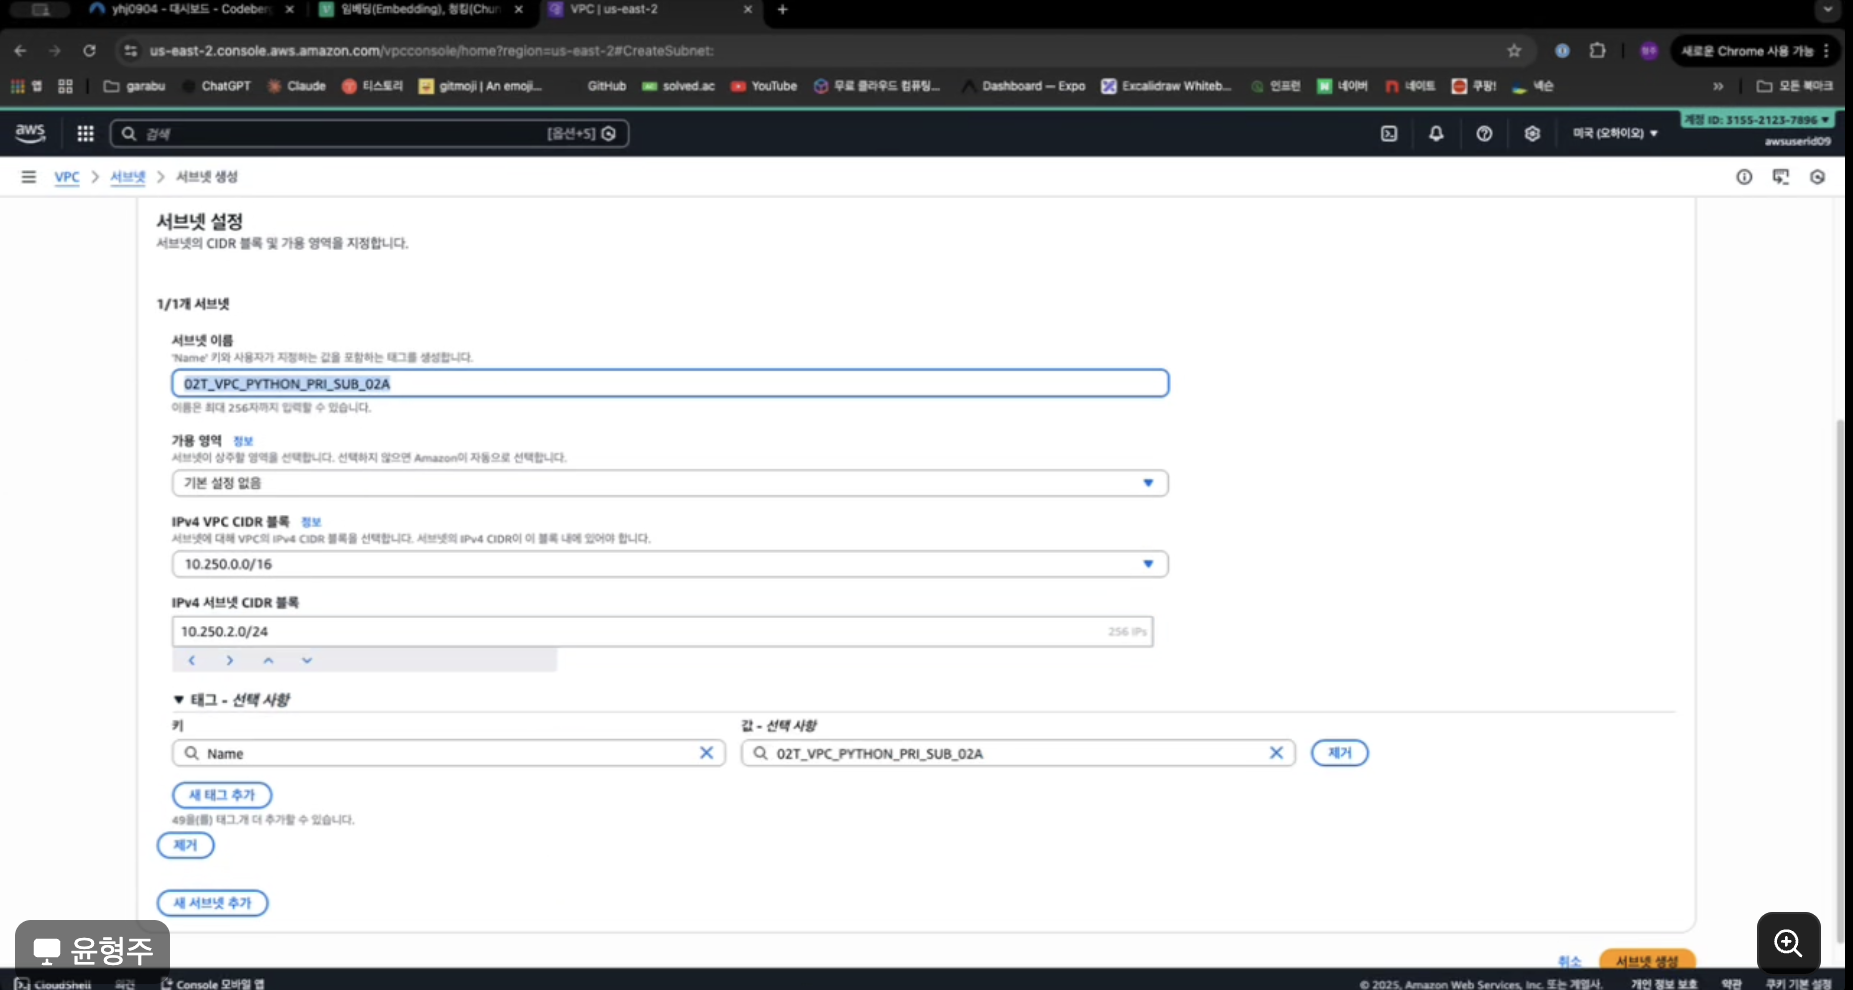
2.Subnet 생성
-
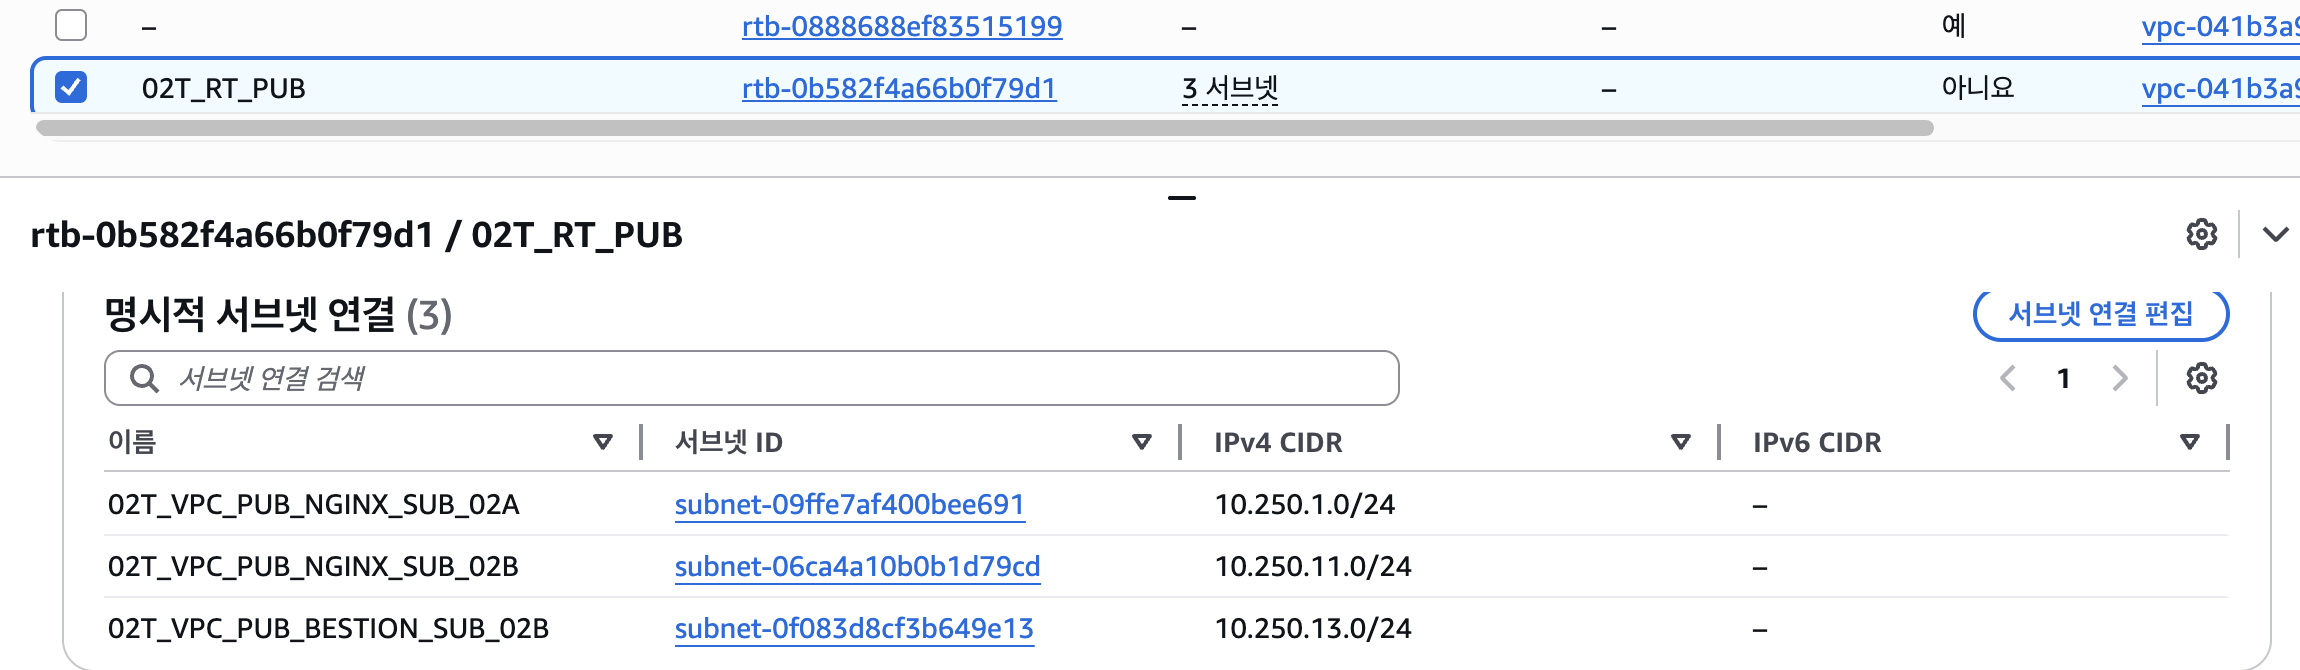
02T_VPC_PUB_NGINX_SUB_02A
10.250.1.0/24 -
02T_VPC_PUB_NGINX_SUB_02B
10.250.11.0/24 -
02T_VPC_PUB_BESTION_SUB_02B
10.250.13.0/24 -
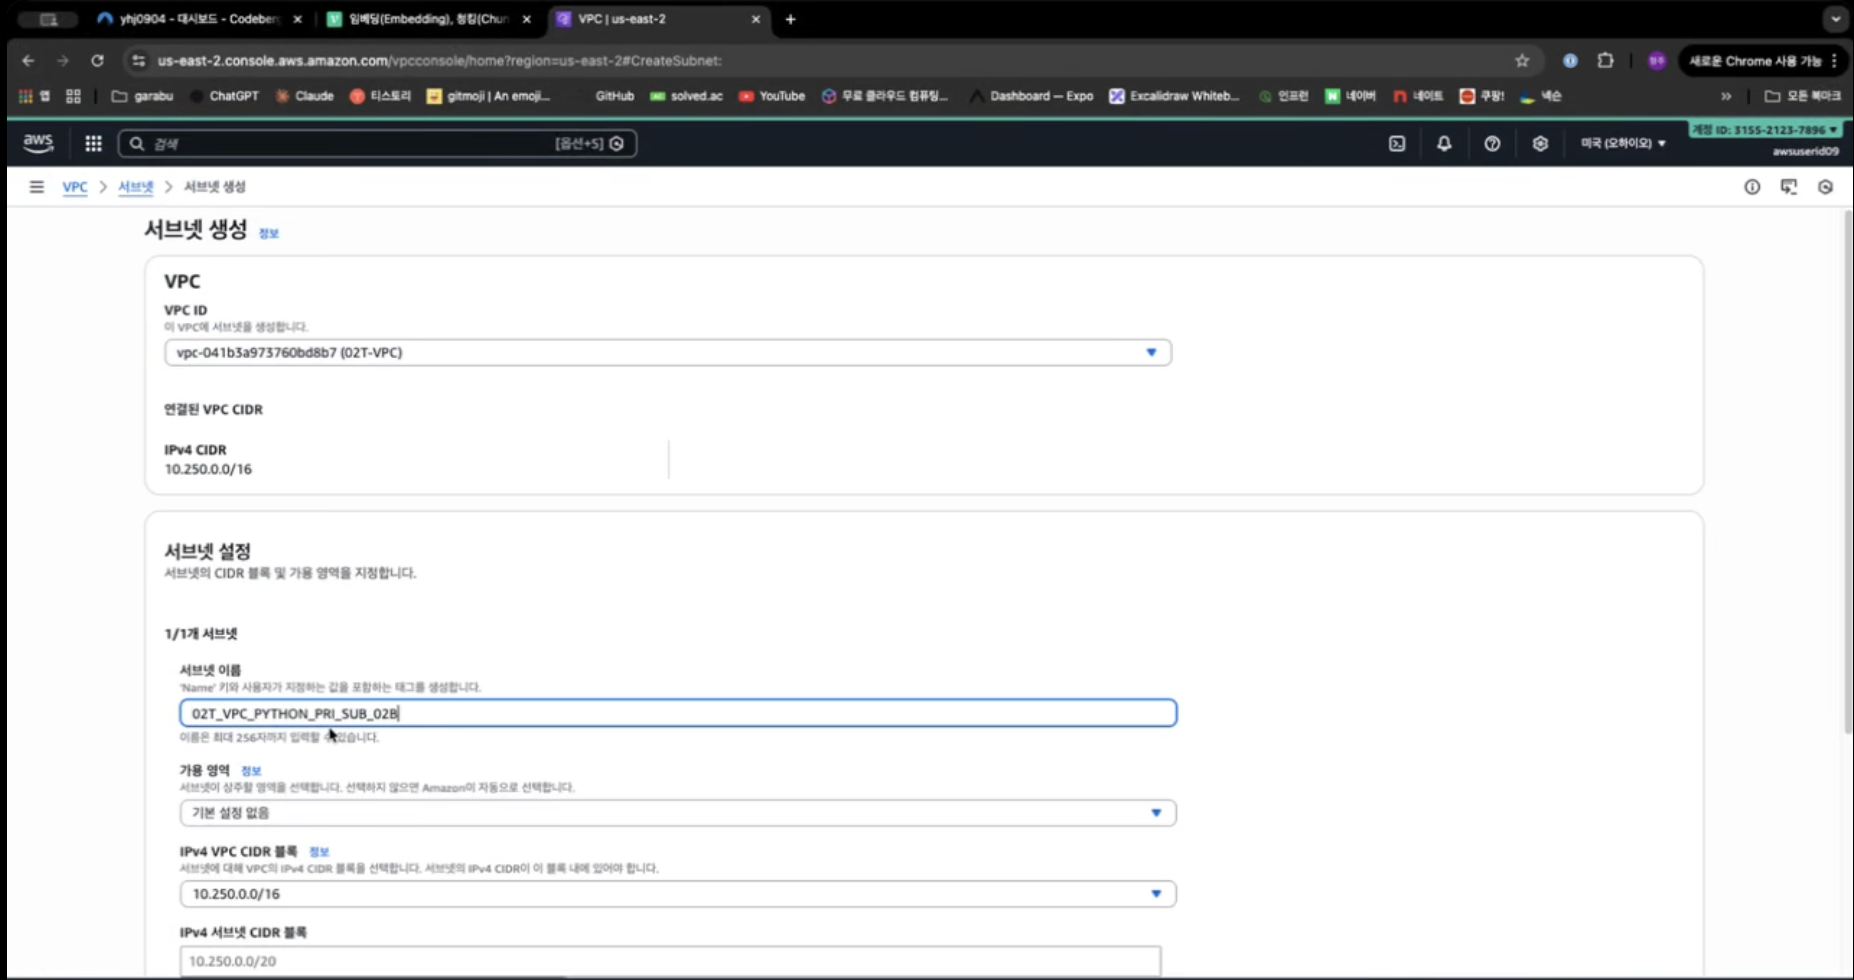
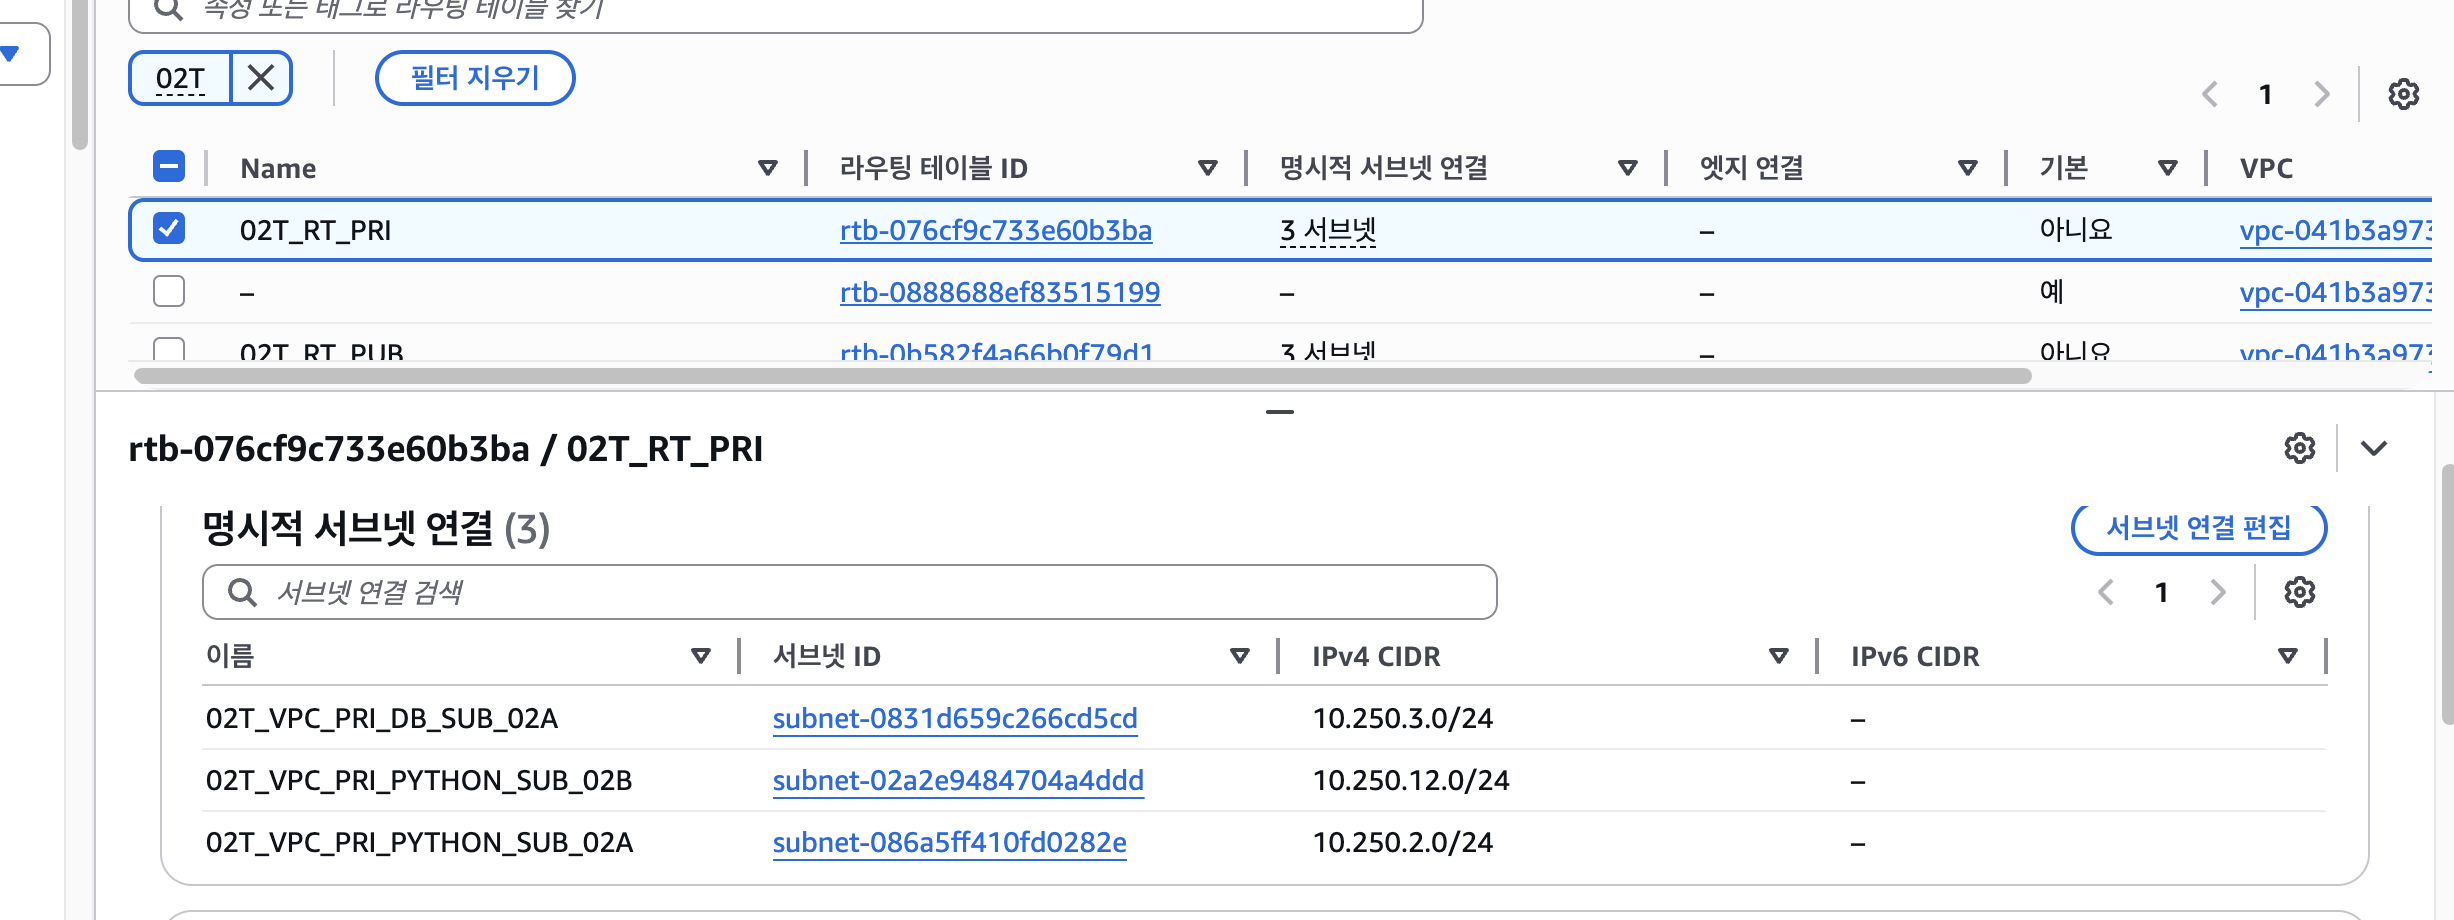
02T_VPC_PRI_PYTHON_SUB_02A
10.250.2.0/24 -
02T_VPC_PRI_PYTHON_SUB_02B
10.250.12.0/24 -
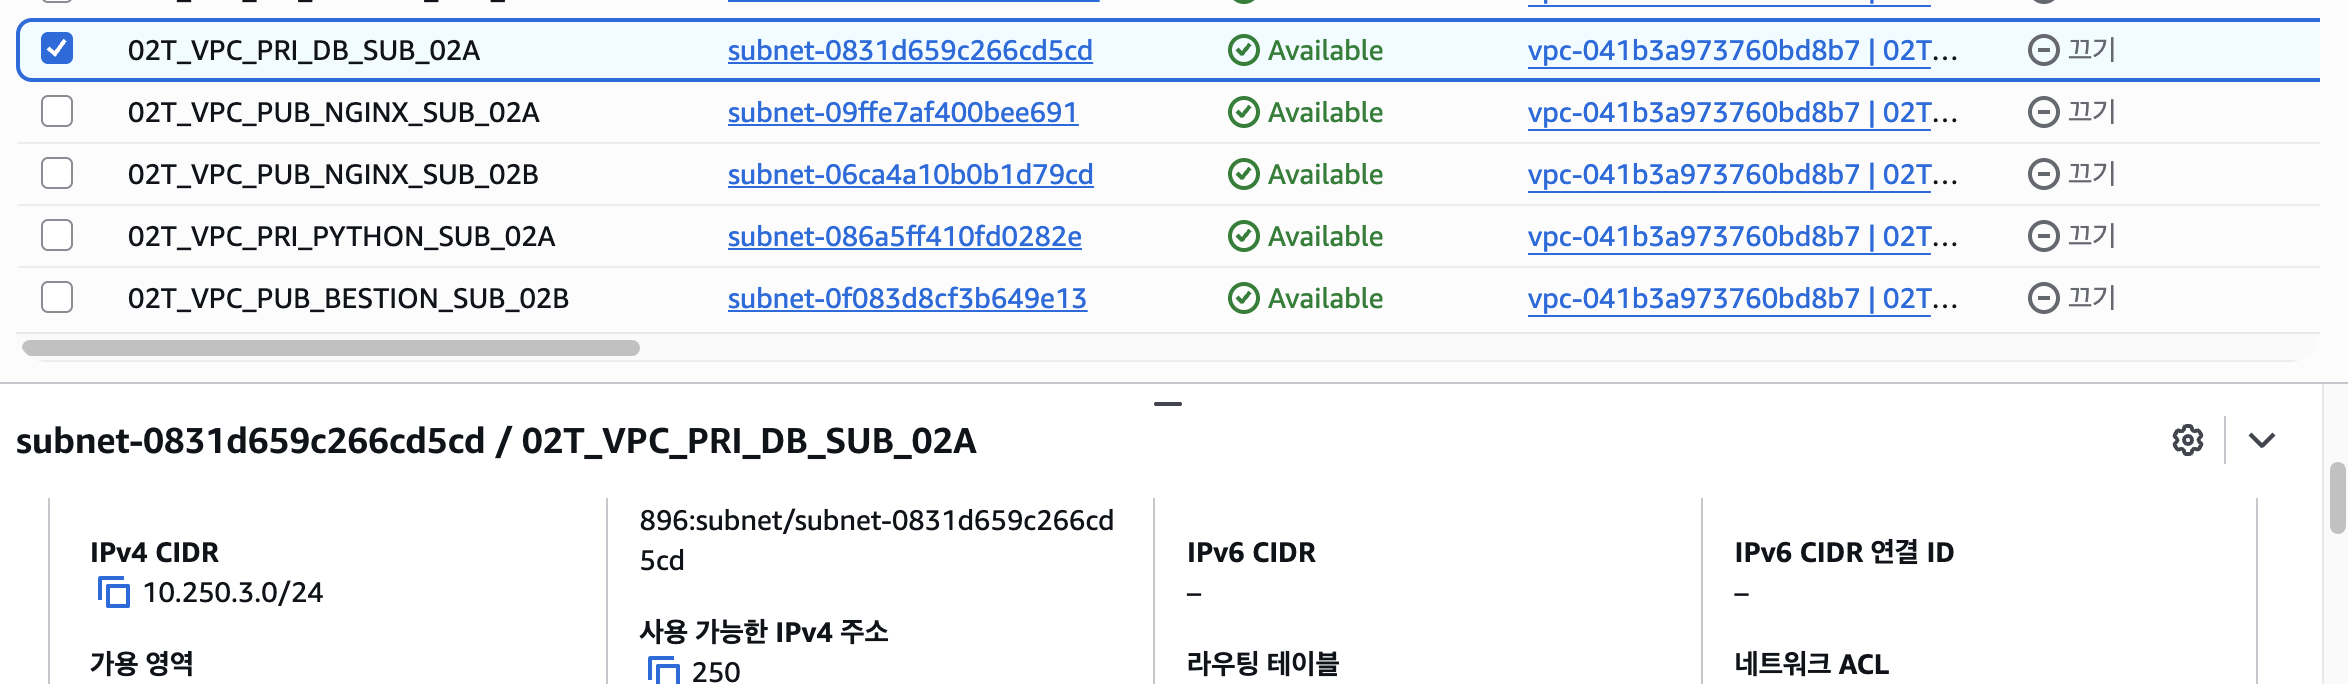
02T_VPC_PRI_DB_SUB_02A
10.250.3.0/24
2-2.NGINX-PUB-2A,2C 생성
NGINX-PUB-2A
2-3.PYTHON-PRI-2A,2C(Private 영역의 서브넷)
PYTHON-PRI-2A
PYTHON-PRI-2B
2-4. DB Subnet DB-PRI-2A
DB-PRI-2A
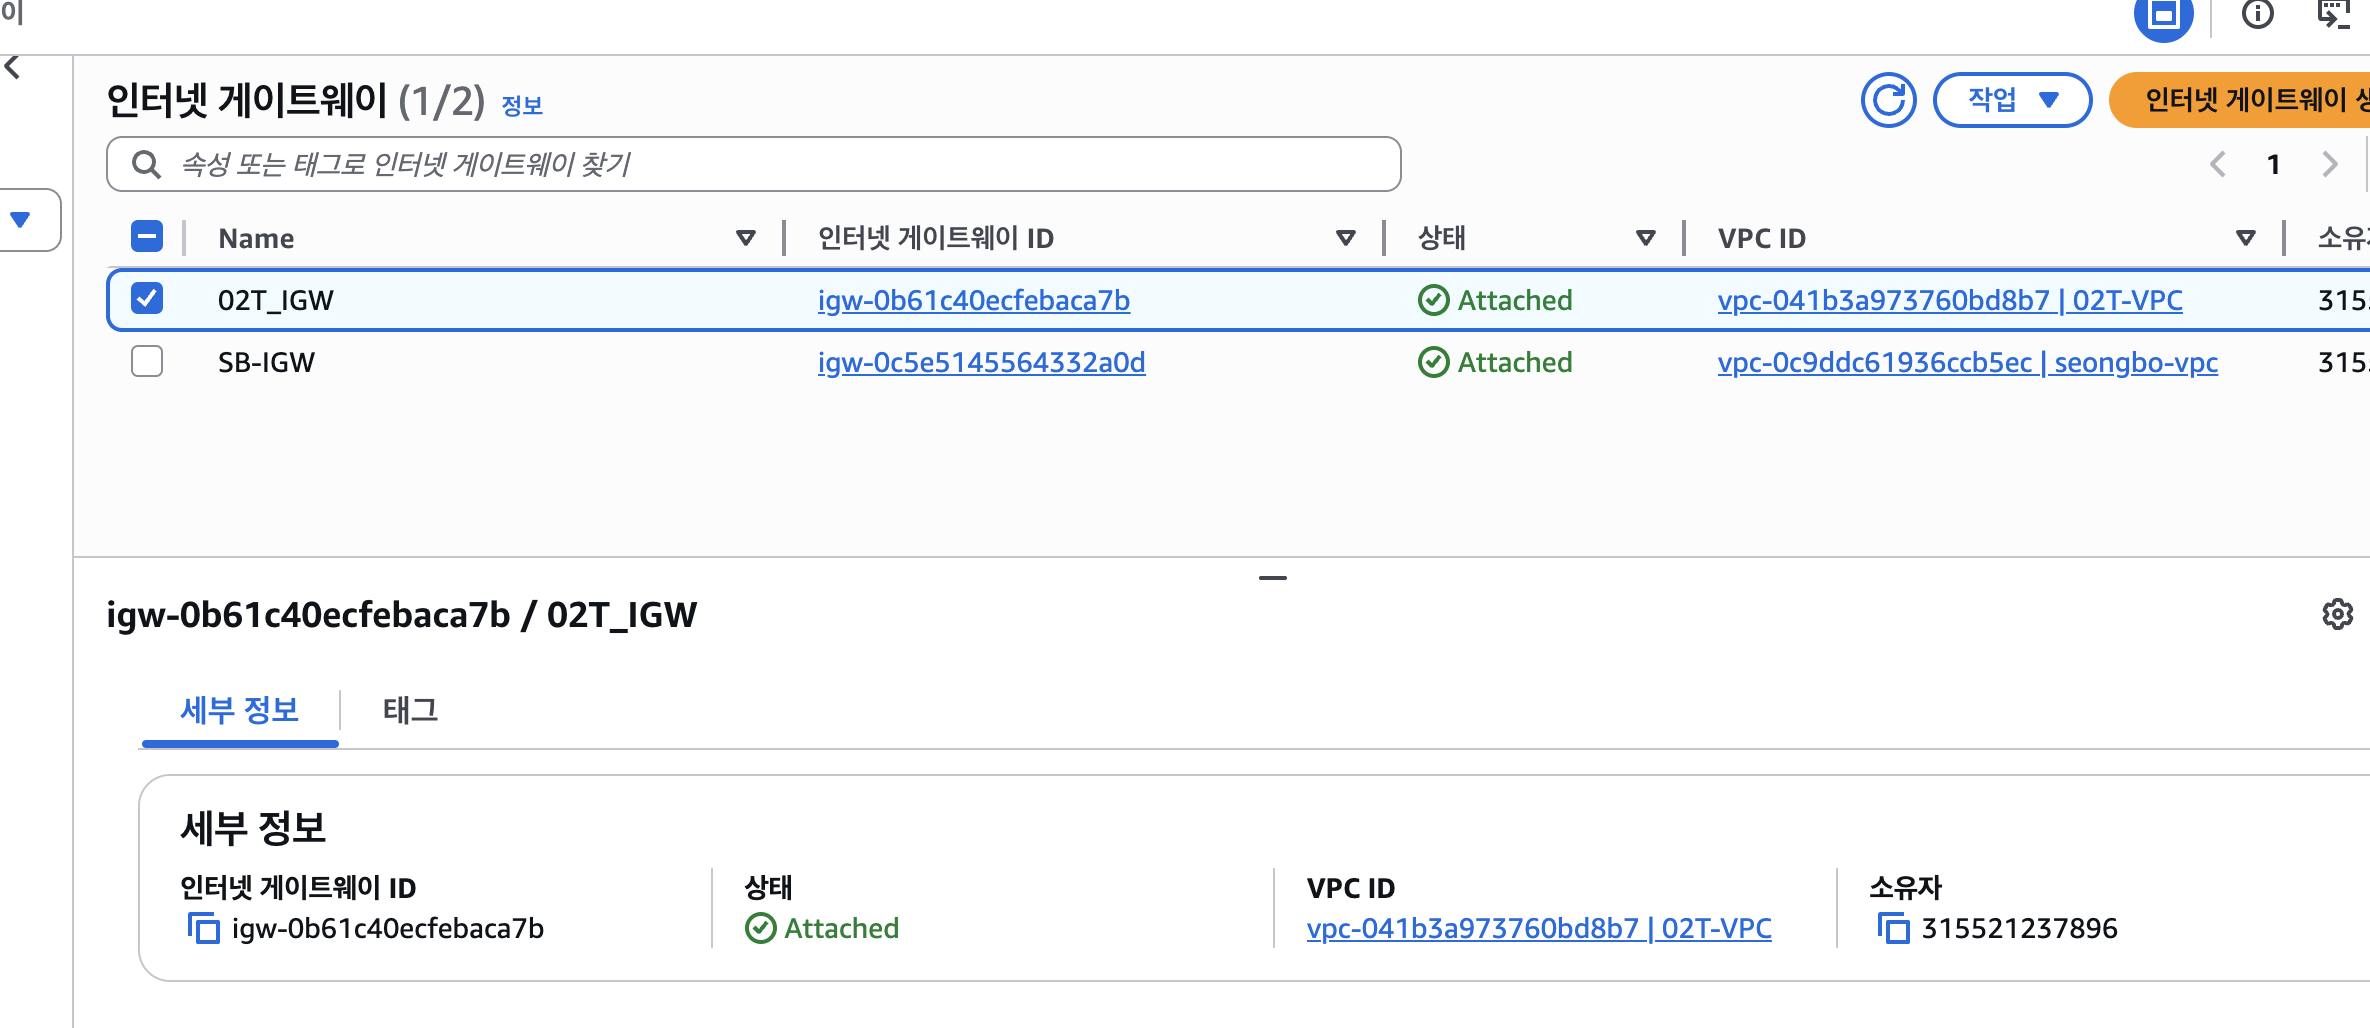
3.Internet Gateway
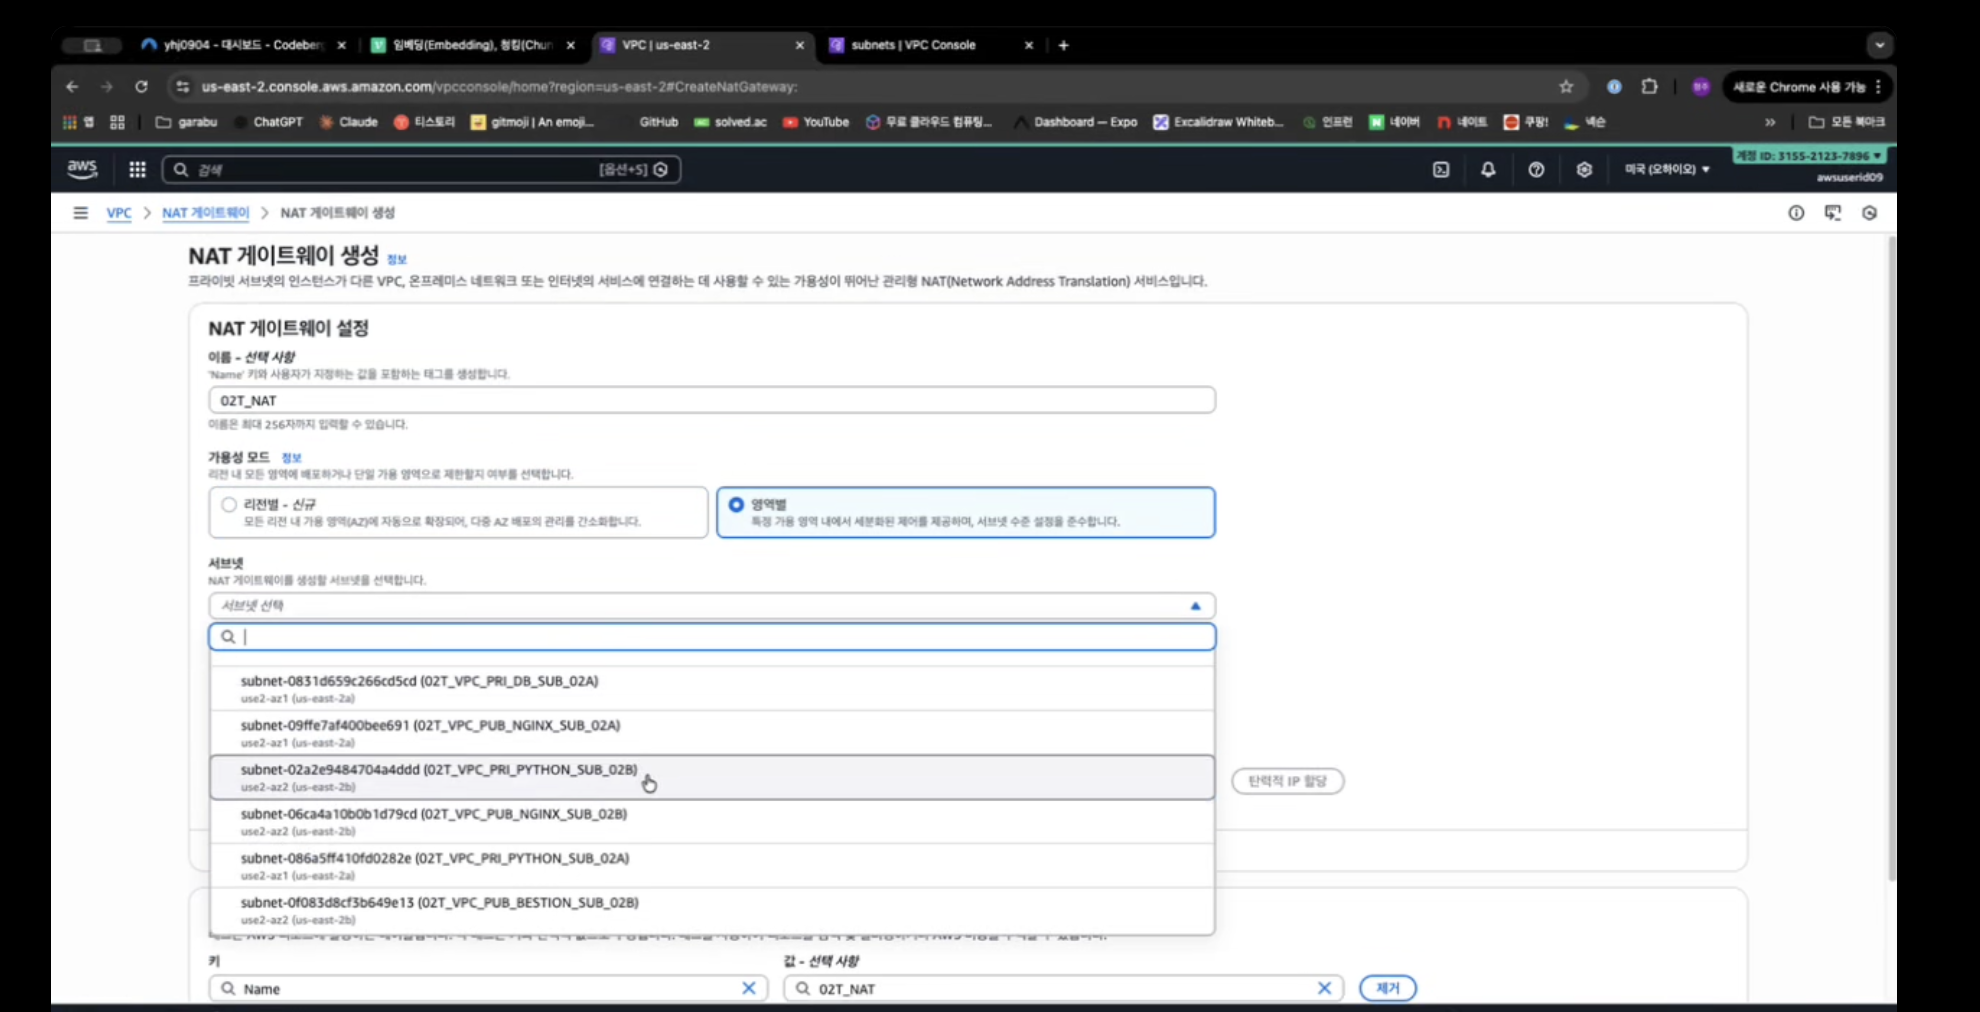
4.NAT Gateway생성
5.Routing Table
5-2.Private 영역의 라우팅 테이블
라우팅 편집
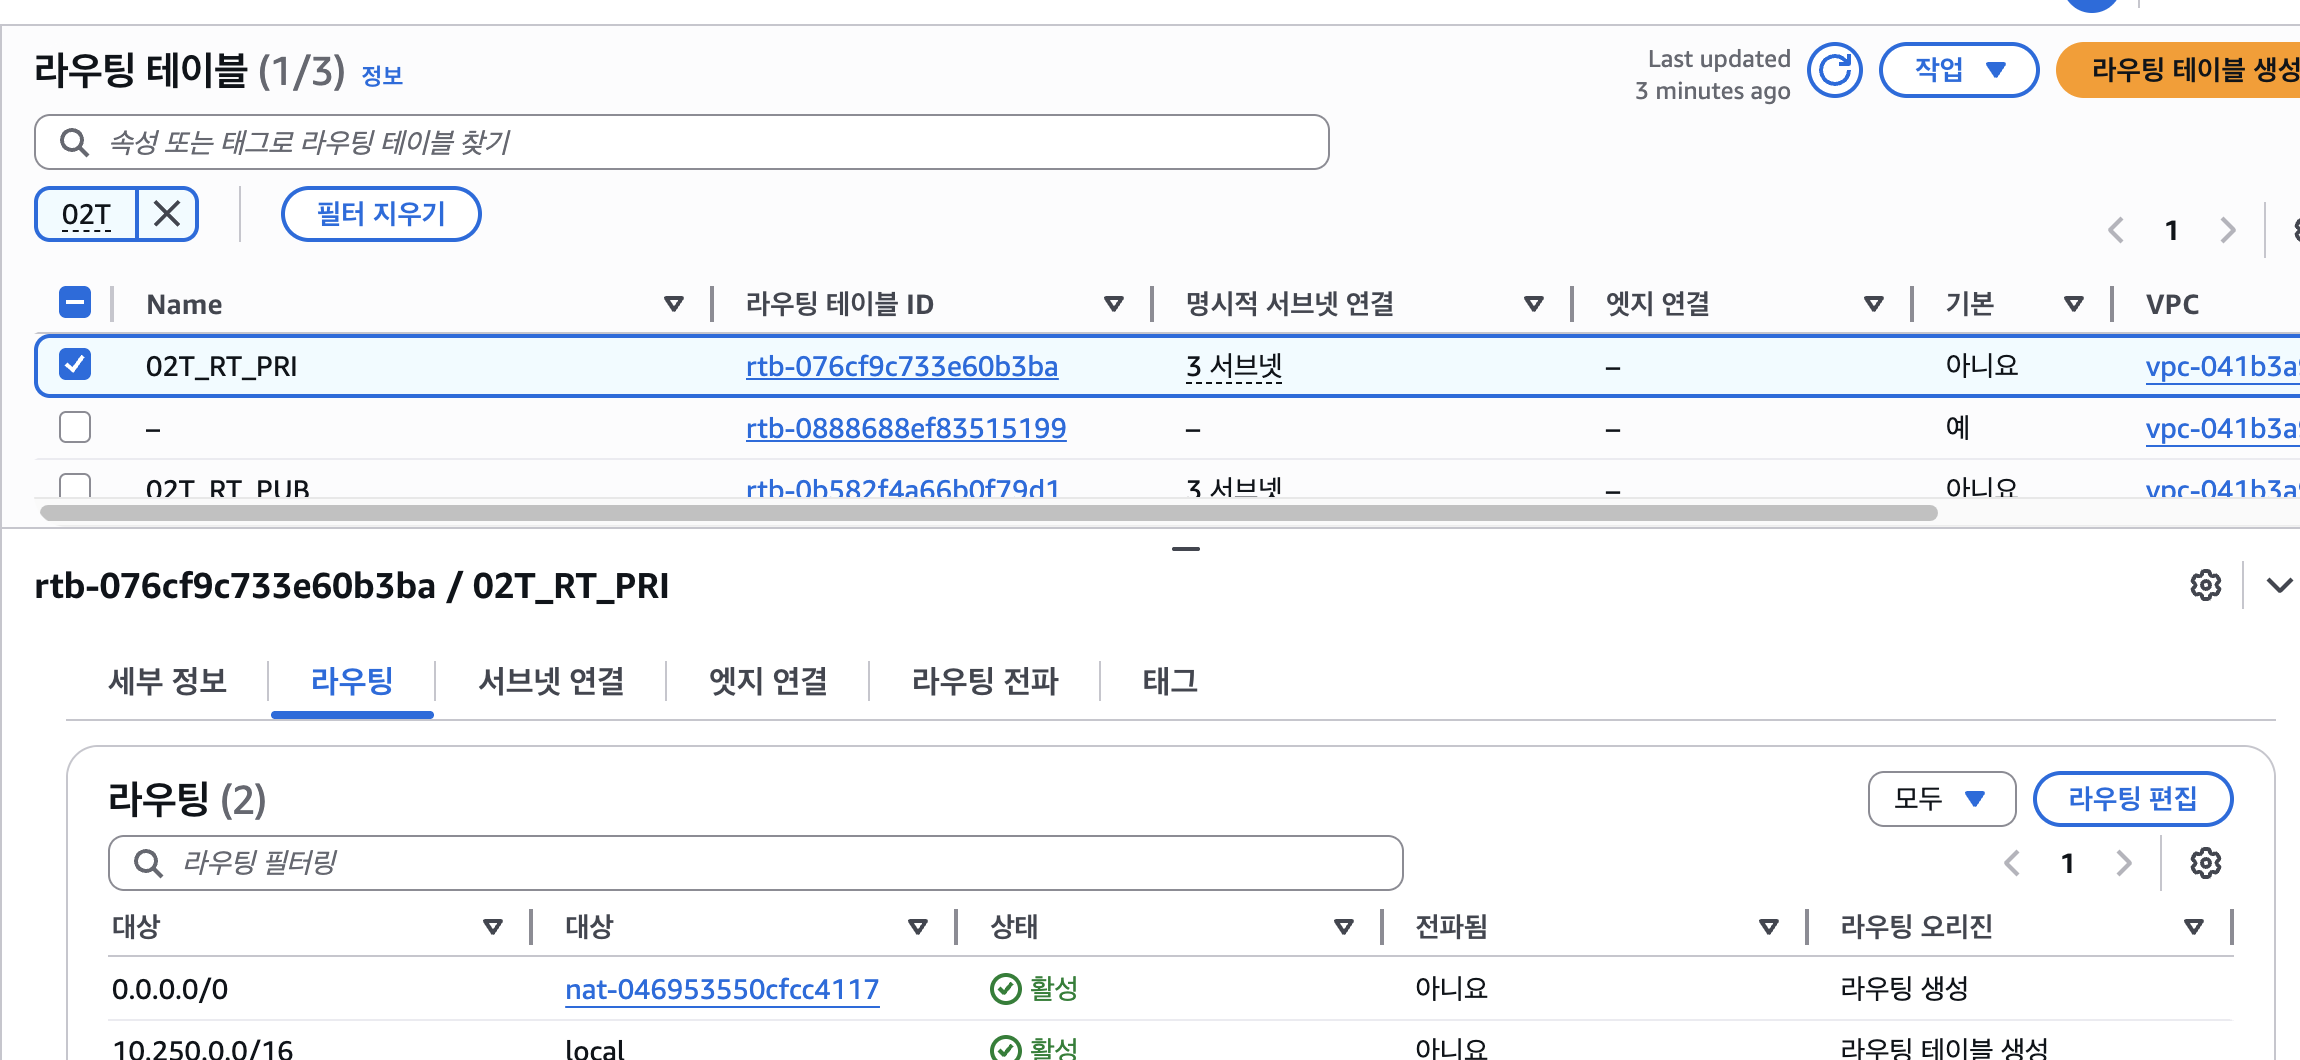
0.0.0.0/0 nat-046953550cfcc4117
서브넷 연결 편집
-
02T_VPC_PRI_PYTHON_SUB_02A
10.250.2.0/24 -
02T_VPC_PRI_PYTHON_SUB_02B
10.250.12.0/24 -
02T_VPC_PRI_DB_SUB_02A
10.250.3.0/24
5-3.Public 영역의 라우팅 테이블 생성
테이블 생성
라우팅 편집
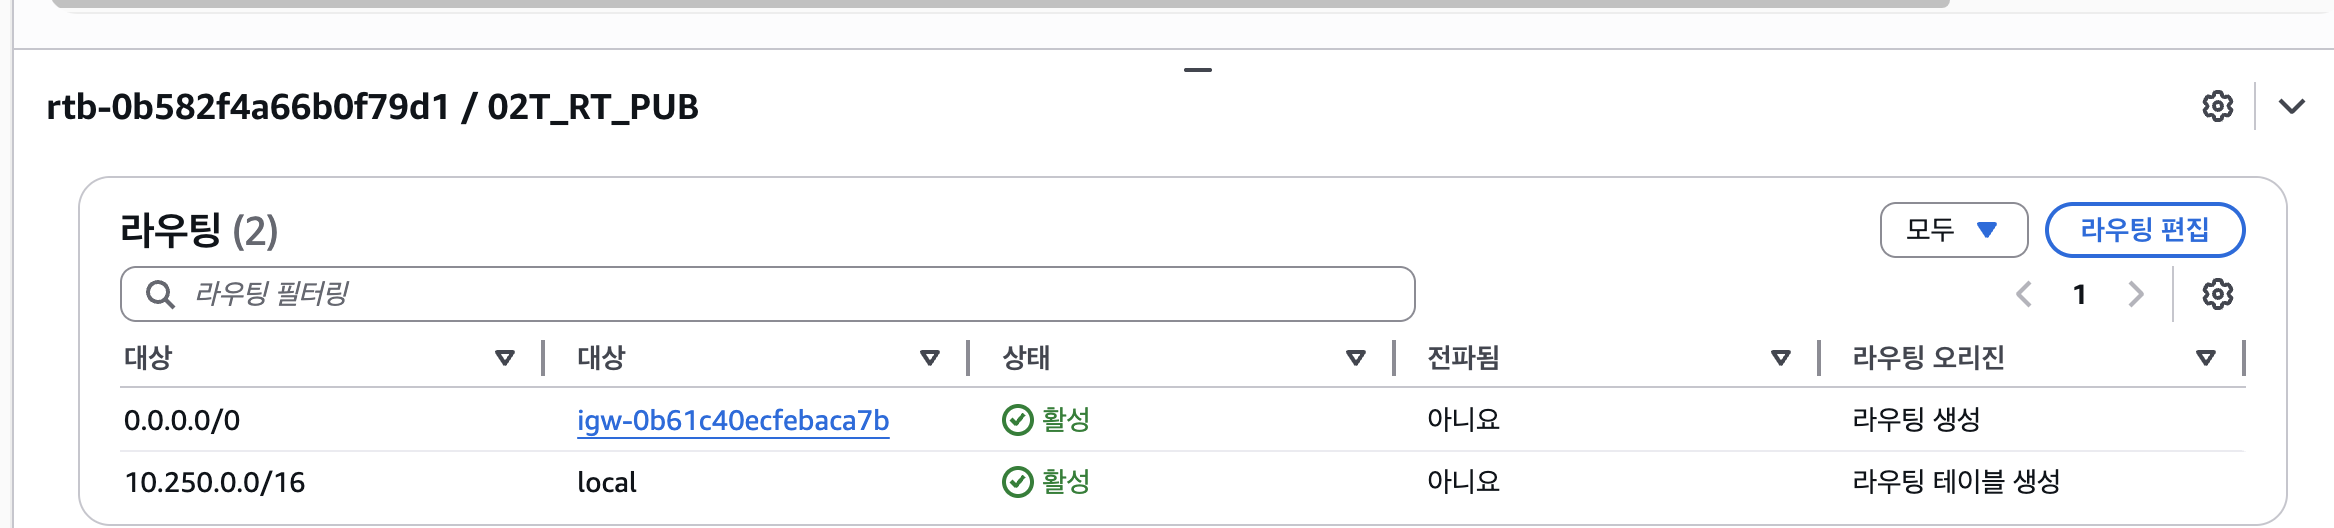
0.0.0.0/0 igw-0b61c40ecfebaca7b
서브넷 연결 편집
-
02T_VPC_PUB_NGINX_SUB_02A
10.250.1.0/24 -
02T_VPC_PUB_NGINX_SUB_02B
10.250.11.0/24 -
02T_VPC_PUB_BESTION_SUB_02B
10.250.13.0/24
6.키페어,bestion 서버
6-2.키페어 만들기

6-3.bestion 서버
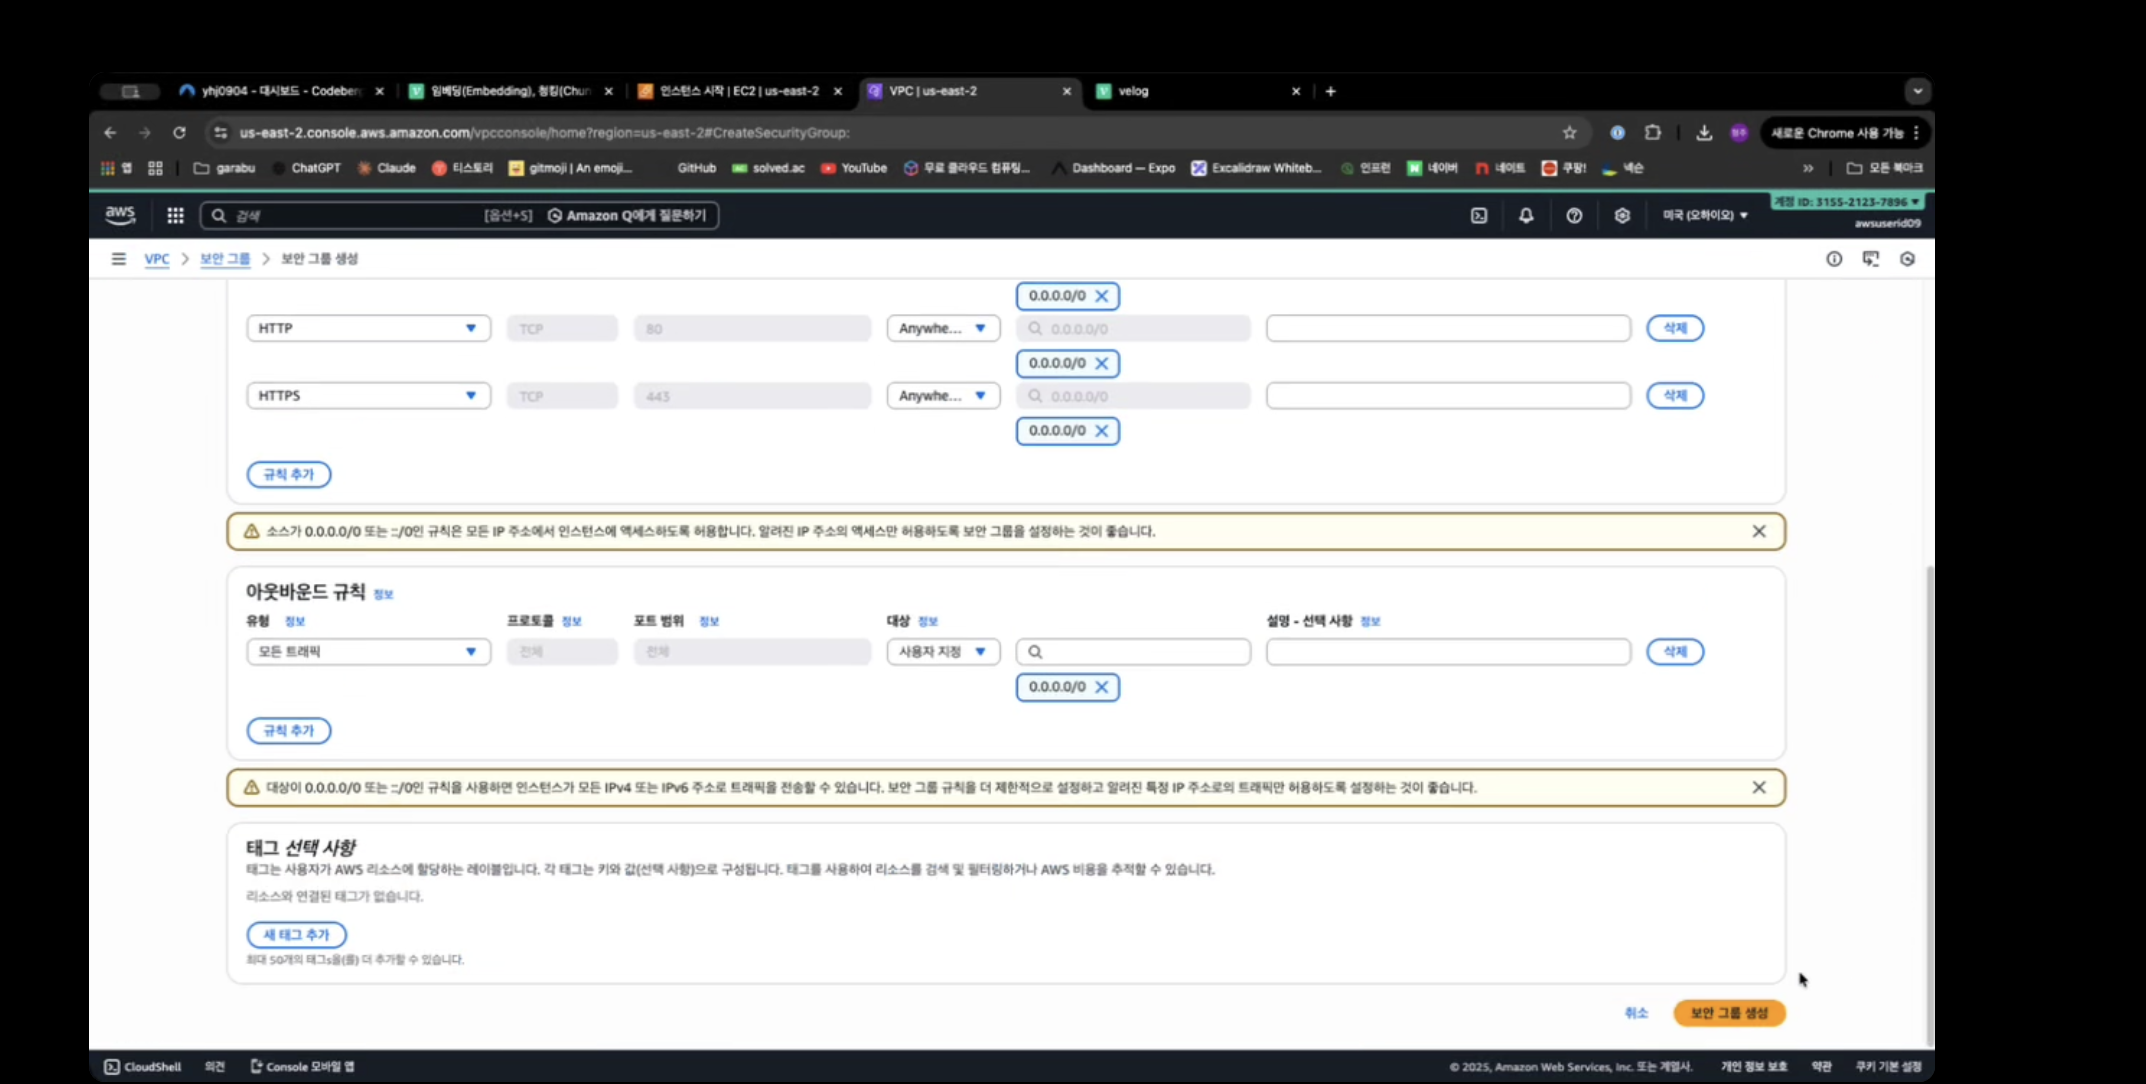
6-4.보안그룹생성
그룹생성
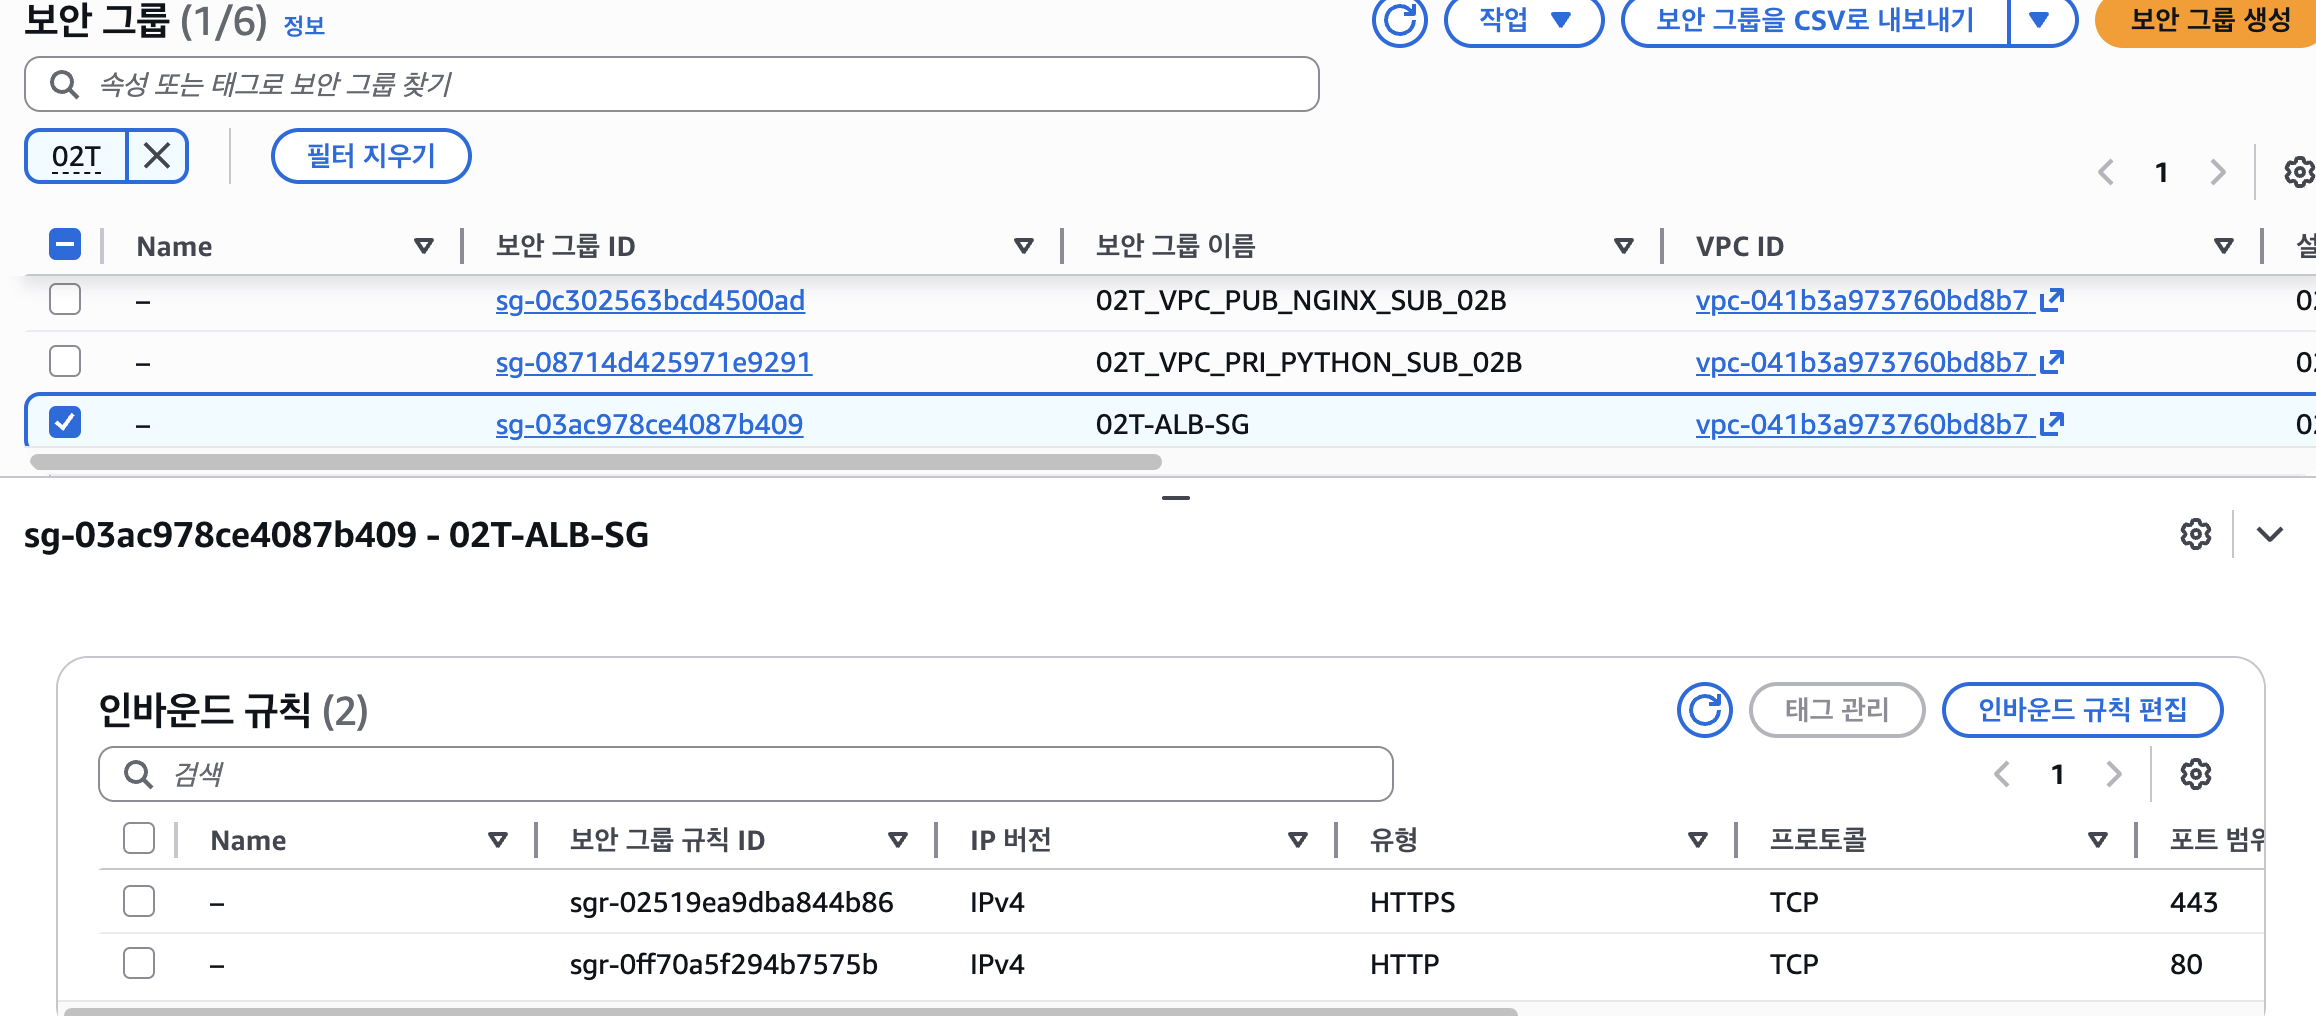
인바운드 규칙 추가
6-5.인스턴스 생성
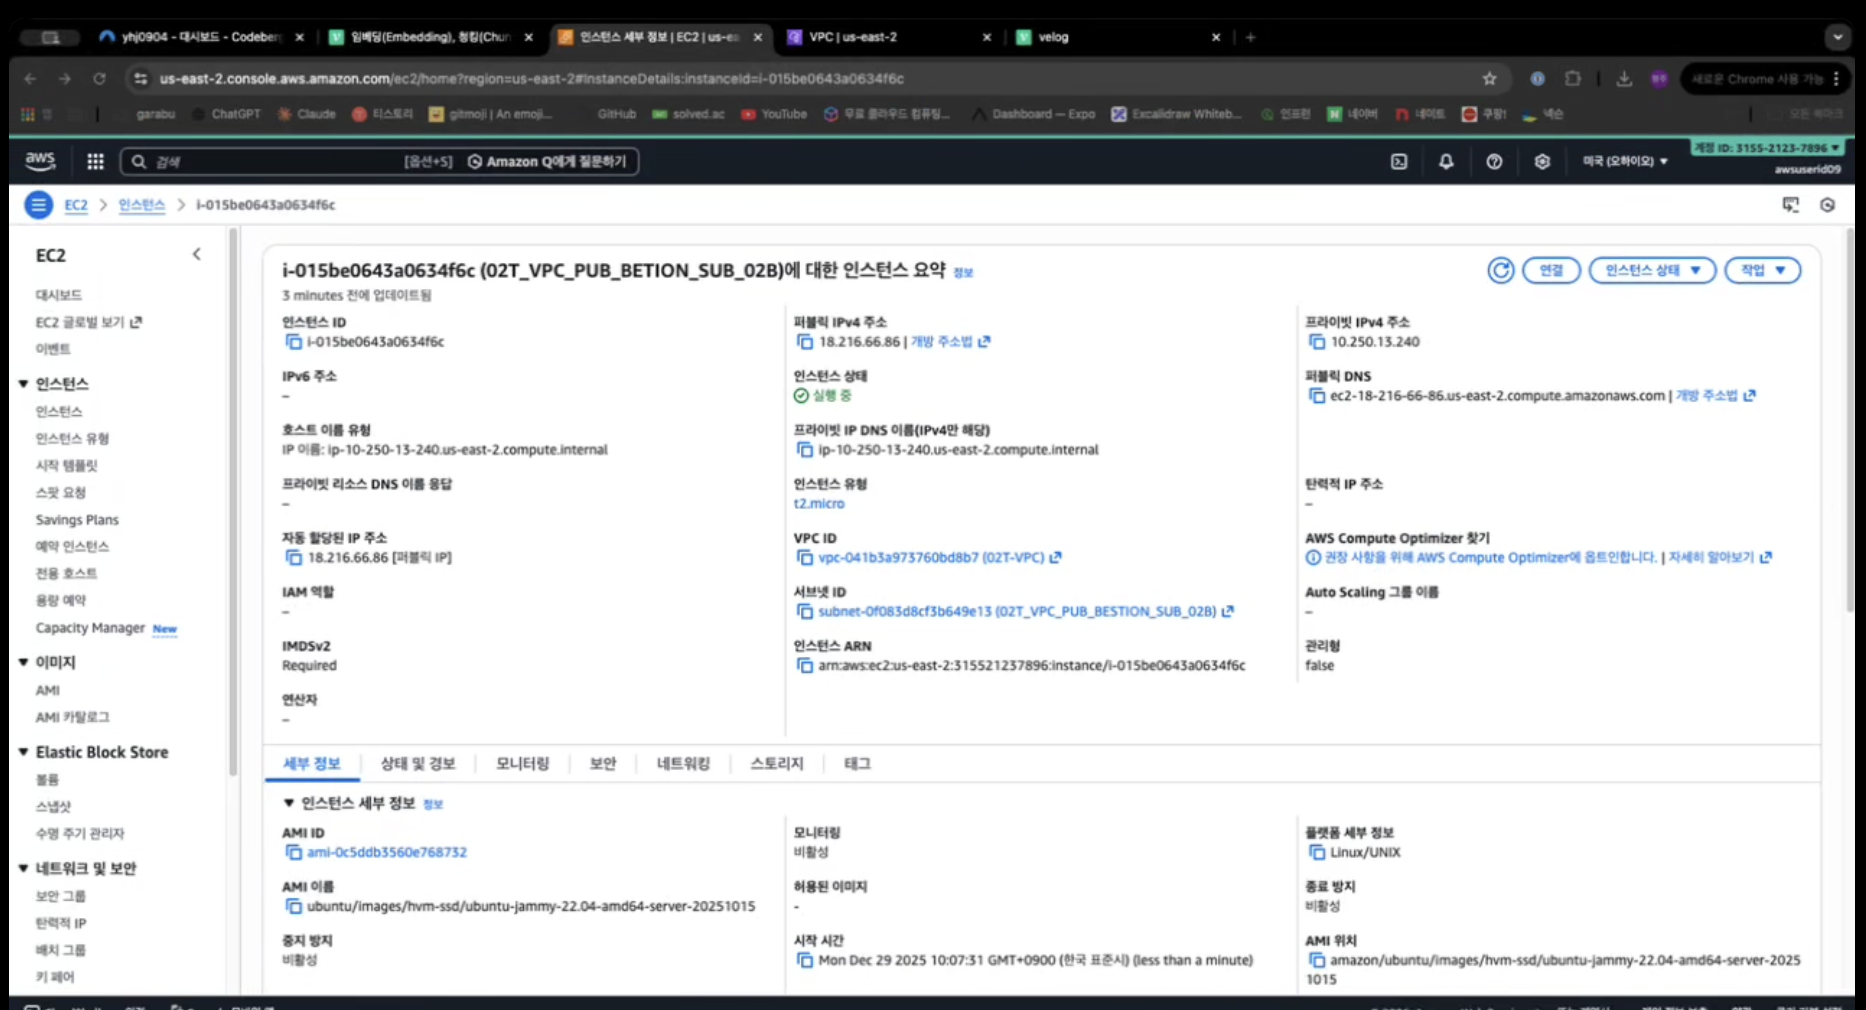
bestion 서버 생성
7. EC2 생성(Nginx Web Server)네트워크 설계
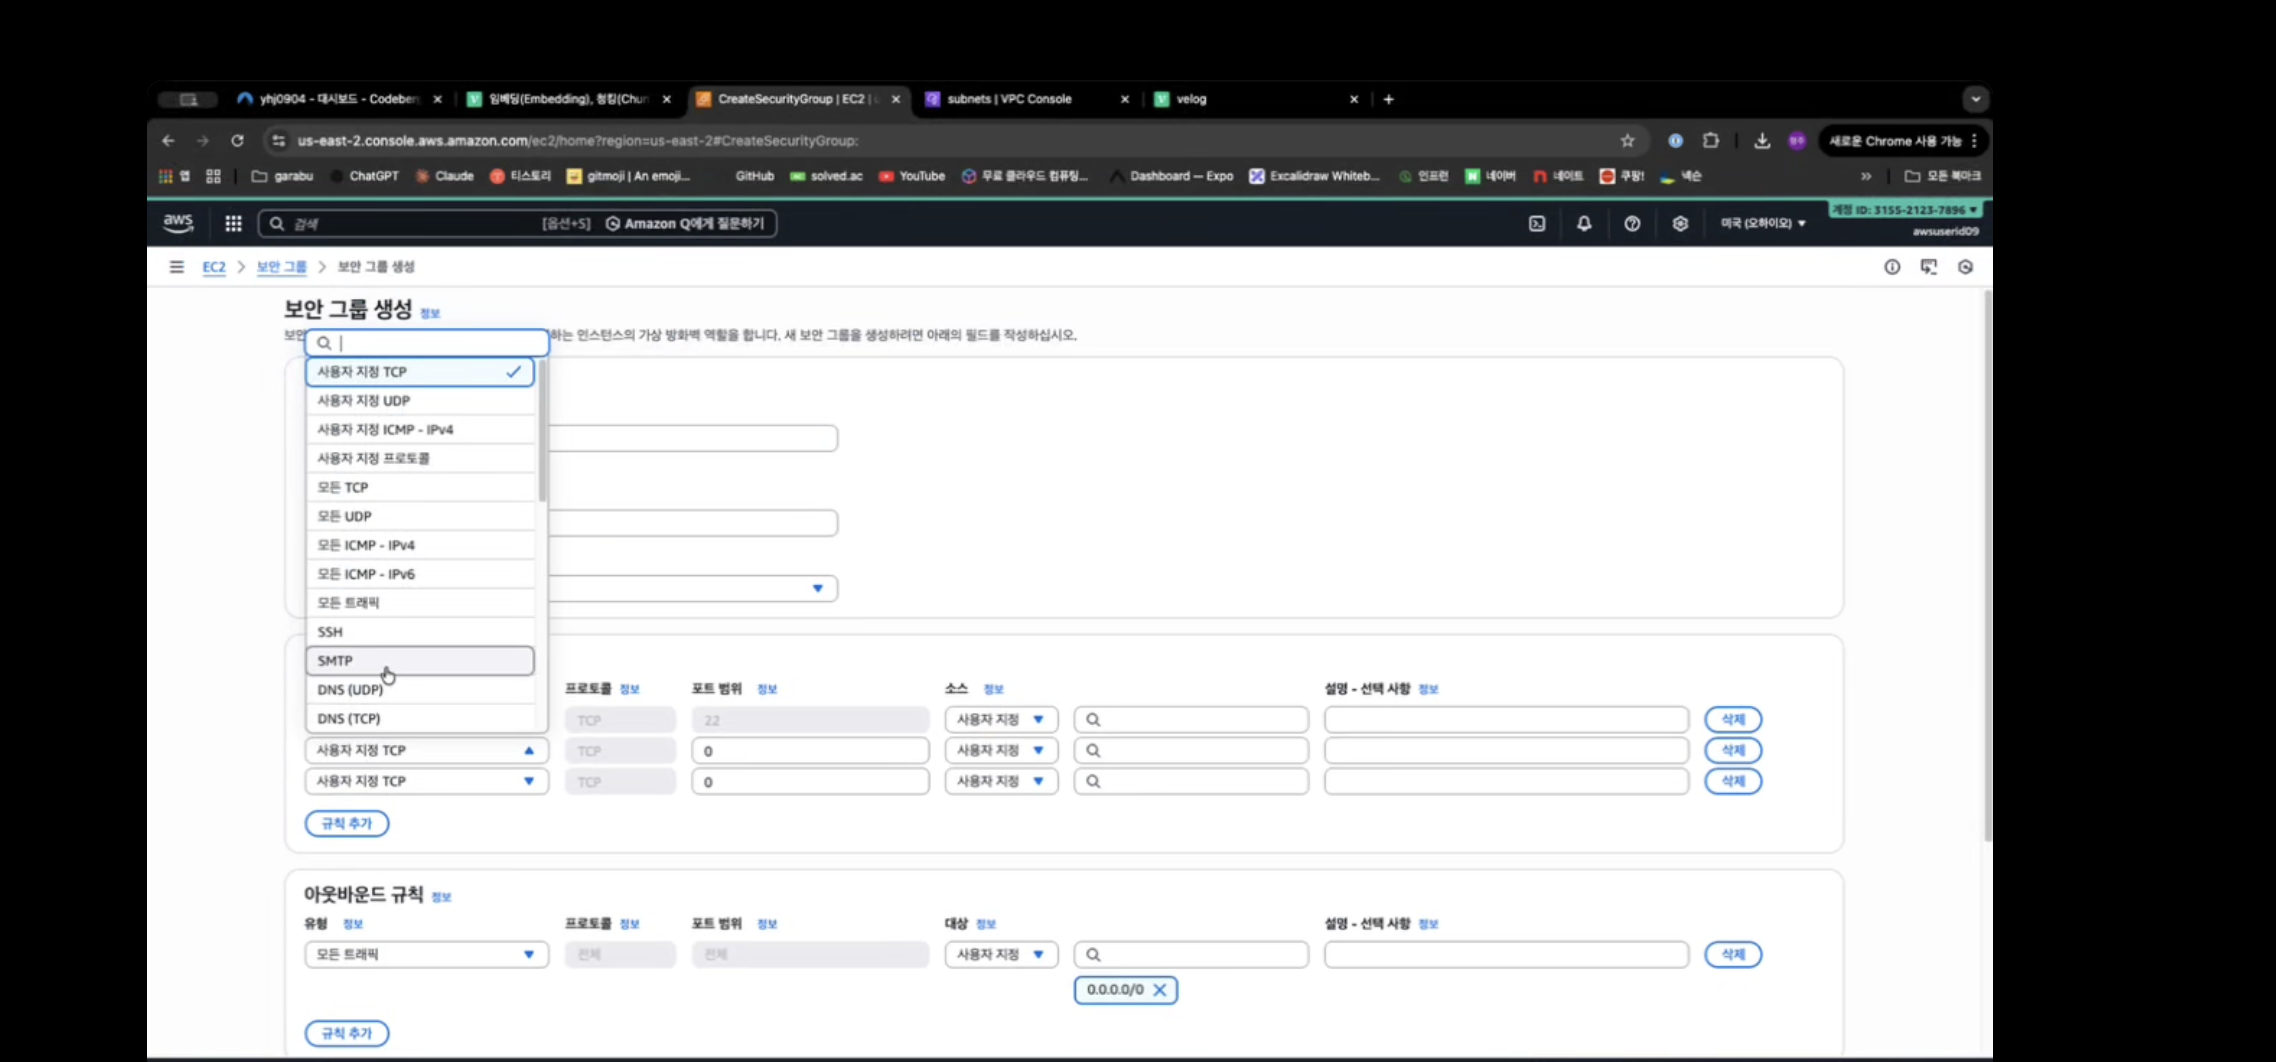
7-2.보안그룹 생성
7-3.Web 전용 서버 생성 (VEC-PRD-VPC-NGINX-PUB-2A,2B)

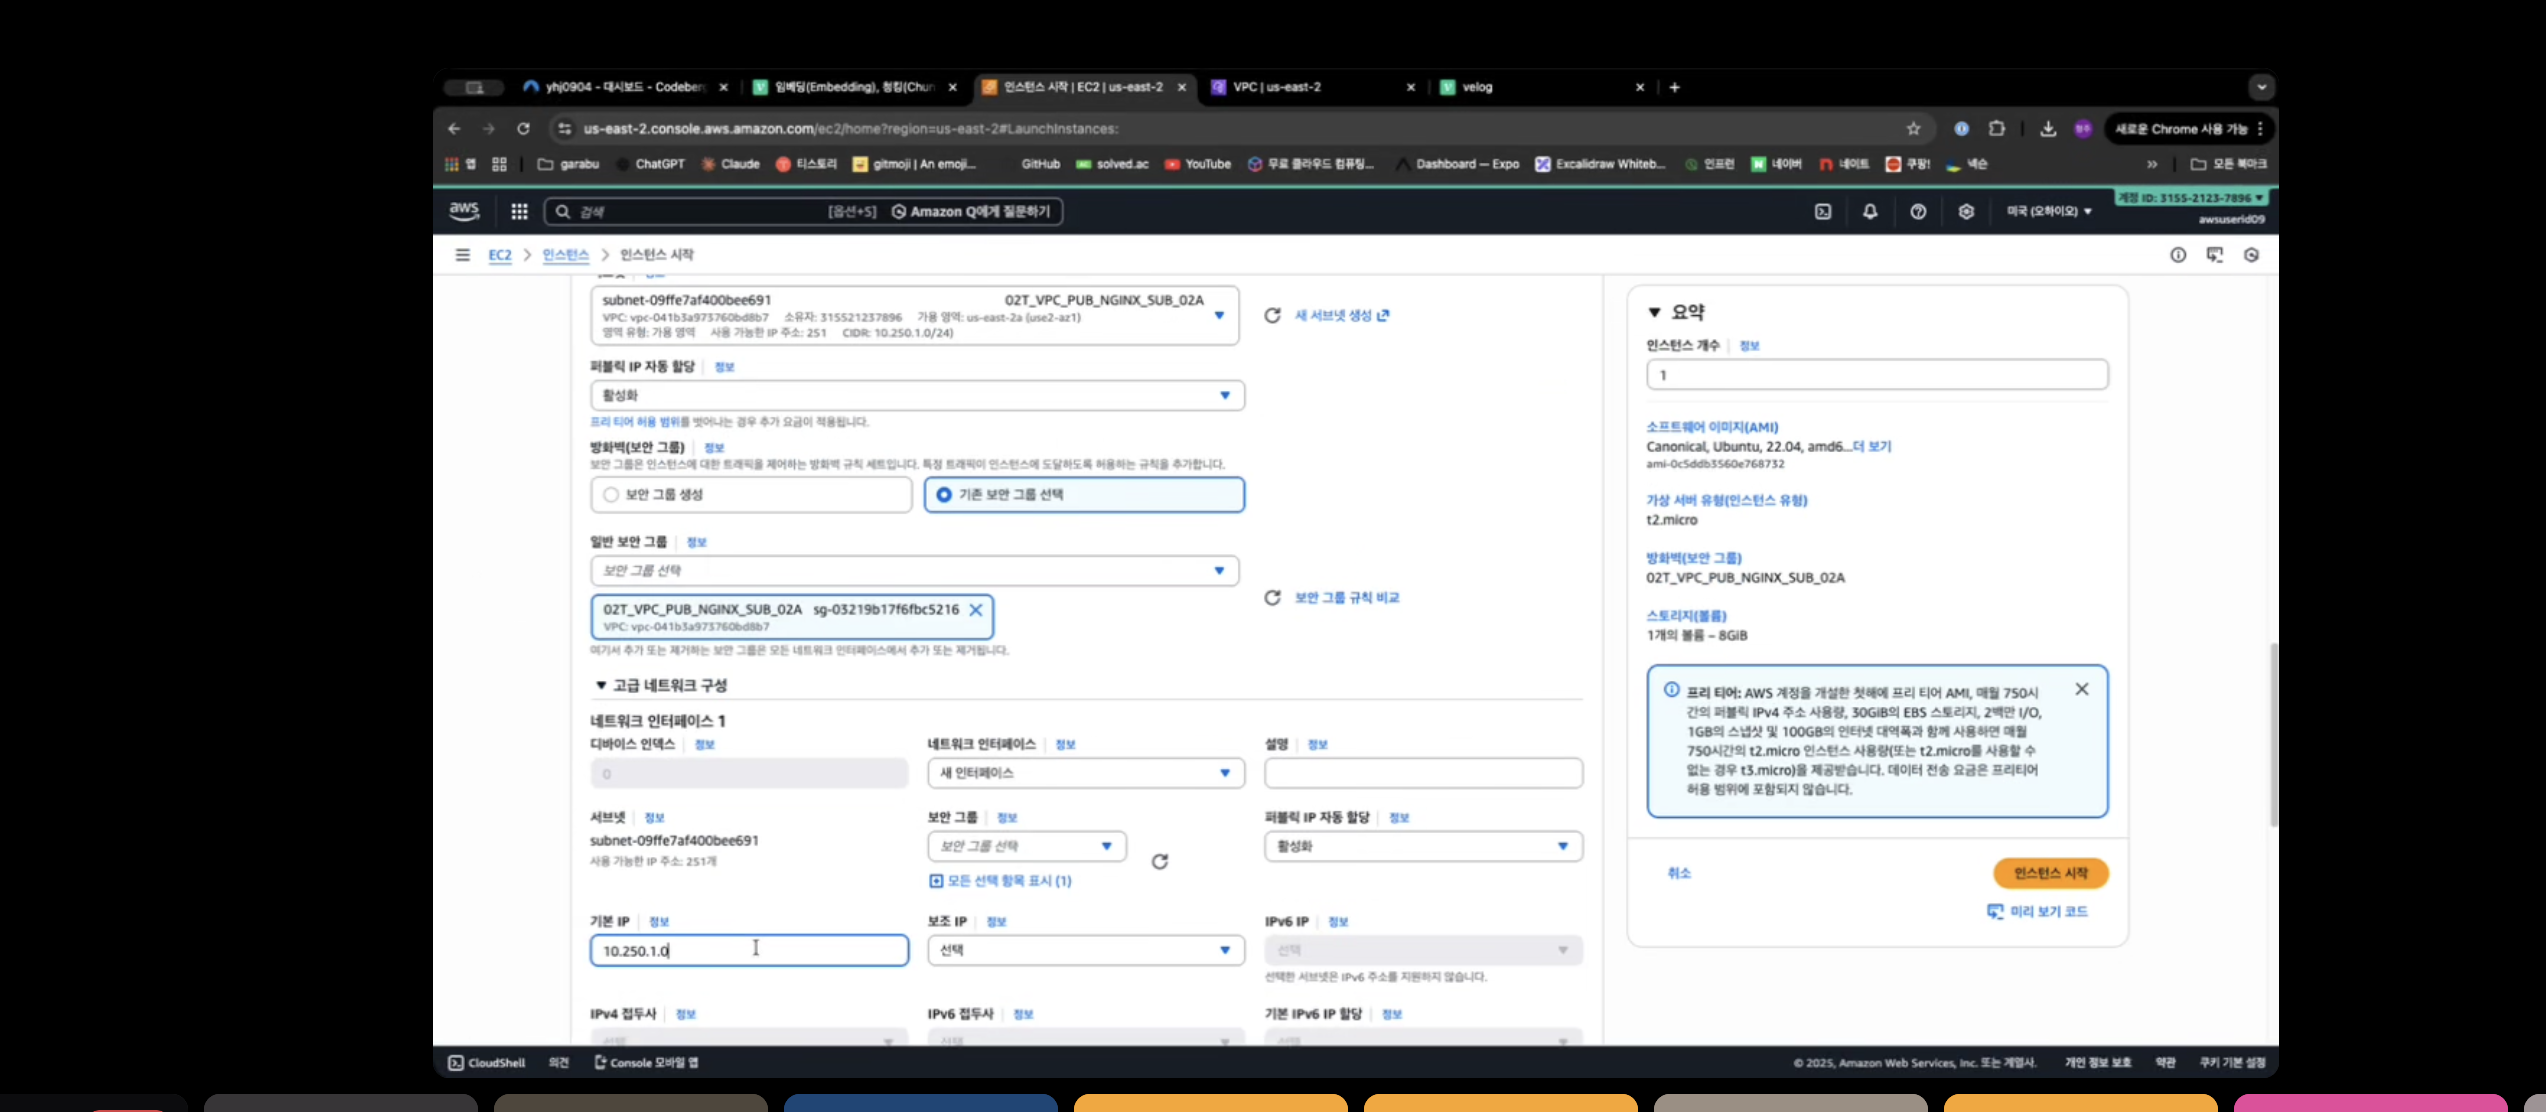
nginx 2a 인스턴스 생성
7-5. SSH 클라이언트로 서버접속
7-6. Nginx 설치
- ubuntu@ip-10-250-11-240:~$ sudo vi /etc/apt/sources.list.d/nginx.list
--->
- deb [signed-by=/usr/share/keyrings/nginx-archive-keyring.gpg] https://nginx.org/packages/ubuntu jammy nginx
- deb-src [signed-by=/usr/share/keyrings/nginx-archive-keyring.gpg] https://nginx.org/packages/ubuntu jammy nginx
--->이거 그대로 입력
- ubuntu@ip-10-250-11-240:~$ curl -fsSL https://nginx.org/keys/nginx_signing.key | sudo gpg --dearmor -o/usr/share/keyrings/nginx-archive-keyring.gpg
-
ubuntu@ip-10-250-11-240:~$ sudo apt update
-
sudo apt install nginx
-
ubuntu@ip-10-250-11-240:~$ nginx -v
nginx version: nginx/1.28.1 -
ubuntu@ip-10-250-11-240:~$ sudo systemctl start nginx
-
ubuntu@ip-10-250-11-240:~$ sudo systemctl status nginx
-
nginx.service - nginx - high performance web server
Loaded: loaded (/lib/systemd/system/nginx.service; enabled; vendor preset: enabled)
Active: active (running) since Mon 2025-12-29 01:37:05 UTC; 6s ago
Docs: https://nginx.org/en/docs/
Process: 1935 ExecStart=/usr/sbin/nginx -c ${CONFFILE} (code=exited, status=0/SUCCESS)
Main PID: 1936 (nginx)
Tasks: 2 (limit: 1125)
Memory: 2.5M
CPU: 9ms
CGroup: /system.slice/nginx.service
├─1936 "nginx: master process /usr/sbin/nginx -c /etc/nginx/nginx.conf"
└─1937 "nginx: worker process" "" "" "" "" "" "" "" "" "" "" "" "" "" "" ""
8.Load Balancer
8-1.Application LoadBalancer
ALB 보안그룹 생성
ALB 대상그룹 생성
ALB 생성
Route 53 수정 > 도메인 사용
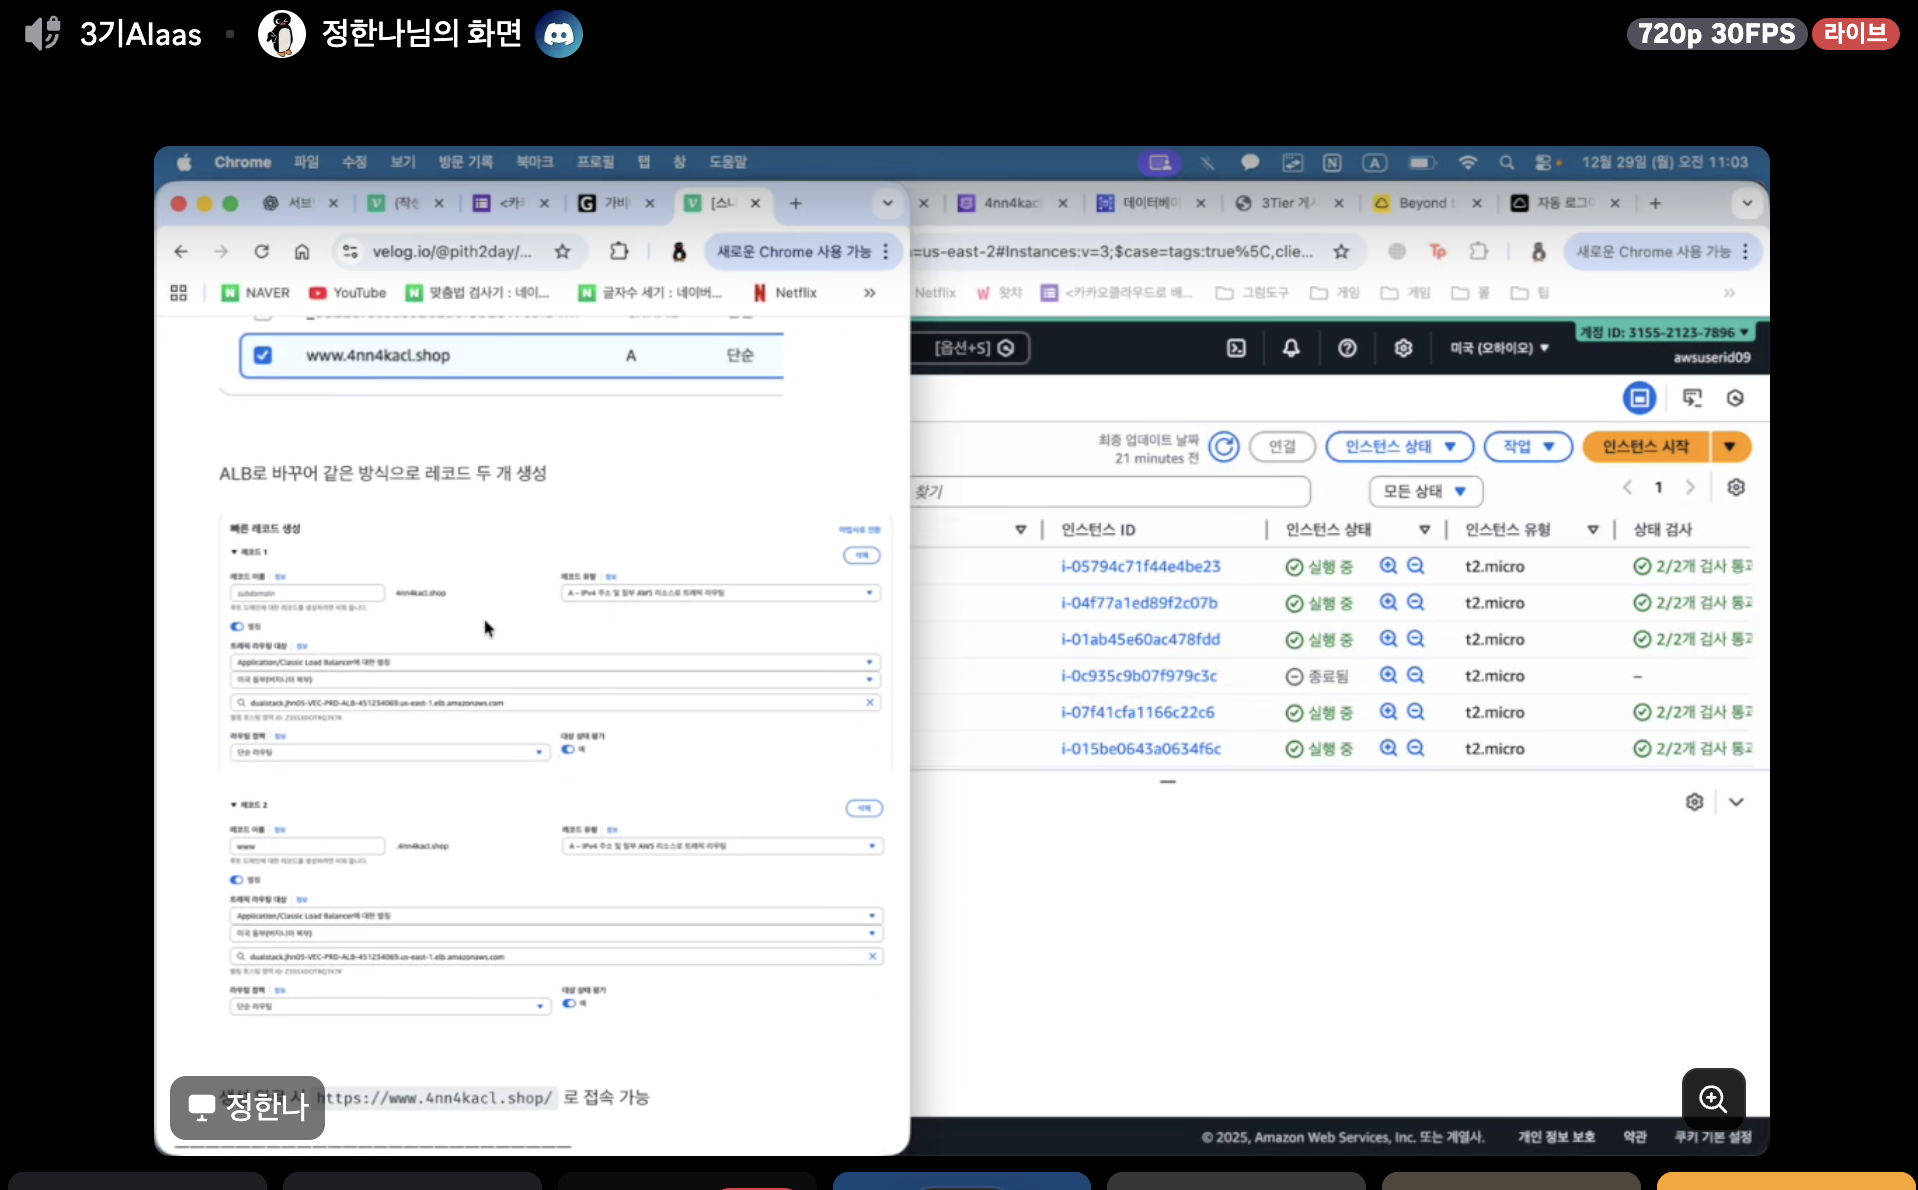
, www 사용
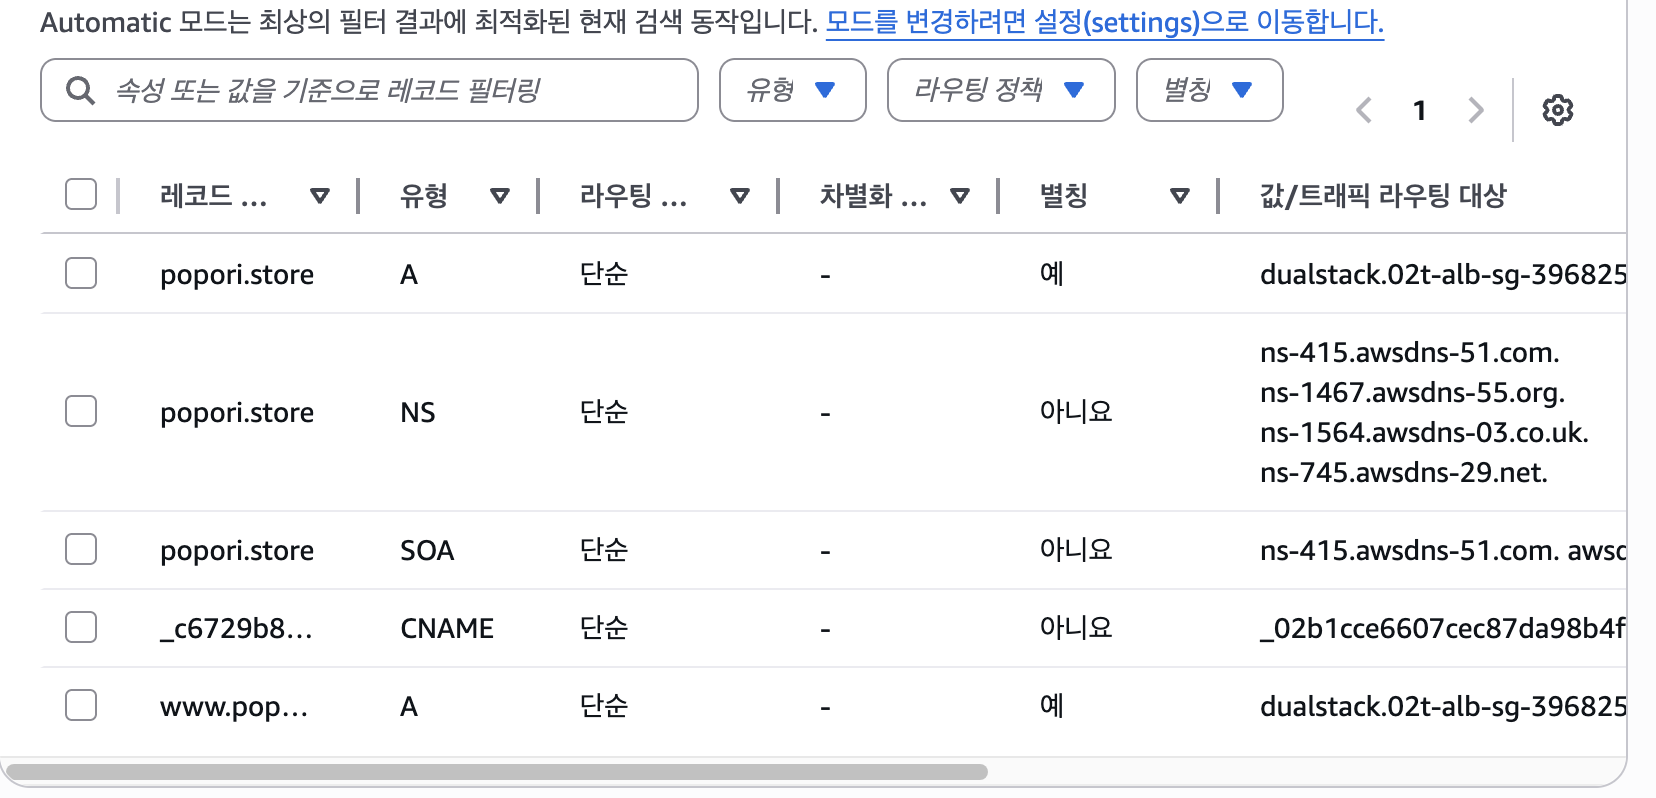
생성확인
9.Route53 레코드
9-1.보안그룹 생성
9-3.Was 전용 서버 생성 (02T_VPC_PRI_PYTHON_SUB_02A,02B)
10. 데이터베이스 만들기
10-1. 보안그룹 생성
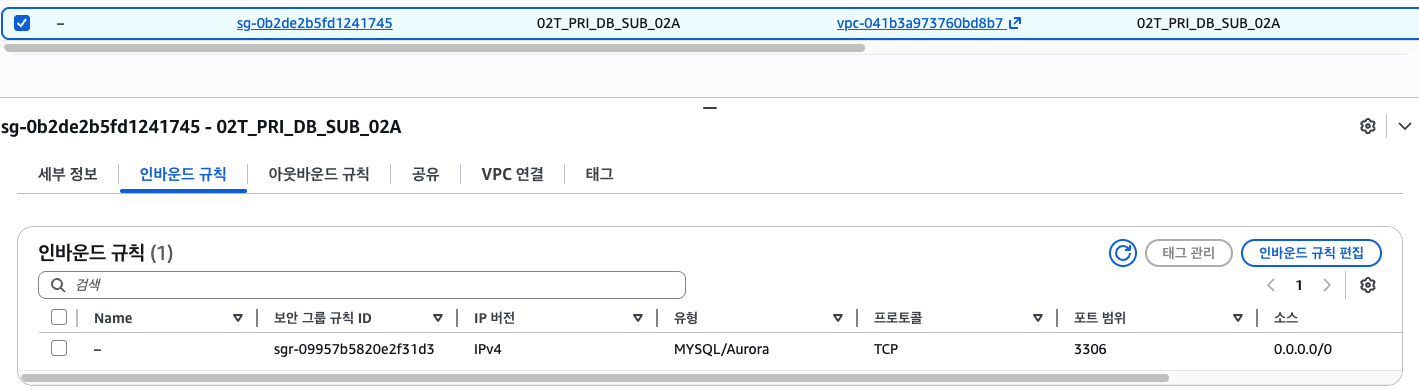
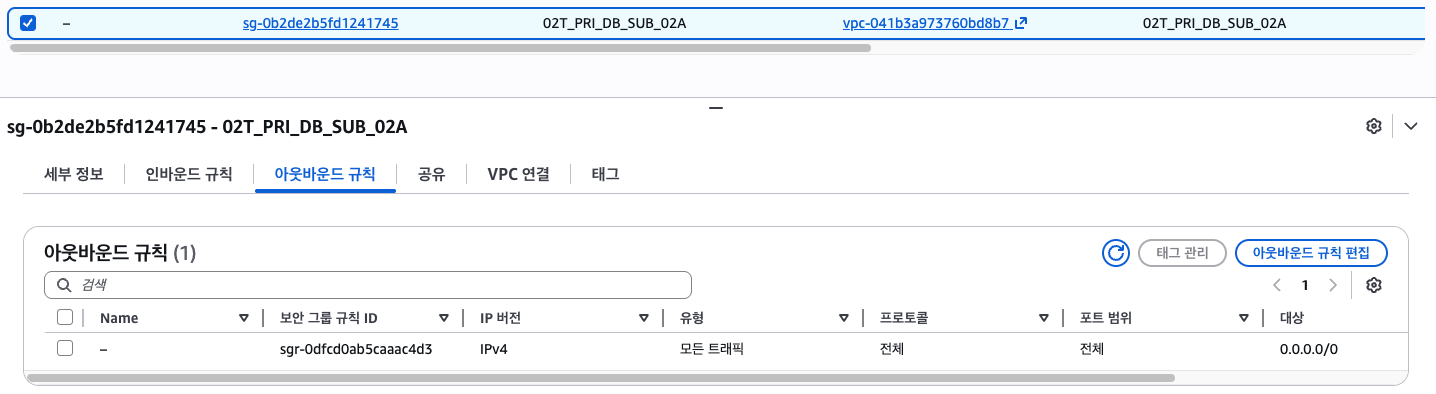
10-2. RDS 생성
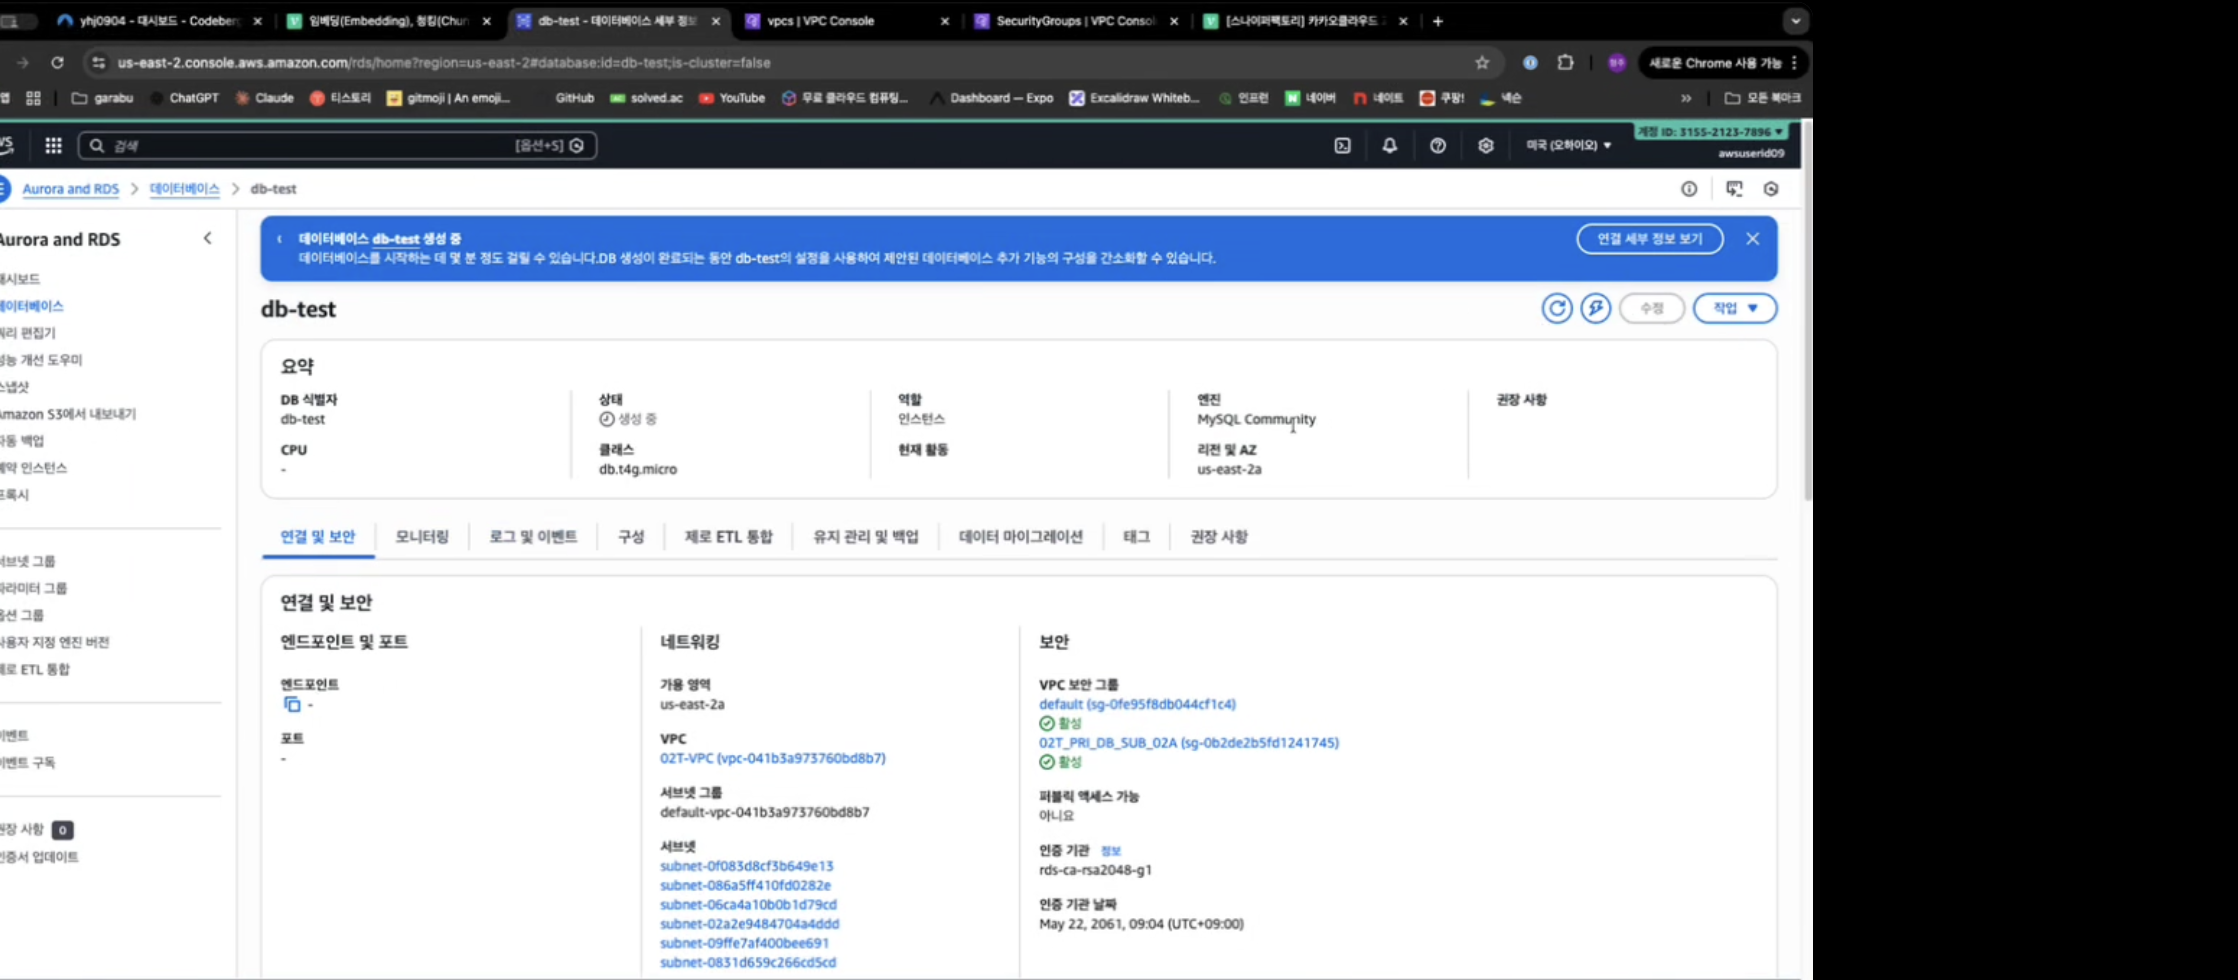

엔드포인트 생성확인
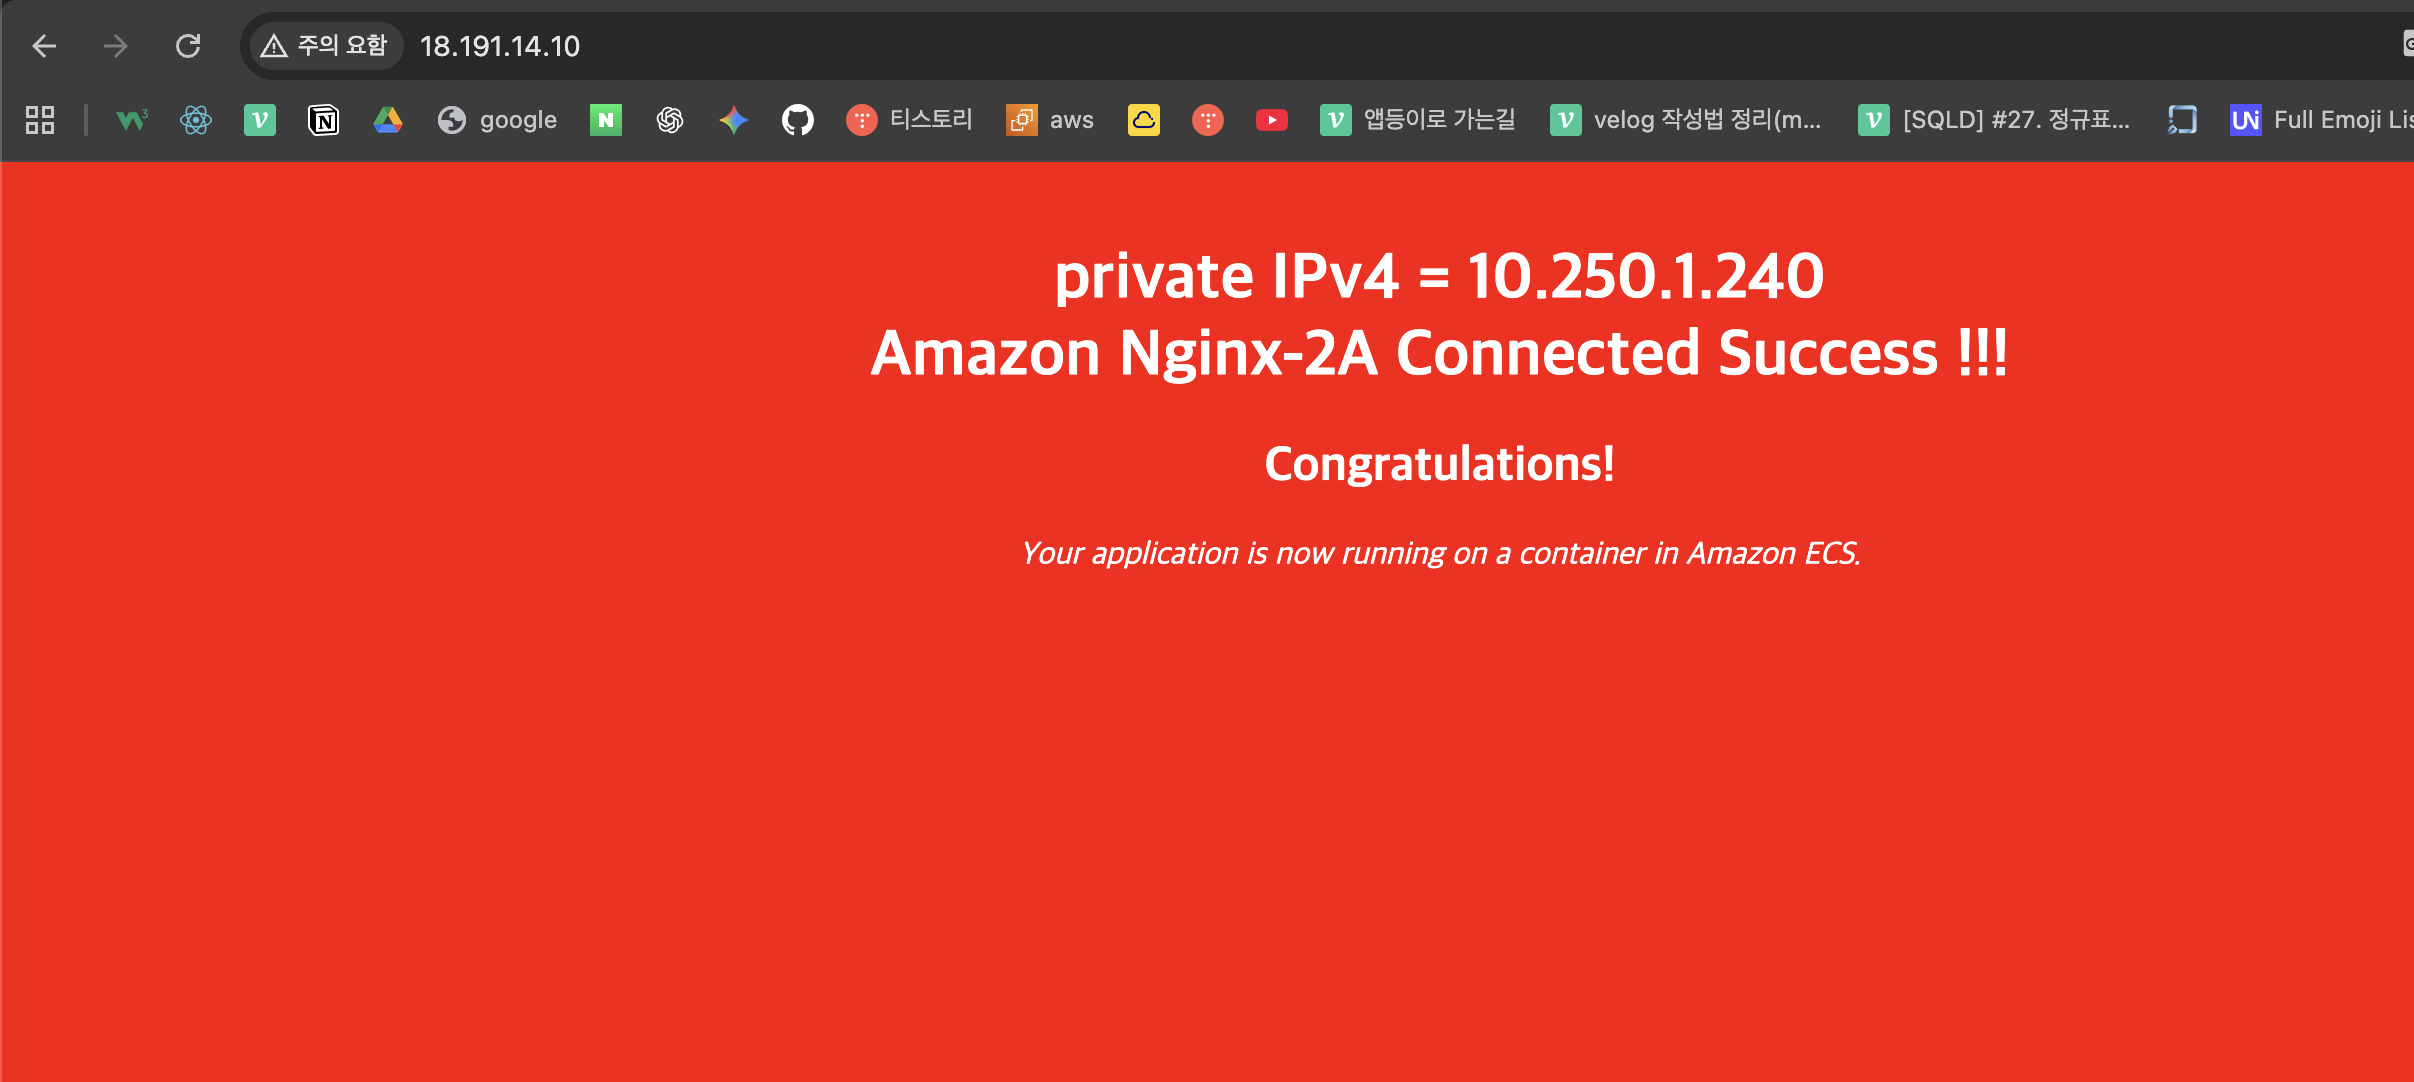
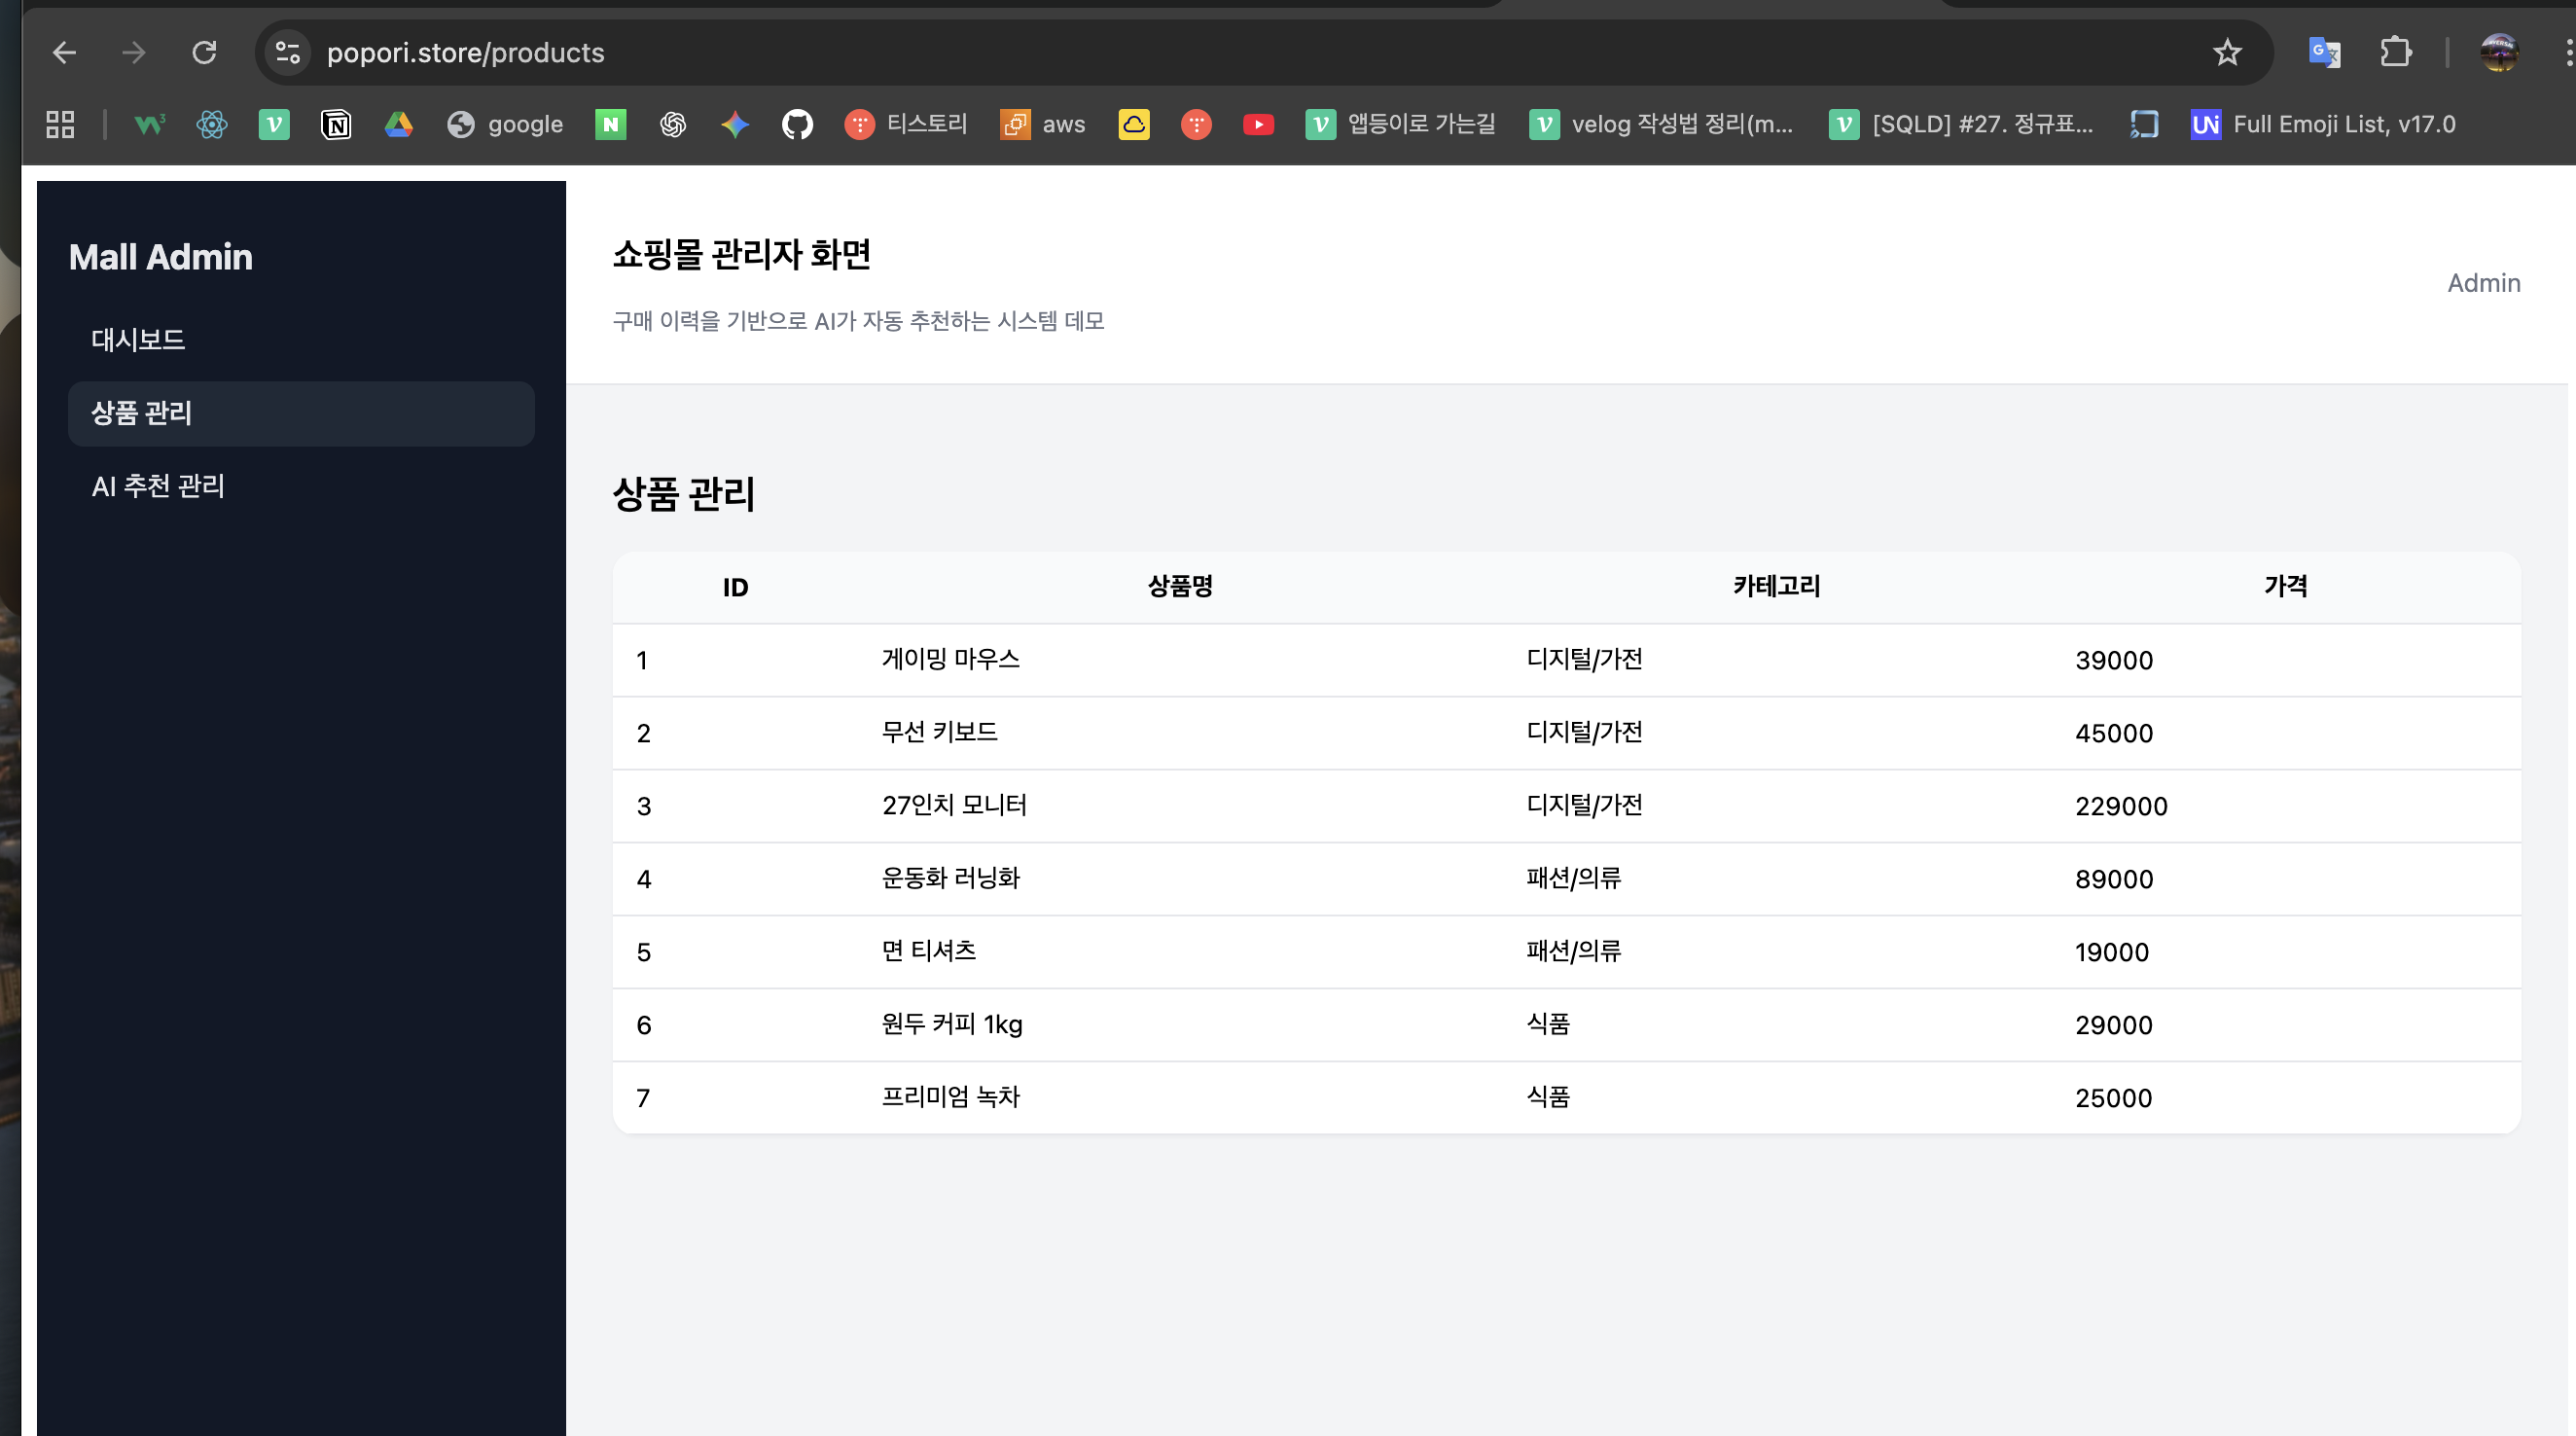
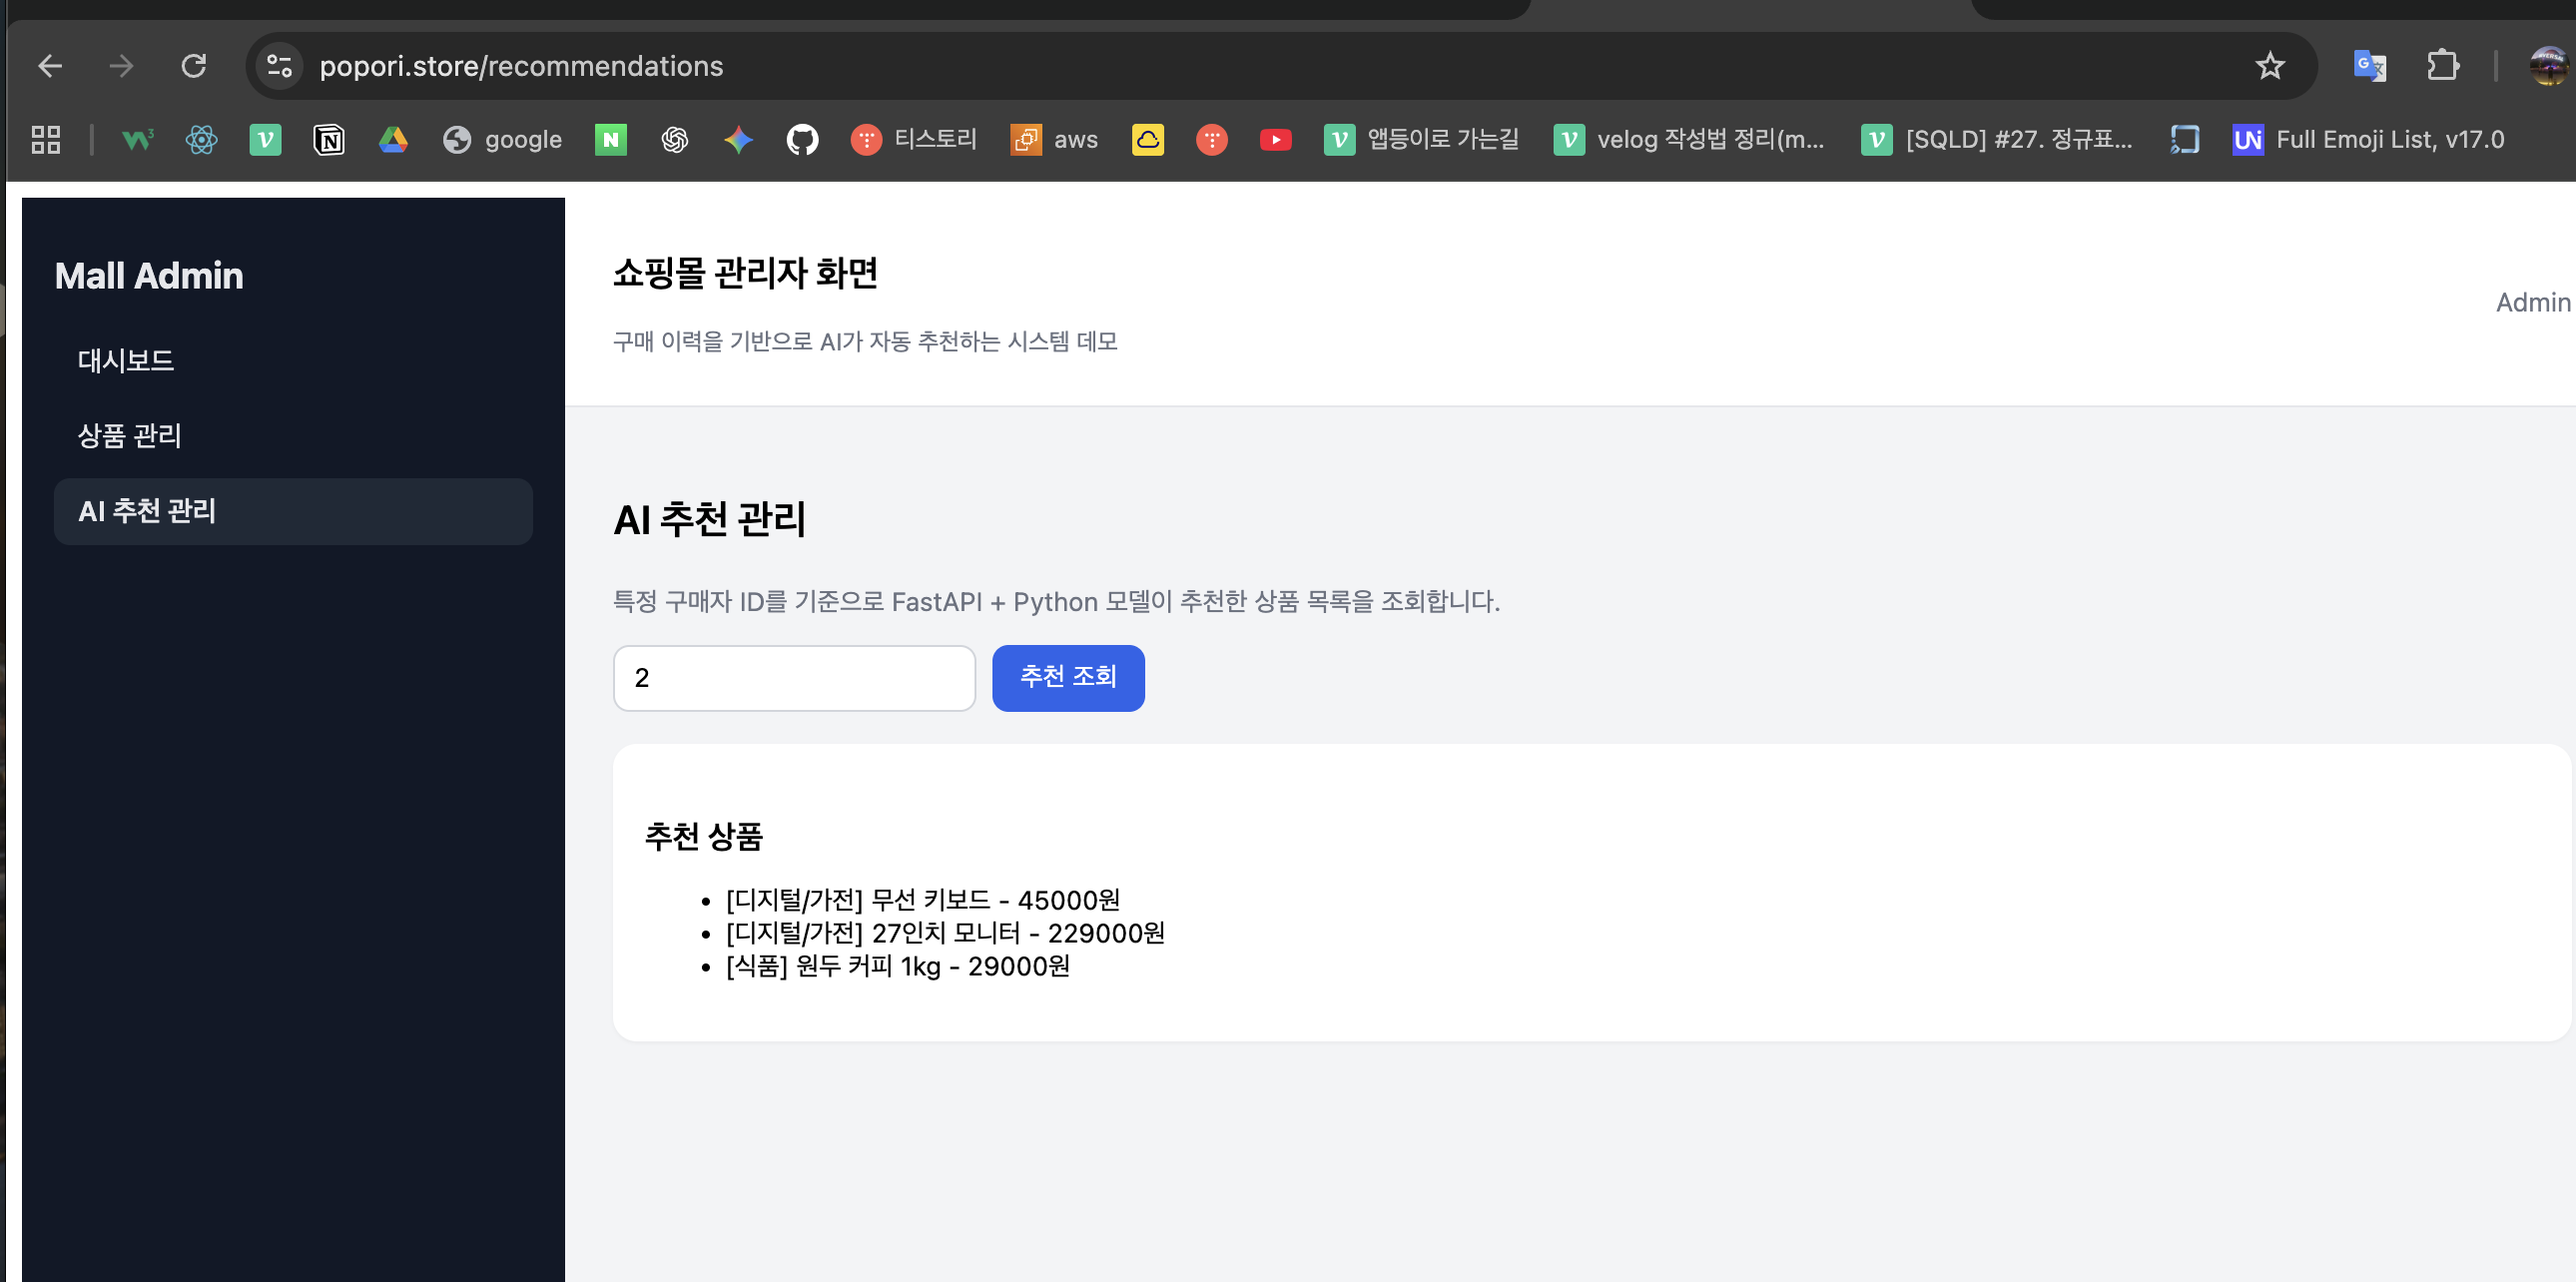
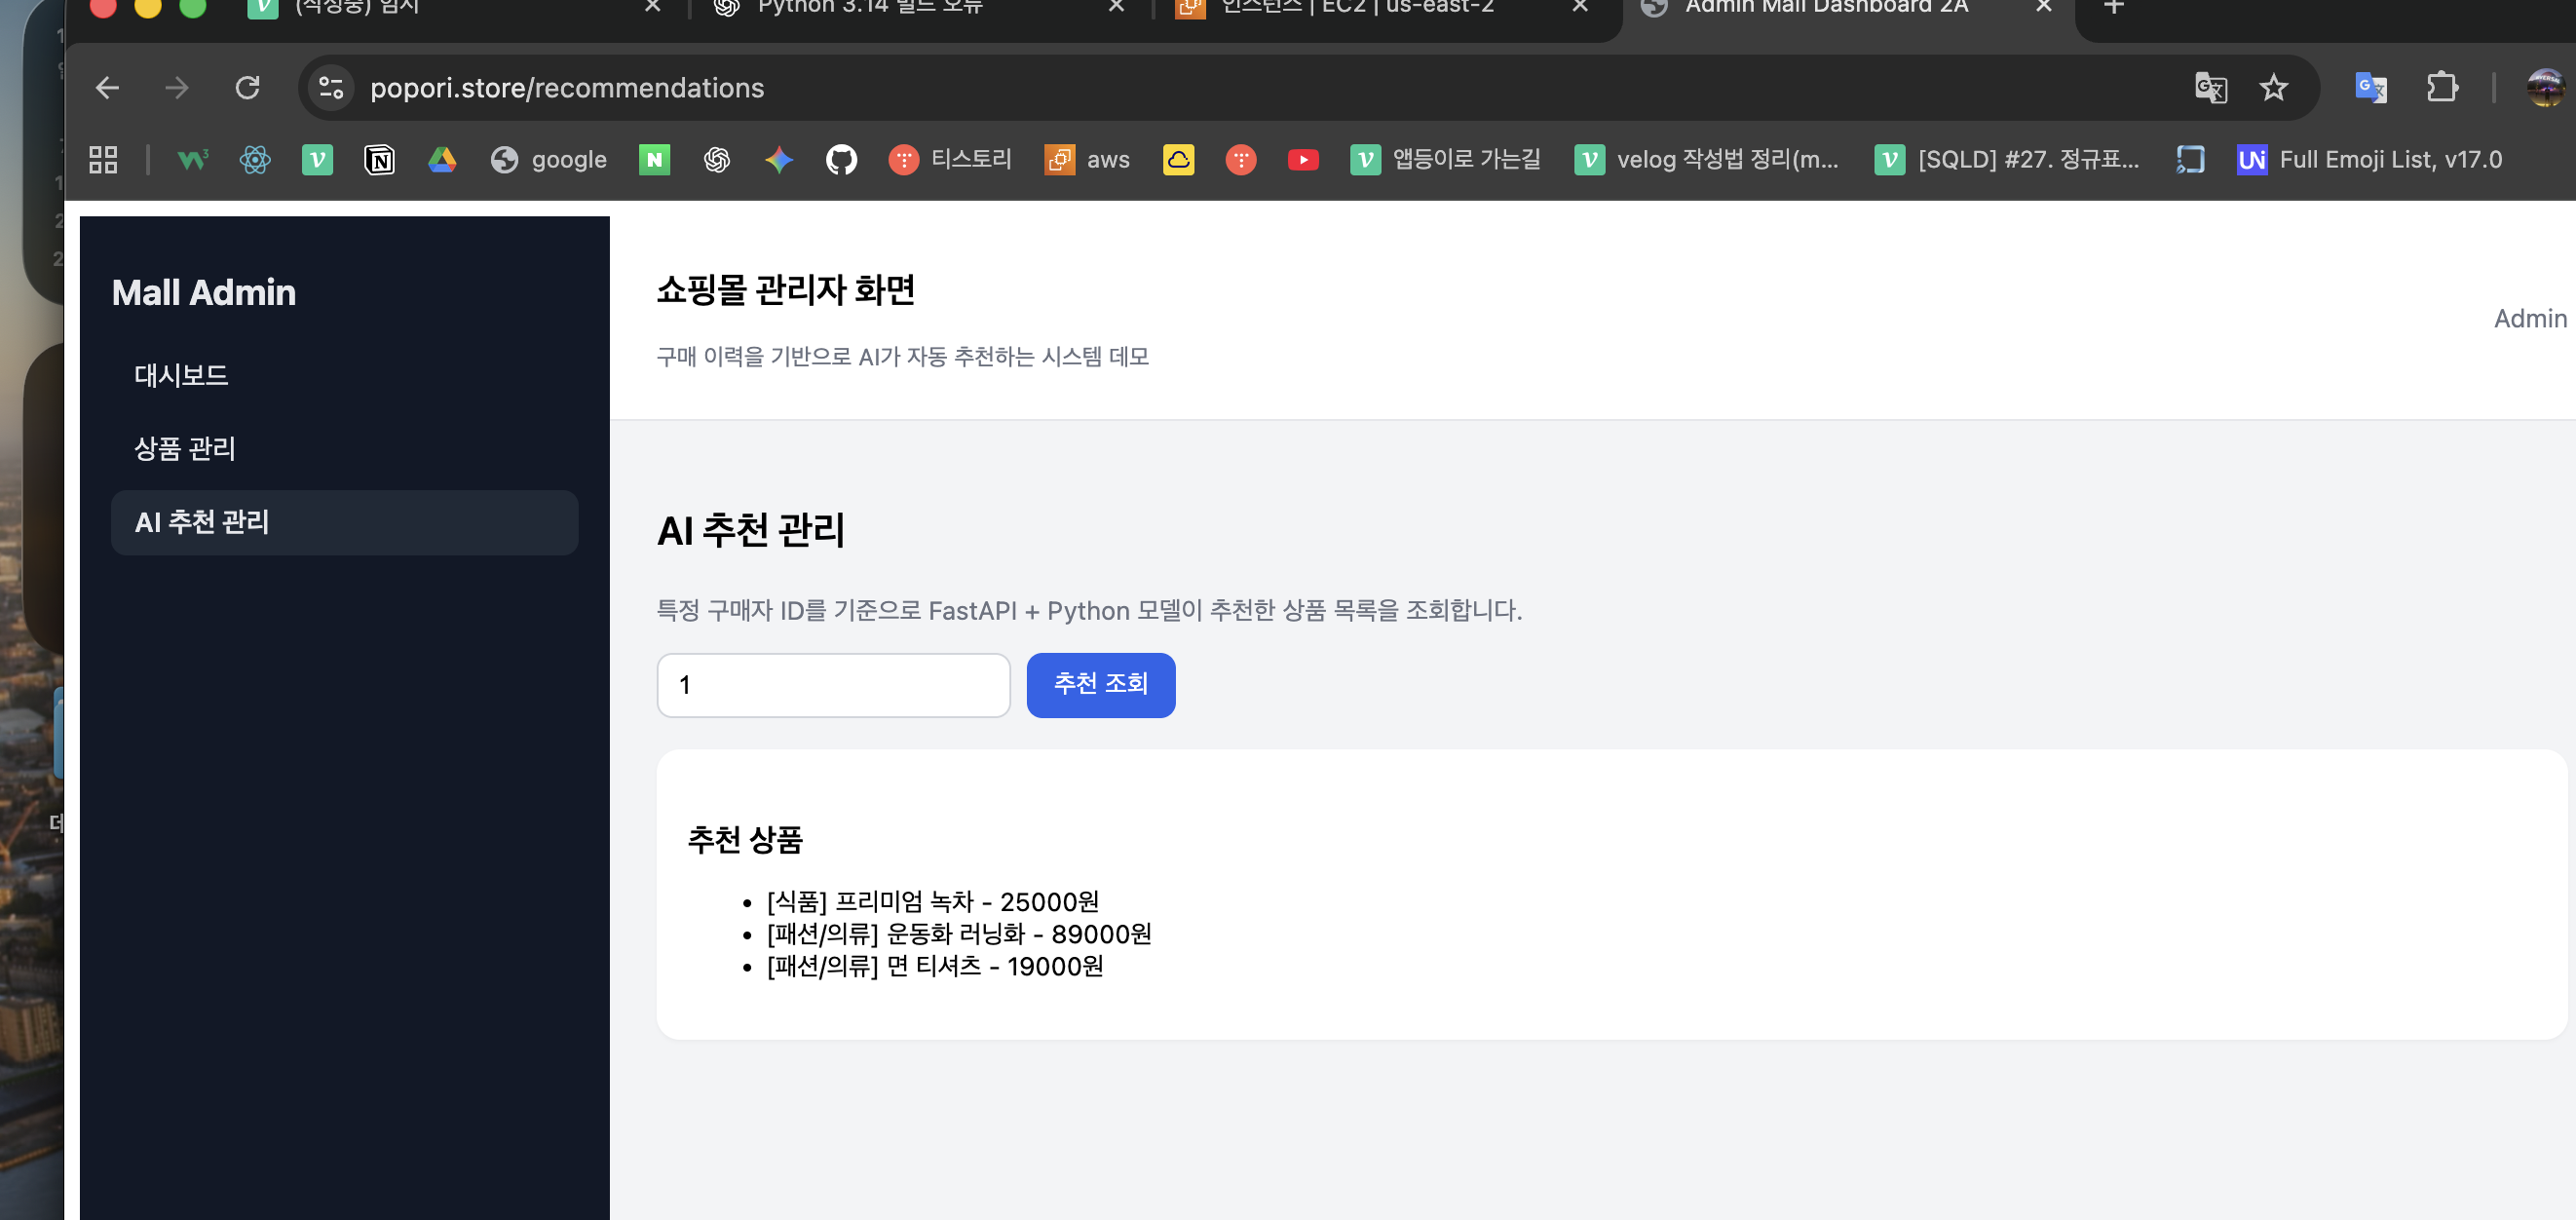
11.실행 결과
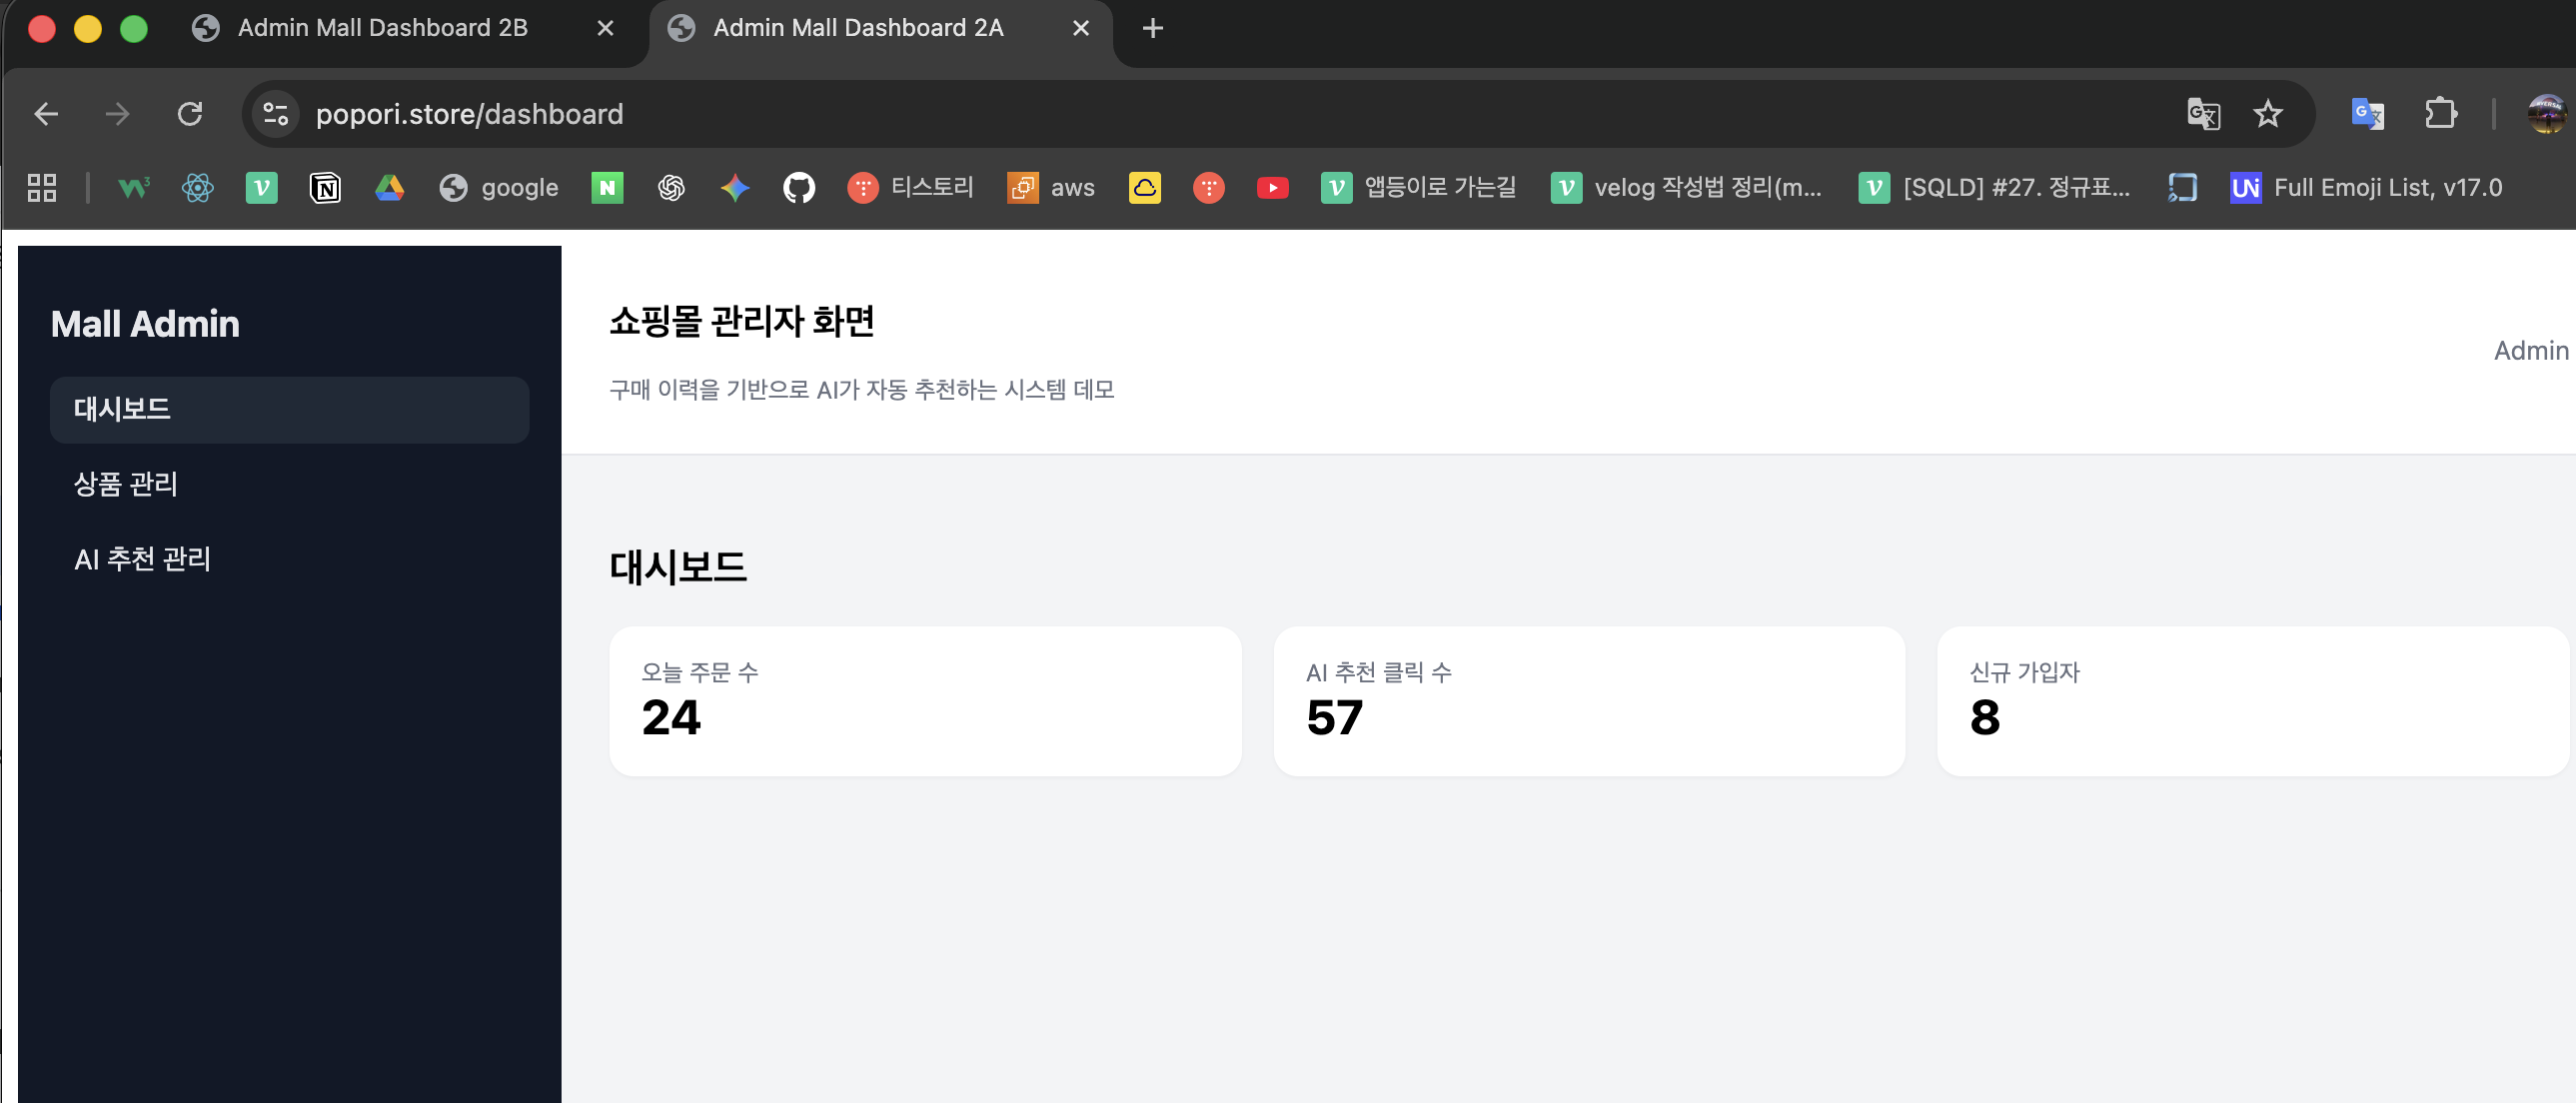
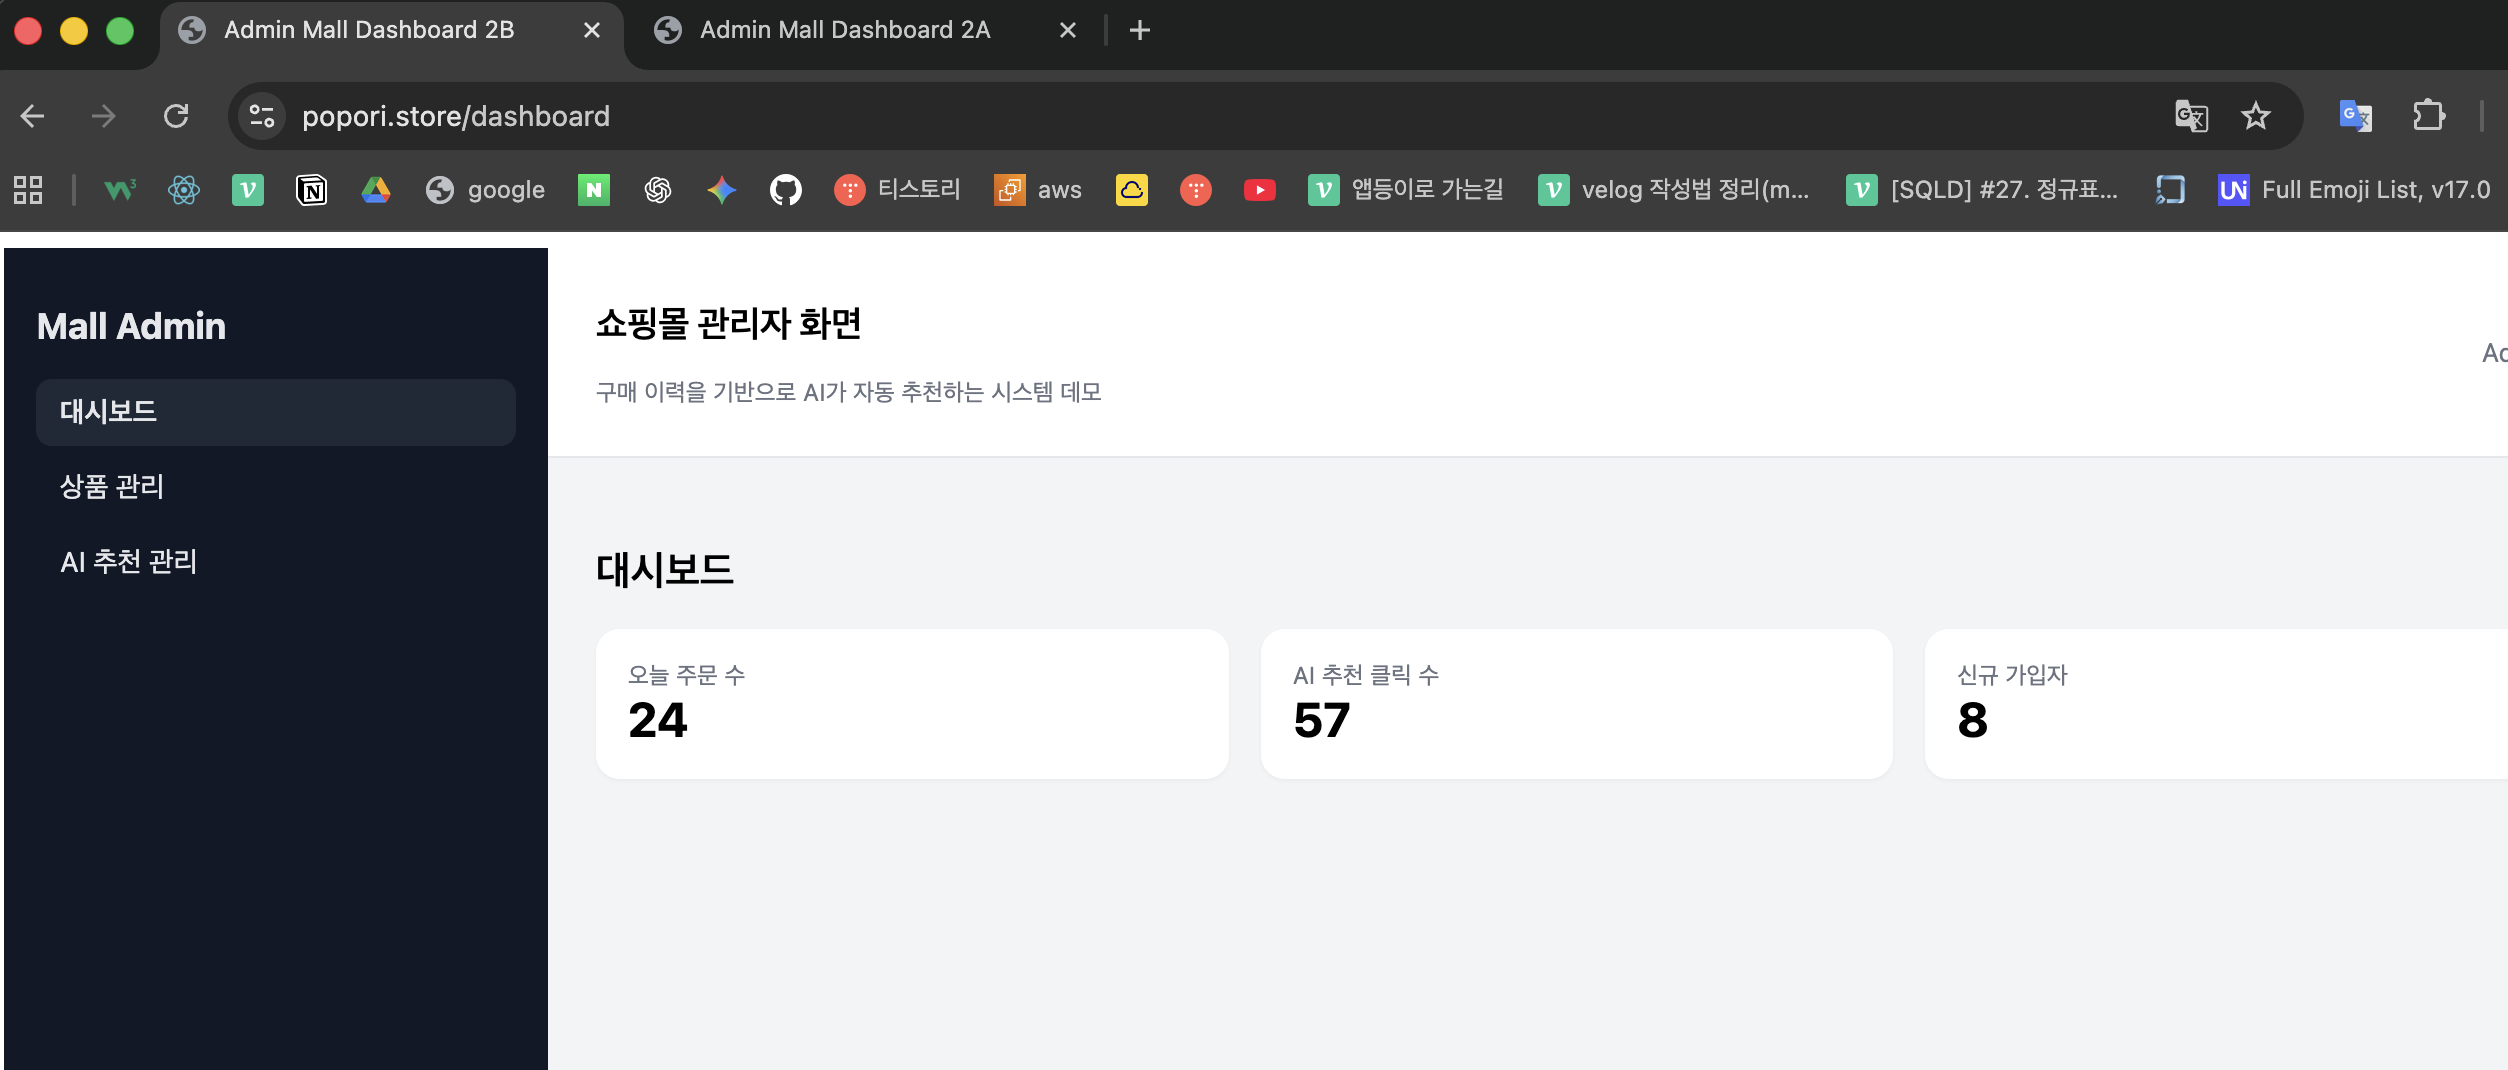
2a 2b 둘다 접속가능
npm install
1-2. 빌드
bash
코드 복사
npm run build
결과
scp -i ~/Downloads/KSB06-powermvp.pem -r dist ubuntu@3.19.143.145:/home/ubuntu/
dist/
├─ index.html
└─ assets/
2. 빌드 파일을 서버로 전송 (scp)
맥(로컬)에서 실행
scp -i ~/Downloads/KSB06-powermvp.pem -r dist ubuntu@3.19.143.145:/home/ubuntu/결과:
/home/ubuntu/dist
- 서버에서 nginx html 경로로 복사
서버 접속
ssh -i ~/Downloads/KSB06-powermvp.pem ubuntu@<nginx_ec2_ip>
sudo -i
nginx 정적 경로로 이동
cd /usr/share/nginx/html
결과:
index.html
assets/
50x.html
4️⃣ nginx 설정 (React SPA + 도메인)
sudo nano /etc/nginx/conf.d/default.confserver {
listen 80;
server_name ksbmaster.store www.ksbmaster.store;
#access_log /var/log/nginx/host.access.log main;
location / {
root /usr/share/nginx/html;
index index.html index.htm;
try_files $uri $uri/ /index.html;
}
#error_page 404 /404.html;
# redirect server error pages to the static page /50x.html
#
error_page 500 502 503 504 /50x.html;
location = /50x.html {
root /usr/share/nginx/html;
}
# proxy the PHP scripts to Apache listening on 127.0.0.1:80
#
#location ~ \.php$ {
# proxy_pass http://127.0.0.1;
#}
# pass the PHP scripts to FastCGI server listening on 127.0.0.1:9000
#
#location ~ \.php$ {
# root html;
# fastcgi_pass 127.0.0.1:9000;
# fastcgi_index index.php;
# fastcgi_param SCRIPT_FILENAME /scripts$fastcgi_script_name;
# include fastcgi_params;