💡 promise를 async와 await을 이용해 더 간단하게 작성하는 방법을 공부해보자!
⭐️ intro

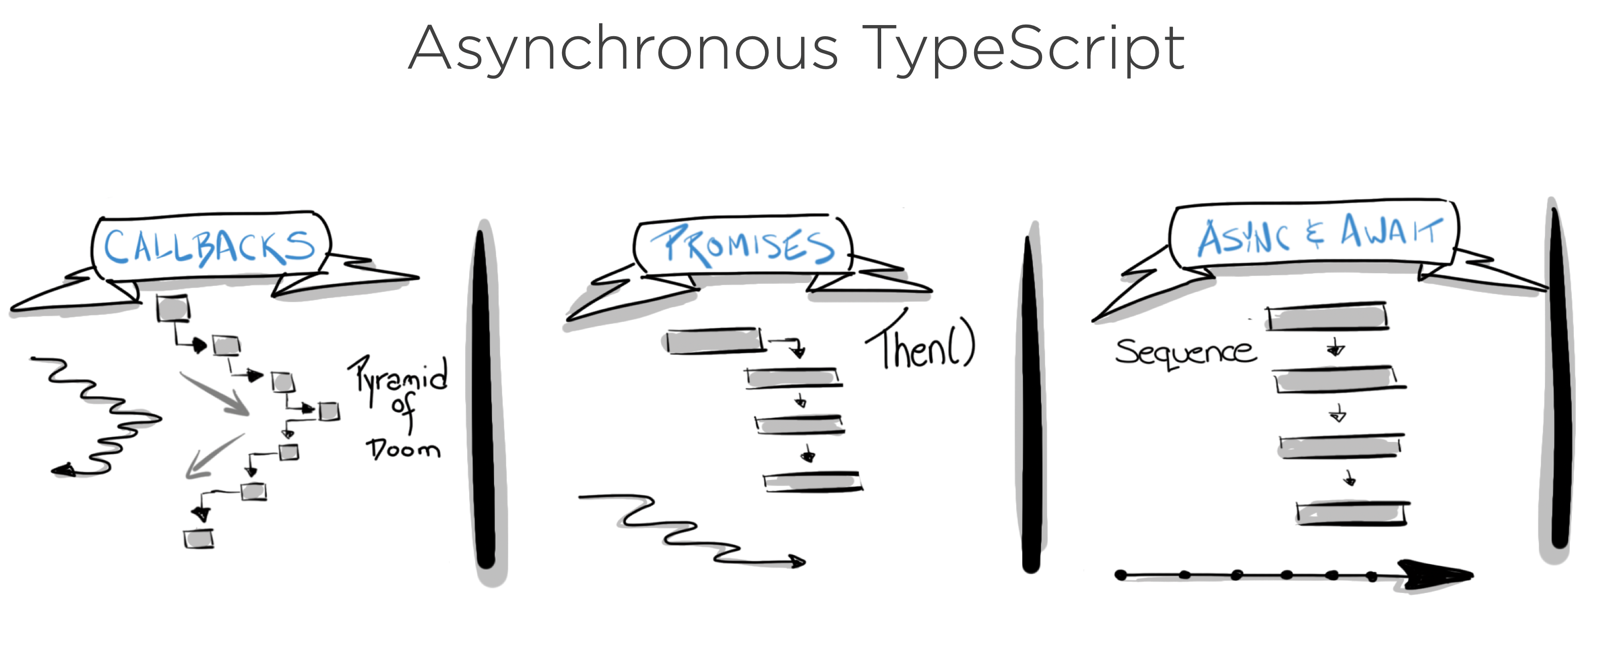
async와await은promise를 조금더 간결, 간편, 동기적으로 실행되는 것처럼 보이게 만들어 준다.promise chaining을 계속하다보면 코드가 난잡해질 수 있다.

- 이런거 위에 조금 더 간편한 api인
async와await를 사용하면 우리가 그냥 동기식으로 코드를 순서대로 작성하는 것처럼 간편하게 작성할 수 있게 도와준다.
-async와await는 새로 추가된 것이 아니라 기존에 존재하는promise위에 조금더 간편한 api를 제공한 것 syntactic sugar: 기존에 존재하는 것 위에, 기존에 존재하는 것을 감싸서 우리가 조금 더 간편하게 쓸 수있는 api를 재공하는 것 ex) class

- 무조건
promise가 나쁘고,async & await으로 전부 바꿔써야된다는 것은 아님(둘의 차이점을 이해하고, 상황에 맞게 잘 써야함)
🔴 async
function fetchUser () {
  // do network request in 10 secs...
  return 'ellie';
}

const user = fetchUser();
console.log(user);- 무언가 오래 걸리는 코드를 비동기적인 처리를 하지 않으면 JS 엔진은 동기적으로(한줄 끝나면 한줄 하고, 이런식) 코드를 수행하기 때문에,
- 위에 코드를 확인해보면,
fetchUser()함수가 실행이 되면 함수의 코드 블럭으로 가서 10초 후에 'ellie'라는 값을 리턴해준다. - 그러면 동기적으로 처리하면 10초동안 기다려야하고, 10초를 기다린 후에야 리턴값을 받을 수 있다. 즉 10초 동안은 다른 것을 진행할 수 없다.
- 비동기 처리를 하지 않았기 때문에 사용자 데이터를 받기 까지 걸리는 그 10초 동안 다른 데이터를 처리 할 수 없는 것이다.
-> 이렇게 오래 걸리는 일들은 비동기적으로 처리할 수 있게 해줘야한다.
// promise를 써서 비동기적으로 처리
function fetchUser () {
  return new Promise((resolve, reject) => {
    // do network request in 10 secs...
    return 'ellie';
  })
}

const user = fetchUser();
console.log(user);resolve와reject를 호출하지 않고, 저런 식으로 리턴을 하게 되면,promise가pending상태가 되어있는 것을 확인해 볼 수 있다.

- 프로미스 안에는 반드시
resolve와reject로 완료를 해줘야만 한다.
function fetchUser () {
  return new Promise((resolve, reject) => {
    // do network request in 10 secs...
    resolve('ellie');
  })
}

const user = fetchUser();
user.then(console.log);
console.log(user);- 상태가
fulfilled로 바뀌고, 결과값도ellie로 출력이 되는 것을 확인해 볼 수 있다.

then이라는 콜백 함수를 이용해서 유저가 들어오면 콘솔로그에 나오겠금 작성해볼 수 있다.promise말고async로 간단하게 작성해볼 수 있다.- 함수 앞에
async키워드만 붙이면된다. 그러면 자동적으로 코드 블럭들이promise로 변환이 되어진다.
async function fetchUser () {
    // do network request in 10 secs...
    return 'ellie';
}

const user = fetchUser();
user.then(console.log);
console.log(user);promise를 사용했을 때와 똑같이 출력된다.

🟠 await
await이라는 키워드는async가 붙은 함수 안에서만 쓸 수 있다.
function delay(ms) {
  return new Promise(resolve => setTimeout(resolve, ms));
}

async function getApple() {
  await delay(3000); // 3초 후 resolve를 호출
  return '🍎';
}

async function getBanana() {
  await delay(1000); // 딜레이가 끝날 때까지 기다렸다가!
  return '🍌'; // 바나나를 출력해줘
}delay()는promise를 return하는데 정해진 ms가 지나면resolve를 호출하는 그런 프로미스를 리턴하게 된다.getApple()은 3초 후에 resolve를 호출할 것인데,await키워드 때문에,delay(3000)이 끝날 때 까지 기다려 준다.- 그래서 3초 후에 사과를 리턴하는 promise가 만들어진다.
getBanana도 프로미스를 만드는 함수이다. 이 아이도 3초 후에 바나나를 리턴하는 함수이다.
🟡 응용해보기
🟤 promise를 사용해서
function pickFruits() {
  return getApple().then((apple) => {
    return getBanana().then((banana) => `${apple} + ${banana}`);
  });
}
pickFruits().then(console.log);
- 콜백지옥...
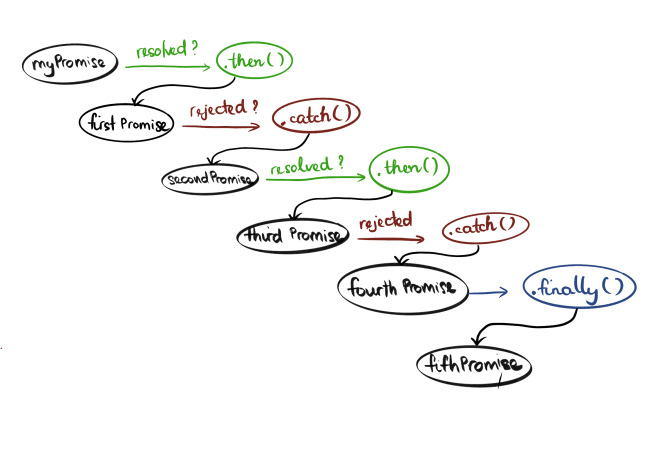
- 프로미스도 너무 중첩적으로 chaining을 하게 되면 콜백지옥과 비슷한 문제점이 발생한다.
🟤 async
async function pickFruits() {
  const apple = await getApple(); // 사과와
  const banana = await getBanana(); // 바나나를 다 받아와서
  return `${apple} + ${banana}`;
}
pickFruits().then(console.log);await,async라는 키워드를 이용해서 우리가 동기적으로 코드를 작성하듯이 즉, 우리가 원래 자연스럽게 코드를 작성하는 것처럼 쓰고, 리턴값도 자연스럽게 하니까 너무 간편함
🟢 에러 처리
🟤 try-catch문
async function getApple() {
  await delay(2000);
  throw 'error'
  return '🍎';
}

async function getBanana() {
  await delay(1000);
  return '🍌';
}

async function pickFruits() {
  try {
  	const apple = await getApple();
  	const banana = await getBanana();
  } catch {

  }
  return `${apple} + ${banana}`;
}

pickFruits().then(console.log);
🔵 await 병렬 처리
async function getApple() {
  await delay(1000);
  throw 'error'
  return '🍎';
}

async function getBanana() {
  await delay(1000);
  return '🍌';
}

async function pickFruits() {
  const apple = await getApple(); // 1s 소요
  const banana = await getBanana(); // 1s 소요
  return `${apple} + ${banana}`; // 총 2s 소요
}
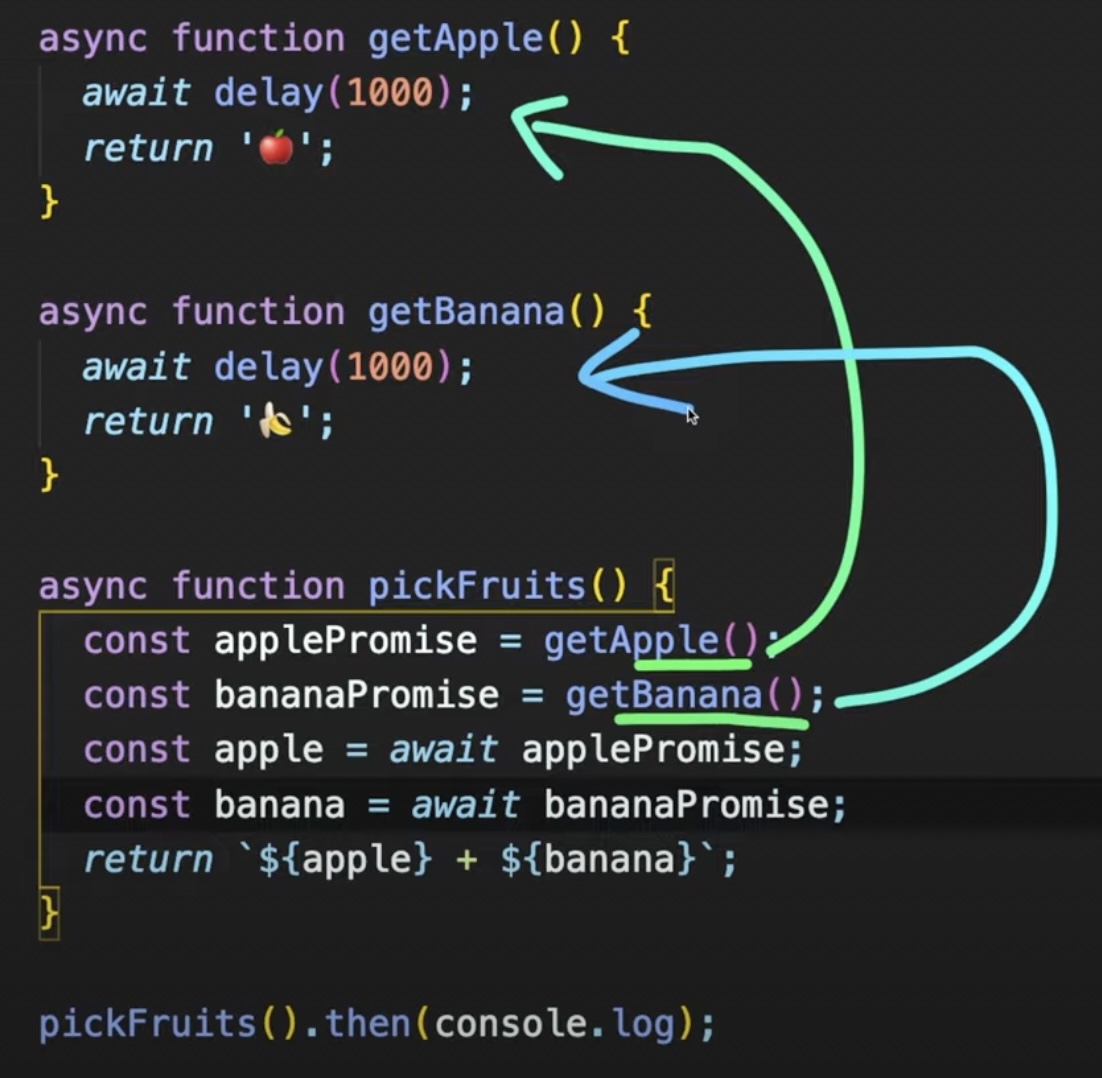
pickFruits().then(console.log);- 이렇게 순차적으로 진행되면 좀 비효율적일 수 있다. 바나나와 애플을 받아오는데 서로 연관되어있지 않기 때문에 서로 기다릴 필요가 없다.
async function pickFruits() {
  const applePromise = getApple();
  const bananaPromise = getBanana();
  const apple = await applePromise;
  const banana = await bananaPromise;
  return `${apple} + ${banana}`;
}
pickFruits().then(console.log);- 1초 만에 병렬적으로 실행되는 것을 확인해볼 수 있다.

- 사과promise를 만들고, 바나나promise를 만들었기 때문에 만들자 마자 바로 코드가 실행이된다. 그래서 병렬적으로 사과와 바나나를 받아오고, 기다렸다가 출력하게 되는 것이다.
- 서로 연관성이 없어서 병렬적으로 기능을 수행할 수 있는 경우에는 보라색 동그라미를 참고해서 더 쉽게 작성할 수 있다.
🟣 유용한 promise
- promise에서 제공하는 API를 이용해서 병렬적으로 수행하는 코드를 간단하게 바꿀 수 있다.
🟤 all
: 프로미스 배열을 전달하게 되면 모든 프로미스들이 병렬적으로 다 받을 때까지 모아주는 API
function pickAllFruits() {
  return Promise.all([getApple(), getBanana()]).then((fruits) => fruits.join(' + '));
}
pickAllFruits().then(console.log); // 🍎 + 🍌
🟤 race
- 어떤 것이든 상관 없고, 먼저 받아지는 값을 받아오고 싶으면
async function getApple() {
  await delay(2000); // 사과는 따는데 2초
  throw 'error'
  return '🍎';
}

async function getBanana() {
  await delay(1000); // 바나나는 따는데 1초
  return '🍌';
}

function pickOnlyOne() {
  return Promise.race([getApple(), getBanana()]);
}

pickOnlyOne().then(console.log);raceAPI를 쓰면 가장 먼저 값을 리턴하는 것만 전달이되어진다.- 그래서 바나나가 1초라서 먼저 수행되었기 때문에 출력이 된다.
🚀 Homework
- promise로 작성된 것을 async와 wait를 이용해서 작성해보자.
async getUserWithRole(user, password) {
  const id = await this.loginUser(user, password);
  const role = await this.getRoles(id);
  return role;
}

userStorage
  .getUserWithRole(id, password) //
  .catch(console.log)
  .then(console.log);
➕ 추가로 공부할 것
1.try-catch문 공부하기
