Terraform
Terraform과
- libvirt
- aws
- openstack
Terraform과 Libvirt
cat /etc/libvirt/qemu.conf로 보면 root가 되어 있다, kvm(libvirt)는 root가 실행한다.
테라폼 설치 후 테라폼과 kvm을 연결하기 위한 플러그인을 설치해야 한다.
Terraform에서 원격으로 kvm을 프로비저닝 할 수 있다.
Terraform에서 런타임 역할을 하는 것은 provider.tf
- main.tf(provider.tf)
- 작업 지시 대상이 누구인지 정의 하는 파일
terraform {
  required_providers {
    libvirt = {
      source = "multani/libvirt" # 플러그인 정보
      version = "0.6.3-1+4"
    }
  }
}

# 테라폼 서버와 kvm 이 한 곳에 있다면 아래 내용은 필요하지 않다
provider "libvirt" {
  alias = "hypervisor"
  uri = "qemu+ssh://root@hypervisor/system"
}- hypervisor을 vi /etc/hosts에 등록
211.183.3.160 hypervisor- 기록시작
terraform init이미지 nfs 연결
- 이미지 먼저 다운받기(hypervisor 노드에)
wget https://cloud.centos.org/centos/7/images/CentOS-7-x86_64-GenericCloud.qcow2[root@hypervisor cloudimg]# virt-customize -a centos-base.qcow2 --root-password password:test123- hypervisor, terraform 노드 둘다 설치
- hypervisor-server 활용, terraform-클라이언트 활용
yum -y install nfs-utils
또는
dnf -y install nfs-utils- hypervisor 노드에서
vi /etc/exports/cloudimg 211.183.3.0/24(rw,no_root_squash)systemctl restart nfs-server- terraform 노드에서 마운트
[root@terraform lab1]# mkdir /cloudimg
[root@terraform lab1]# mount -t nfs hypervisor:/cloudimg /cloudimg- 인스턴스 생성(스펙정의 + 디스크[볼륨]정의)
클라우드 이미지 자체가 볼륨으로 활용 가능하다
- 프로비저닝을 위한 tf 파일 생성
- libvirt.tf
# volume define
resource "libvirt_volume" "centos7vol" {
  name = "centos7-1.qcow2"
  pool = "default"
  source = "/cloudimg/centos-base.qcow2"
  format = "qcow2"
}

# instance define
resource "libvirt_domain" "centos7-1" {
  name = "centos7-1"
  memory = "1024"
  vcpu = 1

  network_interface {
    network_name = "default" # 기본 네트워크 지정
  }

  disk {
    volume_id = "${libvirt_volume.centos7vol.id}"
  }

  console {
    type = "pty"
    target_type = "serial"
    target_port = "0"
  }

  graphics {
    type = "spice"
    listen_type = "address"
    autoport = true
  }
}

# IP 주소 출력
output "ip" {
  value = "${libvirt_domain.centos7-1.network_interface.0.addresses}"
}- 전역변수 지정
export LIBVIRT_DEFAULT_URI="qemu+ssh://root@hypervisor/system"- terraform plan : 위에서 생성한 파일을 검증하고 최종 결과를 예측
terraform plan인증 후 test123 비밀번호를 입력하면 예측 결과가 나온다.
- terraform apply : 실제 프로비저닝을 시작-> libvirt 통해 인스턴스,네트워크 등 생성 시작
plan으로 파일을 검증했더라도 오류가 발생할 수 있다.
terraform apply -auto-approveplan ok면 apply
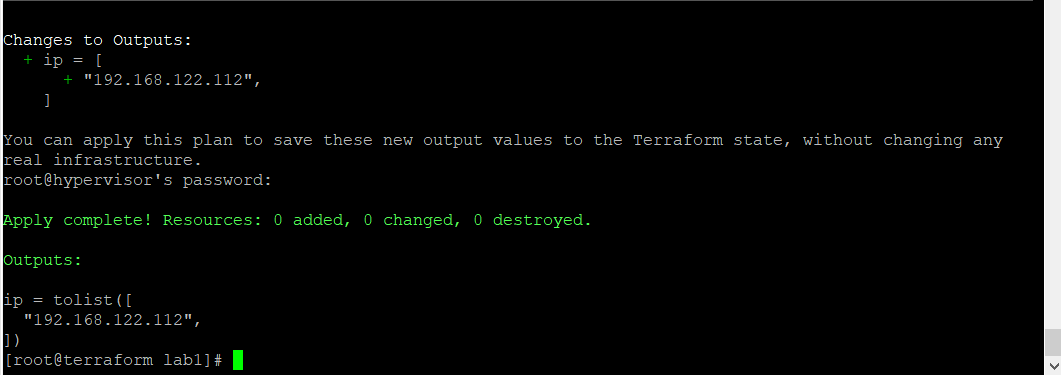
hypervisor에서 ip를 확인했을 때 ip와 일치한다.

- xml 확인
[root@hypervisor cloudimg]# virsh edit centos7-1
Domain centos7-1 XML configuration not changed.- 콘솔로 접속
[root@hypervisor cloudimg]# virsh console centos7-1root, test123으로 접속해 ip 확인, 인터넷 ping 가능
- 인스턴스 삭제
terraform destroylibvirt.tf에서 네트워크 부분 변경
network_interface {
    #network_name = "default" # 기본 네트워크 지정
    bridge = "br0"
  }
terraform apply -auto-approvebr에 연결했을 때 output에 ip가 들어가지 않는다.
hypervisor 노드에 접속해 ip를 확인해보고, terraform 노드에서 해당 IP에 ping을 해보면 연결된다.
[root@hypervisor cloudimg]# virsh console centos7-1
Connected to domain centos7-1
Escape character is ^]

CentOS Linux 7 (Core)
Kernel 3.10.0-1127.el7.x86_64 on an x86_64

localhost login: root
Password:
[root@localhost ~]# ifconfig
eth0: flags=4163<UP,BROADCAST,RUNNING,MULTICAST>  mtu 1500
        inet 211.183.3.205  netmask 255.255.255.0  broadcast 211.183.3.255
        inet6 fe80::5054:ff:fe22:5d49  prefixlen 64  scopeid 0x20<link>
        ether 52:54:00:22:5d:49  txqueuelen 1000  (Ethernet)
        RX packets 62  bytes 7233 (7.0 KiB)
        RX errors 0  dropped 0  overruns 0  frame 0
        TX packets 46  bytes 4232 (4.1 KiB)
        TX errors 0  dropped 0 overruns 0  carrier 0  collisions 0

lo: flags=73<UP,LOOPBACK,RUNNING>  mtu 65536
        inet 127.0.0.1  netmask 255.0.0.0
        inet6 ::1  prefixlen 128  scopeid 0x10<host>
        loop  txqueuelen 1000  (Local Loopback)
        RX packets 6  bytes 416 (416.0 B)
        RX errors 0  dropped 0  overruns 0  frame 0
        TX packets 6  bytes 416 (416.0 B)
        TX errors 0  dropped 0 overruns 0  carrier 0  collisions 0
IP를 직접 넣어주려면? libvirt.tf에서
...
network_interface {
    addresses = ["211.183.3.199"]
    #network_name = "default" # 기본 네트워크 지정
    bridge = "br0"
  }
...
terraform apply -auto-approve변경사항이 적용됐다.
kvm에서 ping 211.183.3.199 하면 잘 되지 않는다. 직접 console 로 들어가서 보면 199가 아닌 다른 IP가 할당 된 것을 볼 수 있다.
KVM과 Terraform의 호환성은 좋지않다. 특히 브릿지로 연결했을 때 잘 호환되지 않는다.
Terraform의 동작
Terraform init
- 가장 최근의 상태정보를 저장하기 위한 .tfstate 파일을 생성한다. terraform plan 이나 terraform apply를 진행하게되면 .tfstate 의 정보를 읽어서 작업을 진행하게 된다.
- 기본적으로 로컬 스토리지에 저장하지만 backend를 사용하여 aws s3, consul, etcd 등 다양하 원격 저장소를 사용할 수도 있다.
- 동시에 동일한 state 에 접근하는 것을 막기 위한 Locking 과 state 파일의 손실을 방지하기 위한 Backup을 위한 기능을 활용된다.
Terraform plan
- 실제 인프라를 배포하며 작업결과가 .tfstate 파일에 저장된다. 로컬의 .terraform 에도 저장된다.
Terraform import
- 인프라에 배포된 리소스를 terraform state 로 옮겨주는 작업이다.
비밀번호가 아닌 Key를 이용하도록 하여 인스턴스를 배포 한다.
-
terraform에서 key-pair 생성 (/root/.ssh/mykey.pem, mykey.pem.pub)
ssh-keygen -q -f ~/.ssh/mykey.pem -N ""[root@terraform lab1]# ls ~/.ssh known_hosts terraform.pem terraform.pem.pub -
terraform에서 /etc/ssh/ssh_config에 hypervisor로 접속할 때에는 root, mykey.pem이용해서 접속가능하도록 설정
vi /etc/ssh/ssh_configHost hypervisor User root IdentityFile ~/.ssh/mykey.pem -
mykey.pem.pub 파일의 내용을 복사해서 hypervisor의 /root/.ssh/authorized_keys에 붙여넣기
vi /root/.ssh/authorized_keysvi /etc/ssh/sshd_configPubkeyAuthentication yes 앞에 # 제거
systemctl restart sshd -
lab1에서 terraform apply를 시도한다. 이 경우 중간에 yes나 test123 입력없이 프로비전 되어야 한다.
terraform apply -auto-approve별도의 입력없이 프로비전 된다.
-
keyscan으로 처음에 yes/no 하는 것 하지않도록 설정 할 수 있다.
ssh-keyscan hypervisor >> ~/.ssh/known_hosts
