문제상황
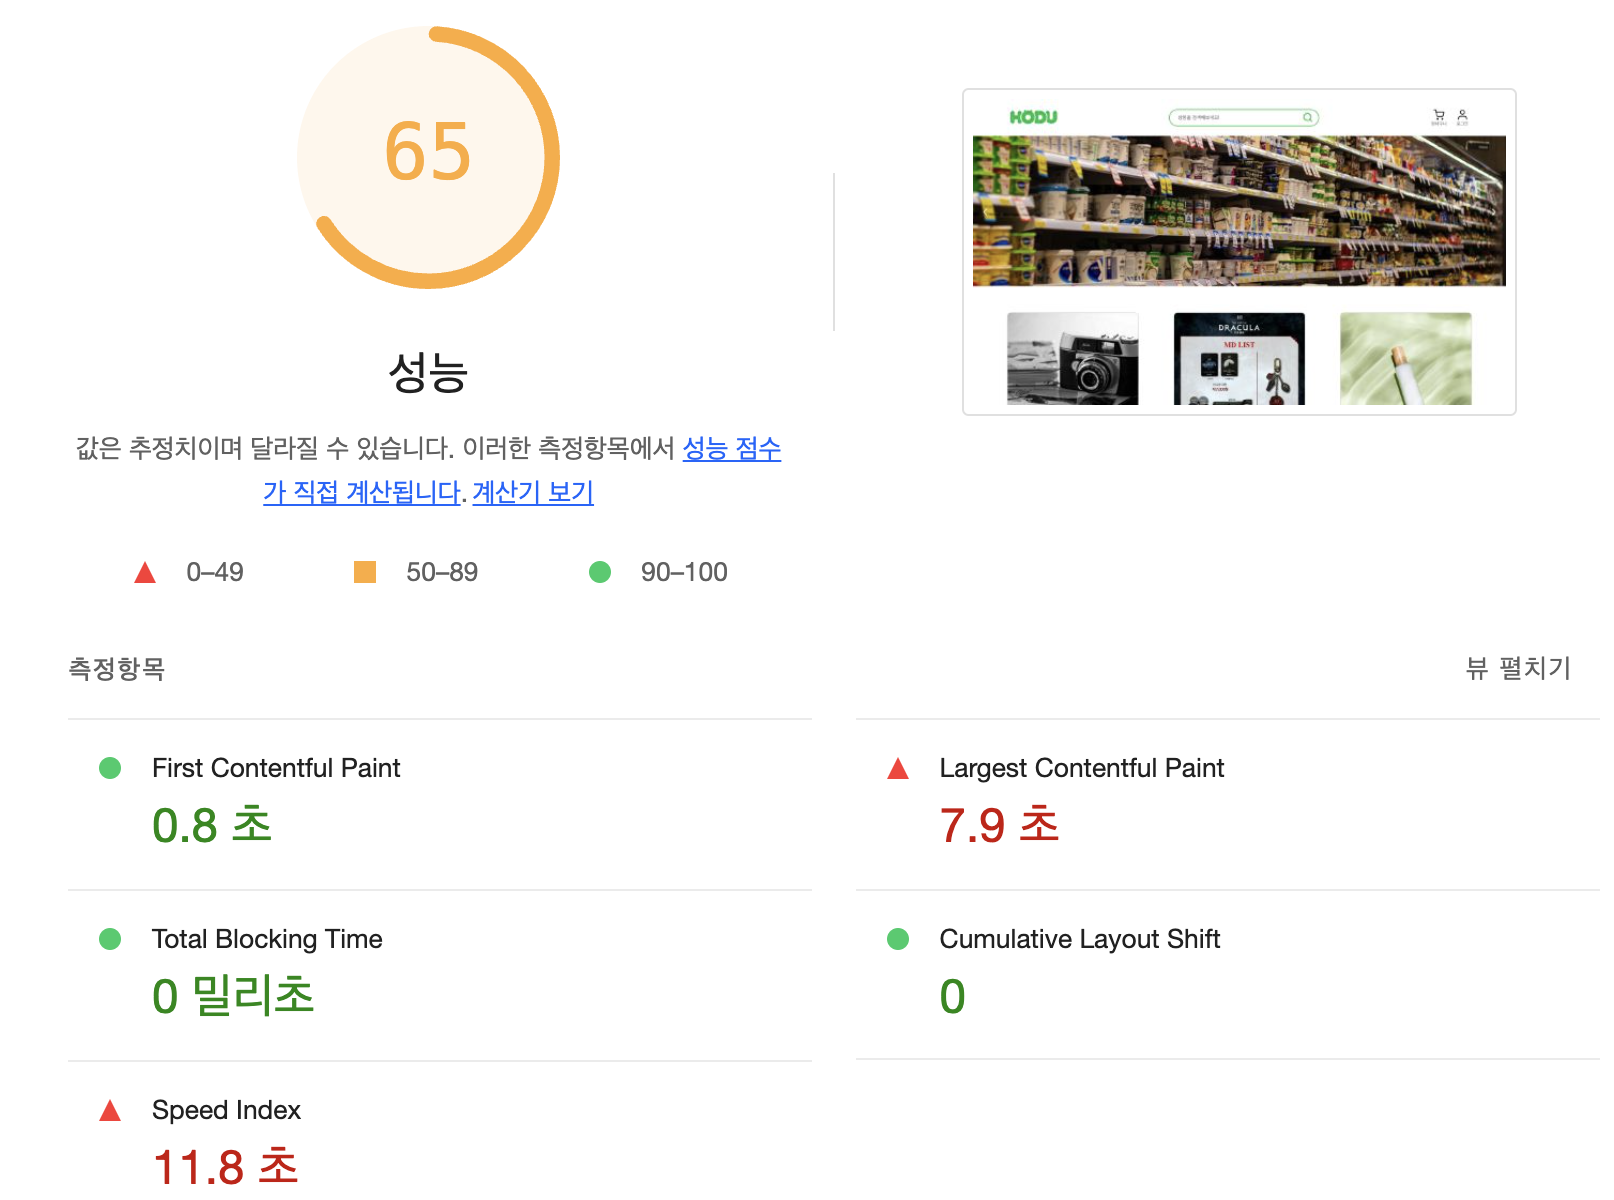
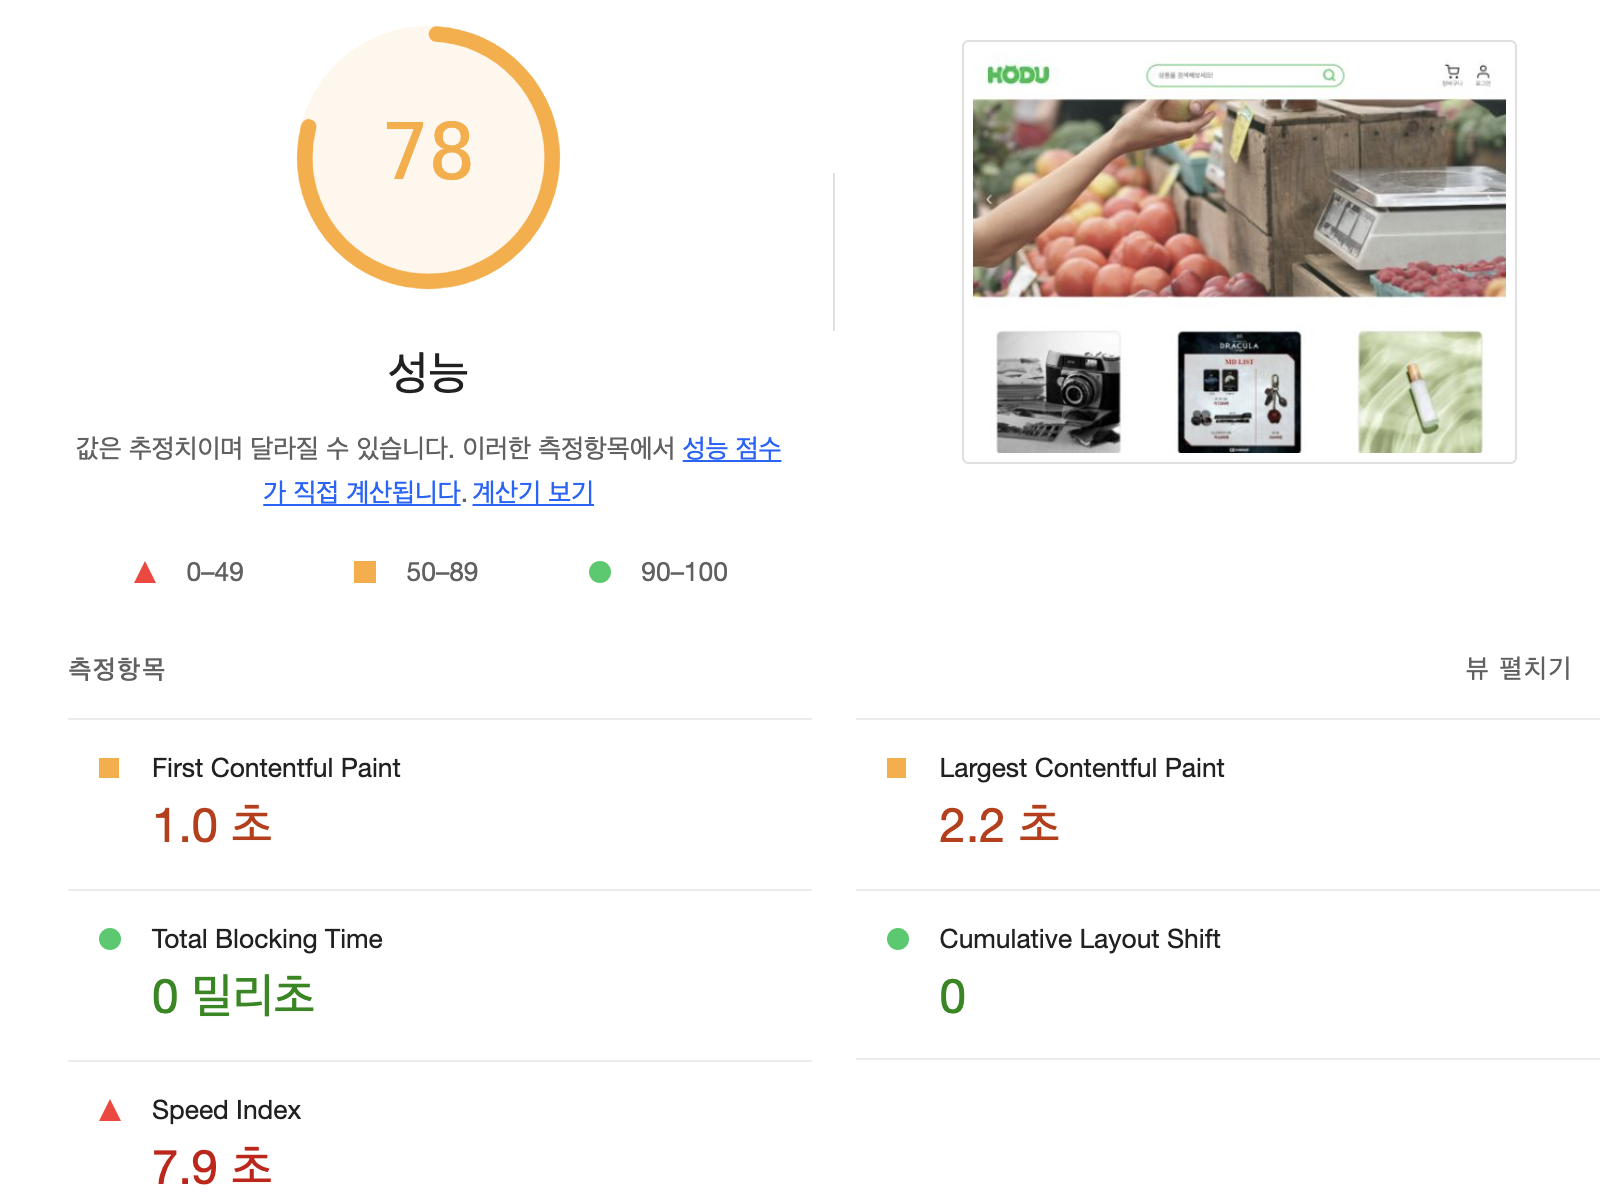
배포환경에서 LightHouse의 결과를 확인했을 때 LCP가 7.9초로 나타나고 있습니다.
해결방법
이미지 최적화
LCP는 보통 이미지와 관련이 크기 때문에 이미지를 최적화하여 LCP를 개선하고자 합니다.
1️⃣ 반응형 이미지 제공
현재 프로젝트는 반응형 웹을 지원하고 있으나 메인 페이지에서 제공하는 배너 이미지를 한가지 크기(1280px or 1920px)로 제공하고 있습니다.
이런 경우 해당 크기보다 작은 기기의 경우 불필요하게 큰 이미지를 다운로드하면 로딩 속도가 느려지고 사용자 경험이 저하되는 문제가 발생할 수 있습니다. 따라서 여러 크기의 이미지를 제공할 필요가 있습니다.
미디어 쿼리 분기점을 609px, 1280px, 그 이상으로 설정하고 있어 이를 참고하여 이미지 크기를 609px, 1280px, 1920px로 설정하였고 이를 wepb로 변환하는 작업을 진행했습니다.
webp로 변환하는 사이트
또한, picture, source 태그를 통해 webp를 지원하지 않는 경우 jpg를 사용, 지원하는 경우엔 webp를 사용하도록 하였습니다.
import bannerImg1 from "../../assets/img/banner1.jpg";
import bannerImg1Lg from "../../assets/img/banner1_lg.webp";
import bannerImg1Md from "../../assets/img/banner1_md.webp";
import bannerImg1Sm from "../../assets/img/banner1_sm.webp";
...
import bannerImg4 from "../../assets/img/banner4.jpg";
import bannerImg4Lg from "../../assets/img/banner4_lg.webp";
import bannerImg4Md from "../../assets/img/banner4_md.webp";
import bannerImg4Sm from "../../assets/img/banner4_sm.webp";

export default function Banner() {
  const imgArr = [bannerImg1, bannerImg2, bannerImg3, bannerImg4];
  const imgArrLg = [bannerImg1Lg, bannerImg2Lg, bannerImg3Lg, bannerImg4Lg];
  const imgArrMd = [bannerImg1Md, bannerImg2Md, bannerImg3Md, bannerImg4Md];
  const imgArrSm = [bannerImg1Sm, bannerImg2Sm, bannerImg3Sm, bannerImg4Sm];
  ...
return (
  ...
	<S.BannerImgContainer ref={swiperRef}>
        {imgArr.map((img, idx) => (
          <picture key={idx}>
            <source
              srcSet={`${imgArrSm[idx]} 609w, ${imgArrMd[idx]} 1280w, ${imgArrLg[idx]} 1920w`}
              type="image/webp"
            />
            <img
              key={idx}
              src={img}
              alt={`배너이미지${idx + 1}`}
              className={swiperCurrentPosition === idx ? "active" : ""}
            />
          </picture>
        ))}
      </S.BannerImgContainer>
  ...
	);
}
2️⃣ 이미지 lazy loading
이미지 lazy loading은 이미지가 화면에 보일 때 로딩하는 기법입니다. 바로 로딩하는 것이 아닌 로딩 시점을 뒤로 미루게됩니다.
ProductImg.tsx
const defaultOption = {
  root: null,
  threshold: 0,
  rootMargin: "0px",
};

export default function ProductImg({ imgSrc, alt }: Props) {
  const [loading, setLoading] = useState(true);
  const imgRef = useRef<HTMLImageElement>(null);

  useEffect(() => {
    const checkIntersect = ([entry]: IntersectionObserverEntry[]) => {
      if (entry.isIntersecting) {
        const target = entry.target as HTMLImageElement;
        target.setAttribute("src", imgSrc);
        setLoading(false);
        io.unobserve(target);
      }
    };

    const io = new IntersectionObserver(checkIntersect, {
      ...defaultOption,
    });
    if (imgRef.current) {
      io.observe(imgRef.current);
    }

    return () => io && io.disconnect();
  }, [imgRef]);

  return (
    <ProductImgWrap
      data-src={imgSrc}
      alt={alt}
      ref={imgRef}
      className={loading ? "loading" : "loaded"}
    />
  );
}

const ProductImgWrap = styled.img`
  width: 100%;
  height: 350px;
  border-radius: 10px;
  border: 1px solid #c4c4c4;
  margin-bottom: 6px;
  object-fit: cover;

  ${media.Medium`
    height: 250px;
  `}
  ${media.Small`
    height: 90px;
  `}
  &.loading {
    filter: blur(10px);
    clip-path: inset(0);
  }
  &.loaded {
    filter: blur(0px);
  }
`;
- IntersectionObserver를 사용해서 이미지 lazy loading을 구현하였습니다.
data-src는 초기에 브라우저가 무시하는 데이터 속성입니다. (주로 lazy loading을 적용할 때 사용하는 속성)data-src를 초기에 설정해주고 뷰포트에 이미지가 들어오게되면 해당 이미지에src속성에imgSrc를 적용해주었습니다.io.unobserver(target)를 하지 않는다면 뷰포트에 타겟이 들어올 때마다 이미지 로드가 또 발생하는 문제가 생길 수 있습니다..! (경험담..😂)
적용 모습
❗️ 로딩중이면 loading 클래스를 추가하여 blur 처리를 하고 로드가 끝나면 blur를 없애고 있었는데 현재 적용된 모습을 보면 blur처리가 잘 나타나지 않고 있습니다.
그래서 코드에서 onLoad={() => setLoading(false)}를 추가하고 checkIntersect 함수에서 setLoading(false)를 제거해주었습니다.
최종 코드
const defaultOption = {
root: null,
threshold: 0,
rootMargin: "0px",
};
export default function ProductImg({ imgSrc, alt }: Props) {
const [loading, setLoading] = useState(true);
const imgRef = useRef<HTMLImageElement>(null);
useEffect(() => {
const checkIntersect = ([entry]: IntersectionObserverEntry[]) => {
if (entry.isIntersecting) {
const target = entry.target as HTMLImageElement;
target.setAttribute("src", imgSrc);
io.unobserve(target);
}
};
const io = new IntersectionObserver(checkIntersect, {
...defaultOption,
});
if (imgRef.current) {
io.observe(imgRef.current);
}
return () => io && io.disconnect();
}, [imgRef]);
return (
<ProductImgWrap
data-src={imgSrc}
alt={alt}
ref={imgRef}
onLoad={() => setLoading(false)}
className={loading ? "loading" : "loaded"}
/>
);
}
const ProductImgWrap = styled.img`
width: 100%;
height: 350px;
border-radius: 10px;
border: 1px solid #c4c4c4;
margin-bottom: 6px;
object-fit: cover;
${media.Medium`
height: 250px;
`}
${media.Small`
height: 90px;
`}
&.loading {
filter: blur(10px);
clip-path: inset(0);
}
&.loaded {
filter: blur(0px);
}
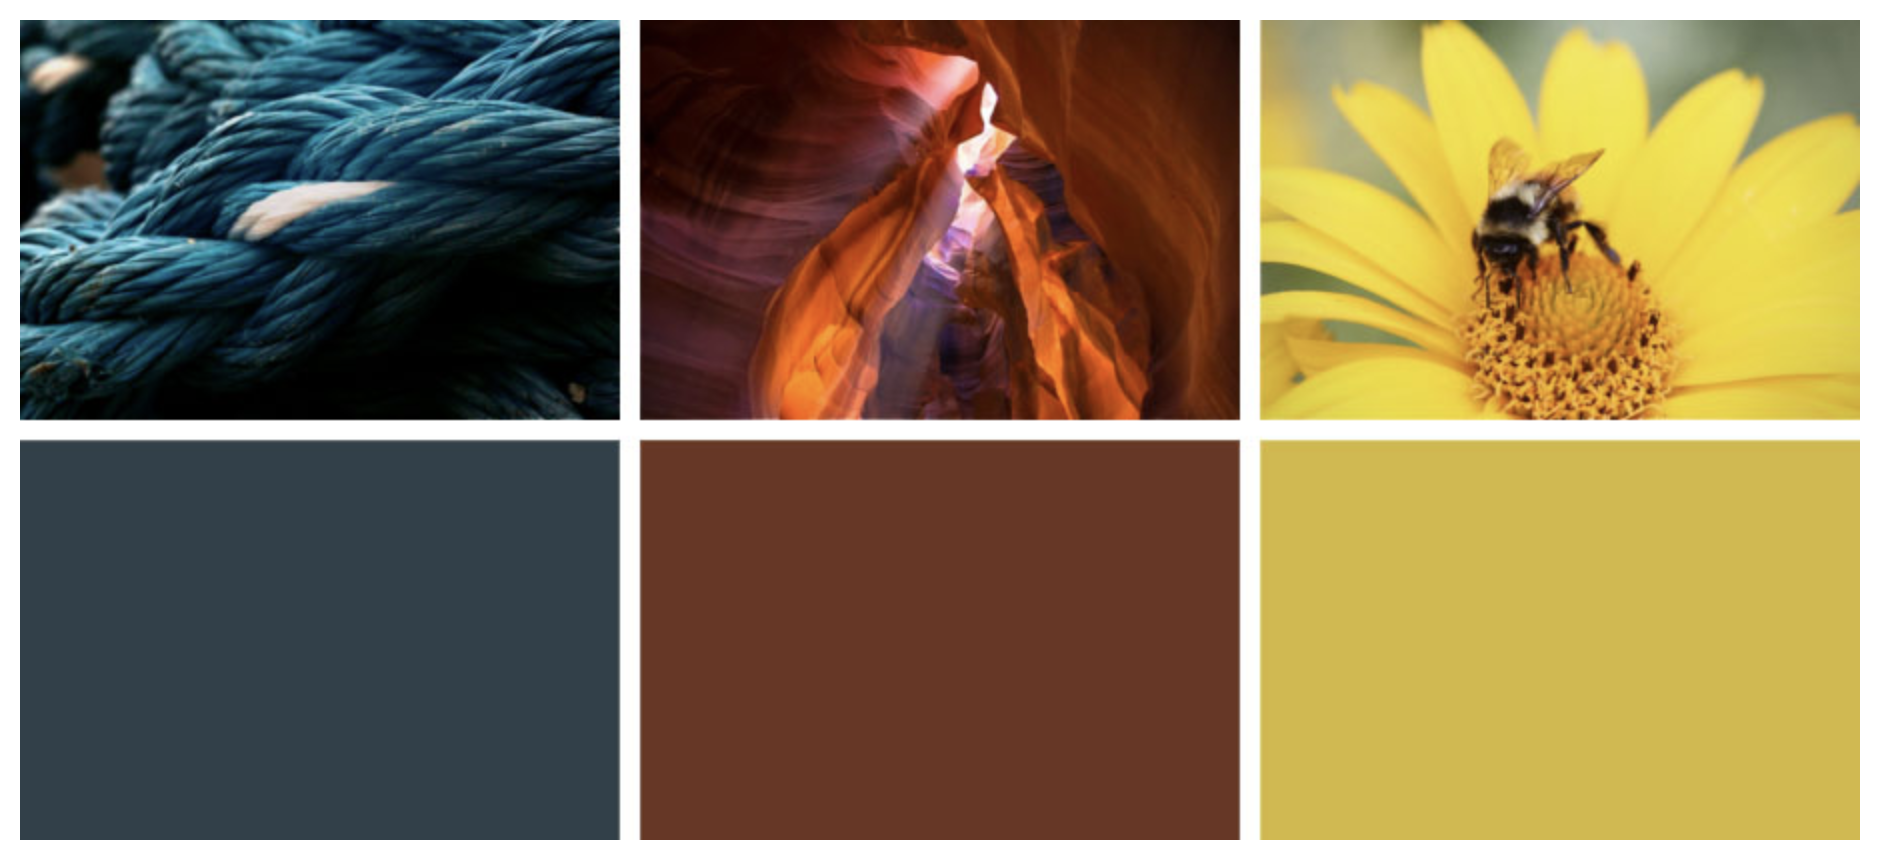
`;블러처리 외에도 대체 이미지로 회색 이미지를 추가하거나 아래와 같이 이미지의 전체적인 색상을 뽑아내서 대체 이미지로 사용하는 방법 등이 있습니다.
최종 구현 모습
이미지 최적화를 적용한 코드를 배포 환경에서 다시 확인해보니 성능이 65->78으로 올랐고, LCP도 7.9초에서 2.2초로 감소한 것을 확인할 수 있습니다.
[참고]
https://helloinyong.tistory.com/297
https://manu.ninja/dominant-colors-for-lazy-loading-images/
https://apost.dev/1075/
https://onlydev.tistory.com/104