오늘의 목표
- 안드로이드 로그인, 회원가입 bad request시 에러메세지 클라이언트에 출력하기
참고한 링크
🌟 Exception 발생 시 내가 원하는 ErrorMessage를 ResponseBody에 담기
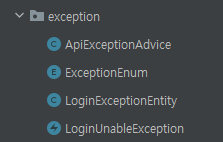
이 설정을 위해 다음과 같이 Exception 폴더를 따로 만들어서 class 네개를 더 선언했다.
1. LoginExceptionEntity (ExceptionEntity)
이 class는 말그래도 exception이 발생했을 때 기존의 ErrorBody 형태 대신 출력해줄 하나의 Entity 형태를 선언하는 기능을 한다. 예를 들어서 원래 아무것도 설정해주지 않았을 때 Rest API 요청에 대한 결과가 에러인 경우 response body는 다음과 같은 형태로 나타난다.
{
   "timestamp": "2019-11-18T08:02:21.347+0000",
    "status": 500,
    "error": "Internal Server Error",
    "message": "No message available",
    "path": "/api/book/1"

}
이 LoginEntity를 예를 들어 아래와 같이 설정할 경우,
@Getter
@ToString
public class LoginExceptionEntity {

    private String errorCode;
    private String errorMessage;

    @Builder
    public LoginExceptionEntity(HttpStatus status, String errorCode, String errorMessage){
        this.errorCode = errorCode;
        this.errorMessage = errorMessage;
    }
}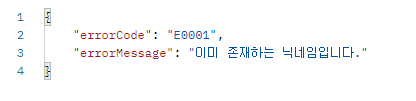
Exception에 대한 Response Body는 위에서 설정된 변수대로 찍히게 된다. (이 Entity 클래스만 만들었다고 물론 바로 바뀌는 것은 아니다! 모든 설정을 마친 후에 바뀌게 된다는 소리이다. 😣)
2. ExceptionEnum
ExceptionEnum은 말그대로 Enum 타입의 클래스로 위에서 새롭게 정의한 변수(code, message)대로 exception을 낼 수 있도록 exception의 옵션을 미리 설정해두는 것이다.
실제 코드를 보면 좀 더 이해가 쉬울 것이다!
@Getter
@ToString
public enum ExceptionEnum {

   RUNTIME_EXCEPTION(HttpStatus.BAD_REQUEST, "E0001"),
   ACCESS_DENIED_EXCEPTION(HttpStatus.UNAUTHORIZED, "E0002"),
   INTERNAL_SERVER_ERROR(HttpStatus.INTERNAL_SERVER_ERROR, "E0003"),
   SECURITY_01(HttpStatus.UNAUTHORIZED, "S0001", "권한이 없습니다."),
   LOGIN_UNABLE(HttpStatus.BAD_REQUEST,"L001","해당 계정을 찾을 수 없습니다. 아이디와 비밀번호를 확인해주세요.");

   private final HttpStatus status;
   private final String code;
   private String message;

   ExceptionEnum(HttpStatus status, String code) {
       this.status = status;
       this.code = code;
   }

   ExceptionEnum(HttpStatus status, String code, String message) {
       this.status = status;
       this.code = code;
       this.message = message;
   }
}
이와 같이 내가 만들고 싶은 Exception의 종류를 enum 옵션으로 이름을 정하고 (LOGIN_UNABLE 같은) 생성자에 위에서 지정한 Entity 생성자와 input이 일치하도록 설정한 뒤 각 enum 옵션마다 미리 매칭되는 httpstatus, code, 그리고 에러메세지를 지정해준다.
3. LoginUnableException (Exception class)
이 클래스에서는 위에서 정의한 exceptionenum 타입을 받아서 exception을 객체화한다.
코드는 매우 간단하다.
@Getter
public class LoginUnableException extends IllegalStateException{
   private ExceptionEnum error;

   public LoginUnableException(ExceptionEnum e){
       super(e.getMessage());
       this.error = e;
   }
}
4. ApiExceptionAdvice
이 class가 있어야 우리가 지금까지 설정한 Exception과 그에 따른 Entity 변수(code와 message)가 exception 발생시 response body에 담길 수 있다.
각 @ExceptionHandler 어노테이션이 붙은 함수를 정의하고 함수의 매개변수로 HttpServeltRequest와 실행할 Exception클래스를 final로 지정한다.
해당 함수의 return 값으로 ResponseEntity(기존의 정의되어 있는 response 값)을 아래 코드와 같이 다시 설정하고 build해주면 된다!
@RestControllerAdvice
public class ApiExceptionAdvice {
   @ExceptionHandler({LoginUnableException.class})
   public ResponseEntity<LoginExceptionEntity> exceptionHandler(HttpServletRequest request, final LoginUnableException e) {
       //e.printStackTrace();
       return ResponseEntity
               .status(e.getError().getStatus())
               .body(LoginExceptionEntity.builder()
                       .errorCode(e.getError().getCode())
                       .errorMessage(e.getError().getMessage())
                       .build());
   }

   @ExceptionHandler({RuntimeException.class})
   public ResponseEntity<LoginExceptionEntity> exceptionHandler(HttpServletRequest request, final RuntimeException e) {
       e.printStackTrace();
       return ResponseEntity
               .status(ExceptionEnum.RUNTIME_EXCEPTION.getStatus())
               .body(LoginExceptionEntity.builder()
                       .errorCode(ExceptionEnum.RUNTIME_EXCEPTION.getCode())
                       .errorMessage(e.getMessage())
                       .build());
   }

   @ExceptionHandler({AccessDeniedException.class})
   public ResponseEntity<LoginExceptionEntity> exceptionHandler(HttpServletRequest request, final AccessDeniedException e) {
       e.printStackTrace();
       return ResponseEntity
               .status(ExceptionEnum.ACCESS_DENIED_EXCEPTION.getStatus())
               .body(LoginExceptionEntity.builder()
                       .errorCode(ExceptionEnum.ACCESS_DENIED_EXCEPTION.getCode())
                       .errorMessage(e.getMessage())
                       .build());
   }

   @ExceptionHandler({Exception.class})
   public ResponseEntity<LoginExceptionEntity> exceptionHandler(HttpServletRequest request, final Exception e) {
       e.printStackTrace();
       return ResponseEntity
               .status(ExceptionEnum.INTERNAL_SERVER_ERROR.getStatus())
               .body(LoginExceptionEntity.builder()
                       .errorCode(ExceptionEnum.INTERNAL_SERVER_ERROR.getCode())
                       .errorMessage(e.getMessage())
                       .build());
   }
}
5. 활용
이제 모든 준비는 끝났다 🤸♀️
그저 Exception을 내고 싶은 장소에 throw new XXXException("message에 넣고싶은 내용"); 만 써주면 된다!
만약 ExceptionEnum에서 미리 enum 옵션으로 정의해 둬서 이미 메세지까지 모두 지정된 에러를 내고싶다면
throw new LoginUnableException(ExceptionEnum.LOGIN_UNABLE); 와 같이 해당 enum타입과 매칭되는 Exception 객체를 새로 생성하고 매개변수로 해당 enum 타입을 주면 된다!
    @Transactional
   public void unScrapArticle(String userId, Long articleId){
       Member user = memberRepository.findByUserId(userId);
       Optional<Article> article = articleRepository.findById(articleId);
       ScrapArticle target = scrapArticleRepositorySupport.findByUserIdandArticleId(userId,articleId);
       if(target == null){
           throw new UnScrapUnscrappedArticleException(ExceptionEnum.UNSCRAP_UNSCRAPPED_ARTICLE);
       }
       target.getScrap_article().getScrap_articles().remove(target);
       target.getScrap_member().getScrap_articles().remove(target);
       scrapArticleRepository.delete(target);
   }
6. 테스트코드
    @Test(expected = UnScrapUnscrappedArticleException.class)
   public void 스크랩안한기사스크랩해제Exception내기(){
       //given
       Article article =  articleRepository.save(new Article("스크랩기사","작성자","날짜","회사","이미지","기사원문","기사요약","해시태그","카테고리",false));
       Member member = memberService.signup(new SignupRequest("scraptestmember"));
       //when
       scrapArticleService.unScrapArticle(member.getUserId(), article.getId());
       //then
       Assertions.fail("예외 발생 안됨");
   }
🎈Retrofit을 이용한 HTTP 통신에서 ErrorMessage 가져오기
HTTP 통신에서 ResponseBody로 ErrorBody를 받게 되는 경우
MemberAPI signInAPI = RetrofitClient.getInstance().create(MemberAPI.class);
           Call<LoginResponseInfo> signInResponseInfo =  signInAPI.signMember(input);
           signInResponseInfo.enqueue(new Callback<LoginResponseInfo>() {
               @Override
               public void onResponse(Call<LoginResponseInfo> call, Response<LoginResponseInfo> response) {
                   if(response.isSuccessful()){
                    // 📌 HTTP 통신 성공, 제대로된 responseBody (Callback에서 원했던 형태) 잘 받아온 경우
                   }
                   else{
                        // 📌HTTP 통신 성공, 그러나 Exception 발생으로 responsebody에 errorbody가 담긴 경우
                   }
               }

               @Override
               public void onFailure(Call<LoginResponseInfo> call, Throwable t) {
                    // 📌 HTTP 통신이 실패한 경우
               }
           });
Retrofit을 활용해서 ErrorMessage를 가져오려면 다음과 같은 코드에서 두번째 핀📌이 꽂혀진 else 부분에서 해당 코드를 구현해야 한다!
왜냐하면 저 부분이 바로 HTTP 통신은 성공했지만 서버에서 로직에 따라 Exception이 발생해서 responsebody가 errorBody로 돌아온 경우이기 때문이다.
ResponseBody에서 ErrorMessage 추출하기
우선 위의 Server 에서 ExceptionEntity를 정의해준 것과 마찬가지로 Android 측면에서도 ErrorBody의 변수(errorCode, errorMessage)를 받을 객체가 필요하기 때문에 해당 클래스를 정의해주어야 한다.
- ErrorBody.class
import com.google.gson.annotations.SerializedName;
public class ErrorBody {
@SerializedName("errorCode")
private String code;

@SerializedName("errorMessage")
private String message;

public String getCode() {
    return code;
}

public String getMessage() {
    return message;
}

public void setCode(String code) {
    this.code = code;
}

public void setMessage(String message) {
    this.message = message;
}
}
이 때 중요한 점은 ErrorBody로 담겨올 Data를 마치 하나의 Json처럼 생각하고 다른 Entity와 똑같이 해당하는 변수를 @SerializedName으로 받아주어야 한다는 것이다. 당연히 받을 변수와 모두 매칭되도록 설계해야 한다.
ErrorBody error = new Gson().fromJson(response.errorBody().charStream(),ErrorBody.class); 그리고 ErrorMessage를 받아야 하는 부분에서 다음과 같은 코드를 작성한다.
이 코드는 response에서 받은 errorBody를 Gson으로 파싱해서 우리가 정의한 ErrorBody 클래스 객체 형태로 변환되도록 하는 코드이다.
여기까지만 구현하면 모든 것이 끝난 것이다 🎆🎇💃
ErrorBody 객체에서 errorMessage를 꺼내오고 싶으면 그냥 error.getMessage() 해주면 된다!