flutter_DefaultTabController

class MyApp extends StatelessWidget {
Widget build(BuildContext context) {
return MaterialApp(
theme: ThemeData.dark().copyWith(
scaffoldBackgroundColor: darkBlue,
),
debugShowCheckedModeBanner: false,
home: DefaultTabController(
length: 3,
child: Scaffold(
appBar: AppBar(
bottom: const TabBar(tabs: [
Tab(icon: Icon(Icons.directions_car)),
Tab(icon: Icon(Icons.directions_transit)),
Tab(icon: Icon(Icons.directions_bike)),
]),
),
),
));
}
}defaulttabcontroller는 length와 child를 기본으로 받는다. tabbar는 tabs로 List형식으로 아이콘들을 받을 수 있다.
위의 링크를 바탕으로 home에 속해있고 appBar 밑에 body를 만든 후 TabBarView로 각각의 페이지로 연결해볼것이다.
  body: const TabBarView(
              children: [
                Center(child: Text('im car')),
                Center(child: Text('im bus')),
                Center(child: Text('im bicycle')),
              ],
            ),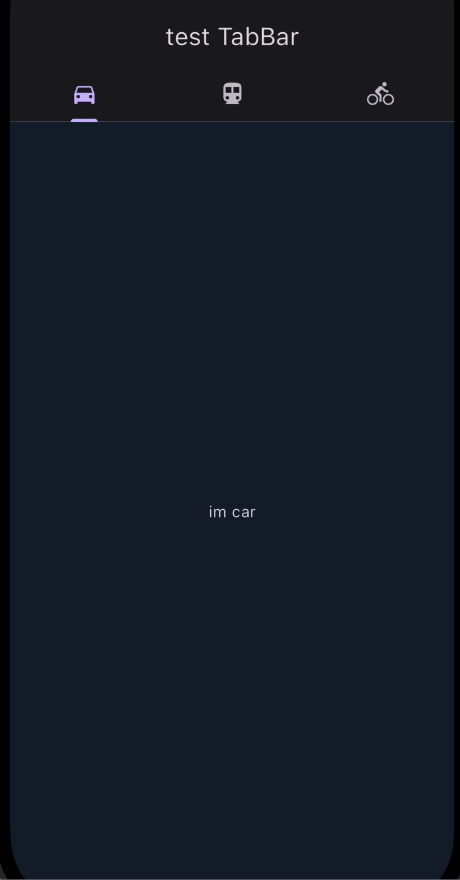
잘 작동된다~
지금은 화면에서 정적인 text만 있기 때문에 화면이 양옆으로 움직이는 건 defaulttabcontroller에 의해서 관리되므로, stateless로만 관리해도 충분하다.
그러나 탭의 내용이 동적으로 변경되어야 할 경우에는, (예를들어 사용자의 입력이나 외부 데이터를 받아오는 경우같은..)stateful한 위젯을 사용해야한다.

진화중인 돌리입니다 :>