Portenta h7 pinouts
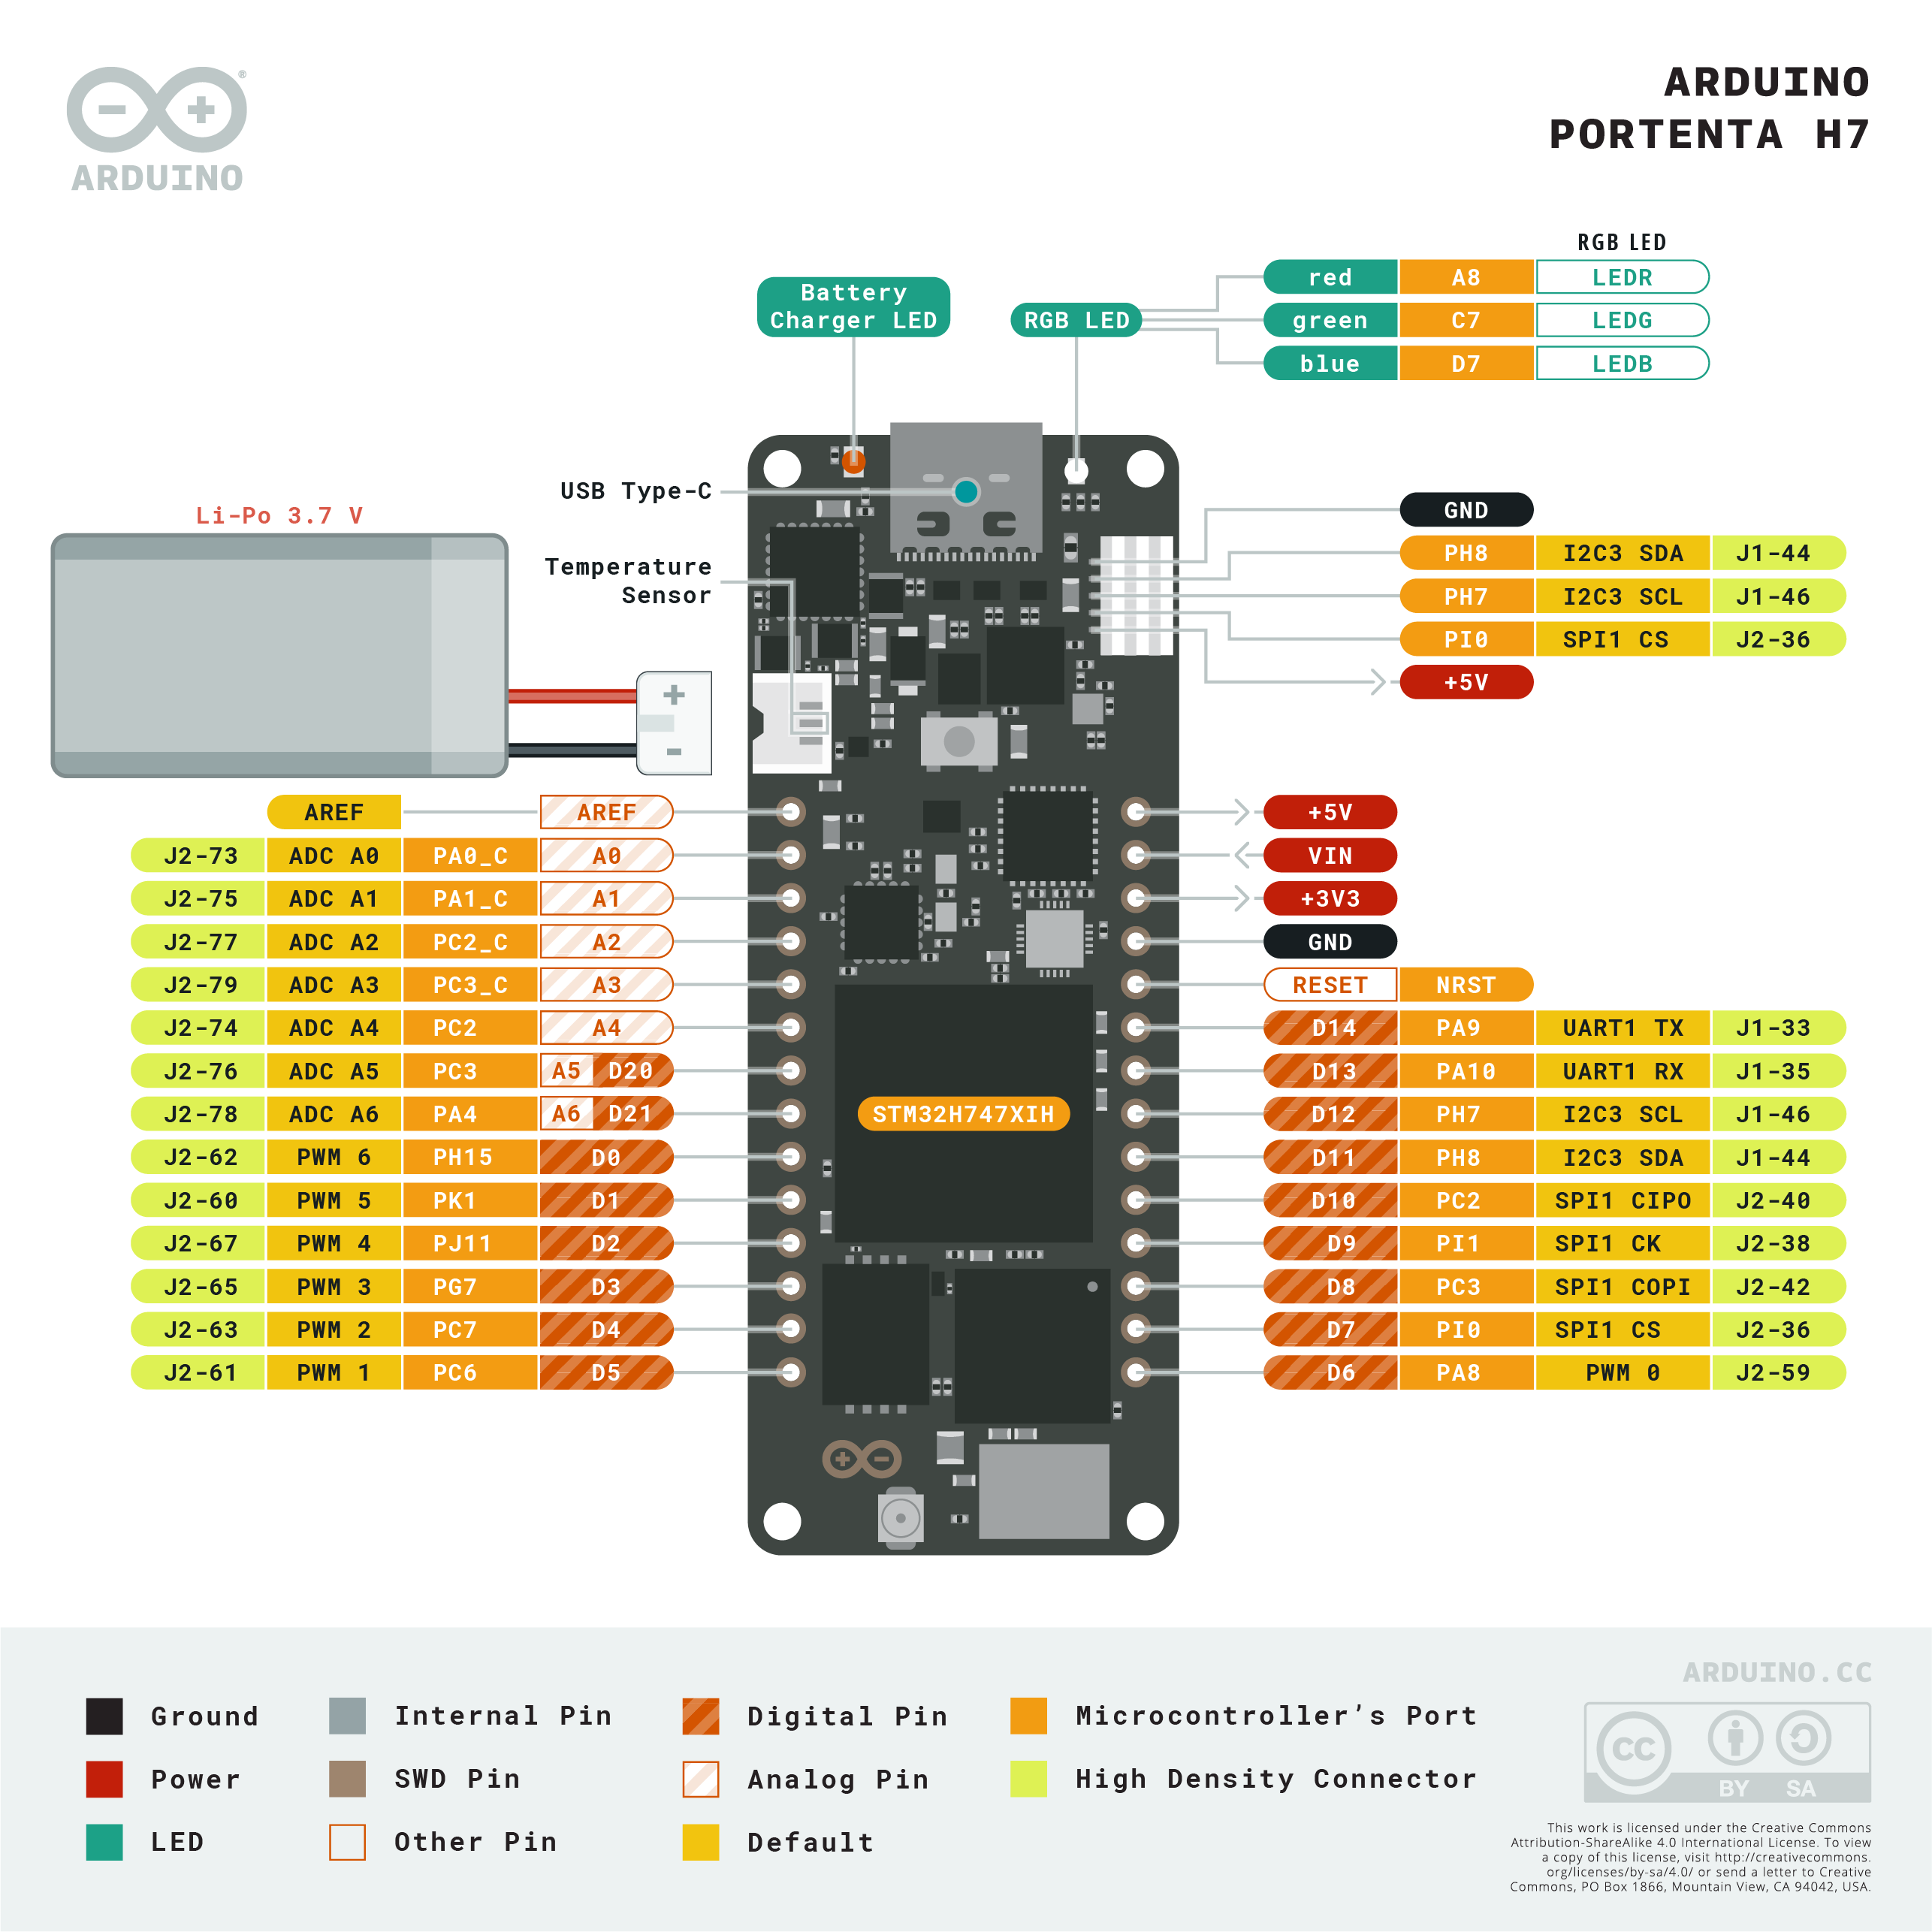
회로도 참고 :
portenta h7 schematics
DeviceTree 작성
zephyr rtos는 linux와 같이 DeviceTree기반의 Device Model을 제공한다. 개인적으로 zephyr를 처음 접하면서 가장 인상 깊은 부분이다.
다음 코드는 potenta h7의 gpio led 부분이다.
#include <st/h7/stm32h747Xi_m7.dtsi>
#include <st/h7/stm32h747xihx-pinctrl.dtsi>

/ {
    gpioled: leds {
        compatible = "gpio-leds";
        red_led_1:led_1 {
            gpios = <&gpiok 5 GPIO_ACTIVE_LOW>;
            label = "LED1";
        };
        green_led_2:led_2 {
            gpios = <&gpiok 6 GPIO_ACTIVE_LOW>;
            label = "LED2";
        };
        blue_led_3:led_3 {
            gpios = <&gpiok 7 GPIO_ACTIVE_LOW>;
            label = "LED3";
        };
    };

  		... (생략)

    aliases {
    	led0 = &red_led_1;
        led1 = &green_led_2;
        led2 = &blue_led_3;
    };
};

... (생략)
portenta h7의 soc와 pin 모델을 포함 한다
#include <st/h7/stm32h747Xi_m7.dtsi>
#include <st/h7/stm32h747xihx-pinctrl.dtsi>
디바이스 트리는 각 노드가 property를 가지고 있다.
property value type :
- empty
- u32
- u64
- string
- prop-encoded-array
- phandle
- string list
대략적인 디바이스 트리의 노드 구조이다.
(참고 : https://elinux.org/Device_Tree_Usage)
/dts-v1/;

/ {
    node1 {
        a-string-property = "A string";
        a-string-list-property = "first string", "second string";
        // hex is implied in byte arrays. no '0x' prefix is required
        a-byte-data-property = [01 23 34 56];
        child-node1 {
            first-child-property;
            second-child-property = <1>;
            a-string-property = "Hello, world";
        };
        child-node2 {
        };
    };
    node2 {
        an-empty-property;
        a-cell-property = <1 2 3 4>; /* each number (cell) is a uint32 */
        child-node1 {
        };
    };
};
디바이스 트리는 하드웨어에 대한 기본 노드 포멧(base.yaml)을 제공한다. 기본 정보는 soc에 대한 정의부터 i2c, spi 등 버스를 이용하는 디바이스까지 정의할 수 있도록 설계되었다. 따라서 각 노드는 레지스터 주소값 또는 인덱스, compatible, label, 그 밖 property를 가질 수 있다. 자세한 내용은 devicetree specification 에서 더 찾아 볼 수 있다.
다시 portenta의 device tree로 돌아가보자.
   gpioled: leds {
          compatible = "gpio-leds";
gpioled는 노드의 label이고 leds는 노드 이름이 되겠다. 이 노드는 compatible이라는 속성을 가지고 있는데, compatible은 바인딩 파일에 대한 hint이다.
바인딩 폴더로 들어가서 gpio-leds.yaml 를 찾아보자
cat $ZEPHRY_BASE/dts/bindings/gpio/gpio-leds.yaml해당 내용은 아래와 같이 정의 되어있다.
compatible: "gpio-leds"

include:
    - name: base.yaml
      property-allowlist: [label]

properties:
    label:
      description:
			...

child-binding:
    description: GPIO LED child node
    properties:
       gpios:
          type: phandle-array
          required: true
       label:
          required: false
          type: string
          description:
          	...
"gpio-leds"는 label property만 가지고 있고, child node의 바인딩 포멧을 정의하고 있다. child node의 property로 gpios와 label을 가진다. gpios의 타입은 phandle-array로 gpios에 필요한 핸들 옵션을 정의하여 넘겨주는 것을 알 수 있다.