
서론
진행하고 있는 프로젝트에 고도화된 검색이 필요하게 되어 이전에 말로만 들어왔던 Elasticsearch를 공부를 했었다.
근데 찾아보니 Elasticsearch에 라이선스 문제가 있어 Opensearch라는 오픈소스 대체제가 등장했다. (관련 내용은 이 게시글에서 잘 설명하고 있으니 참고하자.)
현재 인프라로 사용하고 있는 AWS에서도 Opensearch를 공식적으로 밀고 있었기에 Opensearch로 검색 엔진을 구성해보기로 했다.
AWS의 Opensearch 서비스를 써보기 전(돈 나가니까) 기술 검증을 위해 로컬 PC에 도커를 깔아서 테스트를 해보자.
docker-compose.yml 작성하기
ELK Stack처럼 Opensearch 말고도 Kibana의 대체제 Opensearch Dashboards와 Logstash도 설치해야하기 때문에 docker-compose.yml을 작성해야 한다.
공식 문서에서 알려준 docker-compose.yml을 참고하여 로컬에서 실행할 때 편리하도록 직접 수정했다.
우선 내가 작성한 내용 전부를 보여주자면 이러하다...
services:
  opensearch-node1: # This is also the hostname of the container within the Docker network (i.e. https://opensearch-node1/)
    image: opensearchproject/opensearch:latest
    container_name: opensearch-node1
    environment:
      - cluster.name=opensearch-cluster # Name the cluster
      - node.name=opensearch-node1 # Name the node that will run in this container
      - discovery.seed_hosts=opensearch-node1 # Nodes to look for when discovering the cluster
      - cluster.initial_cluster_manager_nodes=opensearch-node1 # Nodes eligibile to serve as cluster manager
      - bootstrap.memory_lock=true # Disable JVM heap memory swapping
      - "OPENSEARCH_JAVA_OPTS=-Xms512m -Xmx512m" # Set min and max JVM heap sizes to at least 50% of system RAM
      - plugins.security.disabled=true # 보안 플러그인 해제
    ulimits:
      memlock:
        soft: -1 # Set memlock to unlimited (no soft or hard limit)
        hard: -1
      nofile:
        soft: 65536 # Maximum number of open files for the opensearch user - set to at least 65536
        hard: 65536
    volumes:
      - opensearch-data1:/usr/share/opensearch/data # Creates volume called opensearch-data1 and mounts it to the container
    ports:
      - 9200:9200 # REST API
      - 9600:9600 # Performance Analyzer
    networks:
      - opensearch-net # All of the containers will join the same Docker bridge network
  opensearch-dashboards:
    image: opensearchproject/opensearch-dashboards:latest # Make sure the version of opensearch-dashboards matches the version of opensearch installed on other nodes
    container_name: opensearch-dashboards
    ports:
      - 5601:5601 # Map host port 5601 to container port 5601
    expose:
      - "5601" # Expose port 5601 for web access to OpenSearch Dashboards
    environment:
      OPENSEARCH_HOSTS: '["http://opensearch-node1:9200"]' # https -> http
      DISABLE_SECURITY_DASHBOARDS_PLUGIN: true # 브라우저로 접속 시 로그인 제거
    networks:
      - opensearch-net

volumes:
  opensearch-data1:

networks:
  opensearch-net:
내가 수정한 내용은
- 추가 노드 제거
어차피 테스트용으로 싱글 노드로만 돌아가도 상관없기 때문에 관련 설정은 제외 했다. - 보안 플러그인 해제
기본적으로 Opensearch의 REST API에 접근하려면 https를 써야하는데 보안 구성을 하는 게 우선은 테스트 환경에서 번거롭기 때문에 꺼버렸다.당연히 실제 프로덕션 환경에서는 반드시 켜서 적절히 보안을 구성해주어야 한다!!
plugins.security.disabled=true: Opensearch 보안 플러그인 해제DISABLE_SECURITY_DASHBOARDS_PLUGIN: true: Dashboards 로그인 제거OPENSEARCH_HOSTS: '["http://opensearch-node1:9200"]': SSL 연결을 꺼놨기 때문에 https -> http로 변경
실행해보기
작성한 docker-compose.yml로 컨테이너를 실행한다.
이후 브라우저로 http://localhost:9200에 접속해본다.
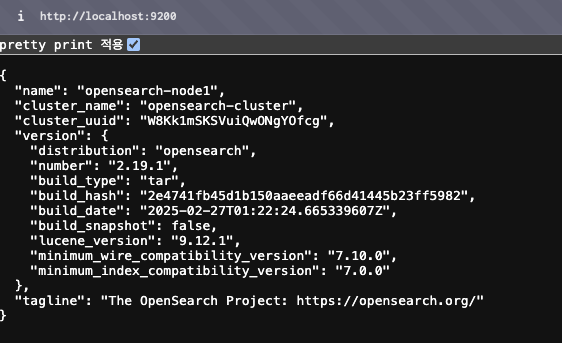
이런 식으로 구성 내용이 잘 넘어오면 실행이 잘 된 것이다.
이번에는 Dashboards에 접속해보자.
http://localhost:5601이다.

이런식으로 홈 화면이 잘 뜨면 올바르게 잘 실행된 것이다!