INTRO
-
관계형 데이터베이스에서의 외래 키 속성을 사용해 모델간 N:1 관계 설정하기
-
RDB(관계형 데이터 베이스)에서는 각 행에서 고유하게 식별 가능한 기본 키가 있고 외래 키(FK)를 사용해 각 행에서 서로 다른 테이블 간의 관계를 만드는 데 사용할 수 있음
RDB에서의 관계
- 1:1
- 한 테이블의 레코드 하나가 다른 테이블의 레코드 단 한개와 관련된 경우
- N:1
- 한 테이블의 0개 이상의 레코드가 다른 테이블의 레코드 한개와 관련된 경우
- M:N
- 한 테이블의 0개 이상의 레코드가 다른 테이블의 0개 이상의 레코드와 관련된 경우
FK
- 외래 키
- RDB에서 다른 테이블의 행을 식별할 수 있는 키
- 참조되는 테이블의 PK를 가리킴
특징
- 키를 사용하여 부모 테이블의 유일한 값을 참조
- 외래 키의 값이 반드시 부모 테이블의 기본 키 일 필요는 없지만 유일한 값이어야함
N:1(Article - Comment)
- Comment(N)- Article(1)
- 0개 이상의 댓글은 1개의 게시글에 작성 될 수 있음
모델 관계 설정

- 게시판의 게시글과 N:1 관계를 나타낼 수 있는 댓글 구현
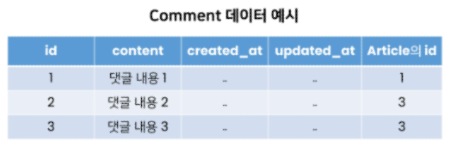
- 3번 게시글에 2개의 댓글이 작성 된거임
Django Relationship fields 종류
- OneToOneField()
- ForeignKey()
- ManyToManyField()
ForeignKey(to, on_delete, ...)
- A many-to-one relationship을 담당하는 Django의 모델 필드 클래스
- Django 모델에서 관계형 데이터베이스의 외래 키 속성을 담당
- 2개의 필수 위치 인자가 필요
- 참조하는 model class
- on_delete 옵션
Comment Model
Comment 모델 정의
class Comment(models.Model):
    article = models.ForeignKey(Article, on_delete=models.CASCADE)
    content = models.CharField(max_length=200)
    created_at = models.DateTimeField(auto_now_add=True) # 작성시간을 장고가 자동으로 저장해줌
    updated_at = models.DateTimeField(auto_now=True)

    def __str__(self):
return self.content- 외래 키 필드는 ForeignKey 클래스를 작성하는 위치와 관계없이 필드의 마지막에 작성됨
- ForeignKey 클래스의 인스턴스 이름은 참조하는 모델 클래스 이름의 단수형으로 작성하는 것을 권장
ForeignKey arguments - on_delete
- 외래 키가 참조하는 객체가 사라 졌을 때,
외래 키를 가진 객체를 어떻게 처리할 지를 정의 - 데이터 무결성을 위해 매우 중요함!!
- on_delete 옵션 값
CASCADE: 부모 객체(참조된 객체)가 삭제 됐을 때 이를 참조하는 객체도 삭제PROTECT, SET_NULL, SET_DEFAULT...등 여러 옵션 존재
Migration 과정 진행
모델 변경 및 추가 했으니까
python manage.py makemigrations
python manage.py migrate
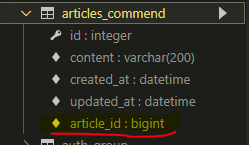
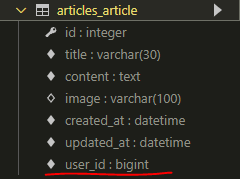
- ForeignKey 모델 필드로 인해 작성된 컬럼의 이름이 articled_id인 것을 확인
- 이처럼 명시적인 모델 관계 파악을 위해 참조하는 클래스 이름의 소문자로 작성하는 것이 권장되었던 거임
관계 모델 참조
Related manager
- Related manager는 N:1 혹은 M:N관계에서 사용 가능한 문맥
- Django는 모델 간 N:1 혹은 M:N관계가 설정되면 역참조할 때에 사용할 수 있는 manager를 생성
역참조
- 나를 참조하는 테이블을 참조하는 것
- 즉, 본인을 외래 키로 참조 중인 다른 테이블에 접근
- N:1 관계에서는 1이 N을 참조하는 상황
article.comment_set.method()
- Article모델이 Comment모델을 참조(역참조)할 때 사용하는 매니저
- Article 클래스에는 Comment와의 어떠한 관계도 작성되어 있지 않으므로
article.comment형식으로는 참조할 수 없음
-> 따라서, Django가 역참조 할 수 있는comment_setmanager를 자동으로 생성해서article.comment_set형태로 댓글 객체를 참조 가능 - 반면 참조 상황에서는 실제 ForeignKey 클래스로 작성한 인스턴스가 Comment 클래스의 클래스 변수이기 때문에
comment.article형태로 작성 가능
ForeignKey arguments - related_name
class Comment(models.Model):
article = models.ForeignKey(Article, on_delete=models.CASCADE, related_name = 'conmments')- ForeignKey 클래스의 선택 옵션
- 역참조 시 사용하는 매니저 이름(model_set manager)을 변경할 수 있음
- 작성 후, migration 과정 필요
- 선택 옵션이지만 상황에 따라 반드시 작성해야 하는 경우가 생김
Comment CRUD 구현
Create
- 사용자로부터 댓글 데이터를 입력 받기 위한 CommentForm 작성
from .models import Article, Comment

class CommentForm(forms.ModelForm):

    class Meta:
        model = Comment
fields = '__all__'- detail 페이지에서 CommentForm 출력
from .forms import ArticleForm, CommentForm

def detail(request, pk):
    article = Article.objects.get(pk=pk)
    comment_form = CommentForm()
    context = {
        'article': article,
        'comment_form' : comment_form,
    }
return render(request, 'articles/detail.html', context)- detail 페이지에서 CommentForm 출력
<!-- articles/detail.html -->
    <h5>Comments</h5>
    <hr>
    <form action="" method = "POST">
      {% csrf_token %}
      {{comment_form}}
      <input type="submit" vlaue="작성">
    </form>
- detail 페이지에 출력된 CommentForm을 살펴보면 다음과 같이 출력됨
- 실 서비스에서는 댓글을 작성할 때 댓글을 어떤 게시글에 작성하는지 직접 게시글 번호를 선택하지 않음
-> 실제로는 해당 게시글에 댓글을 작성하면 자연스럽게 그 게시글에 댓글이 작성되어야함
-> 다음과 같이 출력되는 이유는 Comment클래스의 외래키 필드 article 또한 데이터 입력이 필요하기 때문에 출력되고 있는 거임
-> 따라서, 사용자의 입력으로 FK를 받는게 아니라 view함수 내에서 받아 별도로 처리되어 저장되게 하자
- 외래 키 필드를 출력에서 제외
class CommentForm(forms.ModelForm):

    class Meta:
        model = Comment
        # fields = '__all__'
        exclude = ('article',)
- 출력에서 제외된 FK 데이터는 어디서 받아와야 할까?
-> detail 페이지의 url을 살펴보자
path('<int:pk>/', views.detail, name='detail'),
-> 해당 게시글의 pk값이 사용되고 있다
-> 이 pk값을 바로 댓글의 FK로 활용하면되잖아
- 출력에서 제외된 FK 데이터는 어디서 받아와야 할까?
- 작성을 마치고 보면 article 객체 저장이 이루어질 타이밍이 보이지 않음
- 그래서 save() 메서드는 데이터베이스에 저장하기 전에 객체에 대한 추가적인 작업을 진행할 수 있도록 인스턴스만을 반환해주는 옵션 값을 제공
# article/urls.py
path('<int:pk>/comments/', views.comments_create, name = 'comments_create'),

# articles/views.py
def comments_create(request,pk):
    article = Article.objects.get(pk=pk)
    comment_form = CommentForm(request.POST)
    if comment_form.is_valid():
        # article 객체는 언제 저장할 수 있을까?
        comment_form.save()
    return redirect('articles:detail', article.pk)
<!-- articles/detail.html -->
<form action="{% url 'article:comments_create' article.pk %}" method = "POST">
{% csrf_token %}
{{comment_form}}
<input type="submit" vlaue="작성">
</form>- save 메서드의 commit 옵션을 사용해 DB에 저장되기 전 article 객체 저장하기
def comments_create(request,pk):
    article = Article.objects.get(pk=pk)
    comment_form = CommentForm(request.POST)
    if comment_form.is_valid():
        comment = comment_form.save(commit=False)
        comment.article = article
        comment.save()
return redirect('articles:detail', article.pk)- 성공

The save() method
- save(commit=False)
- 아직 데이터베이스에 저장되지 않은 인스턴스를 반환
- 저장하기 전에 객체에 대한 사용자 지정 처리를 수행할 때 유용하게 사용
Read
- 작성한 댓글 목록 출력하기
- 특정 article에 있는 모든 댓글을 가져온 후 context에 추가
def detail(request, pk):
    article = Article.objects.get(pk=pk)
    comment_form = CommentForm()
    comments = article.comment_set.all()
    context = {
        'article': article,
        'comment_form' : comment_form,
        'comments' : comments,
    }
return render(request, 'articles/detail.html', context)- detail 템플릿에서 댓글 목록 출력하기
    <hr>
    <h5>Comments</h5>
    <h4>댓글 목록</h4>
    <ul>
      {% for comment in comments %}
        <li> {{comment.content}} </li>
      {% endfor %}
    </ul>
    <hr>
    <form action="{% url 'articles:comments_create' article.pk %}" method = "POST">
      {% csrf_token %}
      {{comment_form}}
      <input type="submit" vlaue="작성">
    </form>
Delete
- 댓글 삭제 구현하기 (url, view)
# articles/urls.py
path('<int:article_pk>/comments/<int:comment_pk>/delete/', views.comments_delete, name = 'comments_delete'),

# articles/views.py
def comments_delete(request, article_pk, comment_pk):
    comment = Comment.objects.get(pk=comment_pk)
    comment.delete()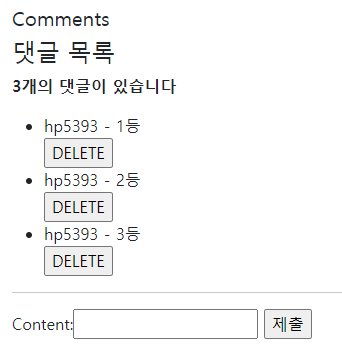
return redirect('articles:detail', article_pk)- 댓글을 삭제할 수 있는 버튼을 각각의 댓글 옆에 출력 될 수 있도록 함
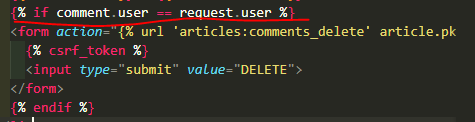
      {% for comment in comments %}
        <li>
          {{comment.content}}
          <form action="{% url 'articles:comments_delete' article.pk comment.pk %}" method = "POST">
            {% csrf_token %}
            <input type="submit" value="DELETE">
          </form>
        </li>
      {% endfor %}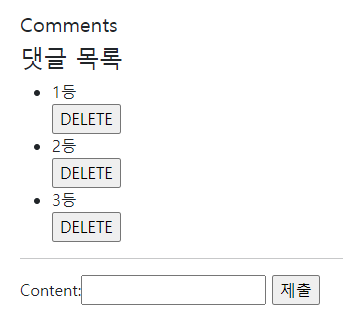
UPDATE
- 지금 안함
- 댓글 수정도 게시글 수정처럼 구현 가능
- 근데 그렇게하면 게시글 수정페이지 처럼 댓글 수정페이지가 필요
- 근데 일반적으로 댓글 수정은 수정 페이지 이동 없이 현재 페이지가 유지된 상태로 댓글 작성 Form 부분만 변경되어 수정할 수 있도록 함
-> Javascript의 영역
Comment 추가 사항
- 댓글 개수 출력하기
- DTL filter -
length사용
{{ comments|length }}

{{ article.vomment_set.all|length }}
{% if comments %}
<p><b>{{ comments|length }}개의 댓글이 있습니다</b></p>
{% endif %}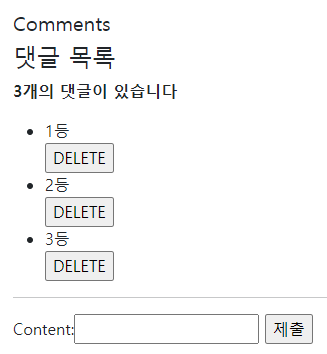
- Queryset API -
count()사용
{{ comments.count }}

{{ article.comment_set.count }}- DTL
for empty활용하기
      {% for comment in comments %}
        <li>
          {{comment.content}}
          <form action="{% url 'articles:comments_delete' article.pk comment.pk %}" method = "POST">
            {% csrf_token %}
            <input type="submit" value="DELETE">
          </form>
        </li>
      {% empty %}
        <p>댓글이 없다 이놈아</p>
      {% endfor %}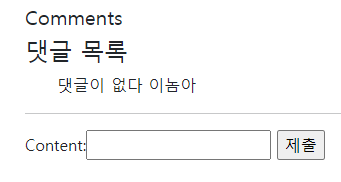
N:1 (Article-User)
- Article(N) -User(1)
- Article 모델과 User 모델 간 관계 설정
- "0개 이상의 게시글은 1개의 회원에 의해 작성될 수 있음"
Referncing the User model
Django에서 User 모델을 참조하는 방법
- settings.AUTH_USER_MODEL
- 반환 값 : 'accounts.User'(문자열)
- User 모델에 대한 외래 키 또는 M:N 관계를 정의할 때 사용
- models.py의 모델 필드에서 User 모델을 참조할 때 사용
- get_user_model()
- 반환 값 : User Object (객체)
- 현재 활성화된 User 모델을 반환
- 커스터 마이징한 User 모델이 있을 경우는 Custom User 모델,
그렇지 않으면 User를 반환 - models.py가 아닌 다른 모든 곳에서 유저 모델을 참조할 때 사용
모델 관계 설정
Article과 User간 모델 관계 설정
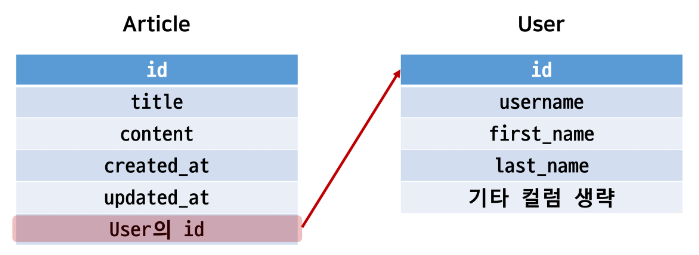
- Article 모델에 User 모델을 참조하는 외래 키 작성
# articles/models.py
class Article(models.Model):
    user = models.ForeignKey(settings.AUTH_USER_MODEL, on_delete=models.CASCADE)
    title = models.CharField(max_length=30)
    content = models.TextField()
    image = models.ImageField(blank=True, null=True)
    created_at = models.DateTimeField(auto_now_add=True)
    updated_at = models.DateTimeField(auto_now=True)

    def __str__(self):
        return f'{self.id}번째글 - {self.title}'
Migration 진행
- 기존에 존재하던 테이블에 새로운 컬럼이 추가되어야 하는 상황!!
-> 따라서, migrations 파일이 곧바로 만들어지지 않고 일련의 과정이 필요함
$ python manage.py makemigrations
You are trying to add a non-nullable field 'user' to article without a default; we can't do that (the database needs something to populate existing rows).
Please select a fix:
 1) Provide a one-off default now (will be set on all existing rows with a null value for this column)
 2) Quit, and let me add a default in models.py
Select an option:
python manage.py makemigrations이후 첫 화면- 기본적으로 모든 컬럼은 NOT NULL 제약조건이 있어서 데이터가 없이는 새로 추가되는 외래 키 필드 user_id가 생성되지 않는다
- 그래서 기본값을 어떻게 작성할 것인지 선택해야한다
- 1을 입력하고 Enter 진행
- 다음 화면에서 직접 기본값을 입력할거임
Please enter the default value now, as valid Python
The datetime and django.utils.timezone modules are available, so you can do e.g. timezone.now
Type 'exit' to exit this prompt
>>>- 두번째 화면
- article의 user_id에 어떤 데이터를 넣을 것인지 직접 입력해야됨
- 마찬가지로 1입력 후 Enter 진행
- 그러면 기존에 작성된 게시글이 있다면 모두 1번 회원이 작성한 것으로 처리된다

Django에서 User 모델을 참조하는 방법 정리
- 문자열과 객체를 반환하는 특징과 Django의 내부적인 실행 원리에 관련된 것이므로 이렇게만 외우도록 한다.
- User모델을 참조할 때
- models.py에서는 settings.AUTH_USER_MODEL
- 다른 모든 곳에서는 get_user_model()
Create
- 인증된 회원의 게시글 작성 구현하기
- 작성하기 전 로그인을 먼저 진행한 상태로 진행
ArticleForm
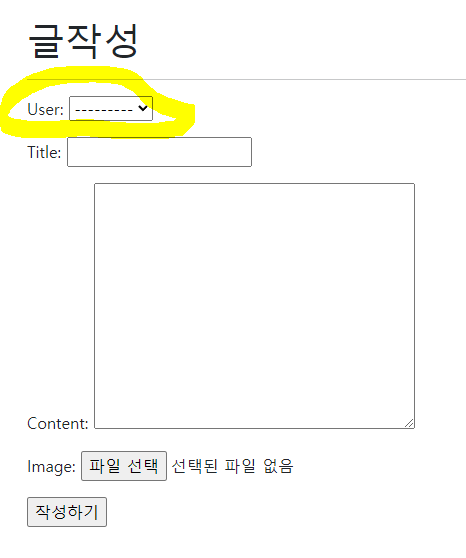
-
ArticleForm 출력을 확인해보면 create 템플릿에서 불필요한 user 필드가 출력됨
-
이전에 CommentForm에서 외래 키 필드 article이 출력되는 상황과 동일
-
user필드에 작성해야 하는 user객체는 view함수의 request 객체를 활용해야 함
-
ArticleForm의 출력 필드 수정
class ArticleForm(forms.ModelForm):
    class Meta:
        model = Article
        # fields = '__all__'
        exclude = ('user',)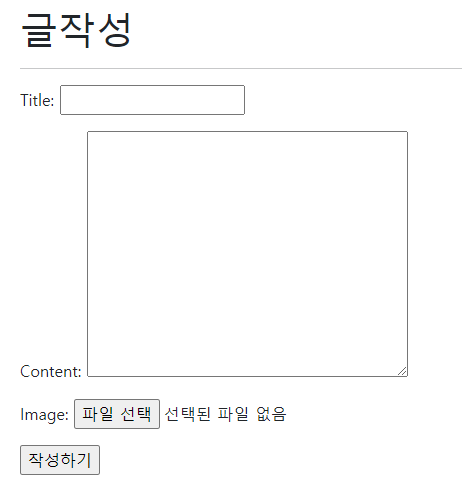
외래 키 데이터
- 게시글 작성 시 작성자 정보가 함께 저장될 수 있도록 save의 commit 옵션을 활용
@login_required
@require_http_methods(['GET','POST'])
def create(request):
    if request.method == 'POST':
        form = ArticleForm(request.POST, request.FILES)
        if form.is_valid():
            article = form.save(commit=False)
            article.user = request.user
            article.save()
            return redirect('articles:detail', article.pk)
    else:
        form = ArticleForm()

    context = {'form': form}
    return render(request, 'articles/create.html', context)
Delete
게시글 삭제 시 작성자 확인
- 이제 게시글에는 작성자 정보가 함께 들어있기 때문에 현재 삭제를 요청하려는 사람과 게시글을 작성한 사람을 비교하여 본인의 게시글만 삭제할 수 있도록 해야한다
@require_POST
def delete(request, pk):
    article = Article.objects.get(pk=pk)
    if request.user.is_authenticated:
        if request.user == article.user:
            article.delete()
            return redirect('articles:index')
    return redirect('articles:detail', article.pk)
Update
- 수정도 마찬가지로 수정을 요청하려는 사람과 게시글을 작성한 사람을 비교하여 본인의 게시글만 수정 할 수 있도록 함
@login_required
@require_http_methods(['GET','POST'])
def update(request, pk):
    article = Article.objects.get(pk=pk)
    if request.user == article.user:
        if request.method == 'POST':
            form = ArticleForm(request.POST, request.FILES, instance=article)
            if form.is_valid():
                form.save()
                return redirect('articles:detail', pk=article.pk)
        else:
            form = ArticleForm(instance=article)

        context = {'form': form, 'article': article}
        return render(request, 'articles/update.html', context)
    else:
return redirect('articles:detail', pk=article.pk)- 추가로 해당 게시글의 작성자가 아니면, 수정/삭제 버튼을 출력하지 않도록 만들자
    {% if request.user == article.user %}
      <a href="{% url 'articles:update' article.pk %}">수정하기</a>
      <form action="{% url 'articles:delete' article.pk %}" id="delete-form">
        {% csrf_token %}
        <input type="submit" value="삭제하기" id="delete-btn" />
      </form><br>
      <hr>
    {% endif %}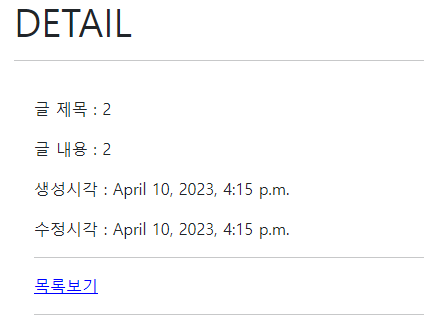
Read
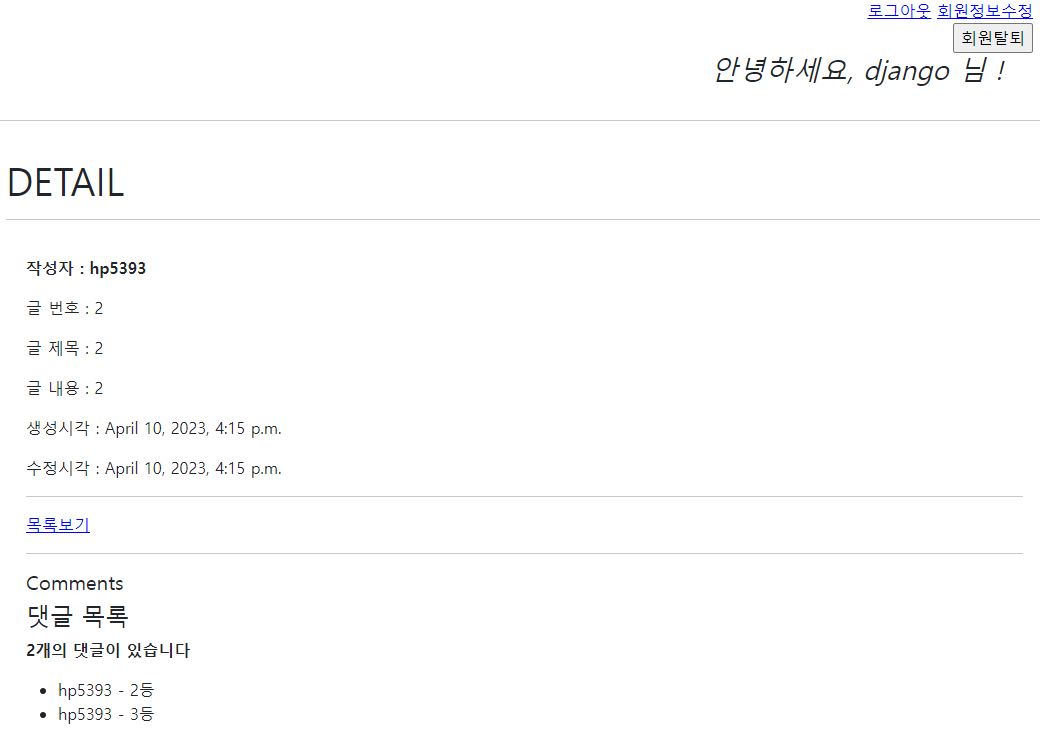
게시글 작성자 출력
- index 템플릿과 detail 템플릿에서 각 게시글의 작성자 출력
    <p><b>작성자 : {{article.user}} </b></p>
    <p>글 번호 : {{article.pk}} </p>
    <p>글 제목 : {{article.title}}</p>
    <p>글 내용 : {{article.content}}</p>
    <p>생성시각 : {{article.created_at}}</p>
    <p>수정시각 : {{article.updated_at}}</p>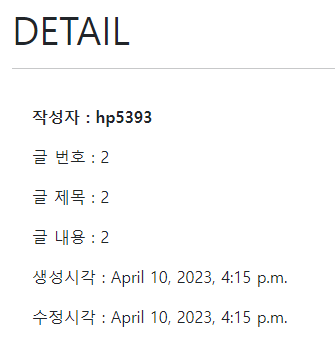
N:1 (Comment - User)
- Comment(N) - User(1)
- Comment 모델과 User 모델 간 관계 설정
- 0개 이상의 댓글은 1개의 회원에 의해 작성될 수 있음
모델 관계 설정
Comment 와 User간 모델 관계 설정
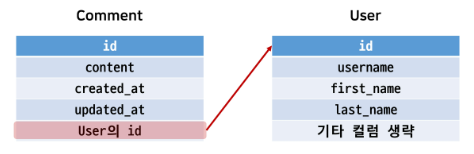
- comment 모델에 User 모델을 참고하는 외래 키 작성
# articles/models.py

class Comment(models.Model):
    article = models.ForeignKey(Article, on_delete=models.CASCADE)
    user = models.ForeignKey(settings.AUTH_USER_MODEL, on_delete=models.CASCADE)
    content = models.CharField(max_length=200)
    created_at = models.DateTimeField(auto_now_add=True)
    updated_at = models.DateTimeField(auto_now=True)

    def __str__(self):
        return self.content
Migration 진행
python manage.py makemigrations
- 기존에 존재하던 테이블에 새로운 컬럼이 추가되어야하는 상황
-> migrations 파일이 곧바로 만들어지지 않고 일련의 과정 필요
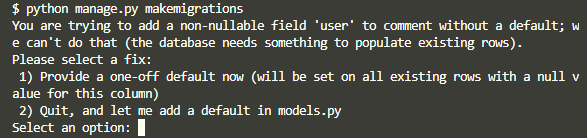
- 첫번째 화면
- 기본적으로 모든 컬럼은 NOT_NULL 제약조건이 있기 때문에 데이터가 없이는 새로 추가되는 외래 키 필드 user_id가 생성되지 않음
- 그래서 기본값을 어떻게 작성할 것인지 선택해야함
- 1을 입력하고 Enter 진행

- 두번째 화면
- comment의 user_id에 어떤 데이터를 넣을 것인지 직접 입력해야함
- 마찬가지로 1 입력하고 Enter 진행
- 그러면 기존에 작성된 댓글이 있다면 모두 1번 회원이 작성한 것으로 처리됨
python manage.py migrate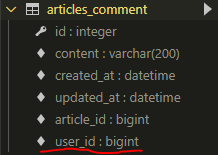
Create
- 인증된 회원의 댓글 작성 구현하기
- 작성하기 전 로그인을 먼저 진행한 상태로 진행
CommentForm

- CommentForm 출력을 확인해보면 create 템플릿에서 불필요한 필드(user)가 출력됨
- user 필드에 작성해야 하는 user객체는 view함수의 request 객체를 활용해야 함
class CommentForm(forms.ModelForm):

    class Meta:
        model = Comment
        # fields = '__all__'
        exclude = ('article','user',)
- CommentForm의 출력 필드 수정
외래 키 데이터 누락
- 댓글 작성 시 이러한 에러 발생
-> 댓글 작성 시 외래 키에 저장되어야 할 작성자 정보가 누락되었기 때문

- 댓글 작성 시 작성자 정보가 함께 저장될 수 있도록 save의 commit 옵션 활용
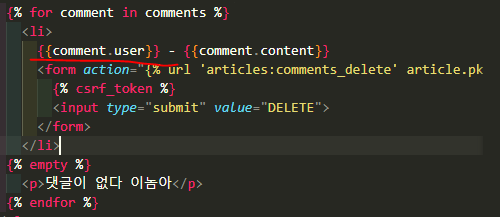
READ
댓글 작성자 출력
- detail 템플릿에서 각 게시글의 작성자 출력
Delete
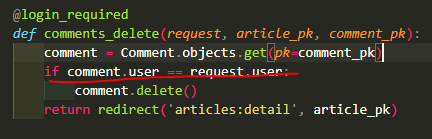
댓글 삭제 시 작성자 확인
- 이제 댓글에 작성자 정보가 함께 들어있기 때문에 현재 삭제를 요청하려는 사람과 댓글을 작성한 사람을 비교하여 본인의 댓글만 삭제할 수 있도록 함
- 추가로 해당 댓글의 작성자가 아니라면, 삭제 버튼을 출력하지 않도록 함
인증된 사용자에 대한 접근 제한하기
- is_authenticated와 View decorator를 활용하여 코드 정리하기
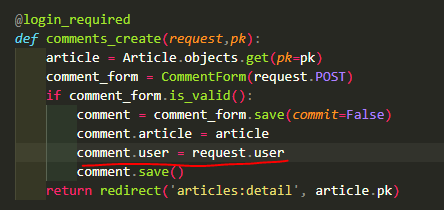
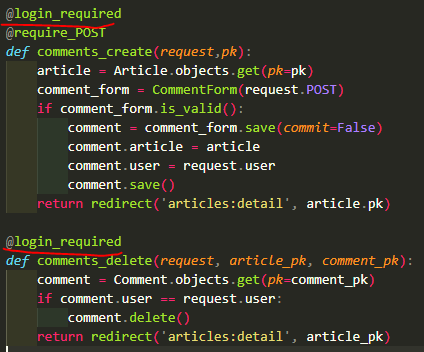
인증된 사용자인 경우만 댓글 작성 및 삭제하기
# articles/views.py
@require_POST
def comments_create(request,pk):
    if request.user.is_authenticated:
        article = Article.objects.get(pk=pk)
        comment_form = CommentForm(request.POST)
        if comment_form.is_valid():
            comment = comment_form.save(commit=False)
            comment.article = article
            comment.user = request.user
            comment.save()
        return redirect('articles:detail', article.pk)
    return redirect('accounts:login')

@require_POST
def comments_delete(request, article_pk, comment_pk):
    if request.user.is_authenticated:
        comment = Comment.objects.get(pk=comment_pk)
        if comment.user == request.user:
            comment.delete()
    return redirect('articles:detail', article_pk)
비인증 사용자는 CommentForm을 볼 수 없도록 하기

