1. Maven 설치 및 환경변수 설정
1-1. Maven 다운로드
https://maven.apache.org/download.cgi
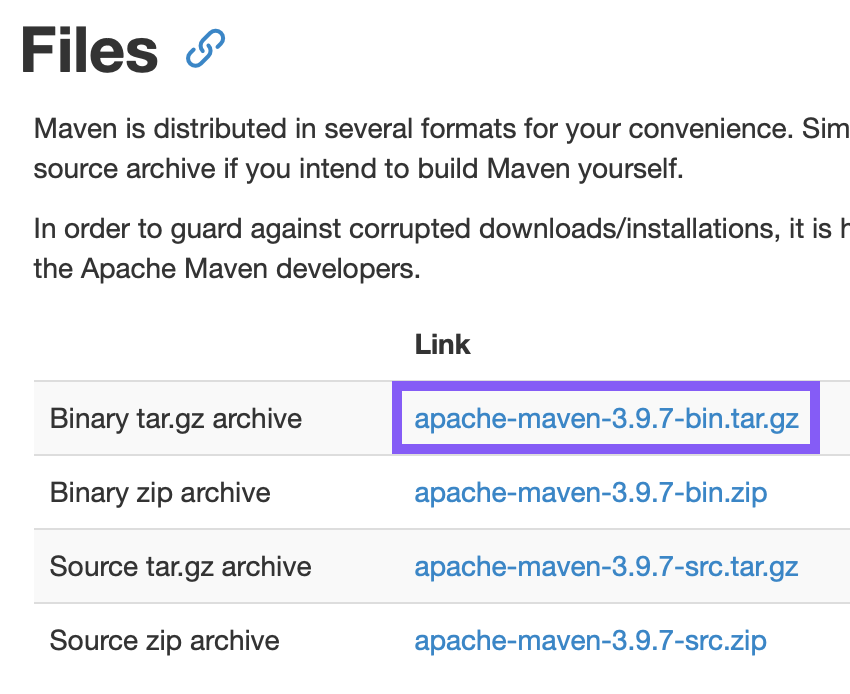
mac 사용자 - tar.gz 다운
1-2. Maven 환경변수 설정
- 로컬 터미널에서 시행
vi .bash_profile
i(insert 모드)
export MAVEN_HOME="[다운받은 maven 파일의 위치]/apache-maven-3.9.7"
export PATH=$PATH:$MAVEN_HOME/bin
esc (insert모드 해제)
:wq (저장 후 나가기)
source .bash_profile (적용하기)
2. war 파일 만들기
cd [프로젝트 경로]
mvn clean package
( clean - resources - compile - testResources - testCompile - test 순으로 실행되고, war 파일이 target 폴더 아래에 생성된다)
- war 파일의 이름을 변경하고 싶은 경우
프로젝트의 pom.xml
//<build>태그 안에 넣어주기

<finalName>pf</finalName>
3. FileZilla 설치하기
https://filezilla-project.org/
- FileZilla cilent 버전 설치한다.
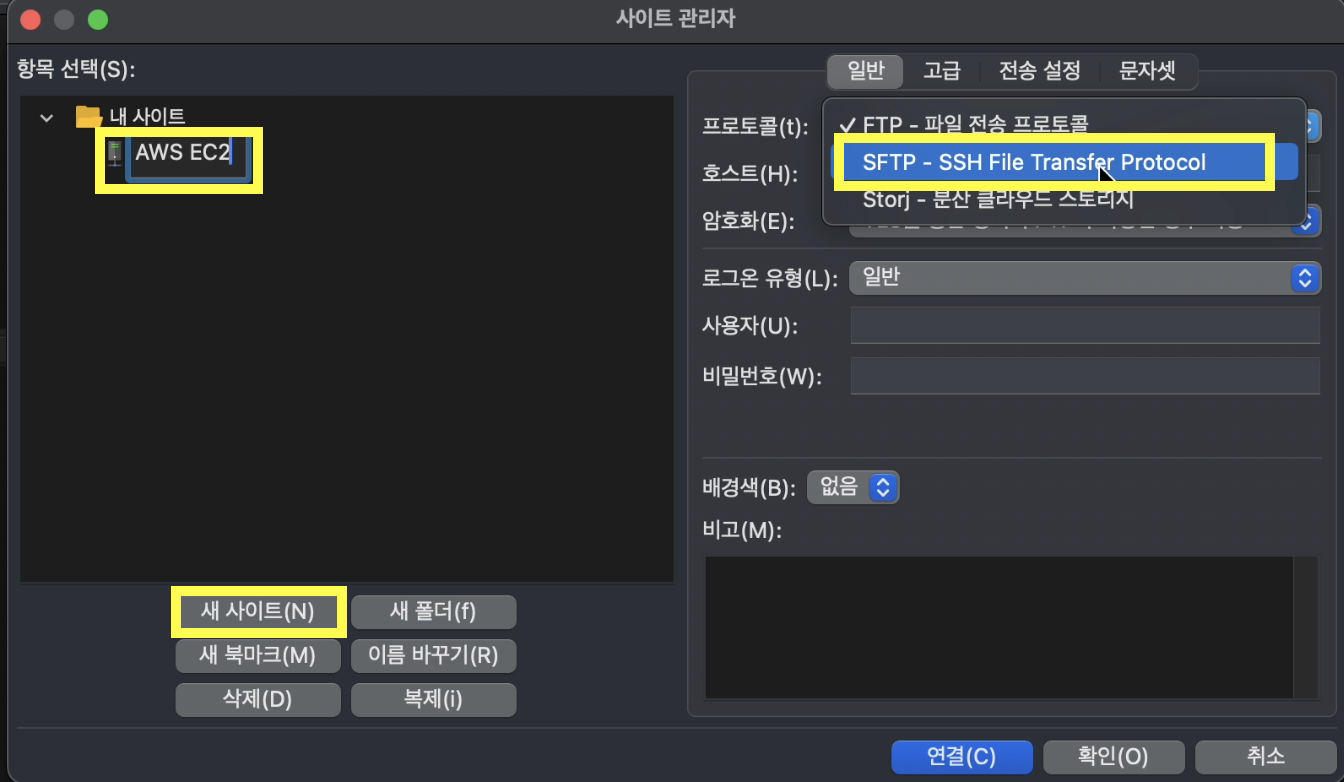
3-1. 기본설정
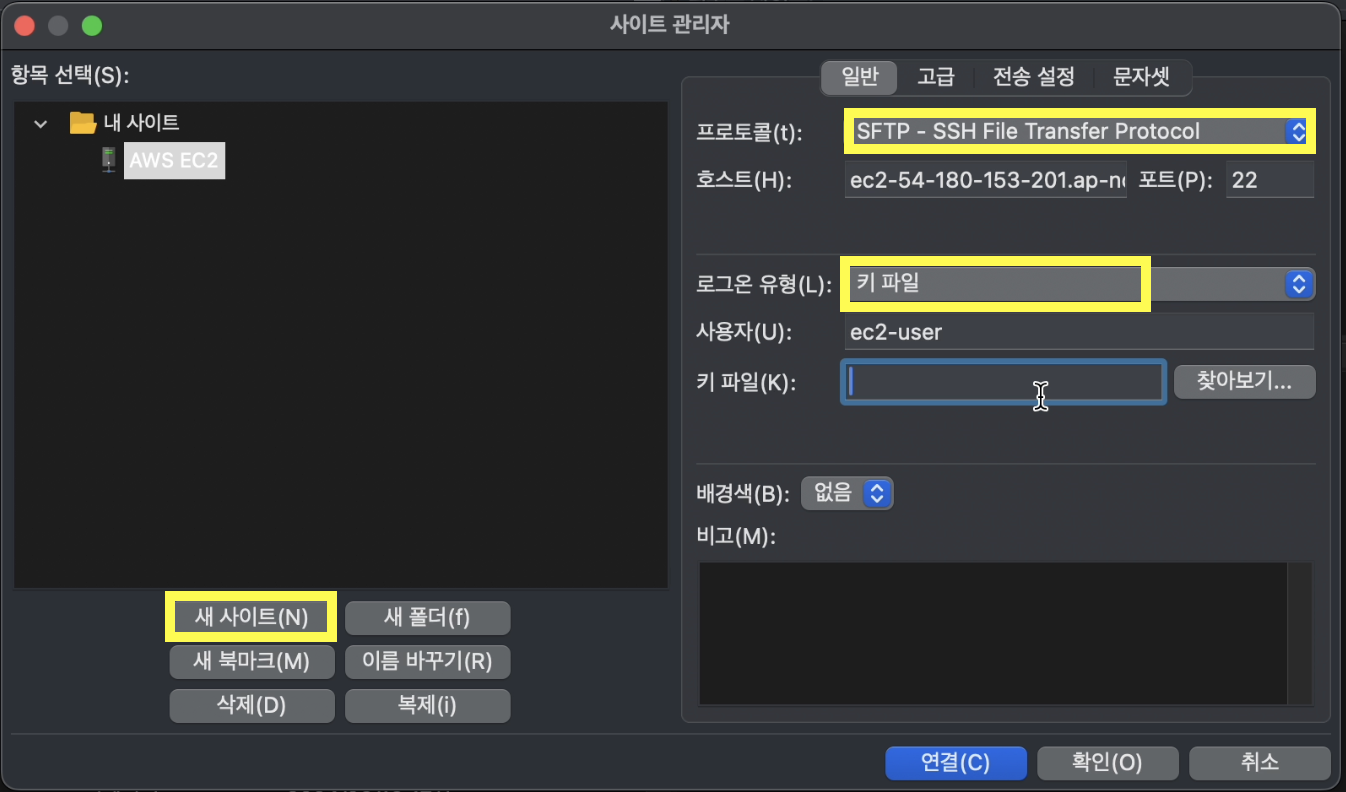
- 새 사이트 눌러서 생성 후 이름 지정하기
- 프로토콜 - SFTP로 지정
호스트 - AWS EC2의 퍼블릭 IPv4 DNS
포트번호 - 22
로그온 유형 - 키 파일
사용자 - ec2-user
키파일 - ~.pem파일 저장 경로
- 프로토콜 - SFTP로 지정
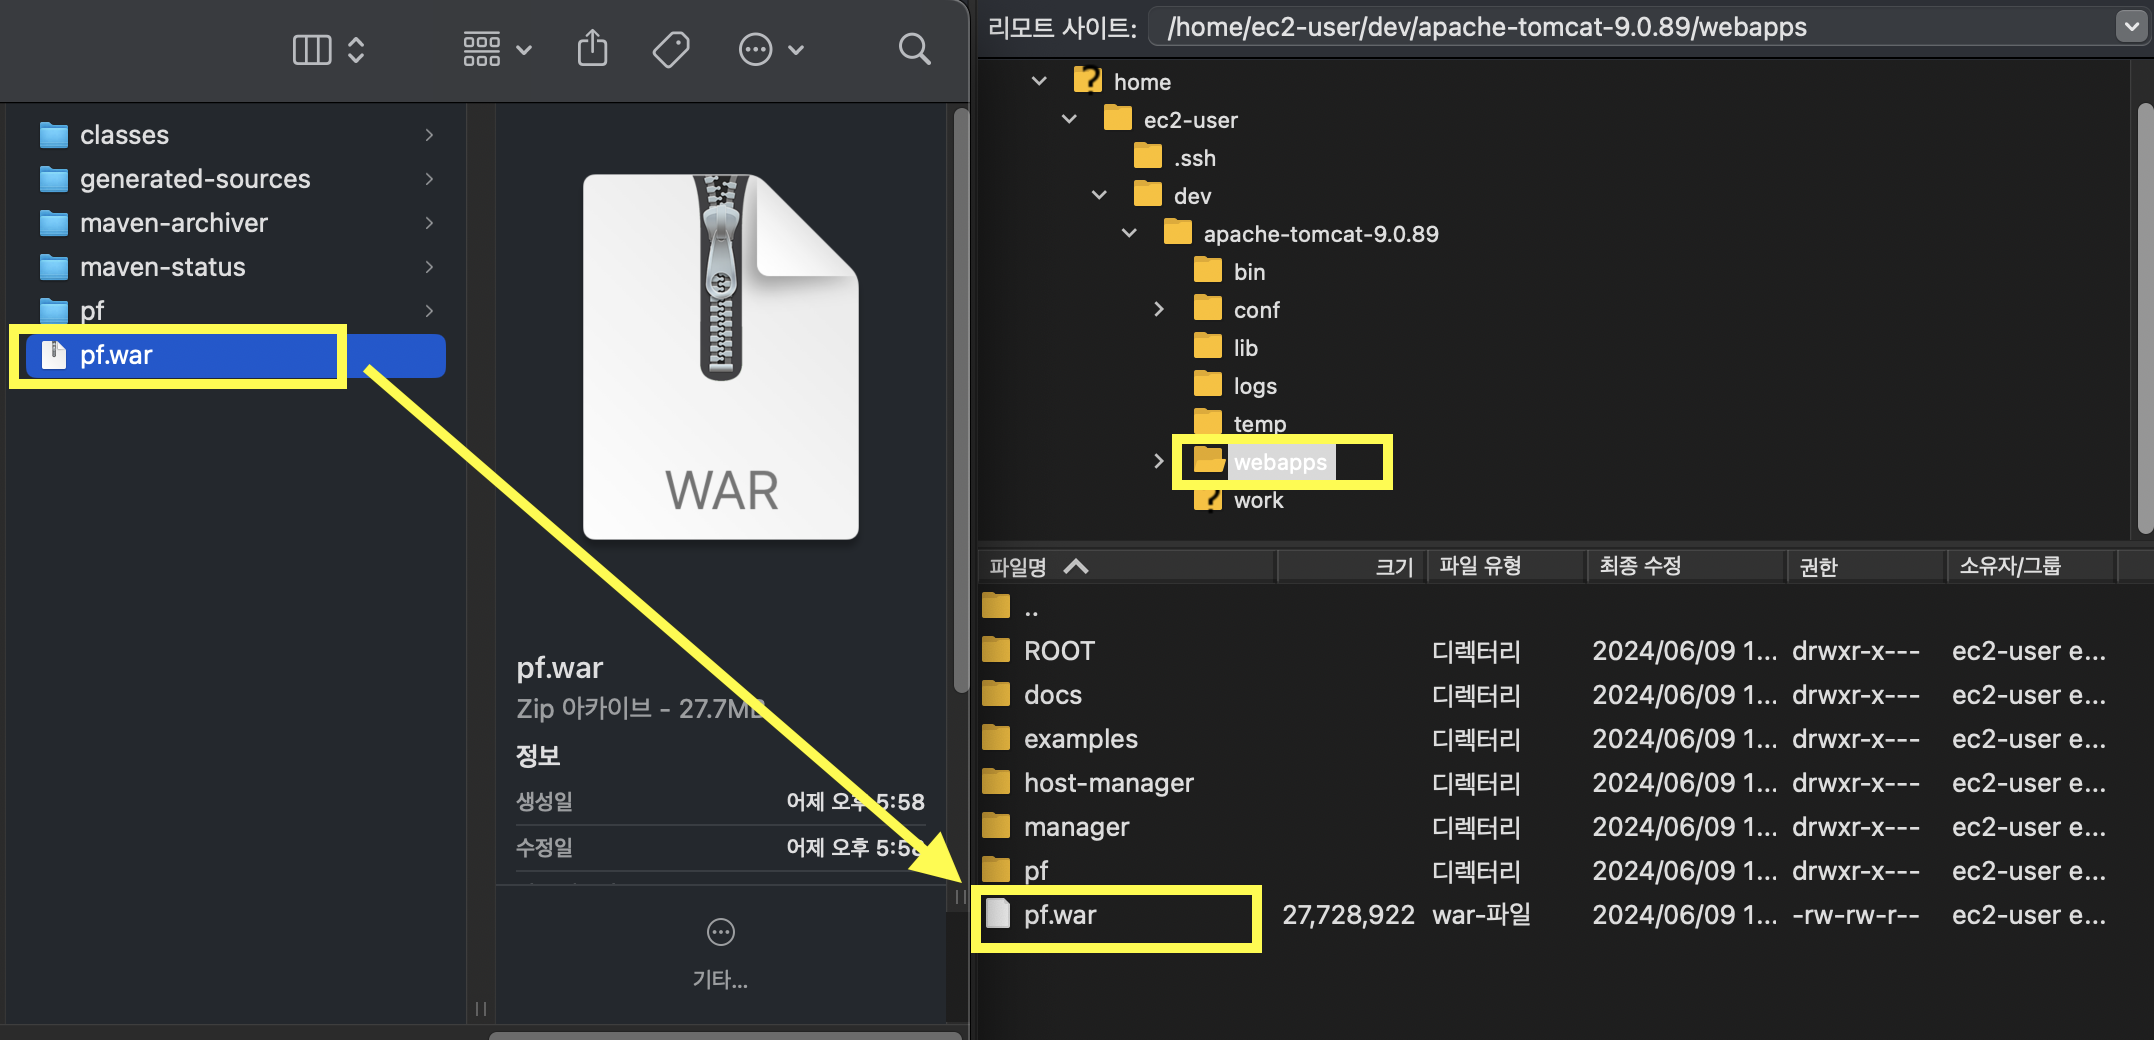
4. 수동배포하기
home > ec2-user > dev > apache-tomcat-9.0.89 > webapps 에 war 파일 드래그하기
- chrome 창에
[EC2의 퍼블릭 IPv4 DNS]:8080/[war 파일 이름]
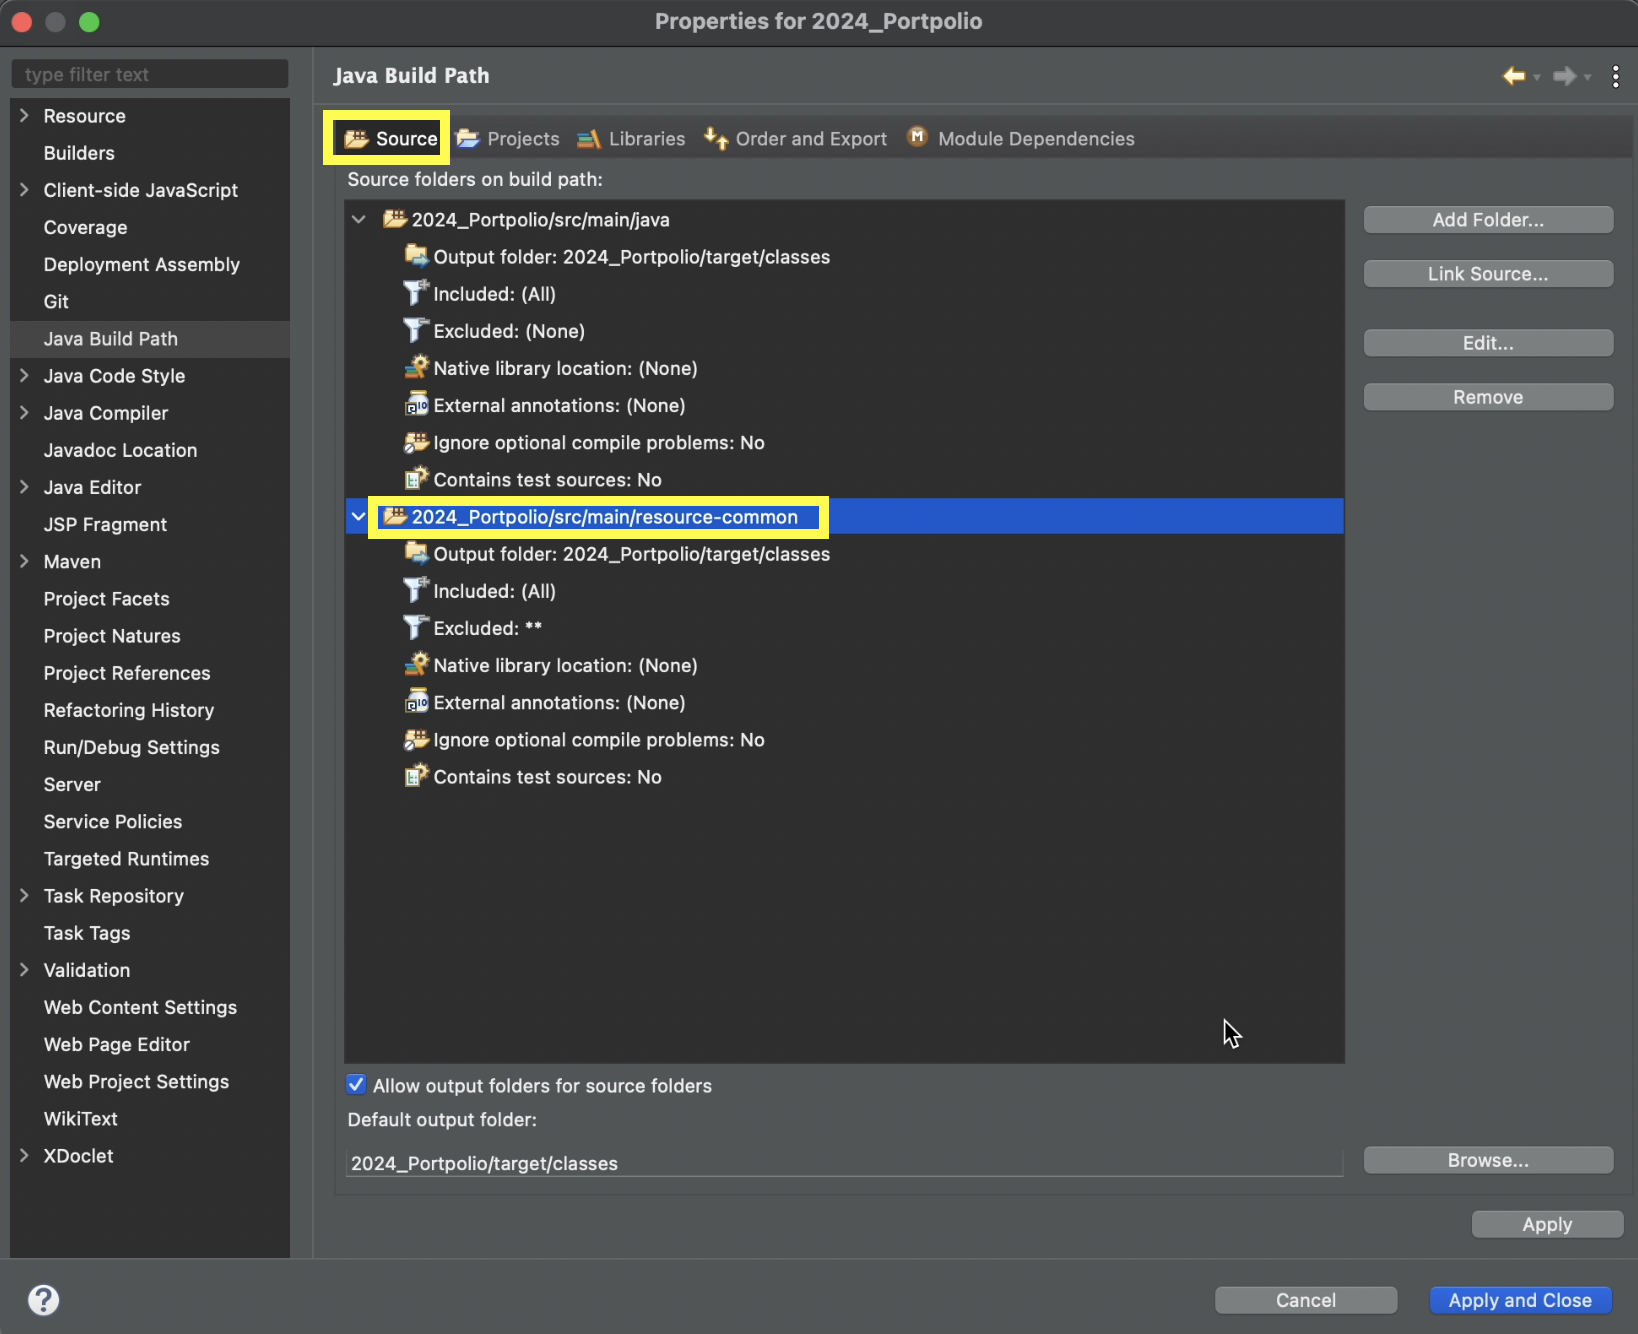
5. 폴더 구조 변경하기
Properties > Java Build Path > Source
- src/main/resources -> src/main/resource-common으로 이름 변경하기
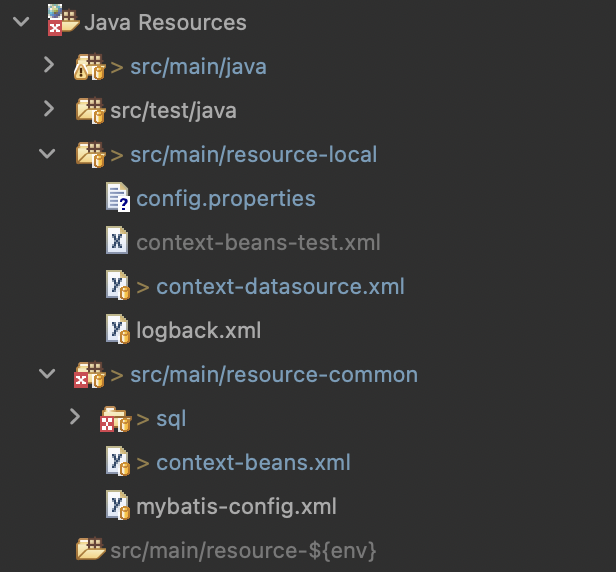
-
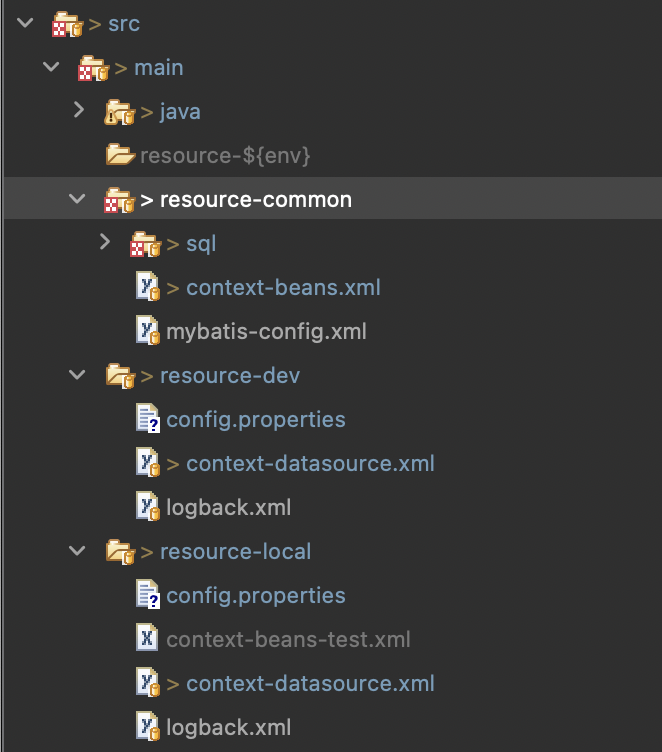
resource를 common / local / dev로 나눈다.
(local db 사용시, RDS사용시) -
resource-local의 context-dataresource.xml은 로컬 db의 아이디, 비밀번호로 설정
resource-dev의 context-dataresource.xml은 RDS의 아이디, 비밀번호로 설정
6. pom.xml 추가
- build 태그 위에 넣기
<profiles>
       <profile>
           <id>local</id>
           <properties>
               <env>local</env>
           </properties>
       </profile>
       <profile>
           <id>dev</id>
           <properties>
               <env>dev</env>
           </properties>
       </profile>
       <profile>
           <id>prod</id>
           <properties>
               <env>prod</env>
           </properties>
       </profile>
</profiles>- build 태그 안에 넣기
<!-- 환경설정에 관한 태그 -->
	<resources>
		<resource>
			<directory>src/main/resource-common</directory>
		</resource>
		<resource>
			<directory>src/main/resource-${env}</directory>
		</resource>
		<resource>
			<directory>${project.build.sourceDirectory}</directory>
			<includes>
				<include>**/*.java</include>
			</includes>
		</resource>
	</resources>
<!-- /환경설정에 관한 태그 -->- build 태그의 plugins 태그 안에 넣기
<!-- 리소스를 시스템 환경에 맞게 구분해주는 플러그인 -->
		<plugin>
			<groupId>org.apache.maven.plugins</groupId>
			<artifactId>maven-resources-plugin</artifactId>
			<version>3.3.1</version>
			<configuration>
				<encoding>UTF-8</encoding>
			</configuration>
		</plugin>
<!-- /resource 구분 플러그인 -->
7. 로컬 터미널에서 dev로 war파일 생성 후 FileZilla 이용해서 배포하기
mvn clean package -Pdev
target > classes > context-dataresource.xml이 입력한 RDS 버전으로.