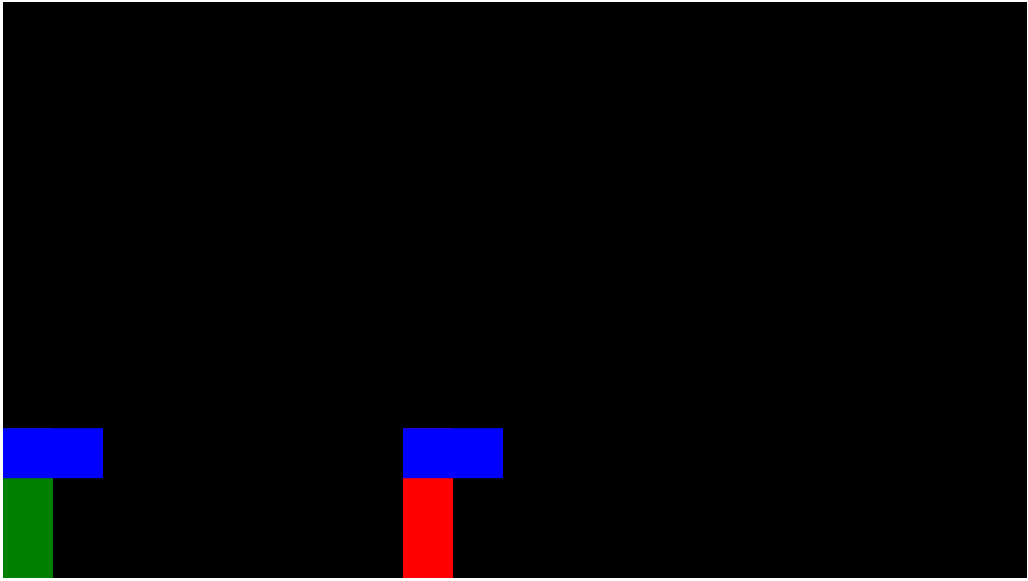
각 캐릭터의 공격 범위를 만들자
공격범위의 attackBox를 만들고 캐릭터 색 구분을 효과적으로 하기 위해 color도 추가했다
class Sprite {
  constructor({ position, velocity, color }) {
    this.position = position;
    this.velocity = velocity;
    this.height = 150;
    this.lastKey;
    this.attackBox = {
      position: this.position,
      width: 100,
      height: 50,
    };
    this.color = color;
  }
draw에 attackBox를 그려주도록 하고 player와 enemy객체에 color도 추가
  draw() {
    c.fillStyle = this.color;
    c.fillRect(this.position.x, this.position.y, 50, this.height);

    //attack box
    c.fillStyle = "blue";
    c.fillRect(
      this.attackBox.position.x,
      this.attackBox.position.y,
      this.attackBox.width,
      this.attackBox.height
    );
  }
const player = new Sprite({
position: {
x: 0,
y: 0,
},
velocity: {
x: 0,
y: 0,
},
color: "green",
});
const enemy = new Sprite({
position: {
x: 400,
y: 100,
},
velocity: {
x: 0,
y: 0,
},
color: "red",
});
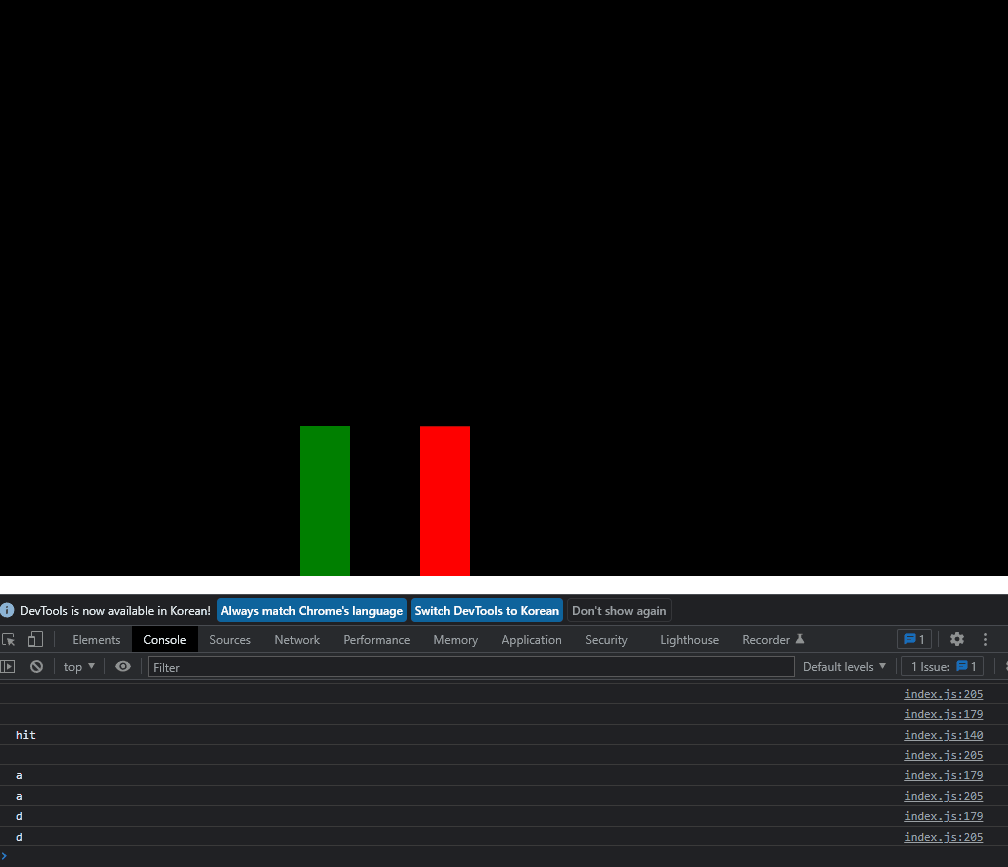
이제 attackBox가 상대에게 닿았을 때의 코드를 작성해보자 animate함수 내에
  if (
    player.attackBox.position.x + player.attackBox.width >=
    enemy.position.x
  ) {
    console.log("hit");
  }
를 추가하고 보면
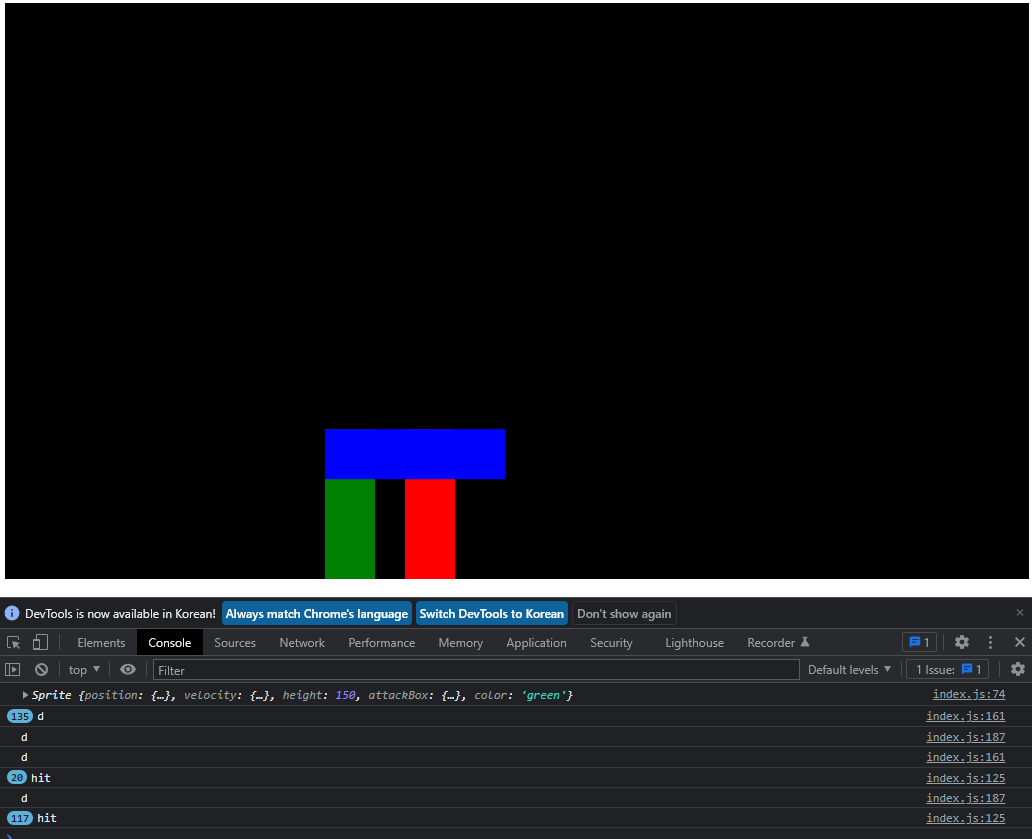
콘솔에 hit가 지속 출력된다.
그런데 문제가 있는데 점프를 하고 있어 attackBox가 닿지 않는데도 x축만을 인식해서 clg문을 지속해서 출력하고 있었다.
if문에 조건을 좀 더 추가해보자.
그 전에 width 값 사용을 위해 Sprite클래스 내 프로퍼티로 추가하자
    this.velocity = velocity;
    this.width = 50
    this.height = 150;
    this.lastKey;
    this.attackBox = {
    ...

      draw() {
    c.fillStyle = this.color;
    c.fillRect(this.position.x, this.position.y, this.width, this.height);
	...
그리고 조건을 바꿔주면
  if (
    player.attackBox.position.x + player.attackBox.width >= enemy.position.x &&
    player.attackBox.position.x <= enemy.position.x + enemy.width &&
    player.attackBox.position.y + player.attackBox.height >= enemy.position.y &&
    player.attackBox.position.y <= enemy.position.y + enemy.height
  ) {
    console.log("hit");
  }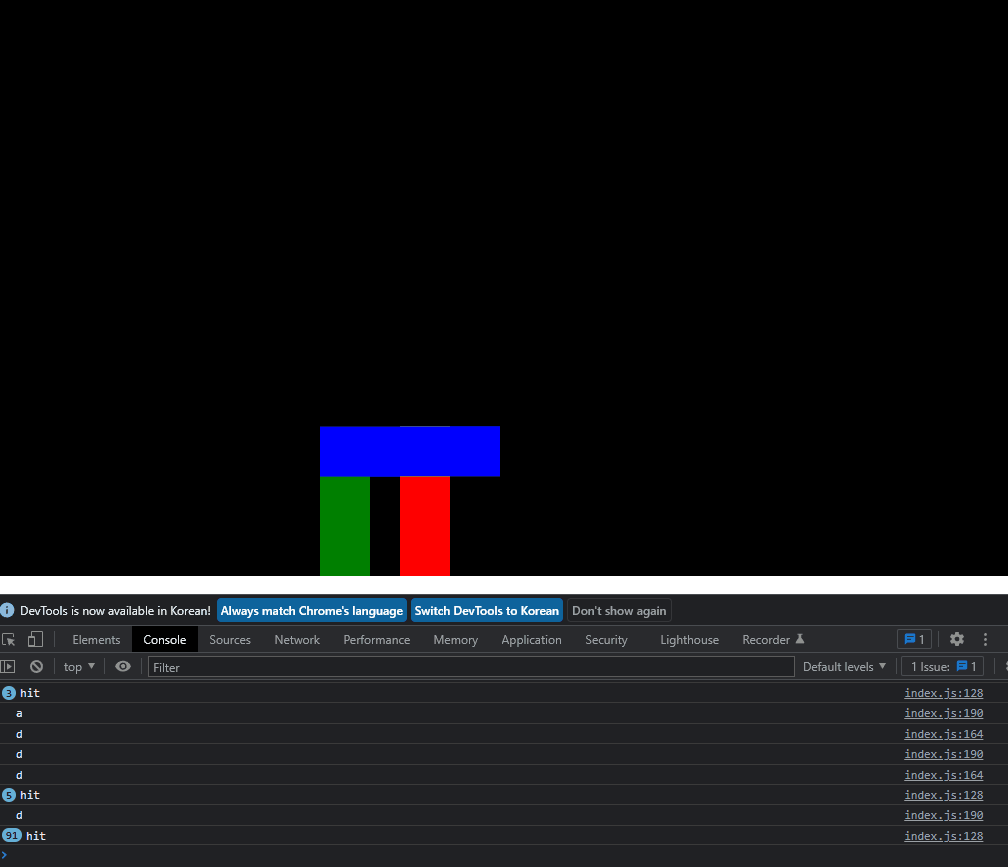
그런데 공격 키를 누를때만 피격판정이 있어야 하기 때문에 isAttacking이라는 프로퍼티를 만들자
class Sprite {
  ...
    };
    this.color = color;
    this.isAttacking;
  }
공격시 딜레이를 주는 attack메소드도 만들고
  attack() {
    this.isAttacking = true;
    setTimeout(() => {
      this.isAttacking = false;
    }, 100);
  }
조건문에도 isAttacking을 추가한 뒤
  if (
    player.attackBox.position.x + player.attackBox.width >= enemy.position.x &&
    player.attackBox.position.x <= enemy.position.x + enemy.width &&
    player.attackBox.position.y + player.attackBox.height >= enemy.position.y &&
    player.attackBox.position.y <= enemy.position.y + enemy.height &&
    player.isAttacking
  ) {
    console.log("hit");
  }
이벤트리스너에 스페이스바 키로 공격메소드를 실행하도록 한다
window.addEventListener("keydown", (event) => {
  //player key
  switch (event.key) {
    ...
    case "w":
      player.velocity.y = -15;
      break;
    case " ":
      player.attack();
      break;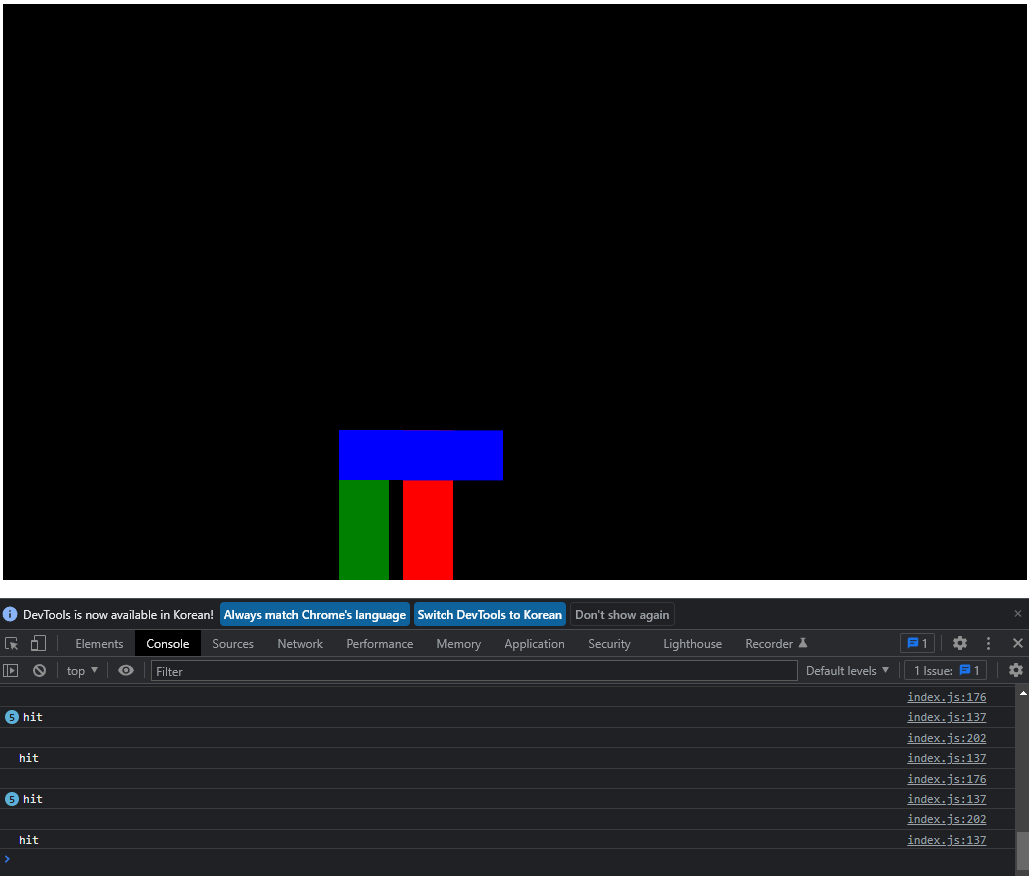
스페이스바 입력시에만 공격 메소드가 실행된다.
그런데 콘솔을 보면 hit가 중복되서 출력되는데 이러면 피격이 여러번 되는 문제가 생긴다.
앞선 if문 안에
  if (
    player.attackBox.position.x + player.attackBox.width >= enemy.position.x &&
    player.attackBox.position.x <= enemy.position.x + enemy.width &&
    player.attackBox.position.y + player.attackBox.height >= enemy.position.y &&
    player.attackBox.position.y <= enemy.position.y + enemy.height &&
    player.isAttacking
  ) {
    player.isAttacking = false;
    console.log("hit");
  }
동작시 isAttacking을 false가 되도록 하여 중첩피격을 방지하자
이제 공격중일때만 attackBox가 보이도록 draw메소드의 attackbox부분을 if문으로 감싸면
    if (this.isAttacking) {
      c.fillStyle = "blue";
      c.fillRect(
        this.attackBox.position.x,
        this.attackBox.position.y,
        this.attackBox.width,
        this.attackBox.height
      );
    }
이제 enemy의 히트박스 위치를 수정해야한다.
attackBox 항시 보이도록 잠시 if문을 지우고 attackBox프로퍼티의 position을 객체로 만들어 x,y값을 넣자
class Sprite {
  constructor({ position, velocity, color }) {
    ...
    this.attackBox = {
      position: this.position,
      width: 100,
      height: 50,
    };
    ...
  }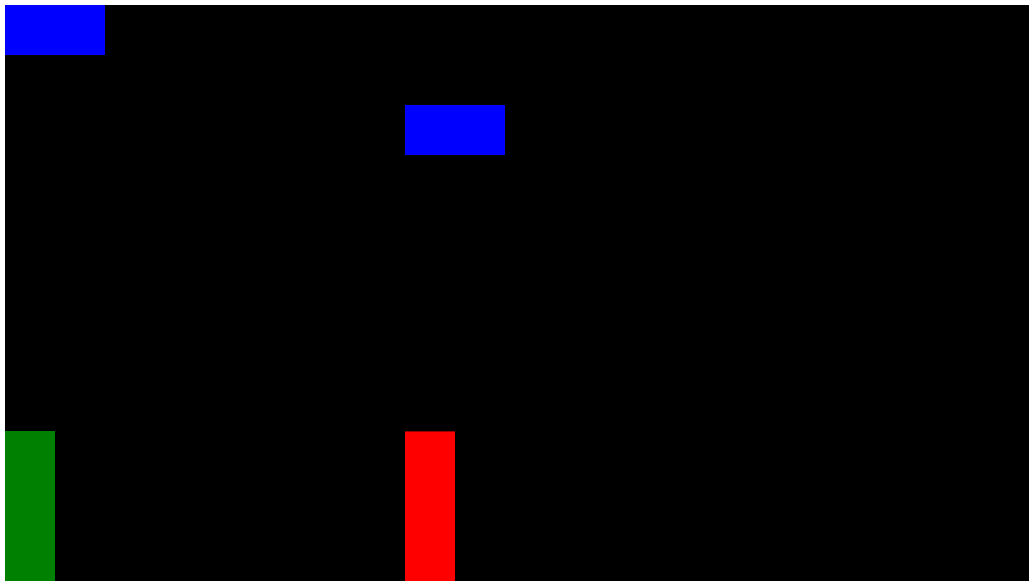
attackBox의 위치가 이상한데 포지션을 따로 다시 잡아줘야 한다.
update메소드에서 다시 잡아주면 된다
  update() {
    this.draw();
    this.attackBox.position.x = this.position.x;
    this.attackBox.position.y = this.position.y;

    ...
그런데 enemy의 attackBox가 반대로 돌아가 있는 문제가 있다.
이를 해결하기 위해 attackBox프로퍼티 내에 offset을 추가하자
class Sprite {
  constructor({ position, velocity, color, offset }) {
    ...
    this.attackBox = {
      position: {
        x: this.position.x,
        y: this.position.y,
      },
      offset,
      width: 100,
      height: 50,
    };
...

const player = new Sprite({
  ...
  offset: {
    x: 0,
    y: 0,
  }
const enemy = new Sprite({
  ...
  offset: {
    x: 50,
    y: 0,
  }
});
update메소드 내에 attackBox를 그려줄 때 이 offset을 적용하면
  update() {
    this.draw();
    this.attackBox.position.x = this.position.x - this.attackBox.offset.x;
    this.attackBox.position.y = this.position.y;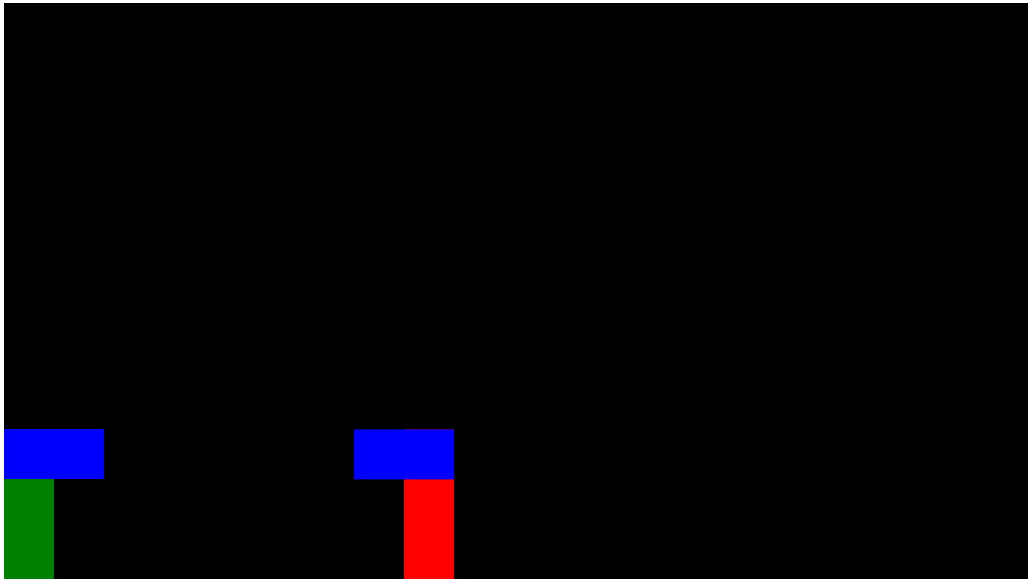
해결이 된다.
그런데 앞서 설정한 조건문의 내용이 너무 길다.
해당 조건문은 두 캐릭터가 attackBox에 접촉했을때 실행되는 조건이 있는데 이를 하나로 묶어보자
{ rectangle1, rectangle2} 를 파라미터로 받는 rectangularCollision 라는 함수를 만들고
return값으로 해당 조건을 넣어준다
function rectangularCollision({ rectangle1, rectangle2}) {
  return (
    rectangle1.attackBox.position.x + rectangle1.attackBox.width >= rectangle2.position.x &&
    rectangle1.attackBox.position.x <= rectangle2.position.x + rectangle2.width &&
    rectangle1.attackBox.position.y + rectangle1.attackBox.height >= rectangle2.position.y &&
    rectangle1.attackBox.position.y <= rectangle2.position.y + rectangle2.height
  )
}
player와 enemy대신 파라미터로 넘겨준 rectangle1, rectangle2를 전달해줘야한다.
그리고 기존의 조건문 안에 파라미터로 player, enemy를 받는 rectangularCollision함수를 넣으면
  if (
    rectangularCollision({ rectangle1: player, rectangle2: enemy }) &&
    player.isAttacking
  ) {
    player.isAttacking = false;
    console.log("hit");
  }
코드를 훨씬 깔끔하게 관리할 수 있다.
enemy가 공격할 경우의 if문을 하나 더 만들고 key switch문을 작성한 뒤
  if (
    rectangularCollision({ rectangle1: enemy, rectangle2: player }) &&
    enemy.isAttacking
  ) {
    enemy.isAttacking = false;
    console.log("hit");
  }

  ...
      case "ArrowDown":
      enemy.isAttacking = true;
  }
불필요한 clg문들을 지우고 실행해 보면
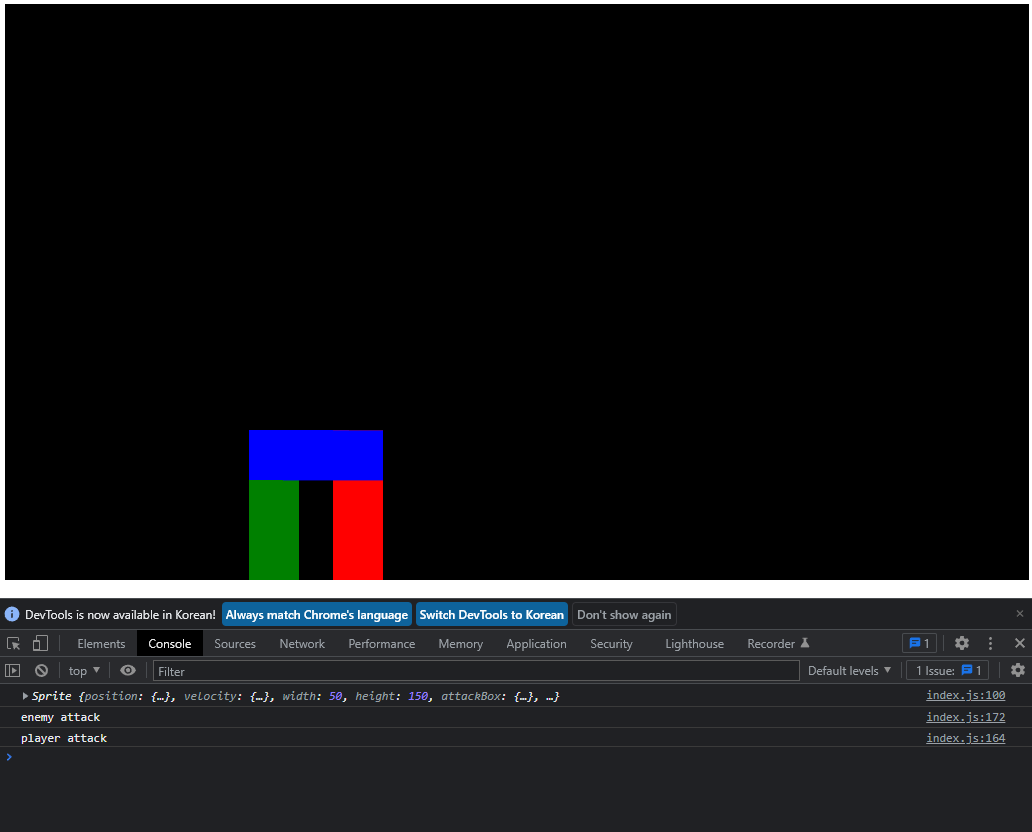
잘 작동한다.
이제 다시 if문을 추가해 공격시에만 attackBox가 보이도록 하자.
다음 포스팅에선 체력바 인터페이스를 만들어볼 예정이다.

상속으로 Player와 Enemy 클래스를 따로 구분해서 구현하면 더 쉽고 관리하기 편해요!