GCP VM사용 및 elastic Search 설치 해보기

Elasticsearch 8.0 설치 가이드
1.GCP VM
-
elasticsearch는 root 권한으로는 실행 불가
-
GCP VM 만들기

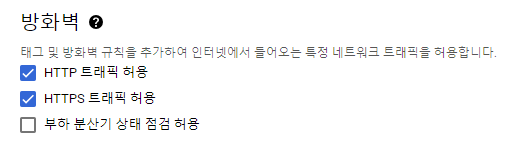
네트워크 default 선택 설정
VM 세팅 완료
2. SSH CONEOLE
해당 VM : SSH console 실행

sudo passwd 를 통해 root 패스워드 설정
elasticsearch-reset-password -i -u elastic
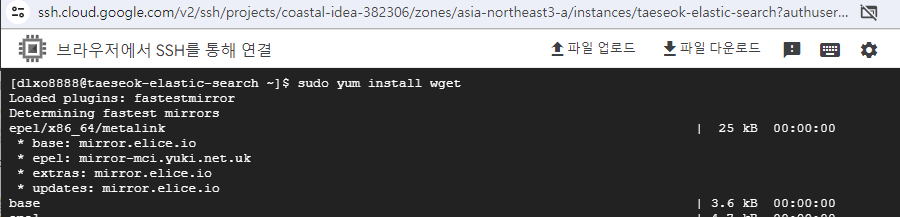
설치
sudo yum install wget
wget https://artifacts.elastic.co/downloads/elasticsearch/elasticsearch-8.11.3-linux-x86_64.tar.gz
wget https://artifacts.elastic.co/downloads/kibana/kibana-8.11.3-linux-x86_64.tar.gz
압축 풀기
🔔 tar ? 압축을 푸는 명령어
tar xfz elasticsearch-8.11.3-linux-x86_64.tar.gz
tar xfz kibana-8.11.3-linux-x86_64.tar.gz
설치 확인
ls

elasticsearch-8.11.3/bin/elasticsearch 실행

3.설치 완료
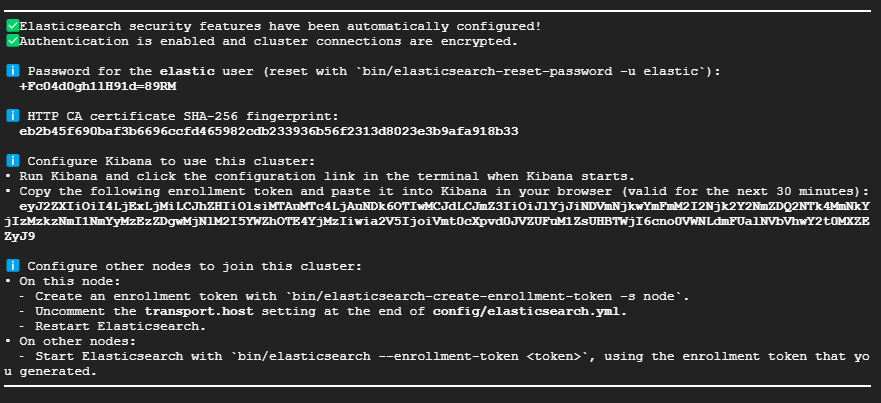
- 정상작동 확인
curl --cacert /http_ca.crt -u elastic 를 실행하여 엘라스틱 설정을 확인한다.
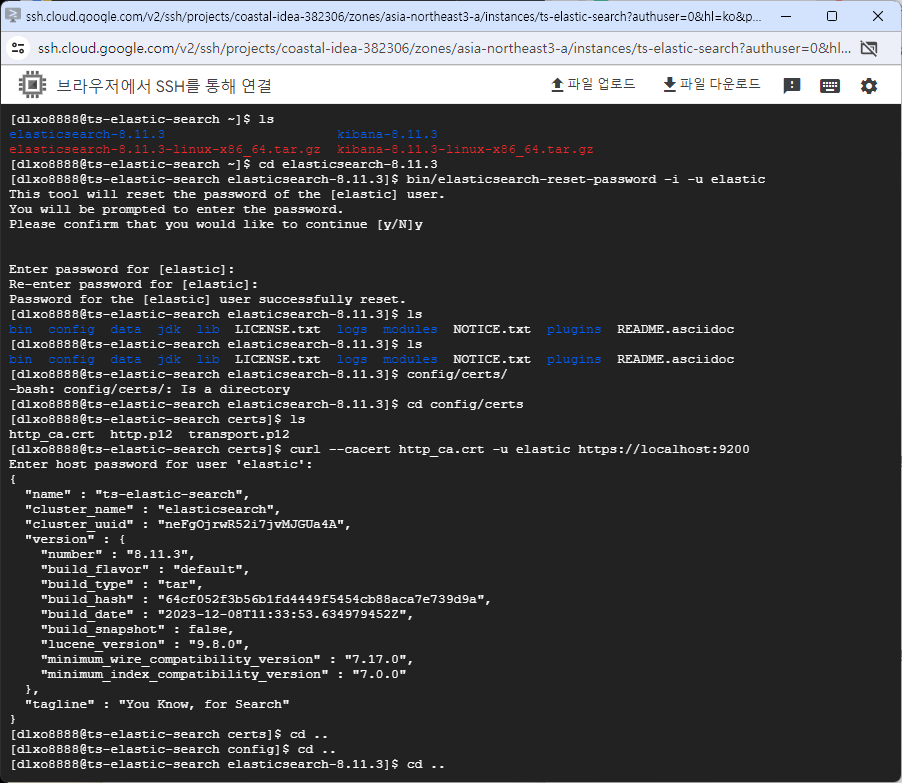
ps -ef | grep elastic
curl --cacert $ES_HOME/config/certs/http_ca.crt -u elastic https://localhost:9200
-
kibana 설치
-
kibana vi /config/kibana.yml enter >>
주석 처리 된 아래 사항들을
server.port : 5601
server.host: "0.0.0.0"
server.publicBaseUrl = "http://새로 만든VM IP:5601
esc 클릭
shift + z +z 클릭해서 나오기
bin/kibana 실행

- 브라우저에서 http://새로 만든VM IP:5601 실행
인증키 등록 후 regist //위에 설정한 pwd를 입력한다
ℹ️ Configure Kibana to use this cluster:
• Run Kibana and click the configuration link in the terminal when Kibana starts.
• Copy the following enrollment token and paste it into Kibana in your browser (valid for the next 30 minutes):
아래 떳던 키워드를 입력한 후 kibana 설치 console 화면에 떳던 6 자리 숫자를 입력한다.
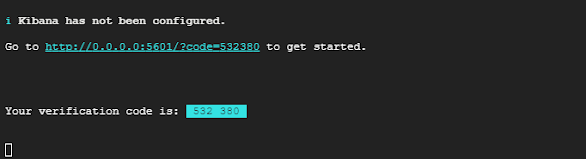
- verification code 입력