맵툴
유니티에서 예약된 폴더인 Editor를 생성하고 MapEditor.cs을 생성한다.
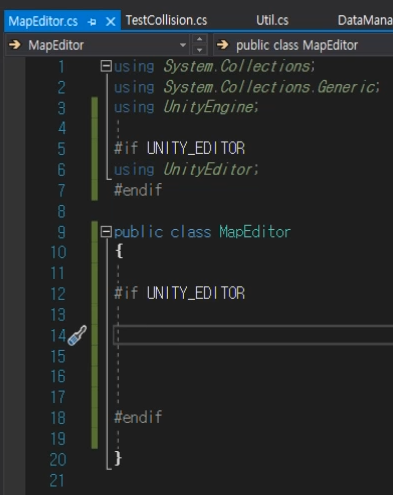
MapEditor에서 작성될 코드는 개발 중에만 컴파일되어야 하기 때문에 다음과 같이 UNITY_EDITOR로 감싸준다.

간단한 예제
public class MapEditor
{
#if UNITY_EDITOR

    [MenuItem("Tools/GenerateMap %#g")]
    private static void HelloWorld()
    {
        if(EditorUtility.DisplayDialog("Hello World!!!", "생성할래?", "응", "ㄴ"))
        {
            new GameObject("Hello World");
        }
    }

#endif
}
위 코드는 유니티 에디터의 메뉴에 Item을 추가하고 사용자가 버튼을 누르면 다이얼로그가 생성되도록 하며 "응"을 선택한다면 true가 반환이 되어 새로운 게임 오브젝트를 생성하는 예제이다.
메뉴 아이템에 대한 단축키도 설정해 줄 수 있다. %는 Ctrl, #은 Shift, &는 Alt를 의미한다. %#g는 Ctrl + Shift + G 키를 눌러야 한다는 의미이다.
텍스트 파일로 내보내기
rock의 좌표를 추출하여 리스트에 전부 추가하는 작업을 했었다. 이제 서버와 공유하기 위해 파일로 만들어야 하는데 두 가지 방법이 있다.
첫번째는 바이너리 파일로 만들어서 1비트 단위(0,1)로 내보내서 파일용량을 압축시킬 수 있는 방법이 있다.
두번째는 보기 쉽도록 갈 수 있는 영역은 0, 못가는 영역은 1로 해서 문자로 내보내는 방법이 있다.
두번째 방법은 맵마다 크기가 다 다를테니 min, max를 받아와야 한다.
public class MapEditor
{
#if UNITY_EDITOR

    [MenuItem("Tools/GenerateMap")]
    private static void HelloWorld()
    {
        GameObject go = GameObject.Find("Map");
        if (go == null)
            return;

        Tilemap tm = Util.FindChild<Tilemap>(go, "Tilemap_Collision", true);
        if (tm == null)
            return;

        using (var writer = File.CreateText("Assets/Resources/Map/output.txt"))
        {
            writer.WriteLine(tm.cellBounds.xMin);
            writer.WriteLine(tm.cellBounds.xMax);
            writer.WriteLine(tm.cellBounds.yMin);
            writer.WriteLine(tm.cellBounds.yMax);

            for(int y = tm.cellBounds.yMax; y >= tm.cellBounds.yMin; y--) // 위에서부터 내려옴
            {
                for(int x = tm.cellBounds.xMin; x <= tm.cellBounds.xMax; x++)
                {
                    TileBase tile = tm.GetTile(new Vector3Int(x, y, 0));
                    if (tile != null)
                        writer.Write("1");
                    else
                        writer.Write("0");
                } // 한줄 끝
                writer.WriteLine();
            }
        }
    }
#endif
}
텍스트파일로 내보내면 영역으로 x, y의 min과 max가 먼저 기록되고 그 다음 0, 1로 출력이 되는 것을 볼 수 있다.
맵 자체를 프리팹으로 관리하기
맵을 프리팹으로 만들때 추후 게임이 커질 경우를 대비하여 맵마다 번호를 붙여서 이름을 지어주자.
그리고 위 코드에선 Map이라는 이름만 찾아 파일로 만들었는데 그 부분도 아래처럼 수정하였다.
Prefabs/Map 폴더에 존재하는 모든 맵 프리팹을 로드해서 GameObject 배열에 넣은다음 하나씩 순회해서 해당 게임 오브젝트의 이름.txt 파일로 내보내도록 하였다.
private static void HelloWorld()
    {
        GameObject[] gameObjects = Resources.LoadAll<GameObject>("Prefabs/Map");

        foreach(GameObject go in gameObjects)
        {
           Tilemap tm = Util.FindChild<Tilemap>(go, "Tilemap_Collision", true);

            using (var writer = File.CreateText($"Assets/Resources/Map/{go.name}.txt"))
            {
                writer.WriteLine(tm.cellBounds.xMin);
                writer.WriteLine(tm.cellBounds.xMax);
                writer.WriteLine(tm.cellBounds.yMin);
                writer.WriteLine(tm.cellBounds.yMax);

                for (int y = tm.cellBounds.yMax; y >= tm.cellBounds.yMin; y--) // 위에서부터 내려옴
                {
                    for (int x = tm.cellBounds.xMin; x <= tm.cellBounds.xMax; x++)
                    {
                        TileBase tile = tm.GetTile(new Vector3Int(x, y, 0));
                        if (tile != null)
                            writer.Write("1");
                        else
                            writer.Write("0");
                    } // 한줄 끝
                    writer.WriteLine();
                }
            }
        }
    }
오류 수정
Map_001 프리팹에서 Tilemap_Collision은 비활성화를 했었는데 이렇게 하면 FindChild() 함수에서 null을 반환한다고 한다. 따라서 프리팹에서 Tilemap_Collision을 체크한 채로 저장하고, 로드할 때 보이지 않도록 비활성화 시켜주는 방식으로 바꾸자
