Webpack
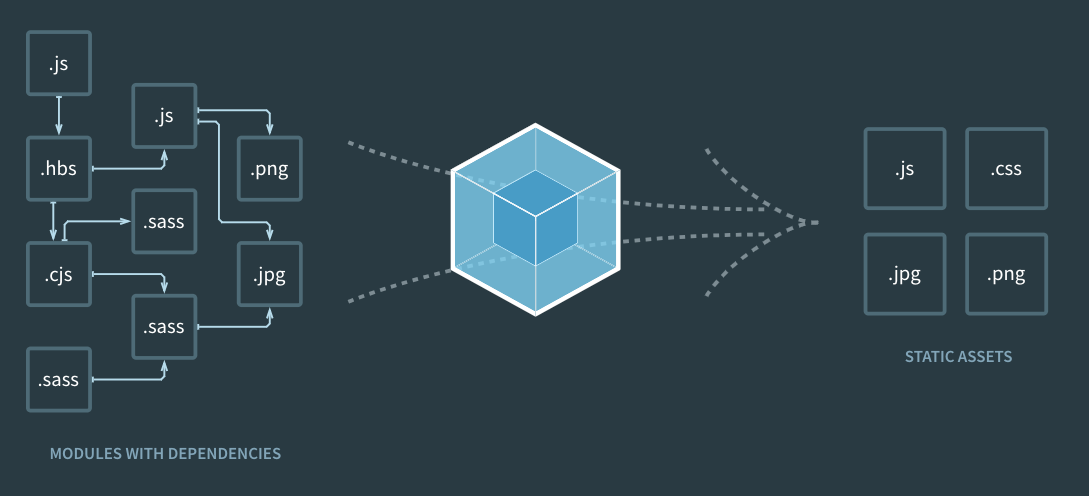
여러 파일로 나뉘어진 파일을 번들러로 묶어, 자원 사용량을 줄이고, 효율적으로 바꿔주는 모듈[ 사전 준비 ]
[ Version ]
Node : v14.7.6
npm : 8.1.4
[ 설치 라이브러리 ]
npm install -D webpack webpack-cli
npm install -D webpack-dev-server
npm install -D html-webpack-plugin
npm install -D style-loader css-loader file-loader
npm install -D mini-css-extract-plugin
실습
- npm 세팅
npm init -y- 라이브러리 설치
npm install -D webpack webpack-cli # webpack 모듈
npm install -D webpack-dev-server # 서버를 띄워줌
npm install -D html-webpack-plugin # html도 읽을 수 있게 하는 플러그인
npm install -D style-loader css-loader file-loader # css, 이미지 호출에 필요
npm install -D mini-css-extract-plugin # internal -> external로 변경- webpack.config.js 파일 생성 후 내용 입력
const path = require("path");

module.exports = {
  entry: "./index.js",
  output: {
    filename: "main.js"
    path: path.resolve(__dirname, "dist")
  }
}- src 폴더 생성 후 .index.js 파일 생성
document.getElementById('root').innerHTML = "Hello World"- index.html 생성
<!DOCTYPE html>
<html>
  <head>
    <meta charset="UTF-8" />
    <title>webpack</title>
  </head>
  <body>
    <div id="root"></div>
    <script src="index.js"></script>
  </body>
</html>
- package.json 내의 script 안에 "build", "start" 명령 추가
  "scripts": {
    "build": "webpack --mode=production",
    "start": "webpack serve --open --mode=development",
    "test": "echo \"Error: no test specified\" && exit 1"
},- 빌드를 통해 dist폴더 아래에 파일 생성
npm run build- 웹 실행 후 결과 확인
npm run start
For me better than yesterday