[설치]
mkcert라는 프로그램을 이용해서 로컬 환경(내 컴퓨터)에서 신뢰할 수 있는 인증서를 만들 수 있습니다.
Ubuntu
우분투의 경우 다음 명령어를 이용해 설치합니다.
$ sudo apt install libnss3-tools
$ wget -O mkcert https://github.com/FiloSottile/mkcert/releases/download/v1.4.3/mkcert-v1.4.3-linux-amd64
$ chmod +x mkcert
$ sudo cp mkcert /usr/local/bin/
[인증서 생성]
먼저 다음 명령어를 통해 로컬을 인증된 발급기관으로 추가해야 합니다.
$ mkcert -install
다음은 로컬 환경에 대한 인증서를 만들어야 합니다. localhost로 대표되는 로컬 환경에 대한 인증서를 만들려면 다음 명령어를 입력해야 합니다.
$ mkcert -key-file key.pem -cert-file cert.pem localhost 127.0.0.1 ::1
이제 옵션으로 추가한 localhost, 127.0.0.1(IPv4), ::1(IPv6)에서 사용할 수 있는 인증서가 완성되었습니다. cert.pem, key.pem 이라는 파일이 생성된 것을 확인할 수 있습니다.
[HTTPS 서버 작성]
node.js 환경에서 HTTPS 서버를 작성하기 위해서는 https 내장 모듈을 이용할 수 있습니다. express.js를 이용해 https 서버를 만들 수도 있습니다.
먼저는 방금 생성한 인증서 파일들을 HTTPS 서버에 적용해주는 작업이 필요합니다.
node.js https 모듈 이용
const https = require('https');
const fs = require('fs');

https
  .createServer(
    {
      key: fs.readFileSync(__dirname + '/key.pem', 'utf-8'),
      cert: fs.readFileSync(__dirname + '/cert.pem', 'utf-8'),
    },
    function (req, res) {
      res.write('Congrats! You made https server now :)');
      res.end();
    }
  )
  .listen(3001);
express.js 이용
만약 express.js 를 사용하는 경우, 다음과 같이 https.createServer의 두번째 파라미터에 들어갈 callback 함수를 Express 미들웨어로 교체하면 그만입니다!
const https = require('https');
const fs = require('fs');
const express = require('express');

const app = express();

https
  .createServer(
    {
      key: fs.readFileSync(__dirname + '/key.pem', 'utf-8'),
      cert: fs.readFileSync(__dirname + '/cert.pem', 'utf-8'),
    },
    app.use('/', (req, res) => {
      res.send('Congrats! You made https server now :)');
    })
  )
  .listen(3001);
실습

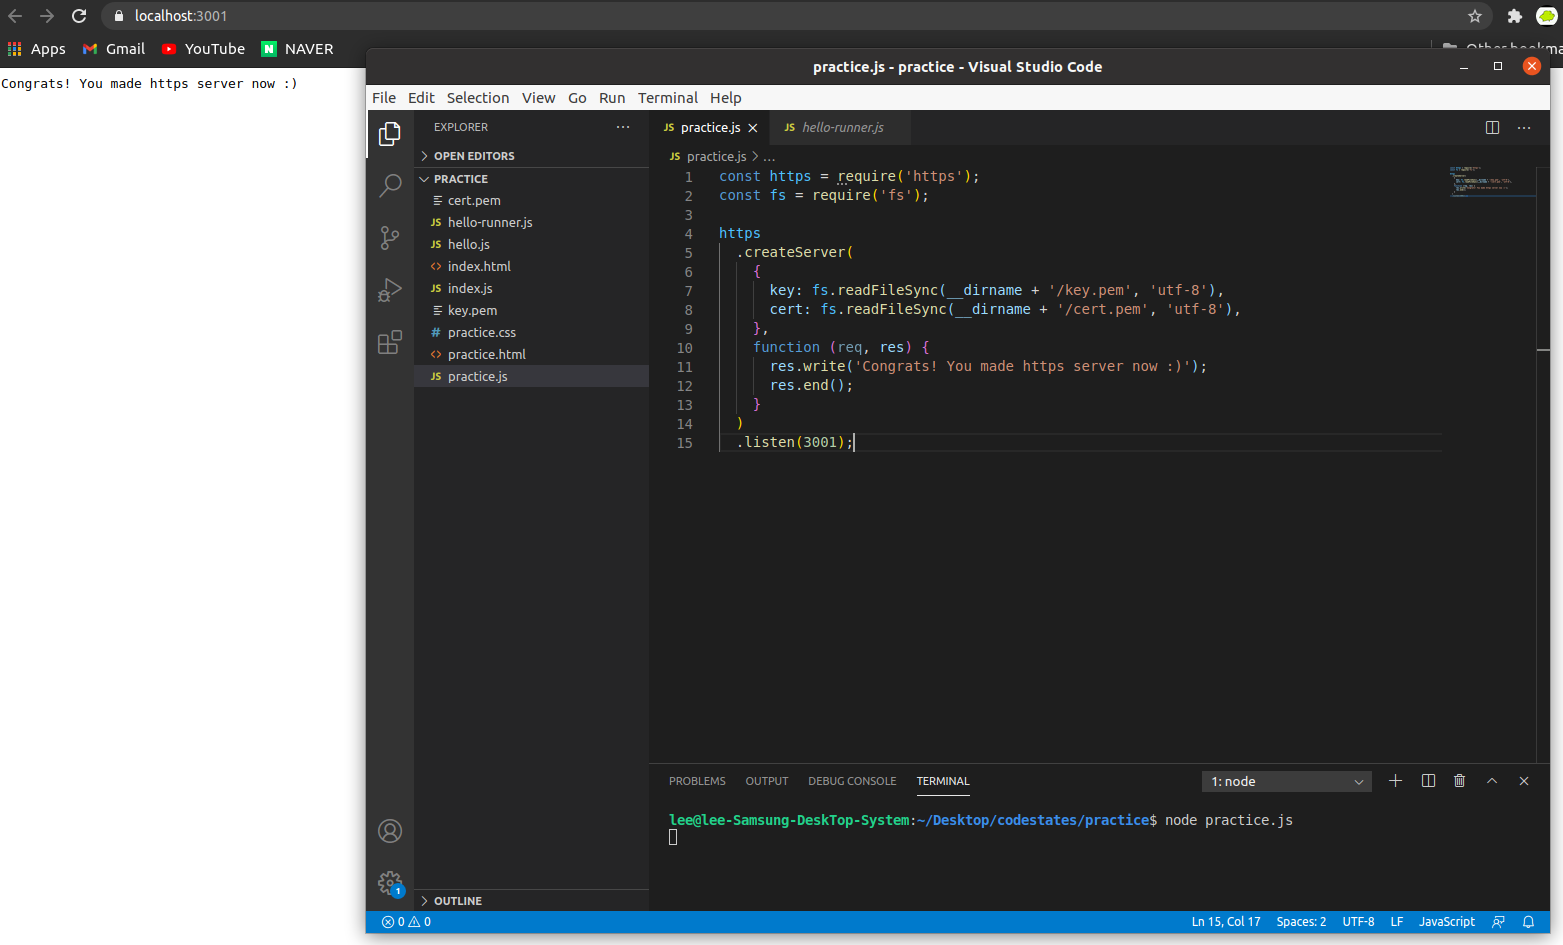
node.js https 모듈 이용해서 실습해봤다.
1. practice.js 에 코드를 복사붙여넣기
2. key.pem, cert.pem 파일을 practice.js 와 같은 위치에 데려왔다. (이것도 파일복붙하면된다.)
3. node practice.js 명령어로 파일을 실행시켰다.
4. https://localhost:3001 로 접속하면 코드 내에 작성된 메세지 확인할 수 있다.
5. 도메인 옆에 자물쇠 표시로 https 프로토콜을 이용한다는 것을 알 수 있다.
