목표 🏆
- jpa가 아닌 다른 DB 접근 기술을 활용하자 (MyBatis)
- gradle이 아닌 maven을 이용하자
- mysql이 아닌 h2 내장 DB를 적극 활용하자
- yml 형식이 아닌 properties를 사용해보자
제가 항상 늘 사용하던 ..jpa...gradle..mysql...yml...없이...
mybatis를 이용하여 페이징처리를 경험해보자 !
Schema.sql 작성 📗
DROP TABLE IF EXISTS post;

CREATE TABLE post
(
    id INTEGER PRIMARY KEY AUTO_INCREMENT,
    title VARCHAR(100) NOT NULL,
    content VARCHAR(255) NOT NULL,
    username VARCHAR(30) NOT NULL,
    createdAt TIMESTAMP DEFAULT CURRENT_TIMESTAMP NOT NULL
);
예시 data.sql 작성 📗
INSERT INTO post(title, content, username)
VALUES ('Spring Web', 'Build web, including RESTful, applications using Spring MVC.', 'dhlee');
INSERT INTO post(title, content, username)
VALUES ('Lombok', 'Java annotation library which helps to reduce boilerplate code.', 'dhlee');
INSERT INTO post(title, content, username)
VALUES ('MyBatis Framework', 'Persistence framework with support for custom SQL, stored procedures and advanced mappings.', 'jhkim');
INSERT INTO post(title, content, username)
VALUES ('H2 Database', 'Provides a fast in-memory database that supports JDBC API and R2DBC access, with a small (2mb) footprint.', 'dhlee');
INSERT INTO post(title, content, username)
VALUES ('Mustache', 'Logic-less Templates. There are no if statements, else clauses, or for loops. Instead there are only tags.', 'jhkim');
INSERT INTO post(title, content, username)
VALUES ('Spring Boot DevTools', 'Provides fast application restarts, LiveReload, and configurations for enhanced development experience.', 'dhlee');
INSERT INTO post(title, content, username)
VALUES ('Validation', 'Bean Validation with Hibernate validator.', 'dhlee');
INSERT INTO post(title, content, username)
VALUES ('Spring Native', 'Incubating support for compiling Spring applications to native executables using the GraalVM native-image compiler.', 'jhkim');
INSERT INTO post(title, content, username)
VALUES ('Spring Session', 'Provides an API and implementations for managing user session information.', 'dhlee');
mybatis-config.xml 작성 📗
<?xml version="1.0" encoding="UTF-8" ?>
<!DOCTYPE configuration PUBLIC "-//mybatis.org//DTD Config 3.0//EN"
        "http://mybatis.org/dtd/mybatis-3-config.dtd">
<configuration>
    <mappers>
        <mapper resource="mybatis/mapper/post-mapper.xml"/>
    </mappers>
</configuration>
mapper.xml 작성 📗
<?xml version="1.0" encoding="UTF-8"?>
<!DOCTYPE mapper PUBLIC "-//mybatis.org//DTD Mapper 3.0//EN"
        "http://mybatis.org/dtd/mybatis-3-mapper.dtd">

<mapper namespace="com.example.blog.mapper.PostMapper">
    <select id="findAll" resultType="com.example.blog.vo.Post">
        SELECT *
        FROM post
        ORDER BY id DESC
    </select>
    <select id="findByPage" resultType="com.example.blog.vo.Post">
        SELECT *
        FROM post
        ORDER BY id DESC
        LIMIT #{limit} OFFSET #{offset}
    </select>
</mapper>
Mapper 작성 ⚙️
- xml에 정의한 이름과 일치하는지 확인해야합니다.
- 게시물 불러오기를 위한 메서드 작성
package com.example.blog.mapper;

import com.example.blog.vo.Post;
import org.apache.ibatis.annotations.Mapper;
import org.apache.ibatis.annotations.Param;

import java.util.List;

@Mapper
public interface PostMapper {
    List<Post> findAll();
    List<Post> findByPage(@Param("limit") Integer limit ,@Param("offset") Integer offset);
}
Vo 작성 ⚙️
- xml 에서 정의한 이름과 다르면 오류가 나니 조심해야합니다.
package com.example.blog.vo;


import java.util.Date;


public class Post {
    Integer id;
    String title;
    String content;
    String username;
    Date createdAt;

    public Post(Integer id, String title, String content, String username, Date createdAt) {
        this.id = id;
        this.title = title;
        this.content = content;
        this.username = username;
        this.createdAt = createdAt;
    }

    // Request
    public Post(Integer id, String title, String content, String username) {
        this.id = id;
        this.title = title;
        this.content = content;
        this.username = username;
    }

    public Integer getId() {
        return id;
    }

    public void setId(Integer id) {
        this.id = id;
    }

    public String getTitle() {
        return title;
    }

    public void setTitle(String title) {
        this.title = title;
    }

    public String getContent() {
        return content;
    }

    public void setContent(String content) {
        this.content = content;
    }

    public String getUsername() {
        return username;
    }

    public void setUsername(String username) {
        this.username = username;
    }

    public Date getCreatedAt() {
        return createdAt;
    }

    public void setCreatedAt(Date createdAt) {
        this.createdAt = createdAt;
    }
}
service 작성 ⚙️
- 페이징 처리를 위한
offset,size전달
package com.example.blog.service;

import com.example.blog.mapper.PostMapper;
import com.example.blog.vo.Post;
import org.springframework.stereotype.Service;

import java.util.List;

@Service
public class PostService {
    private PostMapper postMapper;

    public PostService(PostMapper postMapper) {
        this.postMapper = postMapper;
    }

    public List<Post> getAllPost() {
        return postMapper.findAll();
    }

    public List<Post> getPostByPage(Integer page, Integer size) {
        return postMapper.findByPage(size, (page -1) * size);
    }
}
dto 작성 ⚙️
Request
package com.example.blog.controller.dto;

import com.example.blog.vo.Post;
import lombok.Setter;

@Setter
public class PostRequestDto {
    Integer id;
    String title;
    String content;
    String username;

    public Post  getPost() {
        return new Post(
                this.id,
                this.title,
                this.content,
                this.username);
    }

}
Response
package com.example.blog.controller.dto;

import com.example.blog.vo.Post;
import lombok.Getter;

@Getter
public class PostResponseDto {
    Integer id;
    String title;
    String content;
    String username;

    public PostResponseDto(Post post) {
                this.id = post.getId();
                this.title = post.getTitle();
                this.content = post.getContent();
                this.username = post.getUsername();
    }
}
controller 작성 ⚙️
- 페이징 처리를 위한 for문 처리
package com.example.blog.controller;

import com.example.blog.controller.dto.PostResponseDto;
import com.example.blog.service.PostService;
import com.example.blog.vo.Post;
import org.slf4j.LoggerFactory;
import org.springframework.web.bind.annotation.GetMapping;
import org.springframework.web.bind.annotation.RequestParam;
import org.springframework.web.bind.annotation.RestController;

import java.util.ArrayList;
import java.util.List;
import java.util.logging.Logger;

@RestController
public class PostController {

    private final PostService postService;

    public PostController(PostService postService) {
        this.postService = postService;
    }

    @GetMapping("/post")
    public List<PostResponseDto> getPostList(@RequestParam Integer page) {
        List<Post> postList = postService.getPostByPage(page, 3);

        List<PostResponseDto> postResponseDtoList = new ArrayList<>();
        for (Post post : postList) {
            postResponseDtoList.add(new PostResponseDto(post));
        }
        return postResponseDtoList;
    }
}
view 작성 📗
- ajax 요청을 할 부분을 지정 해두어야합니다.
html
{{>common/header}}
<!-- Page Header-->
<header class="masthead" style="background-image: url('https://codepresso-online-platform-public.s3.ap-northeast-2.amazonaws.com/java-web/home-bg.jpg')">
    <div class="container position-relative px-4 px-lg-5">
        <div class="row gx-4 gx-lg-5 justify-content-center">
            <div class="col-md-10 col-lg-8 col-xl-10">
                <div class="site-heading">
                    <h1>Mybatis Blog</h1>
                </div>
            </div>
        </div>
    </div>
</header>
<!-- Main Content-->
<div class="container px-4 px-lg-5">
    <div class="row gx-4 gx-lg-5 justify-content-center">
        <div class="col-md-10 col-lg-8 col-xl-7">

            {{#posts}}
            <div class="post-preview">
                <a href="#">
                    <h2 class="post-title">{{title}}</h2>
                    <h3 class="post-subtitle">{{content}}</h3>
                </a>
                <p class="post-meta">
                    Post By {{username}}
                </p>
            </div>
            <hr class="my-4" />

            {{/posts}}
<!--            ajax API 호출 하는 부분-->
            <div id="more-posts">

            </div>
<!--            more 버튼-->
            <div class="d-flex justify-content-center mb-4">
                <a class="btn btn-primary text-uppercase" id="more" current-page="1">
                    More
                </a>
            </div>
        </div>
    </div>
</div>
{{>common/footer}}
ajax
- 글을 3개씩 더 불러오기 위한 ajax 처리
$(function(){
    $("#more").click(function(){
        var next_page = parseInt($(this).attr("current-page")) + 1;

        $.ajax({
            method: "GET",
            url: "/post",
            data: {"page": next_page}
        })
        .done(function(response){
            for(var post of response) {
                $("#more-posts").append("<div class=\"post-preview\">" +
                    "<a href=\"#\">" +
                    "<h2 class=\"post-title\">" +
                    post.title +
                    "<h2>\n" +
                    "<h3 class=\"post-subtitle\">" +
                    post.content +
                    "</h3></a><p class=\"post-meta\">Posted by " +
                    post.username +
                    "</p></div><hr class=\"my-4\" />");
             }
        });
        $(this).attr("current-page", next_page);
    });
  });
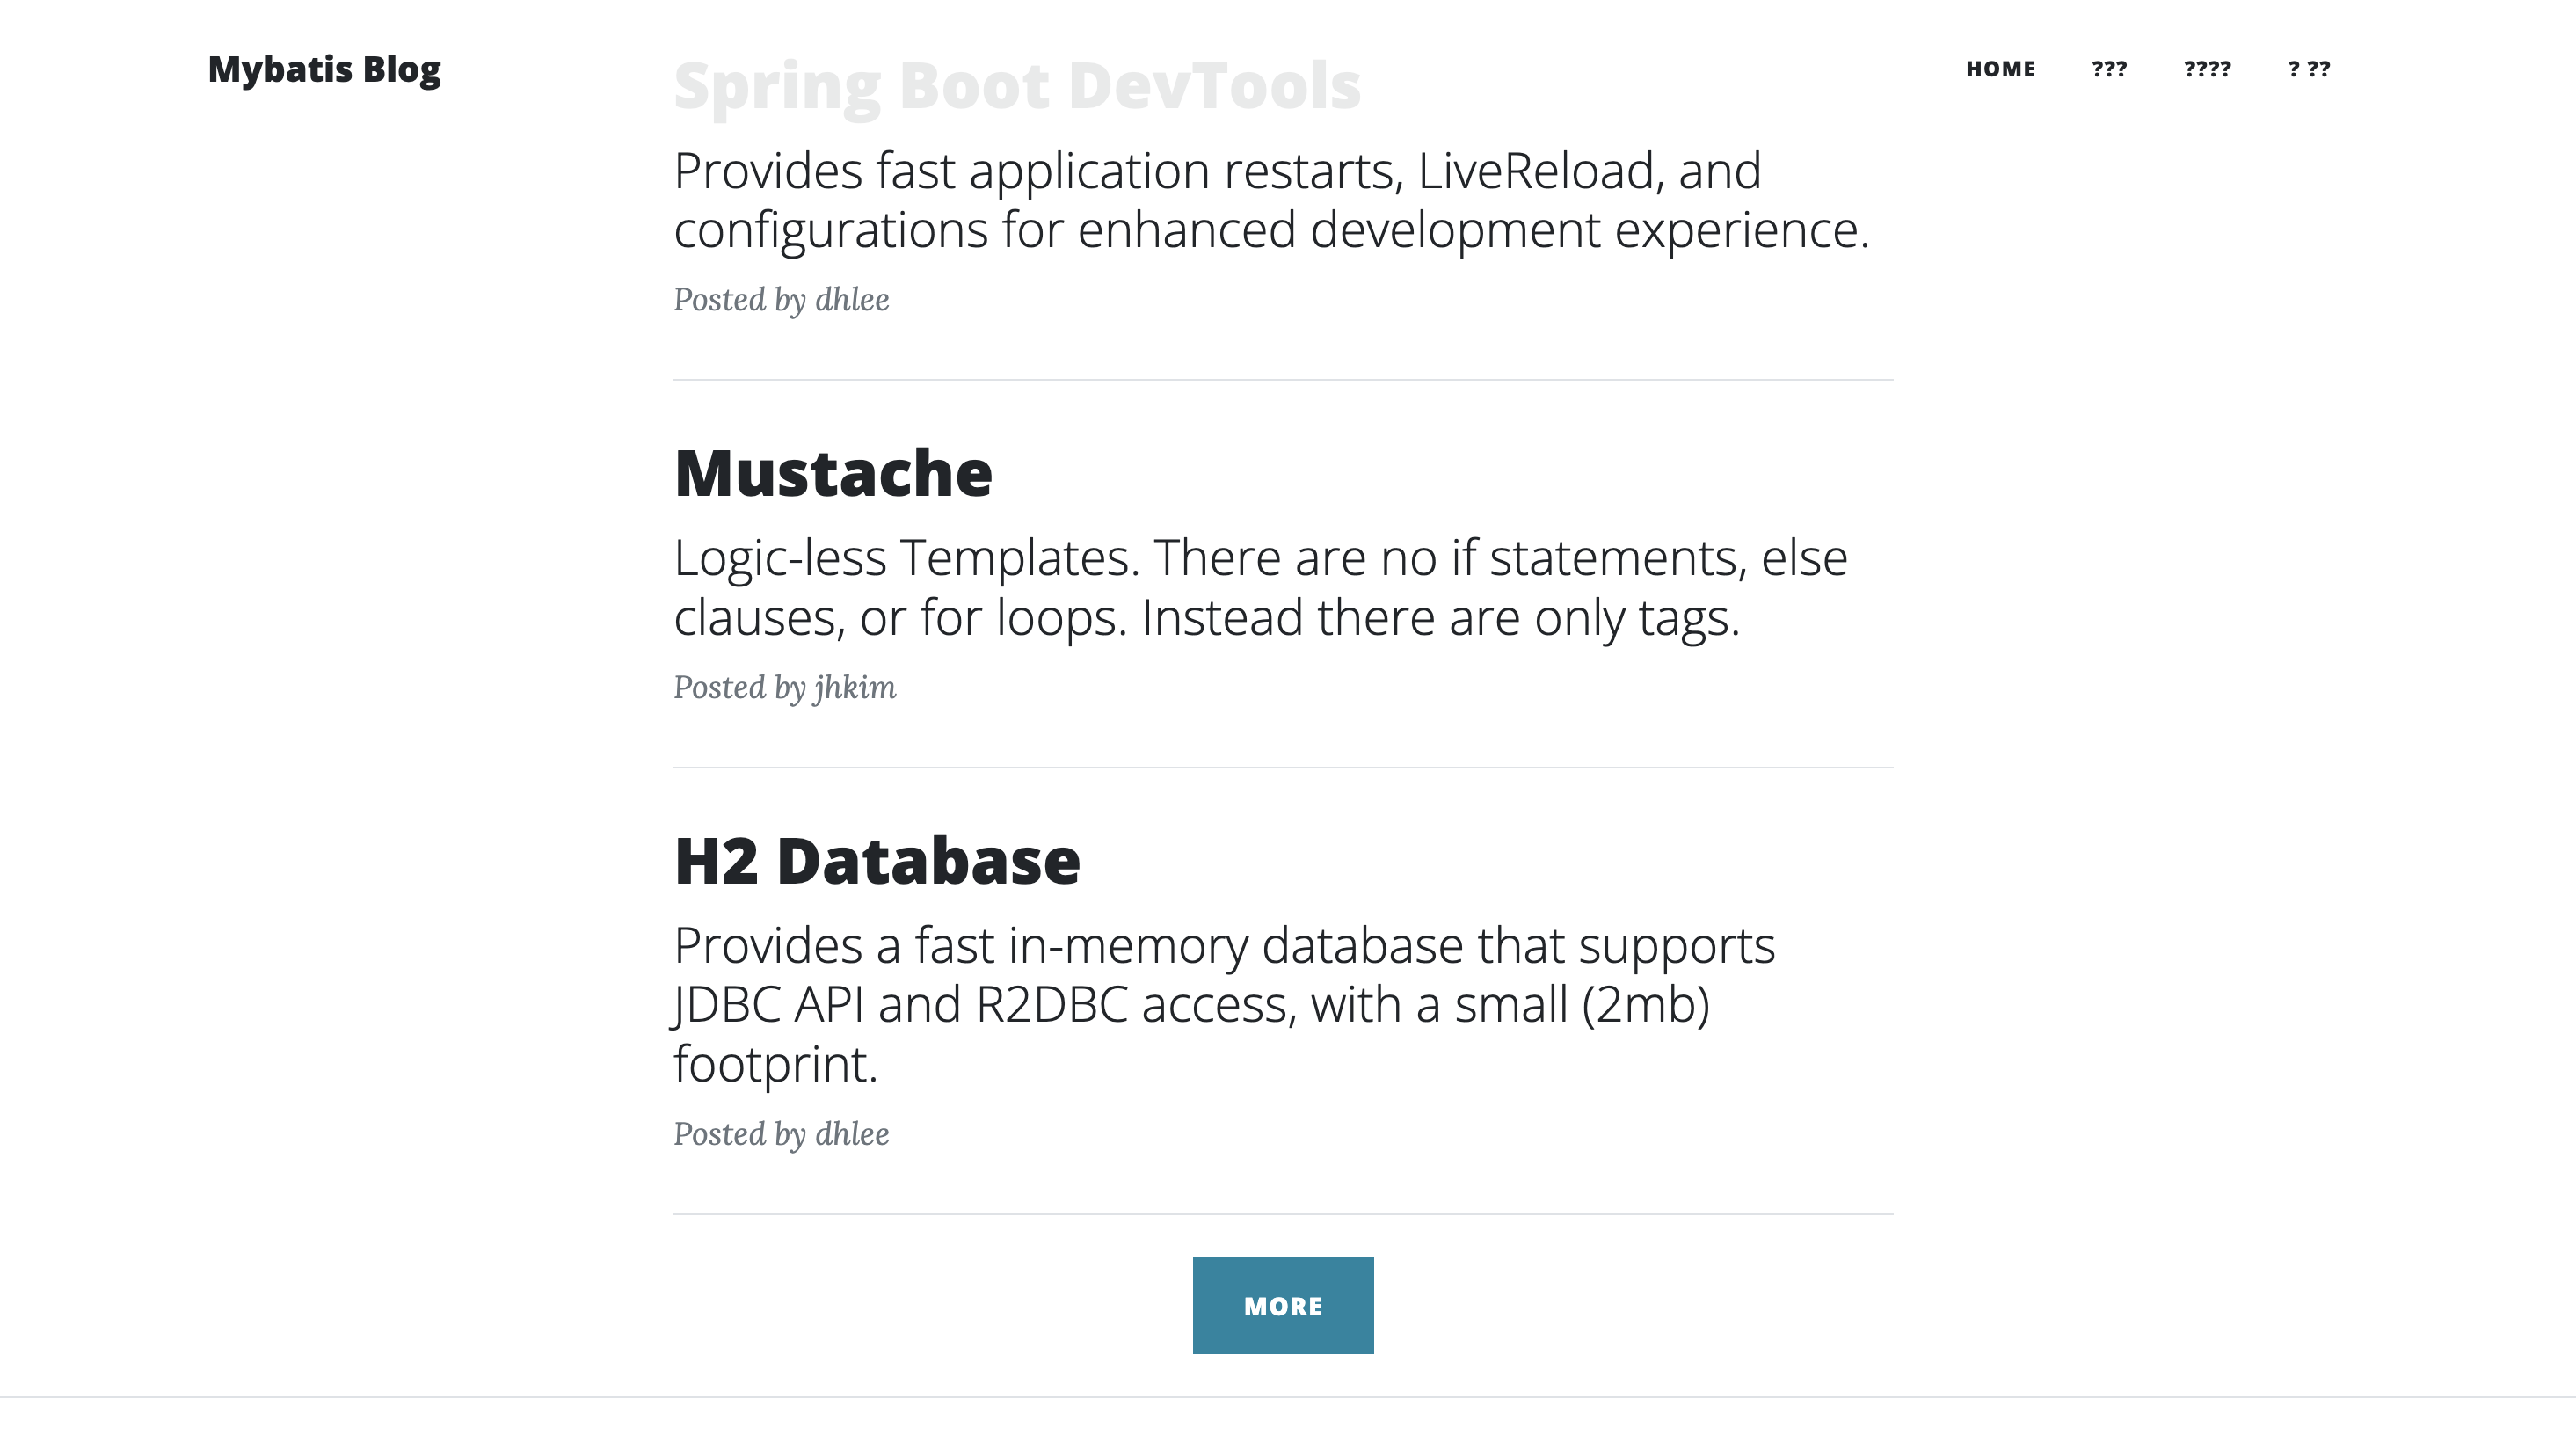
결과 🎉
- more 버튼을 이용하여 글을 3개씩 불러오는 것을 확인 !
후기 ✏️
이전 글에서 todo 를 만들며 실습해보고 블로그 실습을 진행하니 어느정도 mybatis가 어떤 원리로 돌아가는지 감이 오는 것 같았습니다.
그리고 mybatis에서도 Pageble을 통한 페이징 처리가 되는지 확인해보고 실습해봐야겠습니다.

도전해 보는 것이 성장의 첫걸음입니다 :)